Hello crafty friends, happy Thursday!!
Welcome to the Pretty Pink Posh May Product Release Blog Hop! You should have arrived from Pretty Pink Posh blog.
 My sweet friend Paulina, the owner of the Pretty Pink Posh, is certainly one of the most influential people in the papercraft industry. Her sequins always make my projects brighter and prettier and the newly released rose gold & rainbow sequins are no exceptions!! The more I see those bright and colourful sequins, the happier I become!
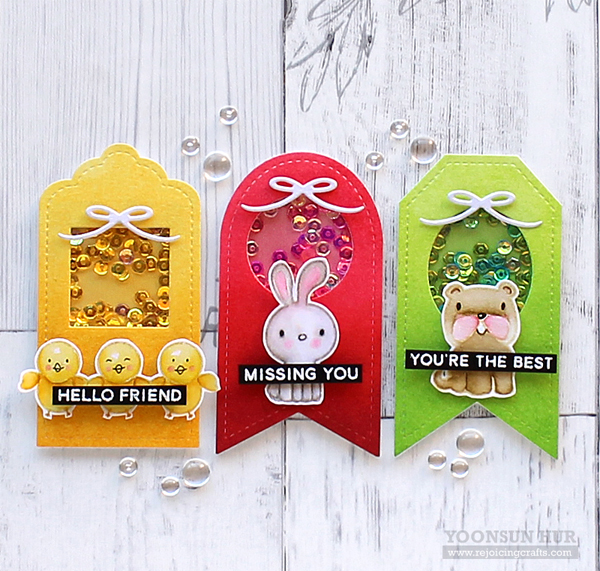 So my first project is tag trio with the new Stitched Essentials 1 dies and matching coloured sequins. First, I ink blended on white card stock with Distress inks using a mini blending tool: (Yellow) Squeezed Lemonade and Wild Honey / (Red) Festive Berries and Fired Brick / (Green) Twisted Citron and Mowed Lawn. I then die cut them with the Stitched Essentials 1 dies, cut the window to each tag for making shaker tags. I used the 4mm Sunshine Glow for the yellow tag, 4mm Strawberry Burst & Fairytale Fuchsia for the red tag, and then 4mm Peridot Mist and Ocean Spray for the green one. I am so in love with those tiny sparkles!!
 For these adorable chicks, I used the Birdie Friends stamp set. I stamped it on watercolour paper with Antique Linen Distress ink, coloured it with Squeezed Lemonade and Fossilized Amber Distress markers.
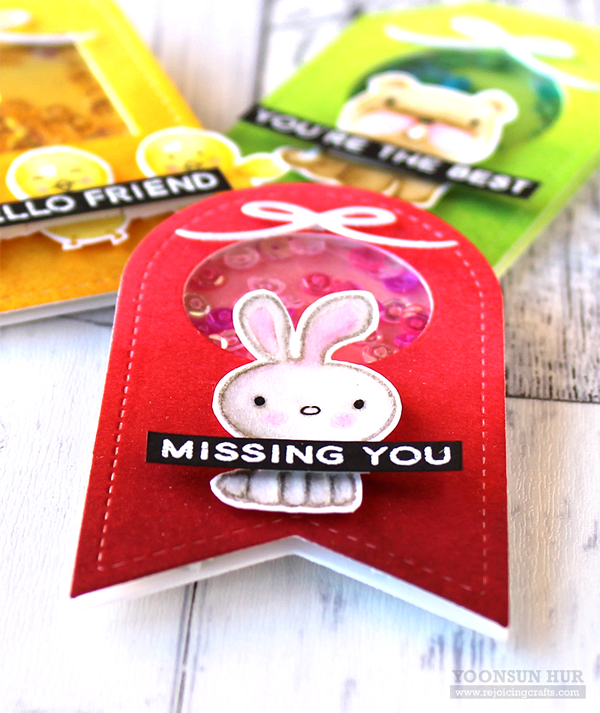 For this cute bunny, I used the Holiday Pals stamp set. I stamped it with Pumice Stone Distress ink, coloured it with Pumice Stone and Worn Lipstick Distress markers.
 This cute dog is from the Holiday Pals stamp set as well. I stamped it with Antique Linen Distress ink, then coloured it with Brushed Corduroy, Vintage Photo, and Worn Lipstick Distress markers.
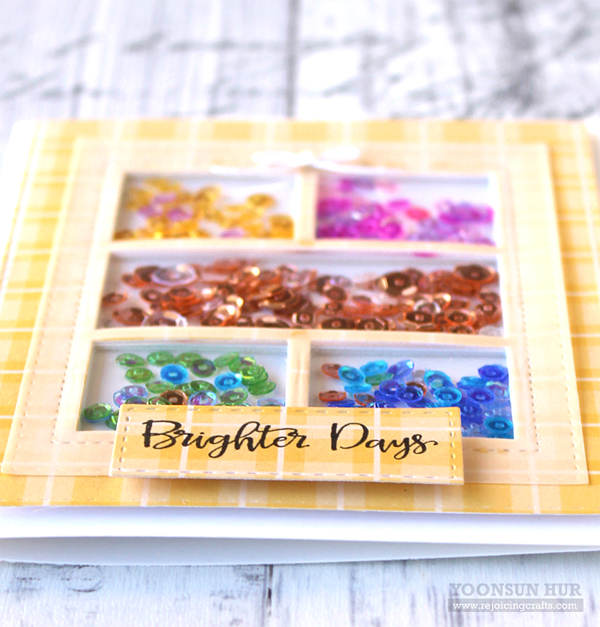
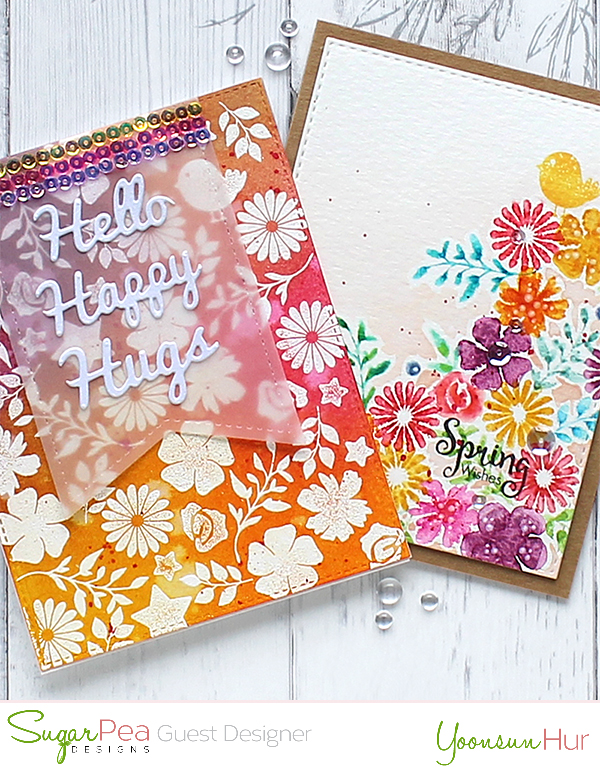
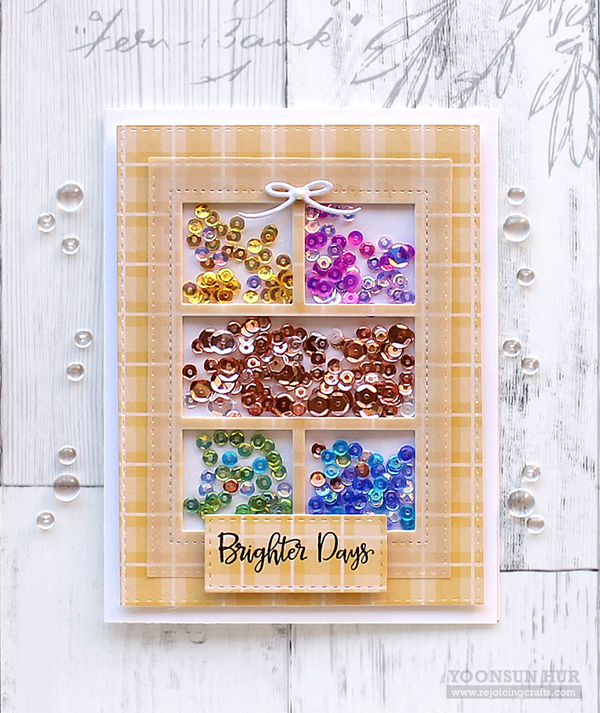 For my second card, I gathered the new sequins in one card. First, I die cut the windows from white card stock using Storybook 4 die five times – I used the negative panels – and then glue them together, mounted this thick window panel (like the foam panel) on A2 white card base using double-sided tape. I then put in the sequins shown as the picture. Next, I die cut the Storybook 4 from the yellow coloured MFT County Fair Plaid pattern paper, back it with acetate sheet – ready for the shaker front – then covered the sequins. For the sentiment, I used the Rainy Days stamp set.
Your next stop on the hop is an amazingly talented Heather Hoffman. We hope you have all enjoyed our fun and inspirational blog hop!
Pretty Pink Posh blog
Yoonsun Hur (Me!!)
Heather Hoffman
Amy Lee
Lisa Elton
Jeanne Jachna
Joni Andaya
Liz Sarkisyan
Heather Pulvirenti
Nichol Spohr Magouirk
Amy Kolling
Yuki Yoshioka
Julia Altermann
Shannon McComb
Nina-Marie Trapani
Vera Rhuhay
Yana Smakula
GIVEAWAY!!
There are 2 $25 gift certificates up for grabs. Winners will be picked randomly along the blog hop. (Comments must be left by 11:59 PM PDT on 5/16/2016. Winners will be announced on the PPP blog)
Thank you so much for stopping by. Happy crafting!!
Keep smiling and be blessed! God bless you all!
Love Love Love RejoicingCrafts
Pretty Pink Posh Store (New release)


Other supplies I used (Simon store)


 With the
  For my second card, I was inspired by my talented teammate


 For my cards today, I used the
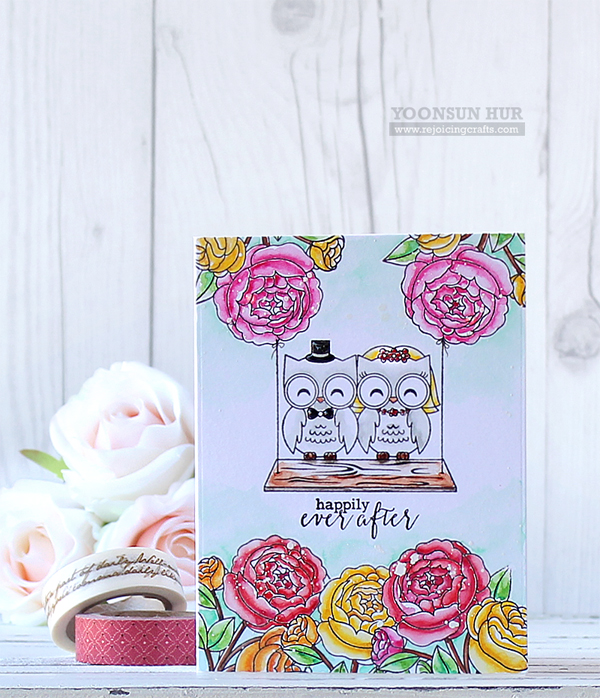
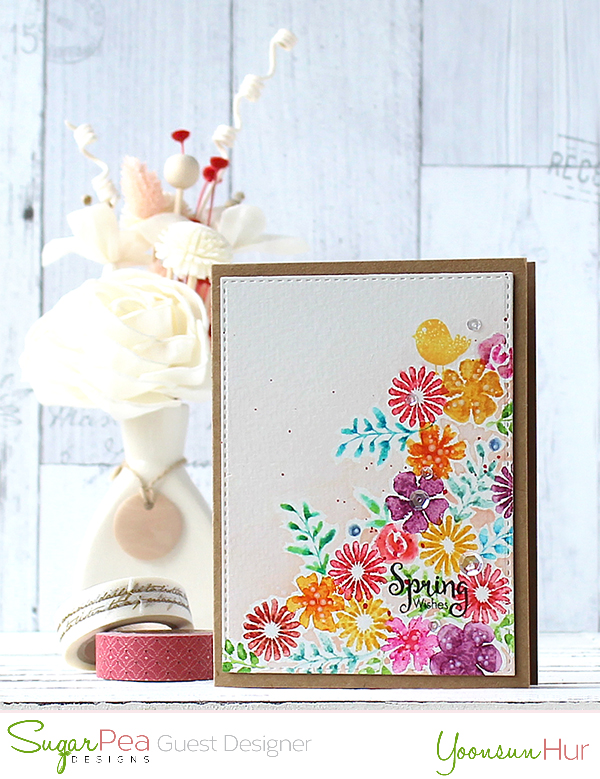 For my first card, I made a watercolour flower card. First, I die cut a piece of
 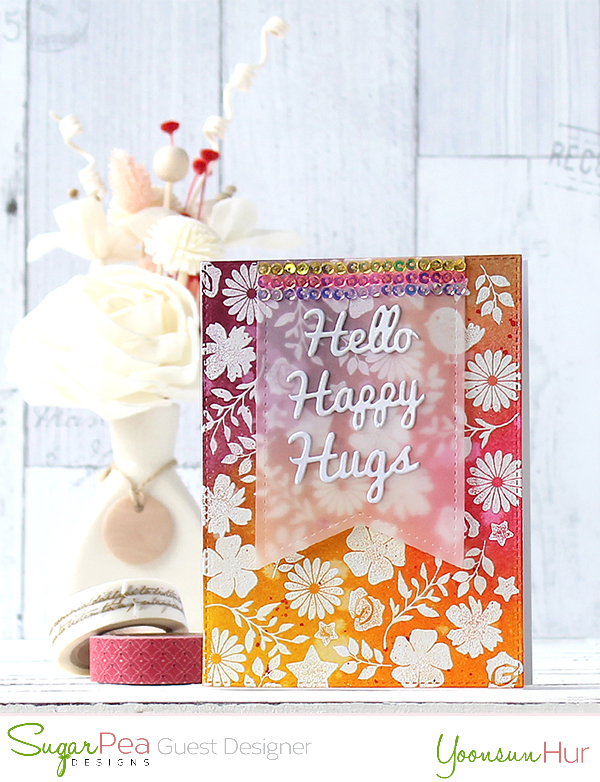 For my second card, I randomly stamped the flowers and leaves on watercolour paper panel using


 My first card is a watercolour card. I love making my own watercolour background with stamps!! First, I die cut a piece of watercolour paper using
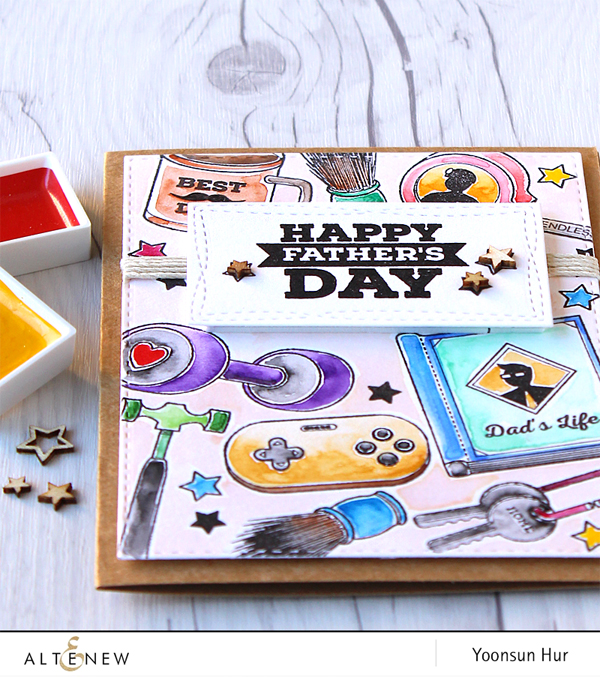
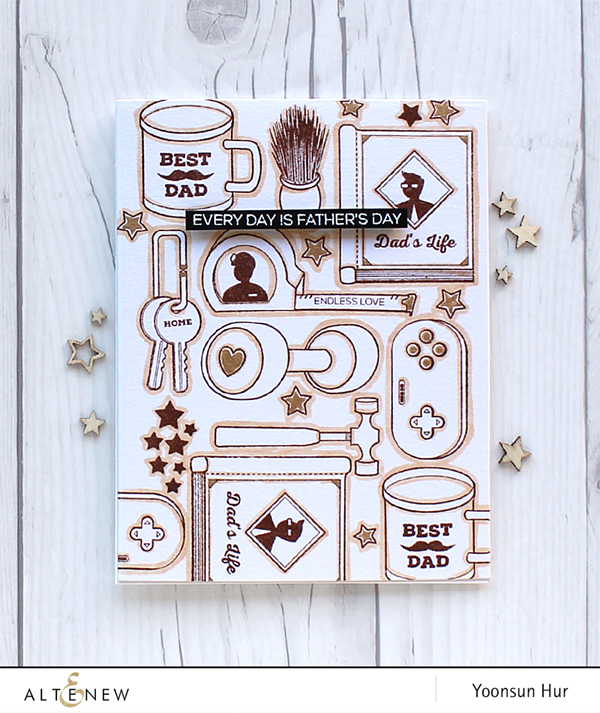 For my second card, I stamped the images on A2 sized white paper panel using
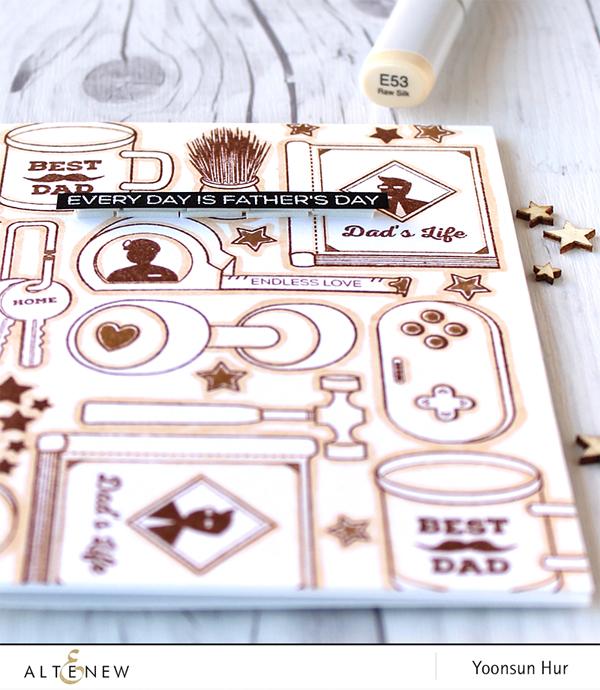
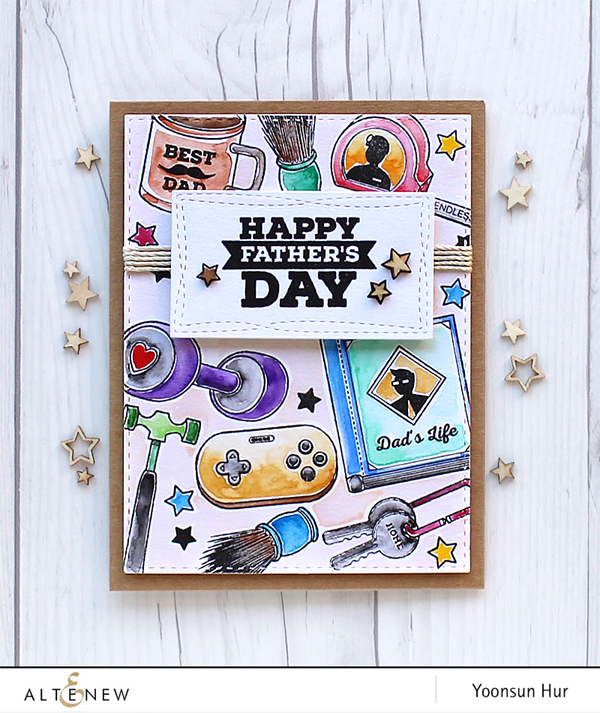
 My last card is a simple shaker card! How can we forget about shaker card for Father’s Day?!! :D First, I randomly stamped the images on A2 white paper panel with


 My today’s card, I used the new
 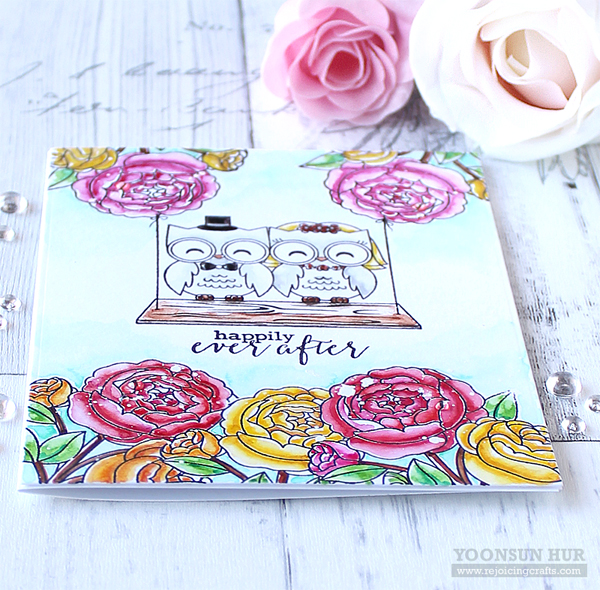 And we lived “happily ever after” :D

