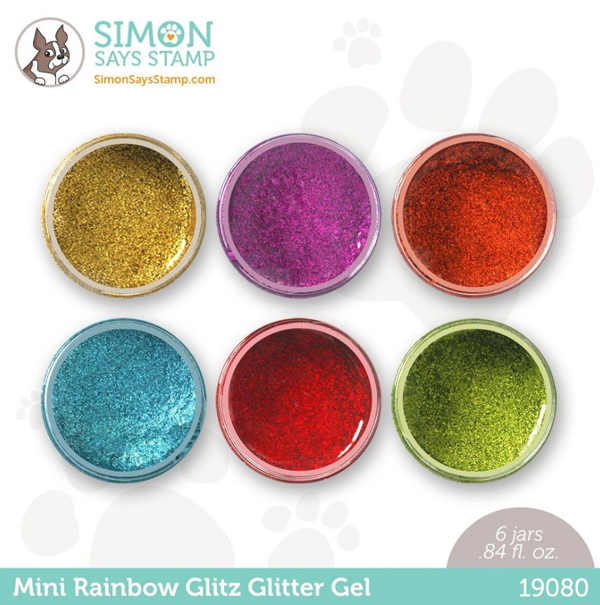
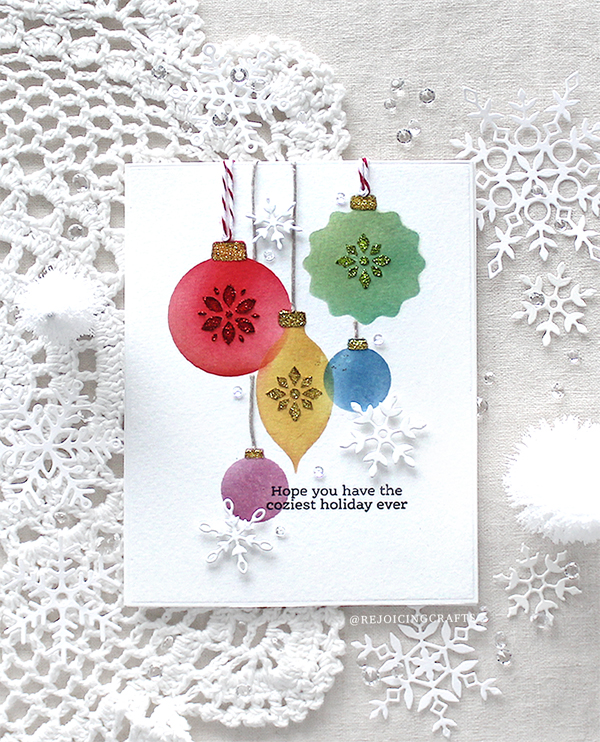
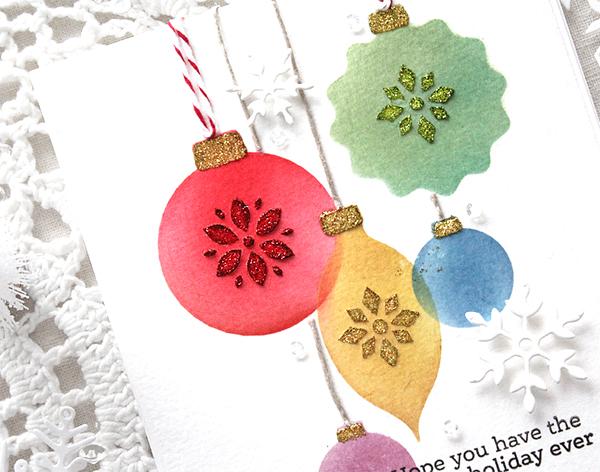
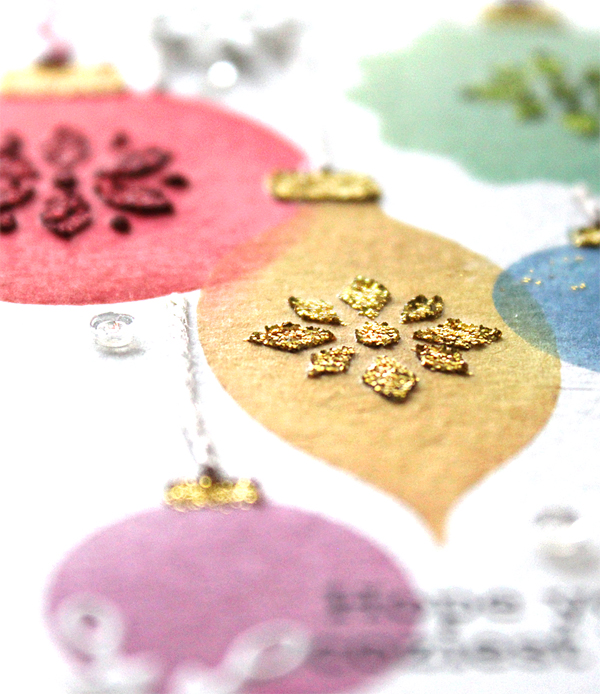
I placed the ornament stencil on A2 sized white paper panel, then applied Distress inks in rainbow order as shown in the picture – you can arrange where you want with the new Ornament Builder stencil. :D Next is the Glitz Glitter Gels! I applied glitter gold, red and green to ornaments – love it so much!! I stamped the sentiment in the Winter Birds set on the bottom right corner using VersaFine Onyx Black. After mounting the panel on white card base using double-sided tape, then decorated the card with tiny snowflakes & clear sequins.
I will share more of my Handmade Holiday Release cards on Friday. Please look forward to upcoming Handmade Holiday Release blog hop starting tomorrow. Stay tuned!
Keep smiling and be blessed! God bless you all! Love Love Love RejoicingCrafts
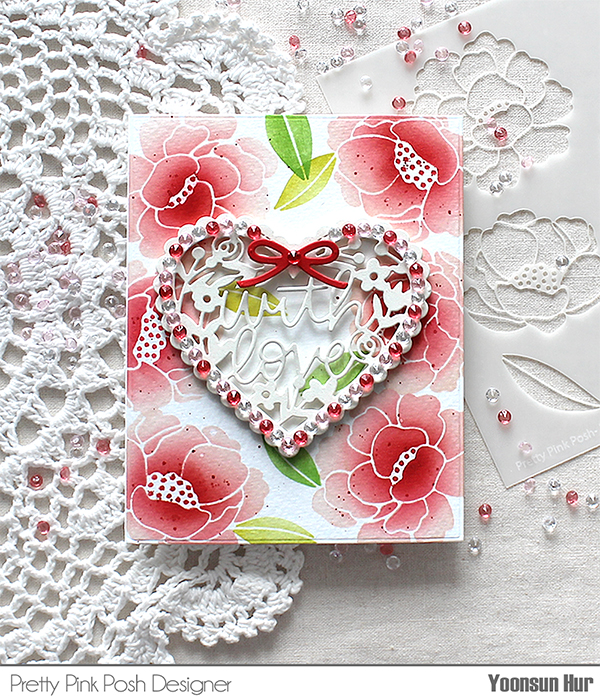
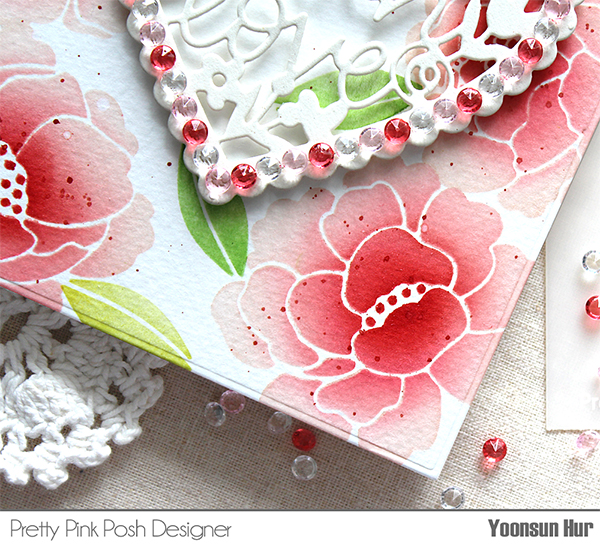
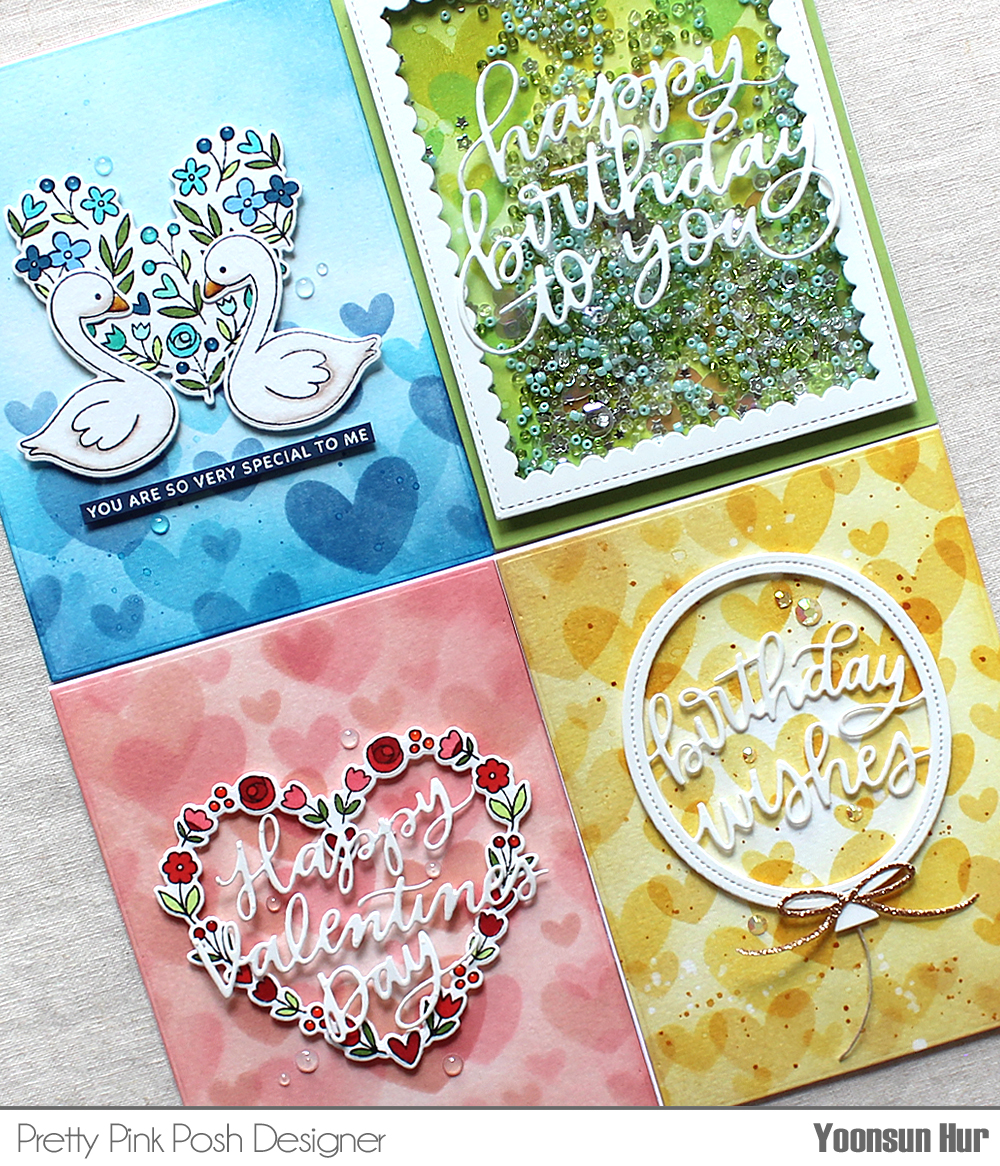
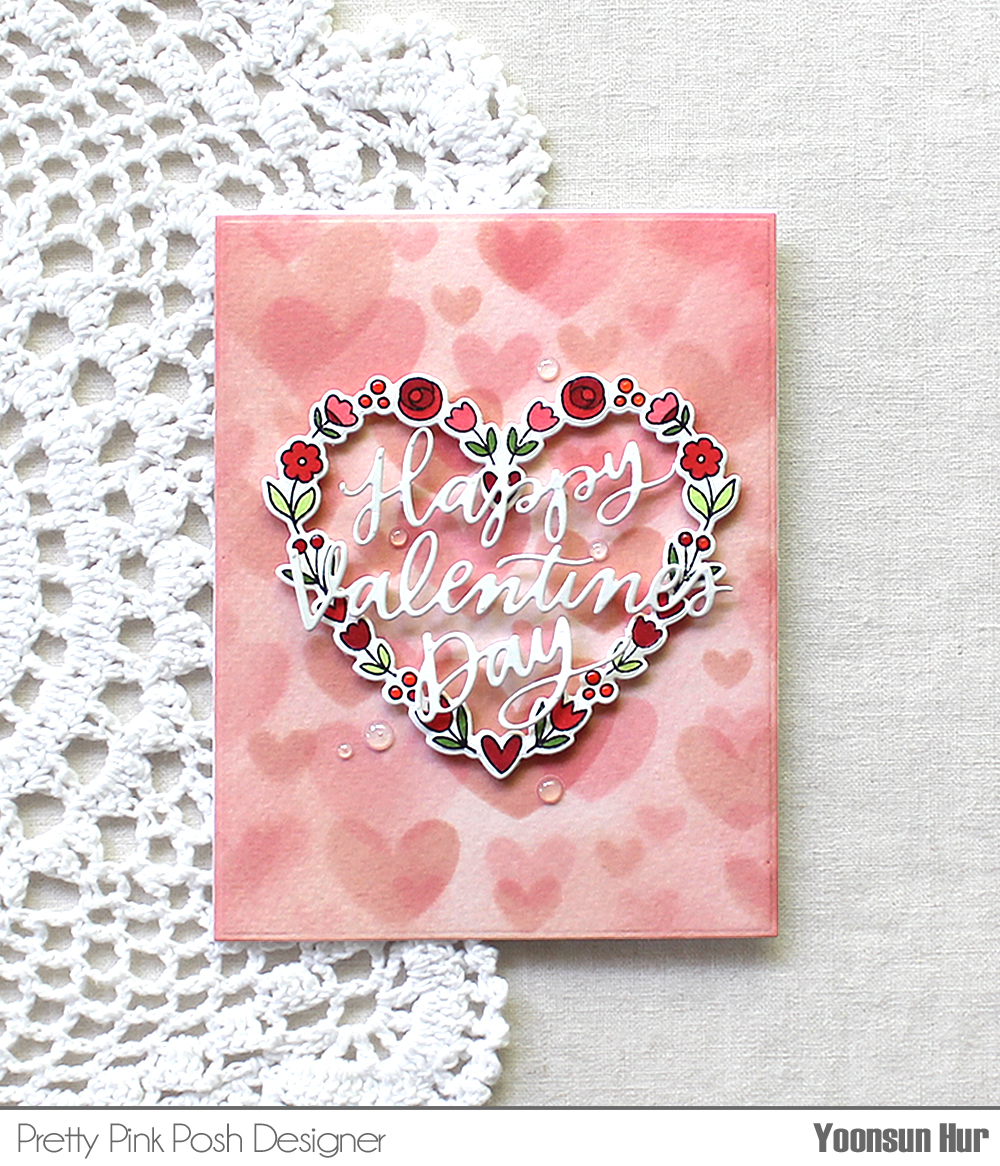
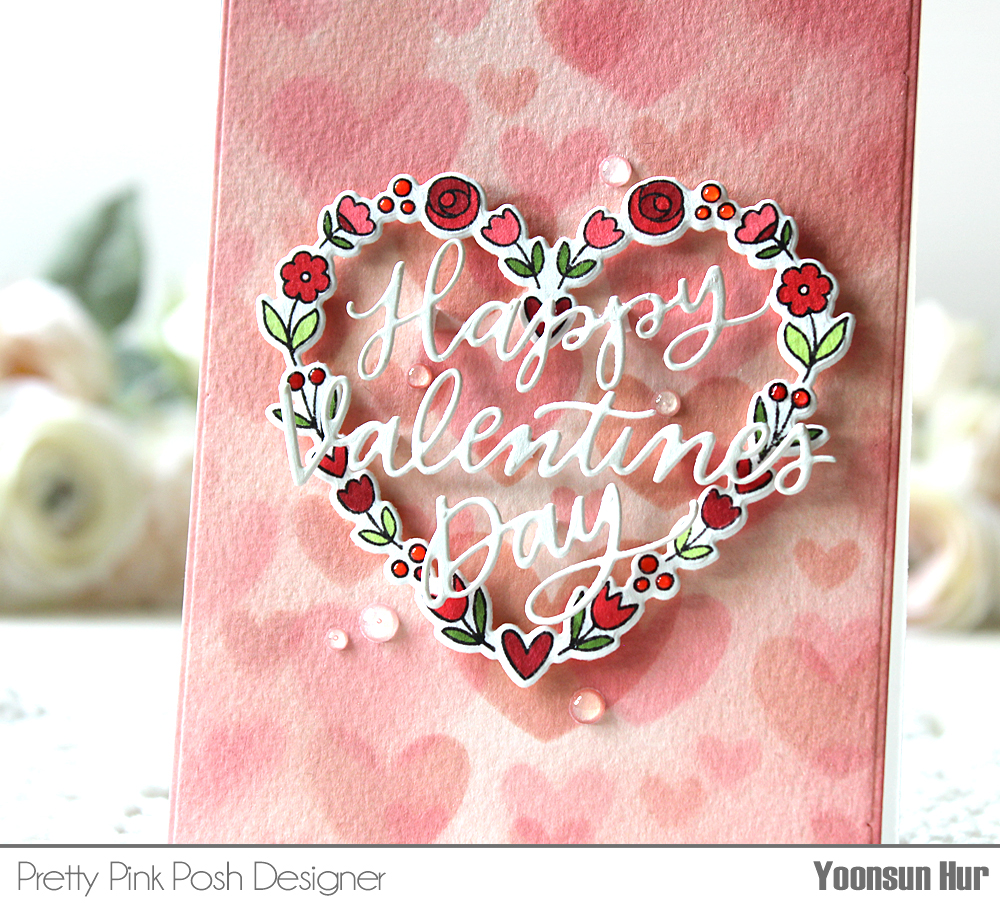
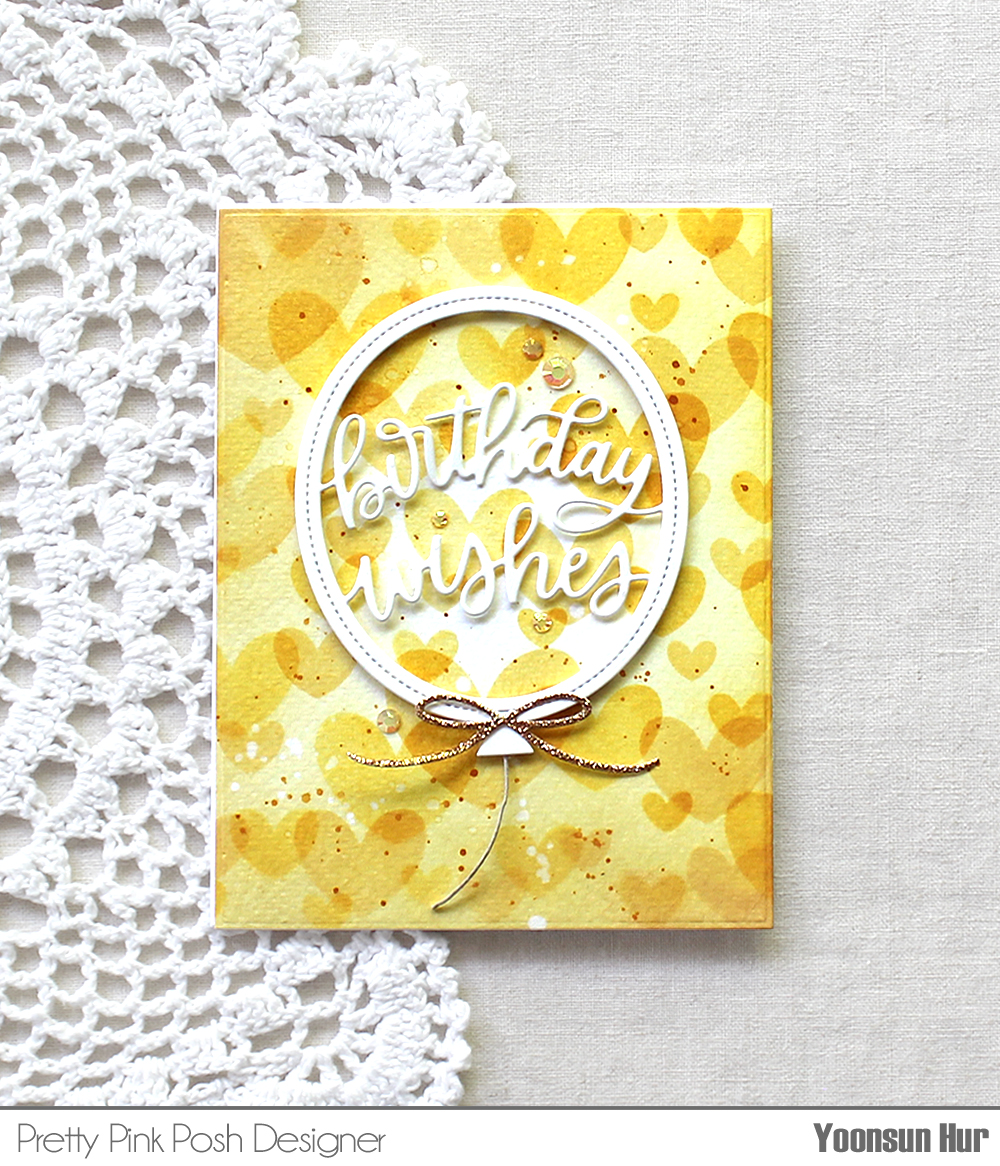
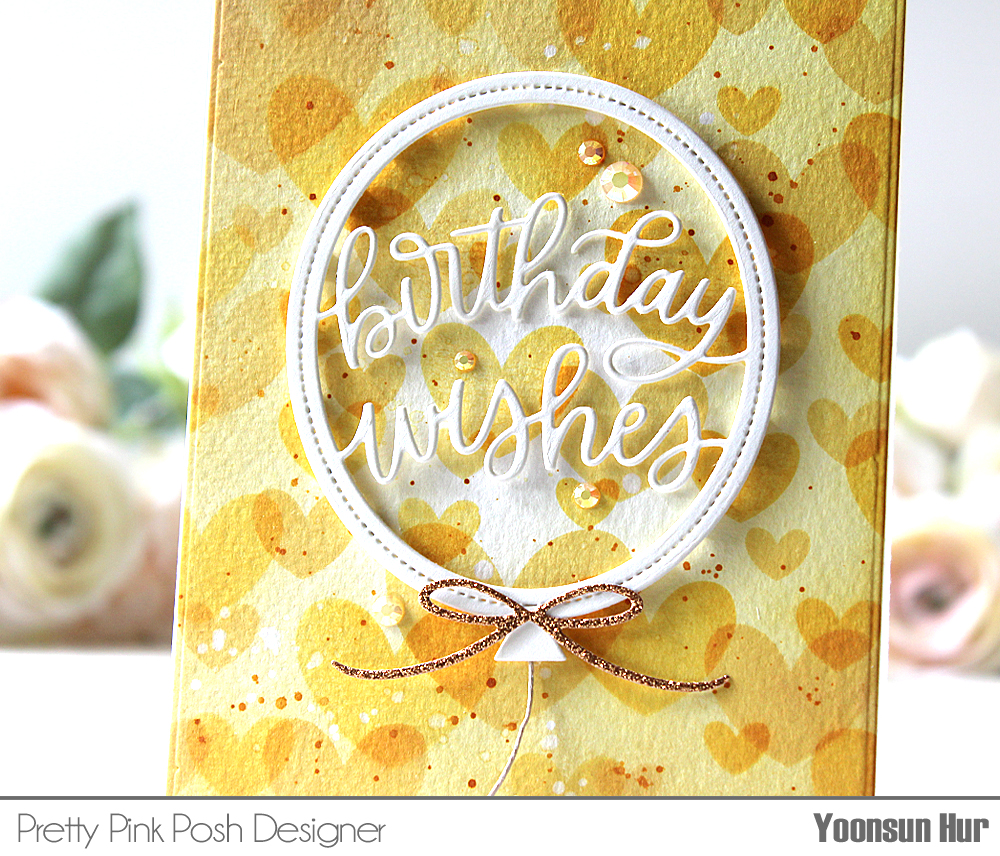
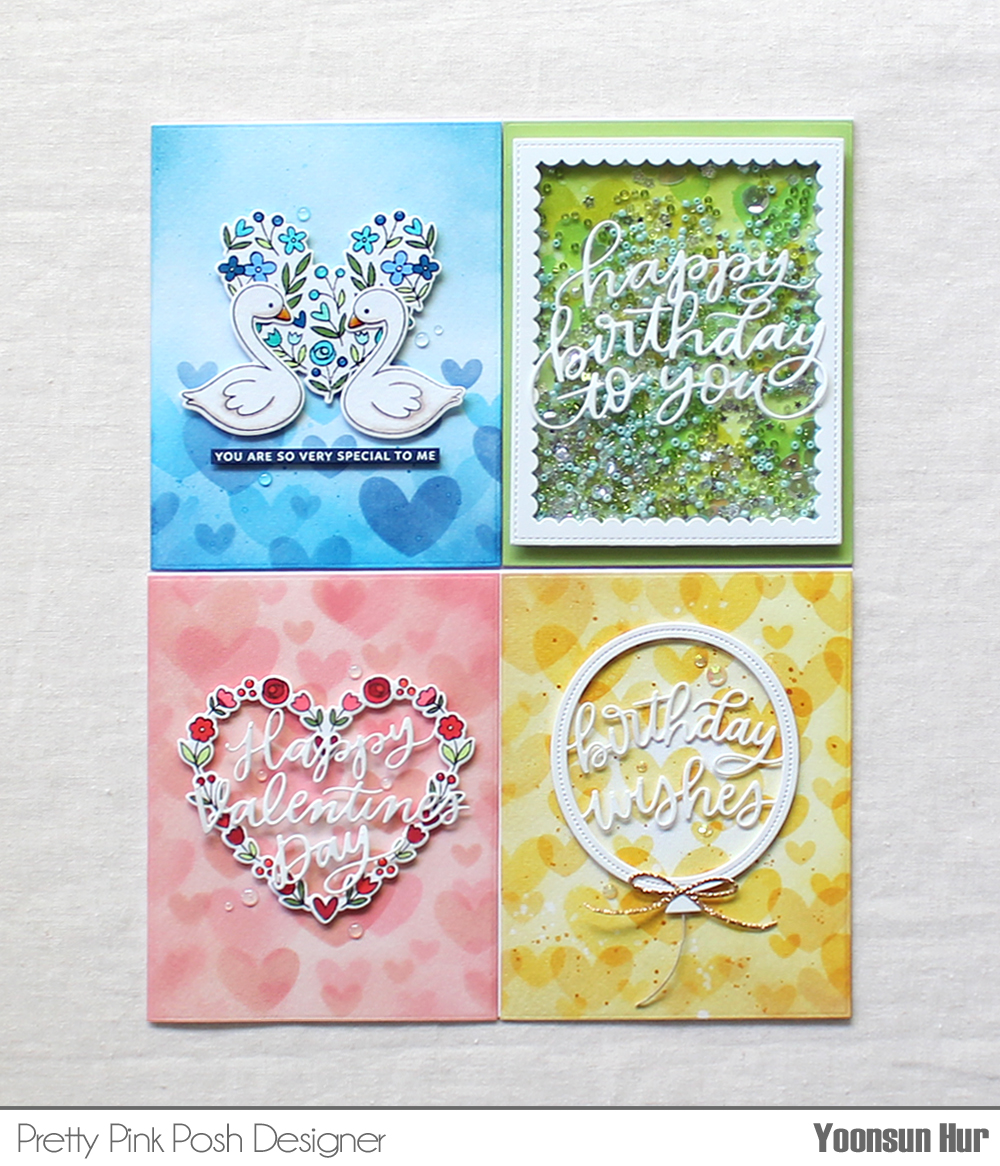
Hello, hello crafty friends! Welcome to the first day of the Pretty Pink Posh 7th Birthday Celebration Blog Hop. Pretty Pink Posh turned 7! Come join this 3 days celebration for fun, inspiration and surprises. Let’s start!! For my first card, actually this is my first card in 2021, I’m featuring brand new Peonies stencil along with the With Love shaker die. I laid the Peonies stencil on A2 sized watercolour paper panel in place first, and then applied Distress inks onto the paper panel – Tattered Rose & Fired Brick for flowers, Mowed Lawn & Crushed Olive for leaves. I added red ink splatters all over the floral panel. I die cut heart shaped “with love” sentiment from white cardstock using the With Love shaker die, then decorated the edge with the new Sweetheart Rhinestones.
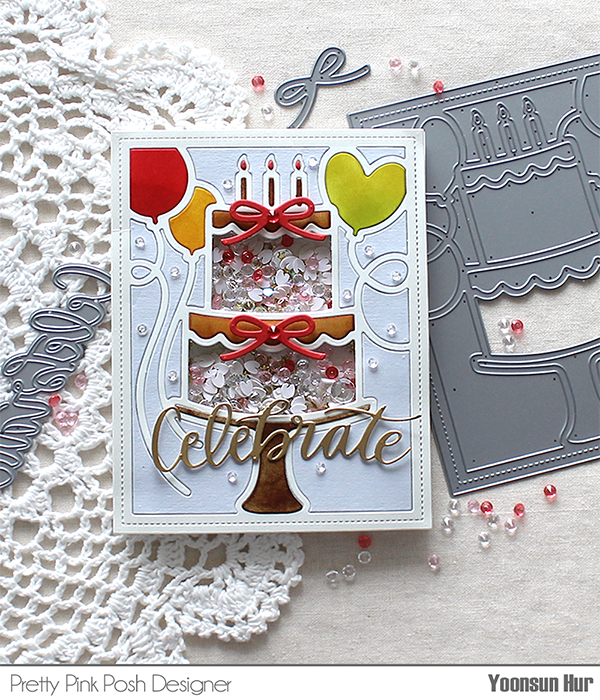
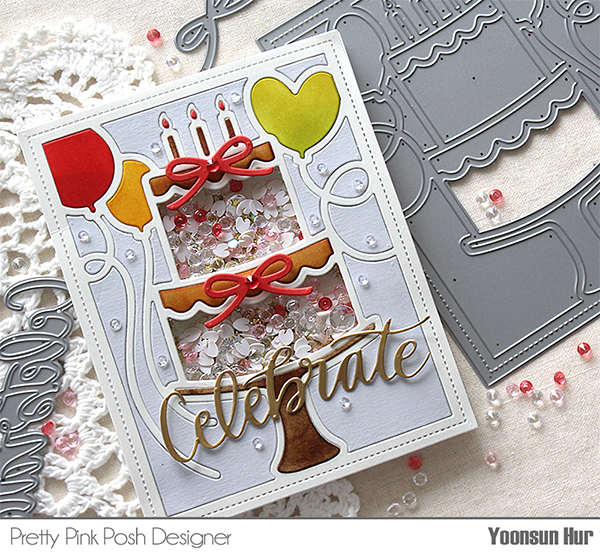
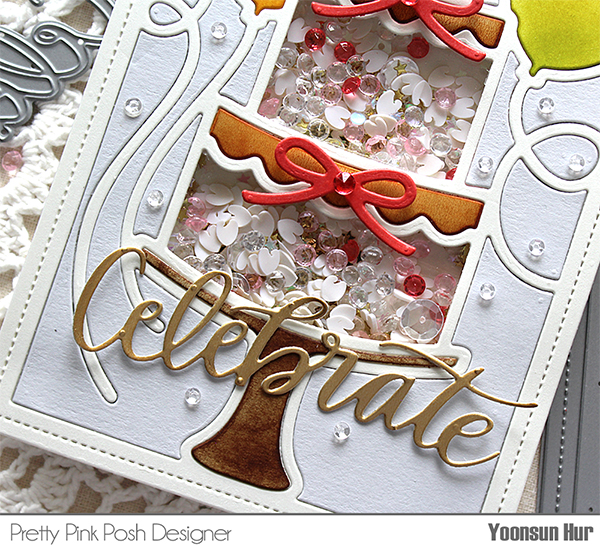
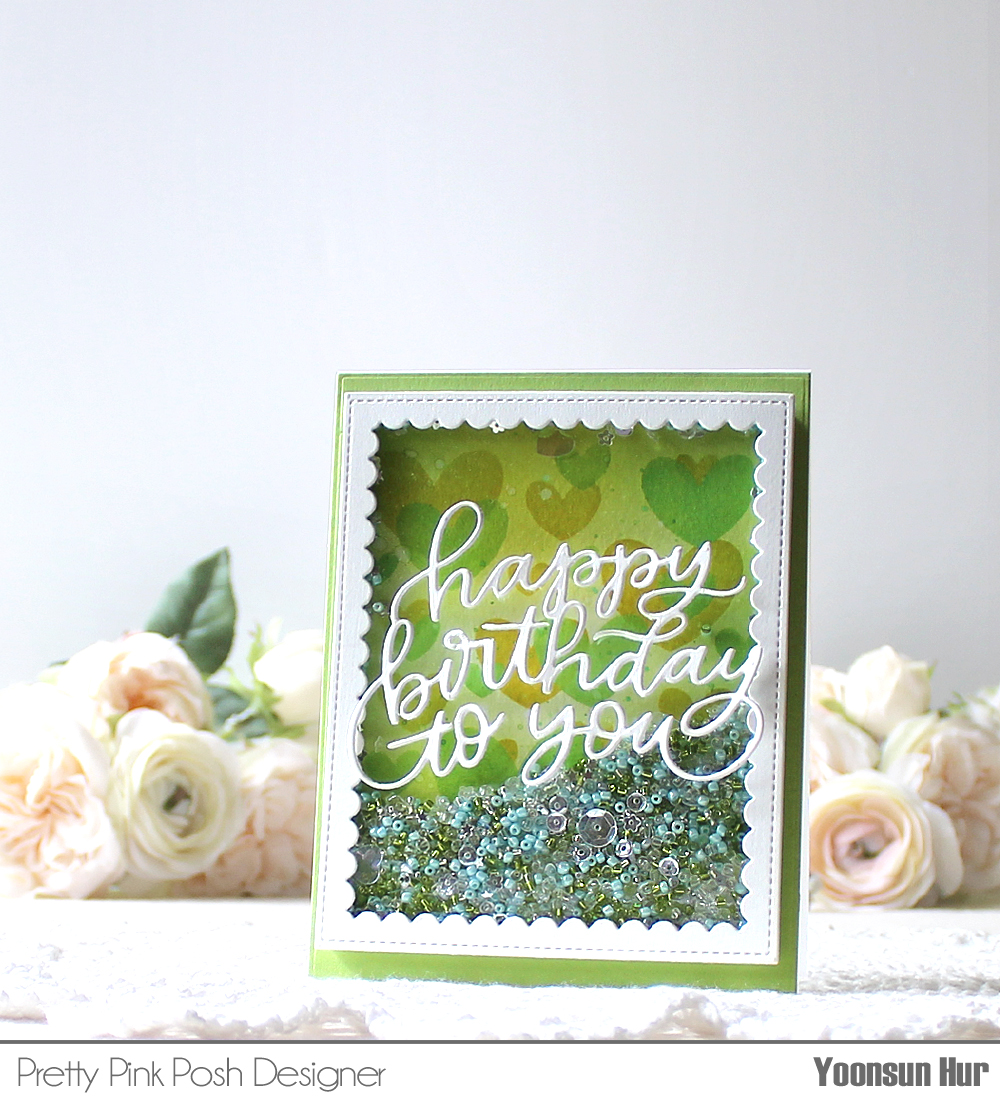
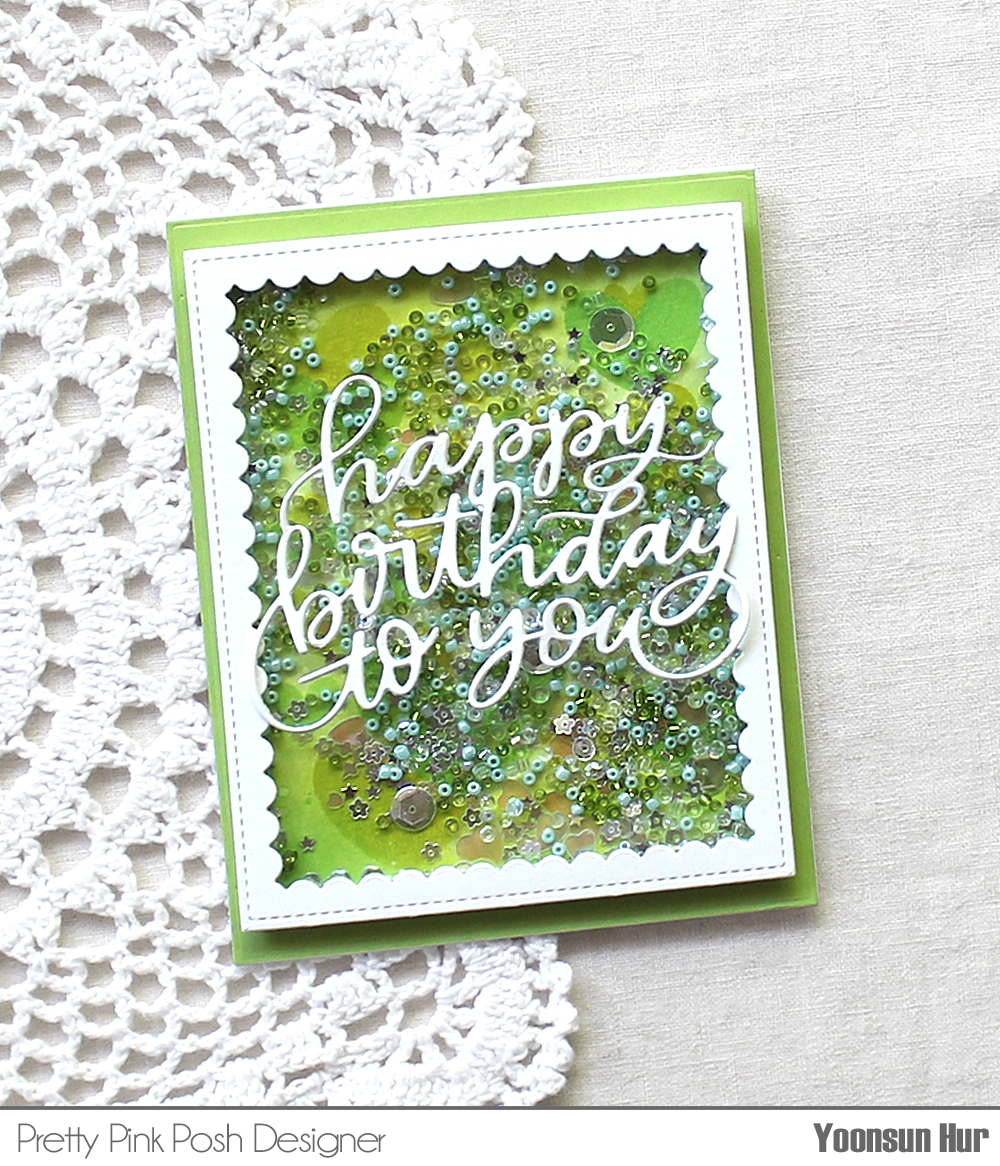
For my second card, I made a fun birthday shaker card with the new Birthday Cake dies. I die cut the Birthday Cake panel from thick white cardstock first, and then die cut it from pale grey cardstock again. I inked balloons & cakes with Distress inks, then inlaid all elements in place. For the middle part of the cake, I adhered acetate sheet to the back of them, filled with Sweetheart Rhinestones, White Hearts Clay Confetti and Sparkling Clear Sequins.
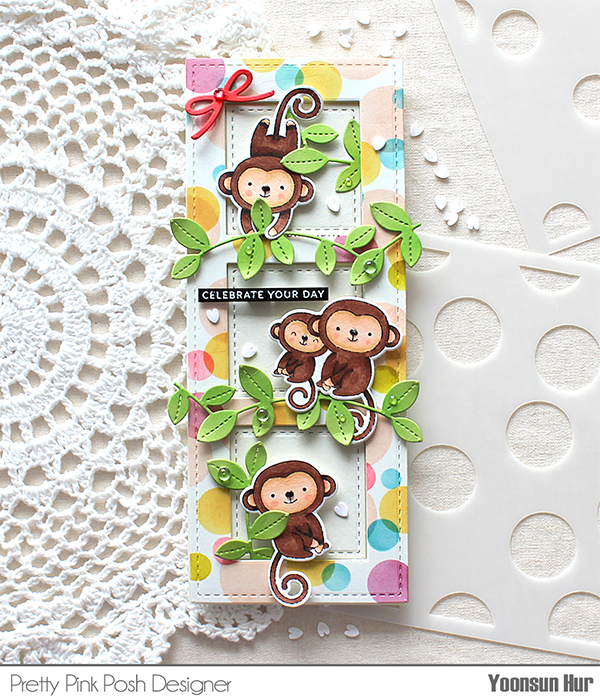
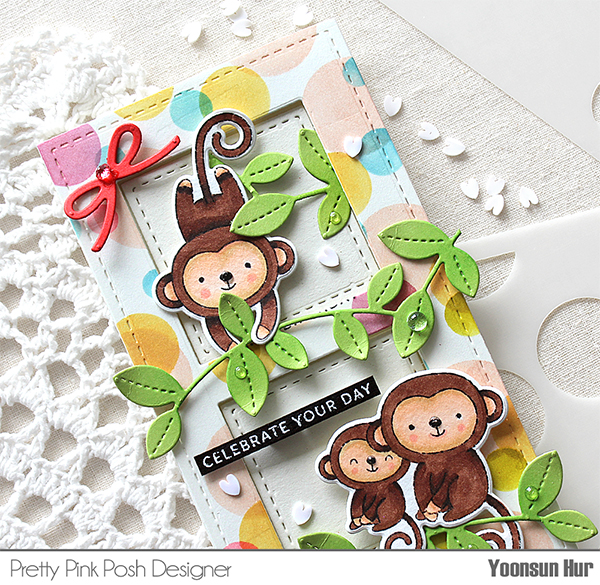
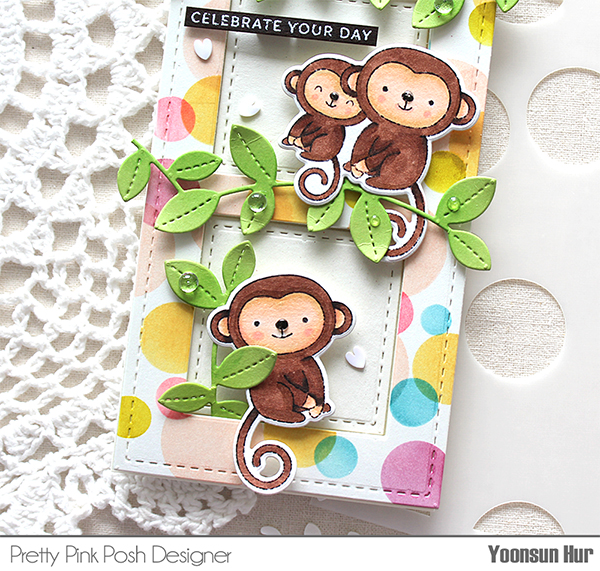
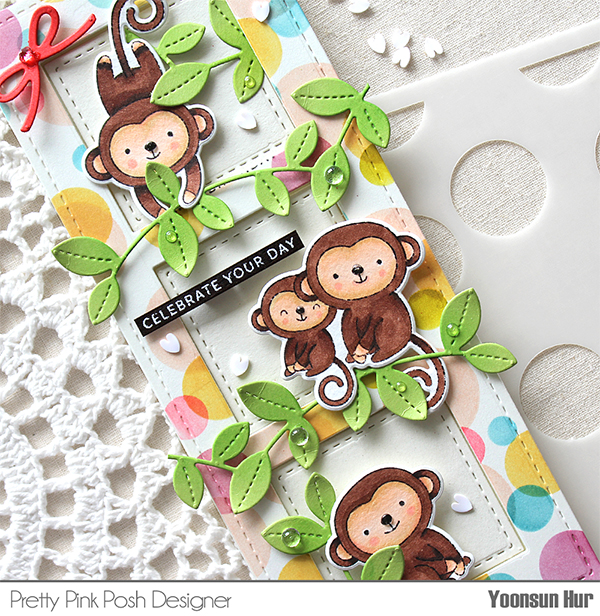
For my last card for the hop, I made a slimline birthday card with the new Slimline Peekaboo Windows die set – it is my first slimline card!! :D I die cut stitched 3.25″ x 8.25″ base panel from white cardstock using the Slimline Peekaboo Windows die set first, and then made 3 square windows to the centre of the panel. I made colourful bokeh background using the new Layered Bokeh stencils. On the centre of the card, I added Copic coloured monkeys and leaves for fun!
Here is a closer look:
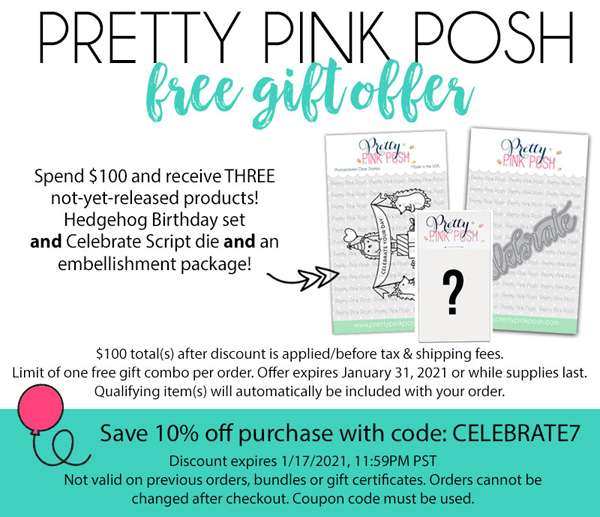
GIVEAWAY!! Pretty Pink Posh is giving away 6 $25 gift certificates total during the three day blog hop celebration. Comments must be left by 11:50pm January 15, 2021 and the winners will be announced on the Pretty Pink Posh blog.
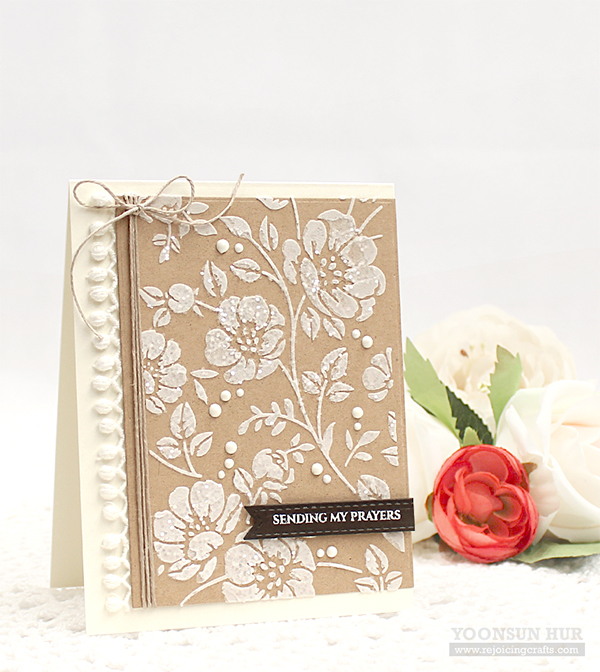
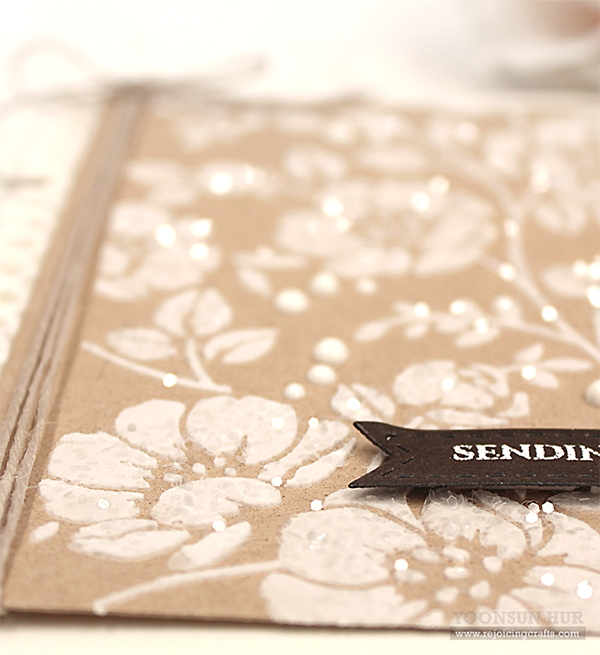
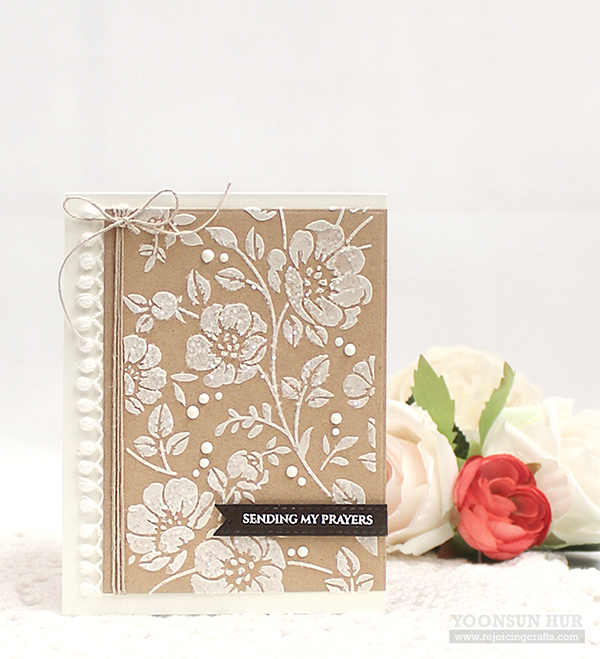
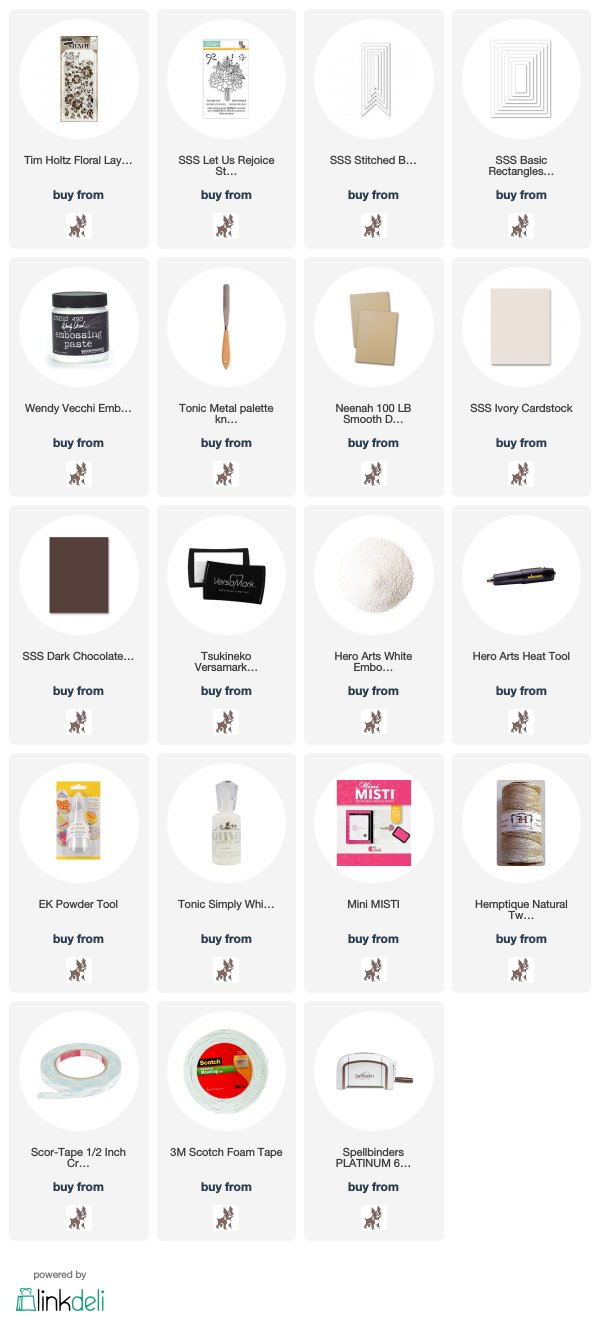
Hello crafty friends, I am back with you this week to share my floral card I’ve created using the Tim Holtz Floral Layering Stencil. Here is what I came up with: I started by die cutting rectangle panel from kraft card stock using the SSS Basic Rectangles die. I then laid the Tim Holtz Floral Layering Stencil over the kraft panel, applied white embossing paste using palette knife. I carefully removed the stencil, and then sprinkled a bit of clear glitter over the flowers. Once the panel was completely dry, I decorated the left side of the panel with natural twine & pom pom trim. For the sentiment, I used the SSS Let Us Rejoice stamp set. I heat embossed the sentiment on the SSS Dark Chocolate card stock in white, trimmed it out using the SSS Stitched Banners die. Simon Says Stamp generously provides a $50 Gift Voucher each week to shop at the fabulous Simon Says Stamp Store!
Thank you so much for stopping by. Have a wonderful day!
Keep smiling and be blessed! God bless you all! Love Love Love RejoicingCrafts
Hello crafty friends!
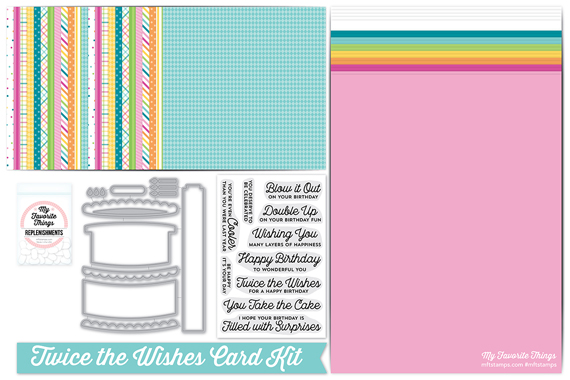
It’s Time! This awesome interactive Twice the Wishes Card Kit is available in the MFT Store now!! Twice the Wishes Kit
Twice the Wishes Stamp Set
Interactive Birthday Cake Die-namics
Sweet Celebration Patterned Paper
19 sheets of Heavyweight Card Stock – Cotton Candy (2), Razzle Berry (2), Orange Fizz (2), Pineapple (2), Sour Apple (2), Blu Raspberry (2), Tropical Teal (2), Smooth White (5)
Slider Elements – 1 bag of 25
Here is what I came up with: To start, I made a soft pastel balloon background with the Big Balloons Stencil – I used the Banana Split, Pink Lemonade, Spearmint, Sno Cone, and Wild Wisteria hybrid inks. I then stamped the sentiment from the Twice the Wishes set on the bottom of the panel using Black Licorice hybrid ink. Next, I die cut the cake elements from heavy white card stock using the Interactive Birthday Cake Die-namics, lightly inked the cake layers with Distress inks using mini ink blending tool: Worn Lipstick for the bottom layer, Mustard Seed for the top layer. Decorating for the cake, I used the Polynesian Paradise stamp set. I stamped the flowers and pineapple on watercolour paper in black pigment ink, coloured them with Distress markers, then fussy cut them. I mounted the panel on white card base using double-sided tape first, and then added all elements as shown to the card using dimensional foam tape. Make sure to check out MFT Blog for all the info for today along with links to all the other DT member’s blog posts.
Thank you so much for stopping by. Happy crafting!!
Keep smiling and be blessed! God bless you all! Love Love Love RejoicingCrafts


 I started by die cutting rectangle panel from kraft card stock using the
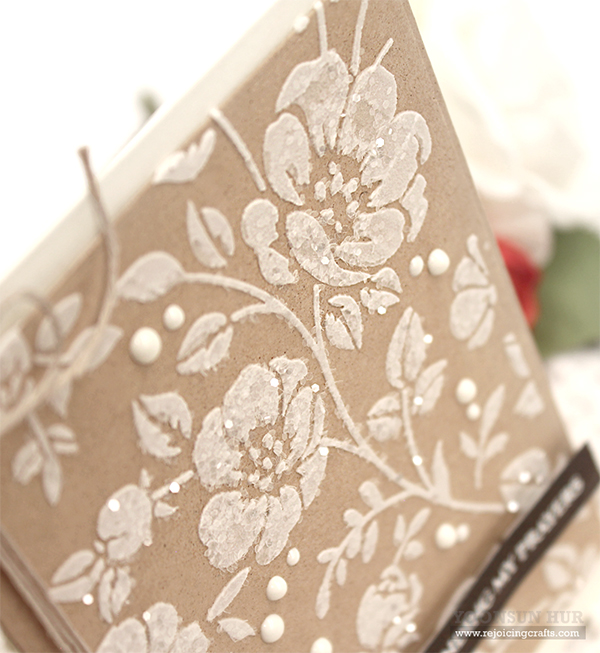


 Twice the Wishes Kit
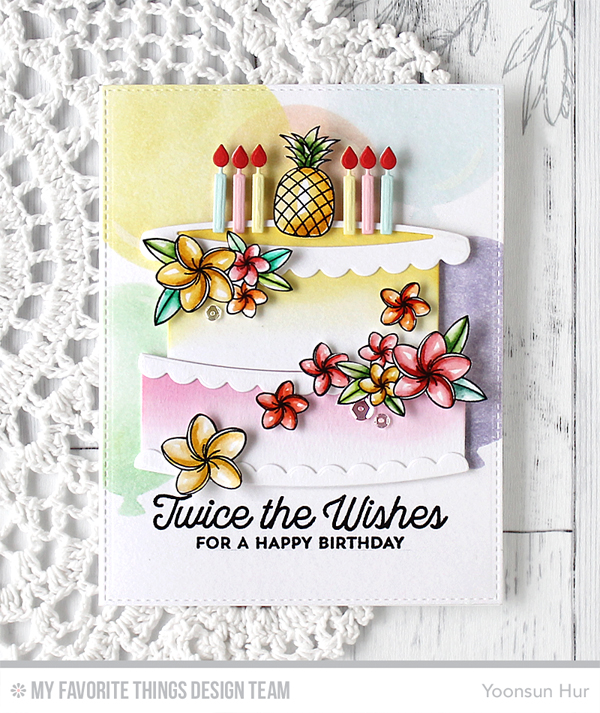 To start, I made a soft pastel balloon background with the
 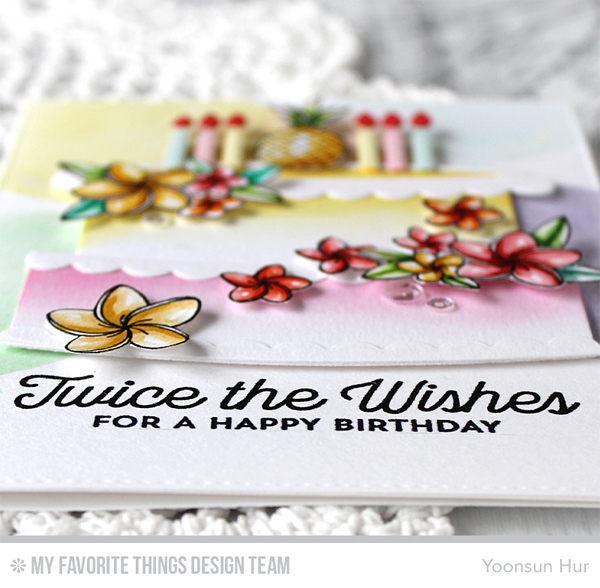 Make sure to check out


