Hello crafty friends!
Welcome to Day 3 of the Pretty Pink Posh March 2022 Product Release Blog Hop. If you arrived here from the super talented Rachel Arribas’s blog you are on the right track.
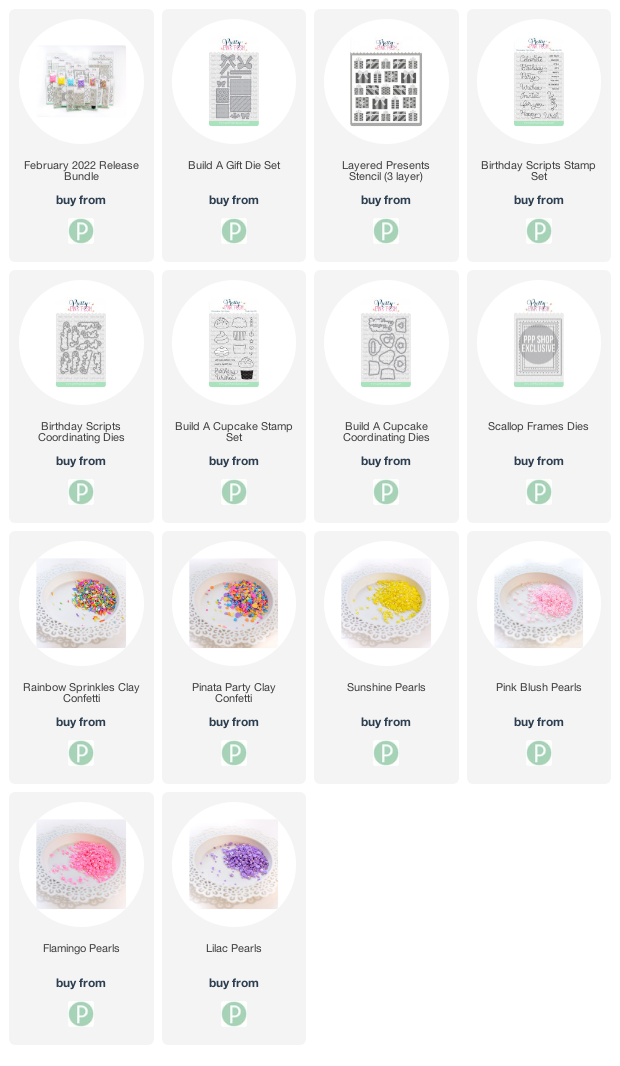
Pretty Pink Posh March theme is Easter & Spring. There are lots of fresh and adorable items!
For my first card, I used the new Butterfly Shaker die, Smile Script die and Layered Butterflies stencil. All three new items are so adorable, right?!! I made cute butterflies background with the Layered Butterflies stencil and Distress inks.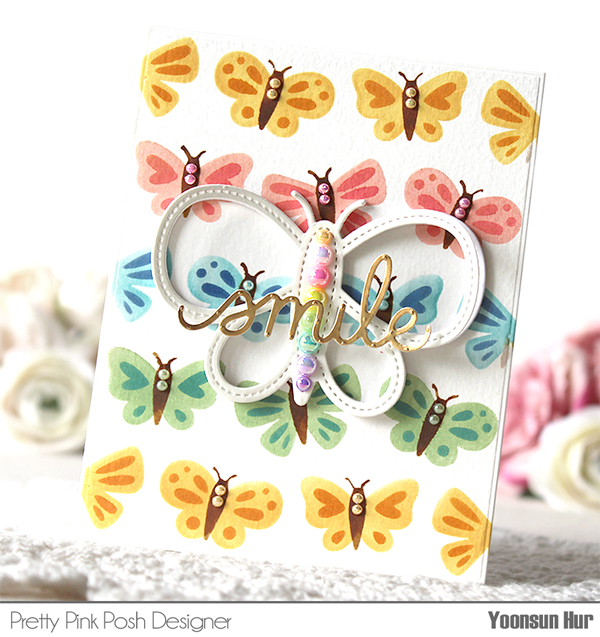
I die cut the Butterfly Shaker from white cardstock, the Smile Script from metallic gold cardstock, and then added them to the centre of the card front.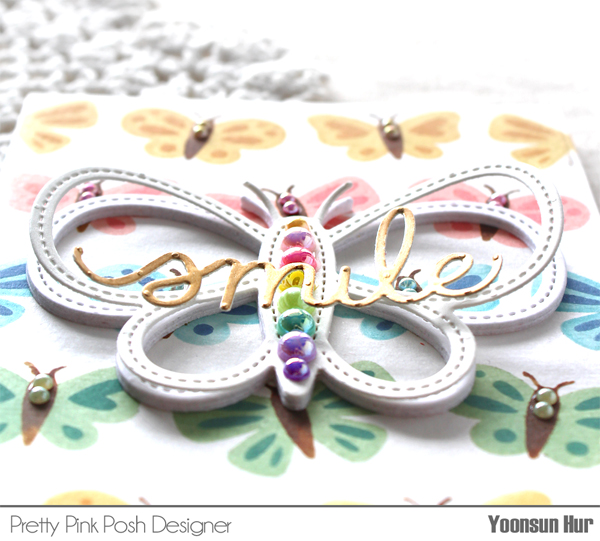
I decorated the centre of all butterflies with the new pearls. I love these all rainbow coloured pearls so much!!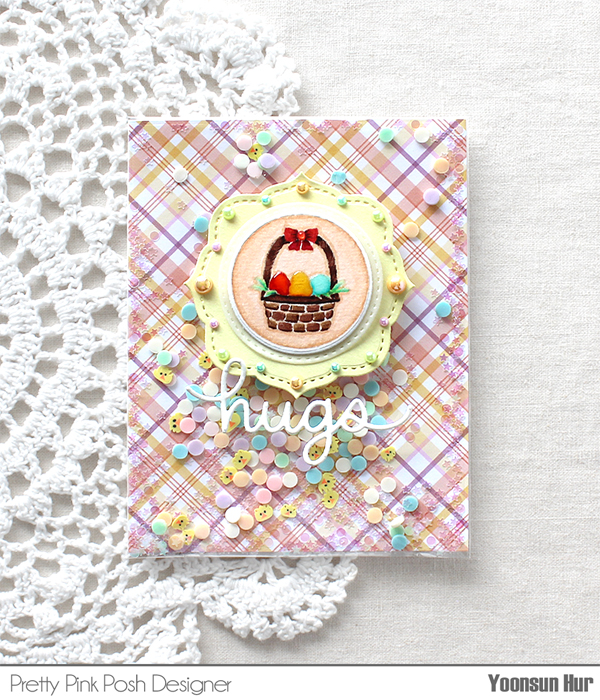
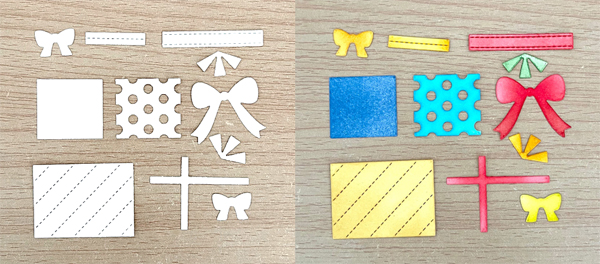
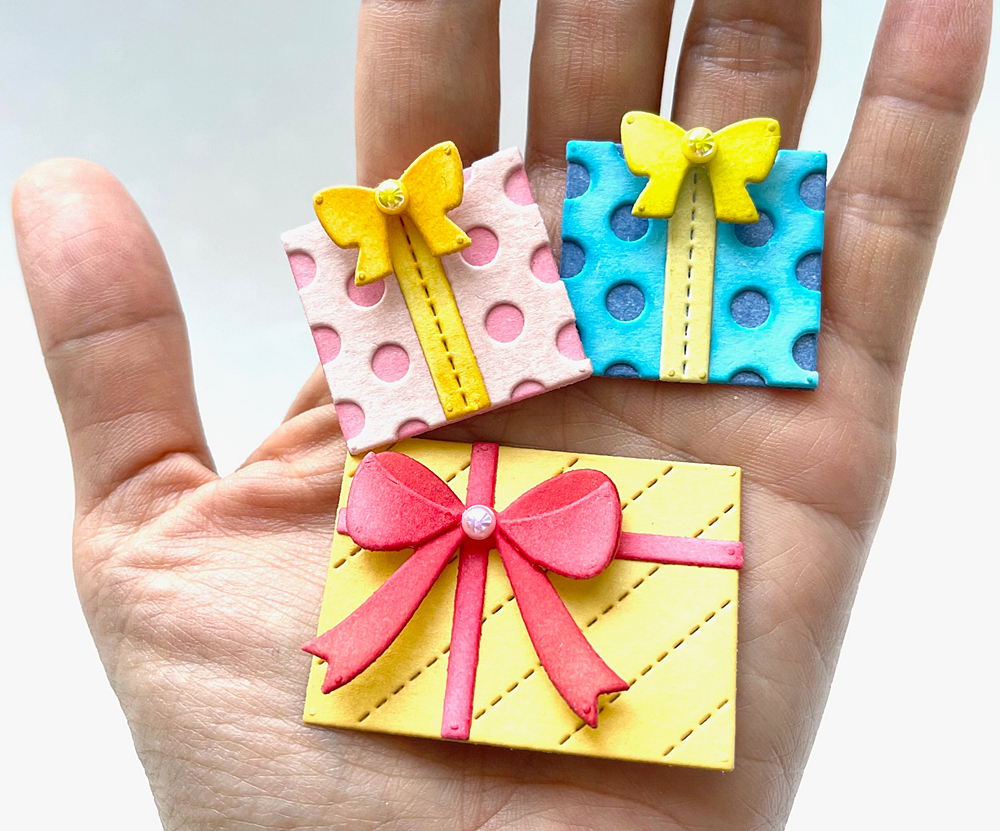
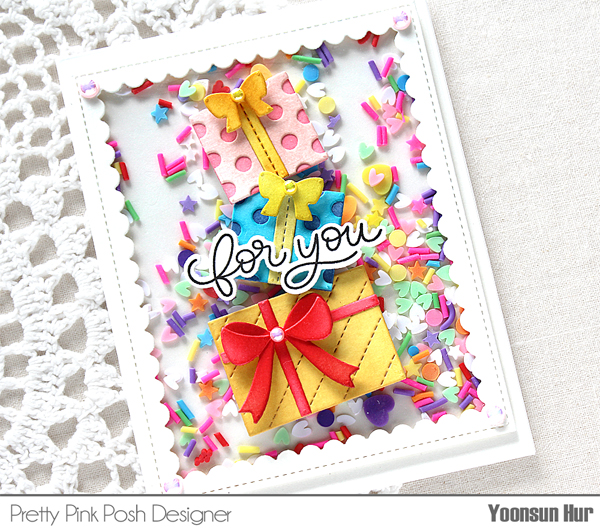
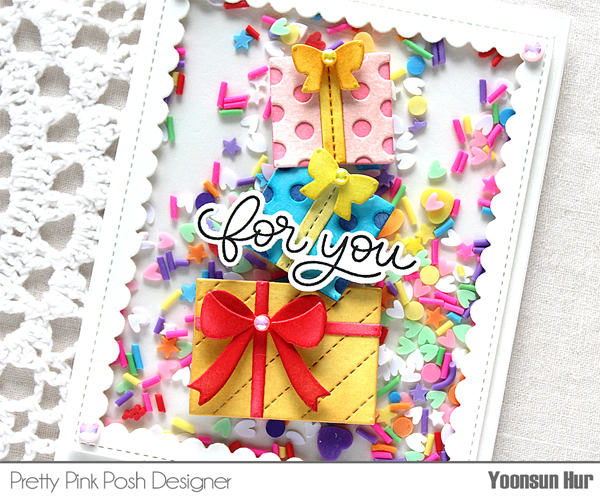
For the second card, I made edge-to-edge shaker card. For the background, I cut a piece of clear plastic bag bigger than A2 size, applied sticky double-side tape to all the edges of back of the background panel, covered the panel with clear plastic piece, and then filled it with the new Bunny Garden Clay Confetti, Iridescent Mini Circle and Iridescent Mini Star Confetti.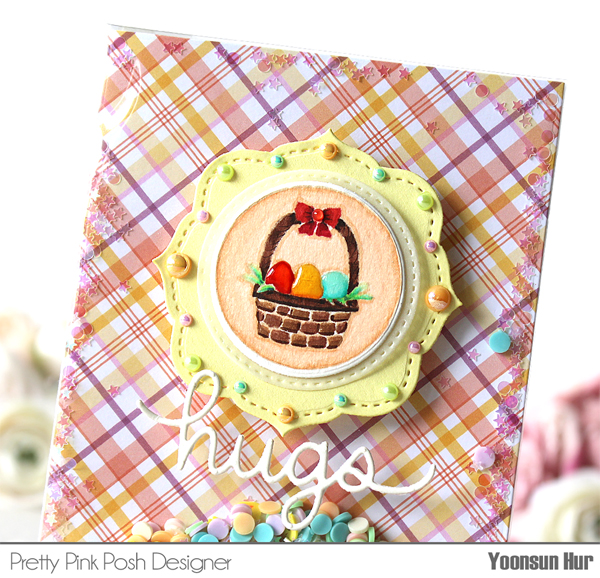
For the centre of the card, I stamped the Easter egg basket image in the Easter Circles set using pale beige dye ink, coloured it with Copic markers, and then die cut with the matching die. I love the floral shaped die in the Easter Circles coordinating die set.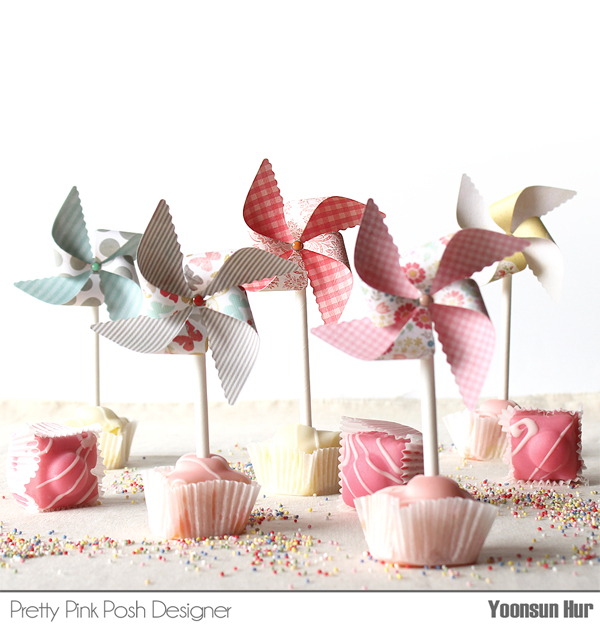
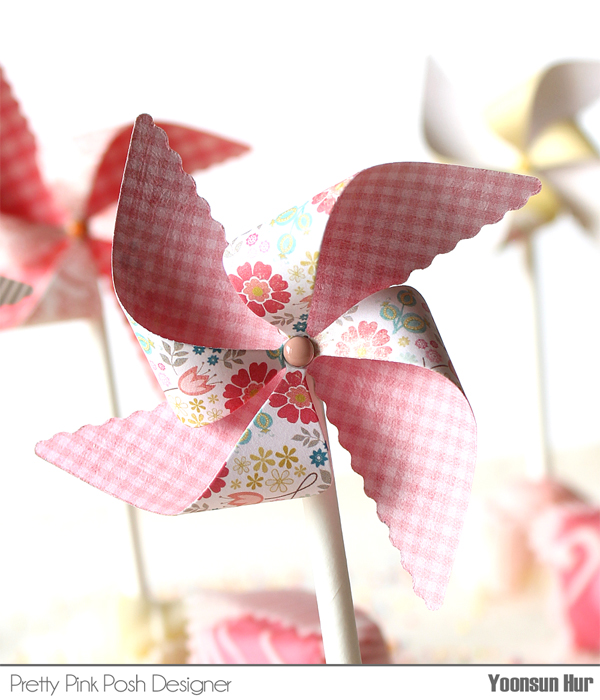
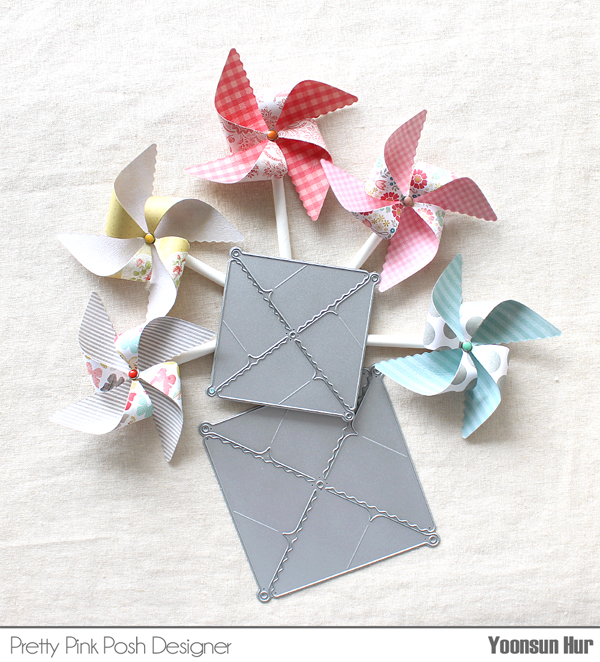
My last, but not least, project is cake topper with super-duper adorable 3D Pinwheels die set. It’s my most favourite among entire March products, Woohoo! One of my closest friends’ daughter, Danielle turns five next week and she looooves pinwheels! So I made these pinwheel cake toppers for Danielle. :D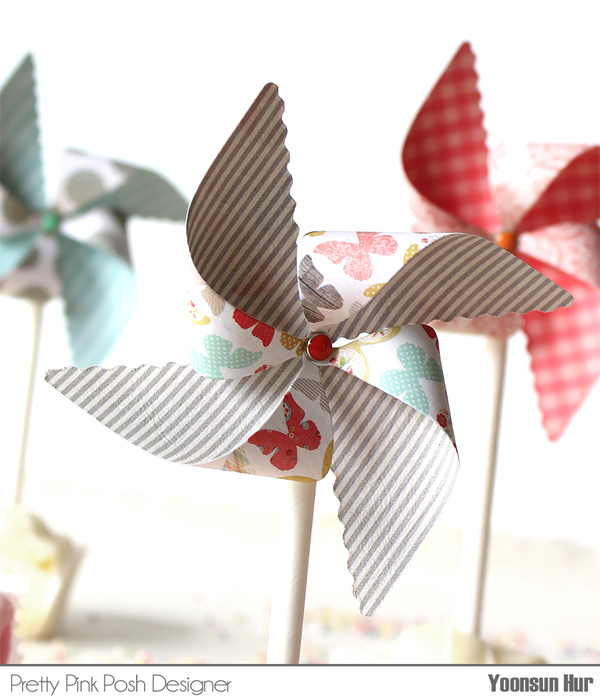
GIVEAWAY!!
There are 3 $25 gift certificates up for grabs (one winner each day). Winners will be picked randomly along the blog hop. Comments must be left by 11:59 PM PST on 3/20/2022. Winners will be announced on the PPP blog.
BLOG HOP LIST:
Pretty Pink Posh blog
Mindy Eggen
Wanda Guess
Melody Rupple
Rachel Arribas
Yoonsun Hur (Me!!)
Tammy Stark
Thank you so much for stopping by. Have a great day!
Keep smiling and be blessed. God bless you all.
Love Love Love RejoicingCrafts


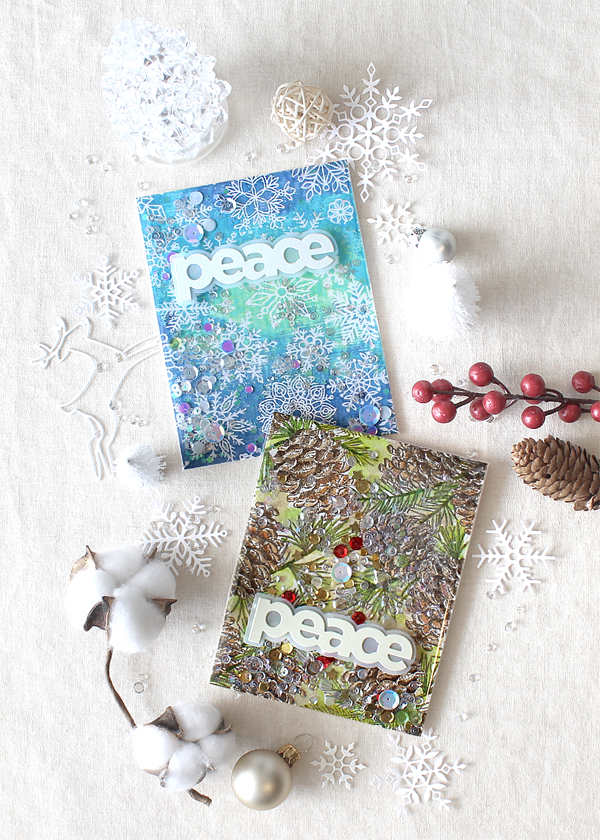

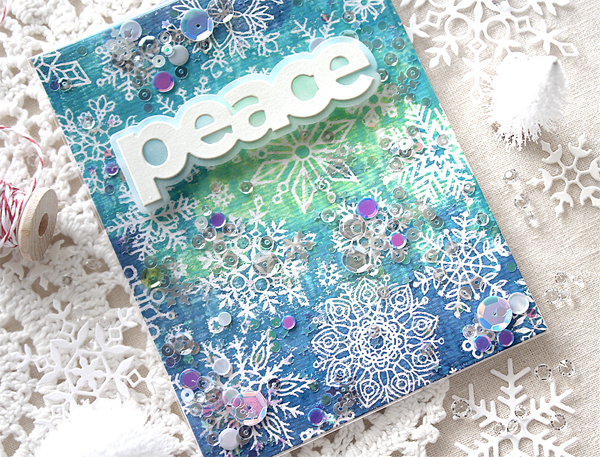

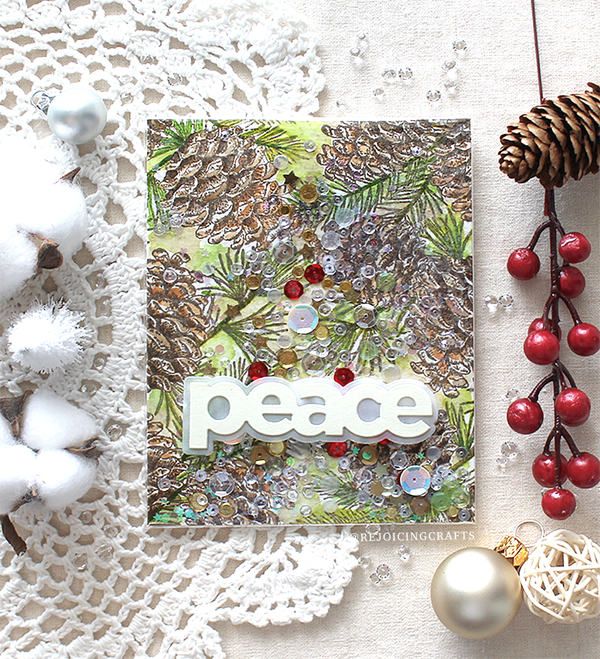
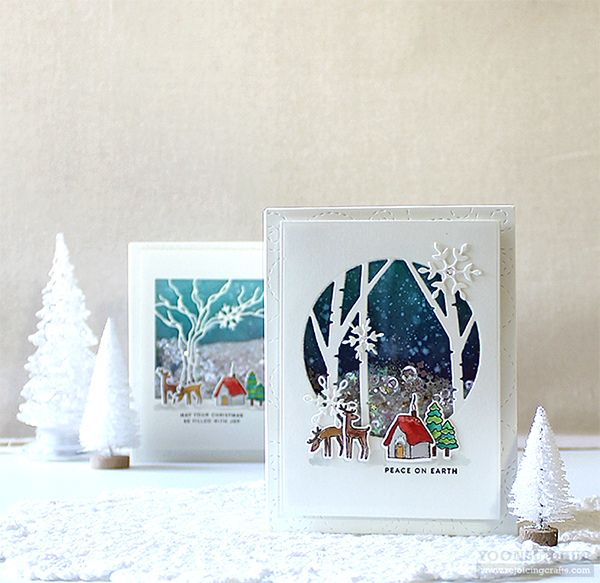
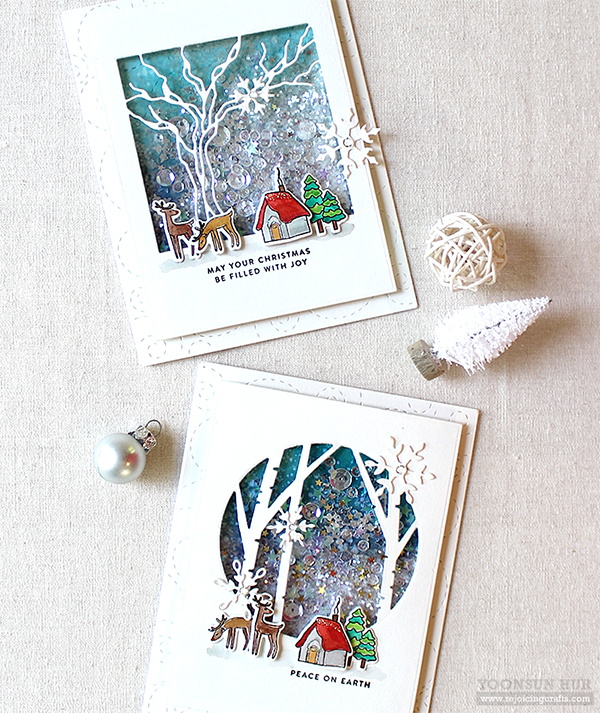
 This is what I made in December last year. I love making snowy winter scene with tree window dies so I couldn’t resist making another beautiful winter night scene this year!
 For this card, I used the
 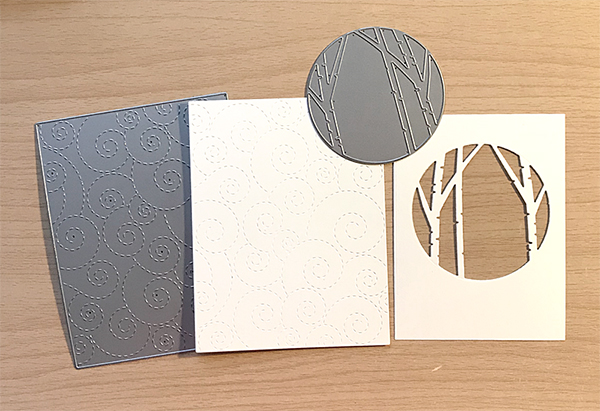 I die cut the
  For the snowy night scene, I ink blended to the
 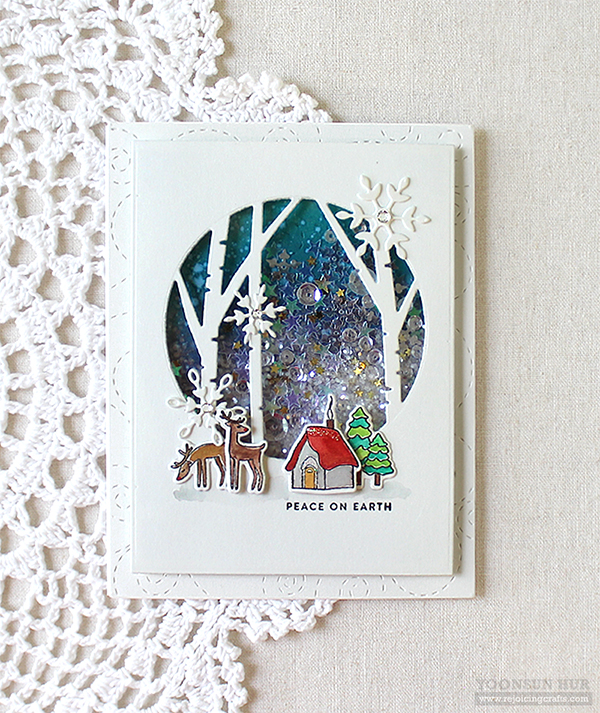 I stamped deers, house, trees from the
 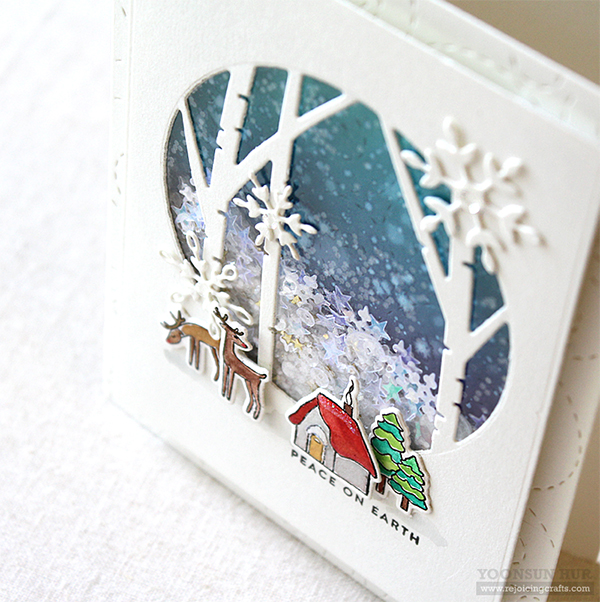 I decorated the card front with some snowflake die cuts, watercoloured objects.
 For the sentiment, I used the
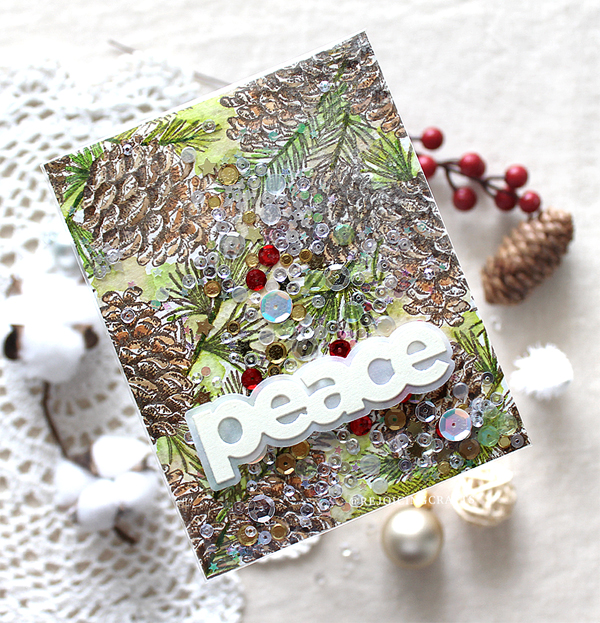
 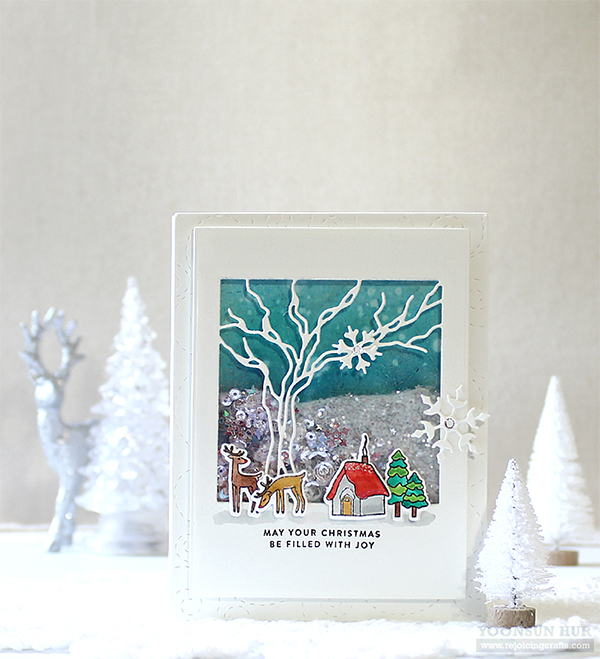 Here is another Christmas tree shaker card with the
 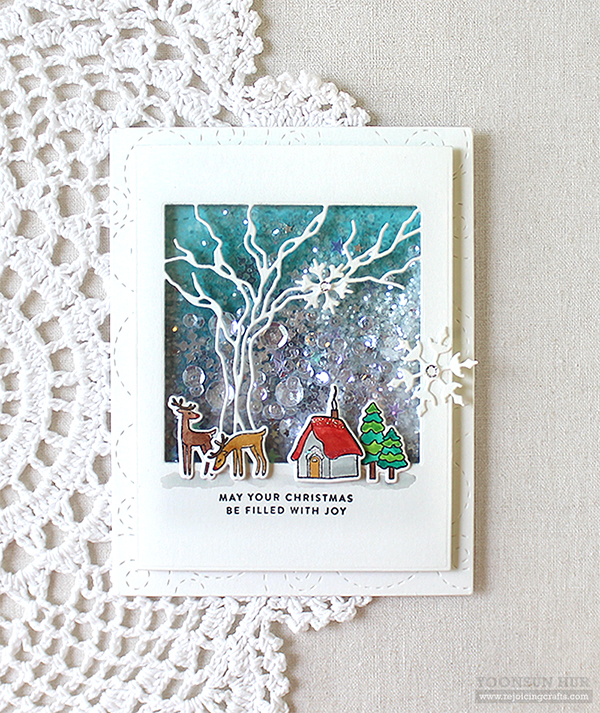 I love this intricate
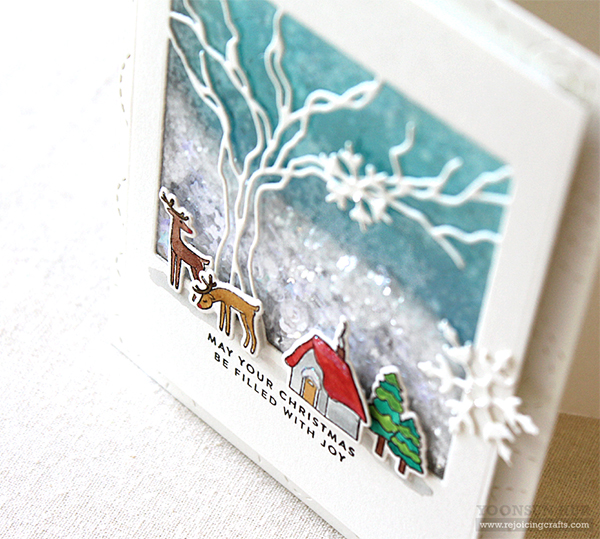

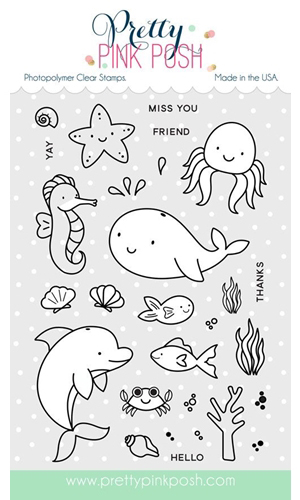
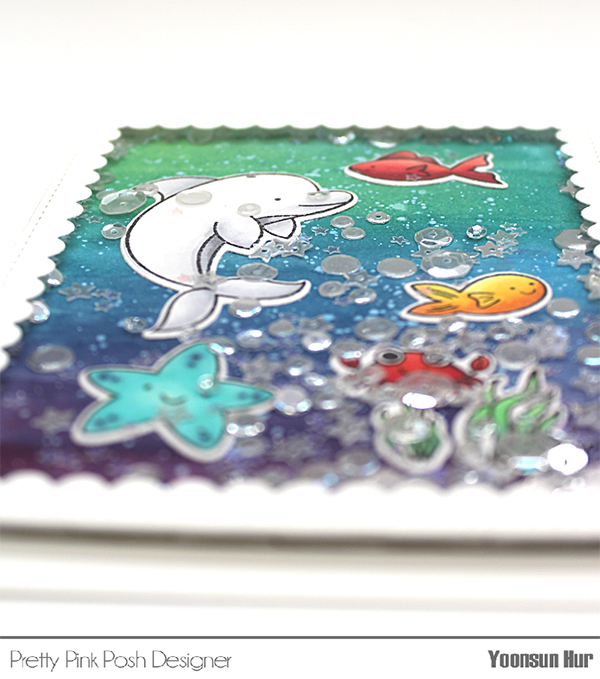
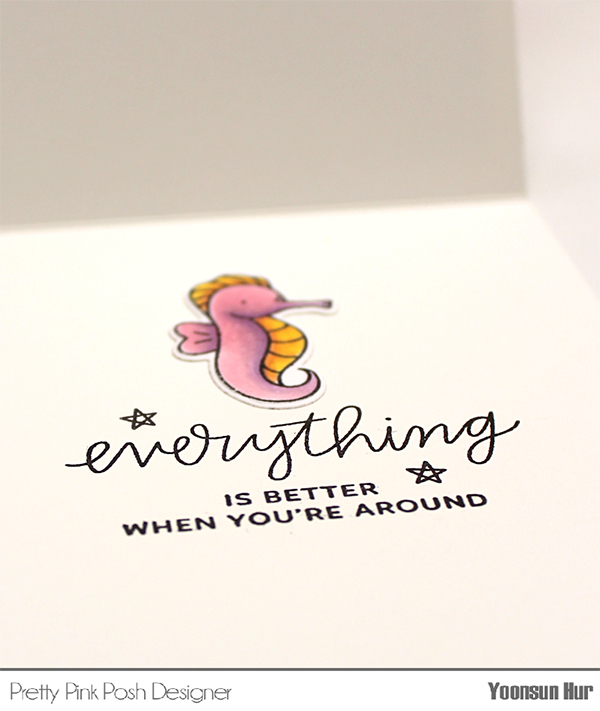
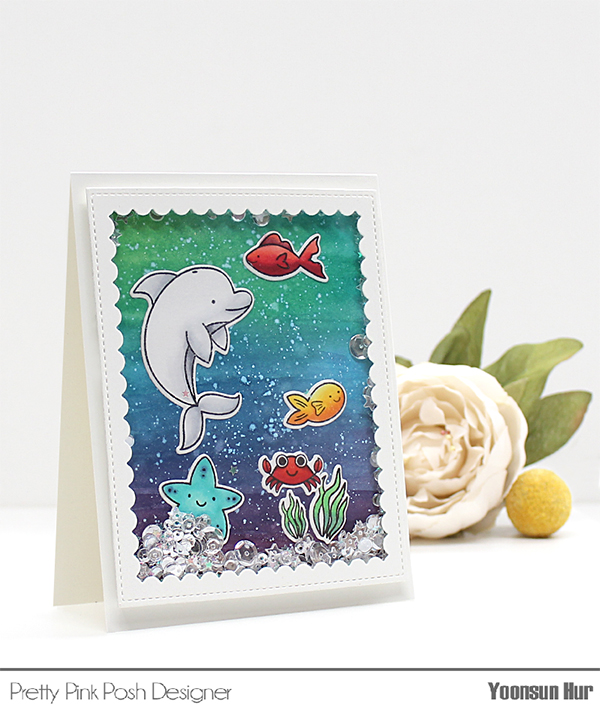 I started by stamping adorable sea creatures from the
 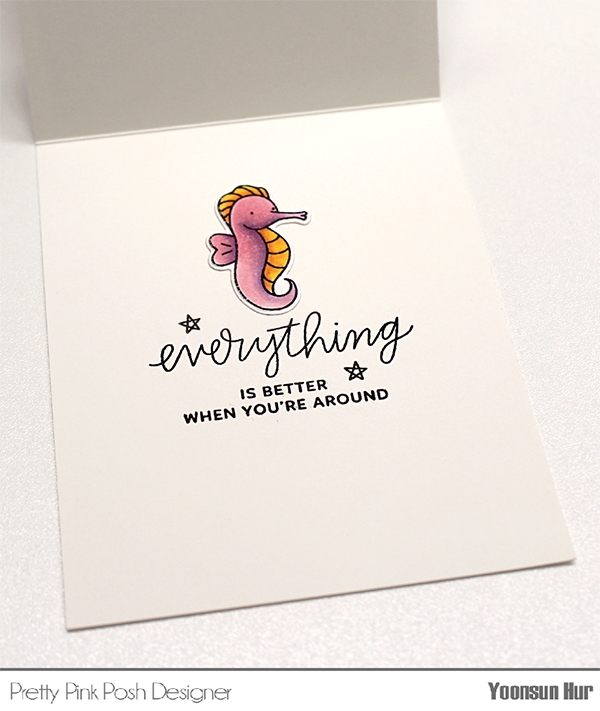 Ta-da!! I stamped the sentiment (from the
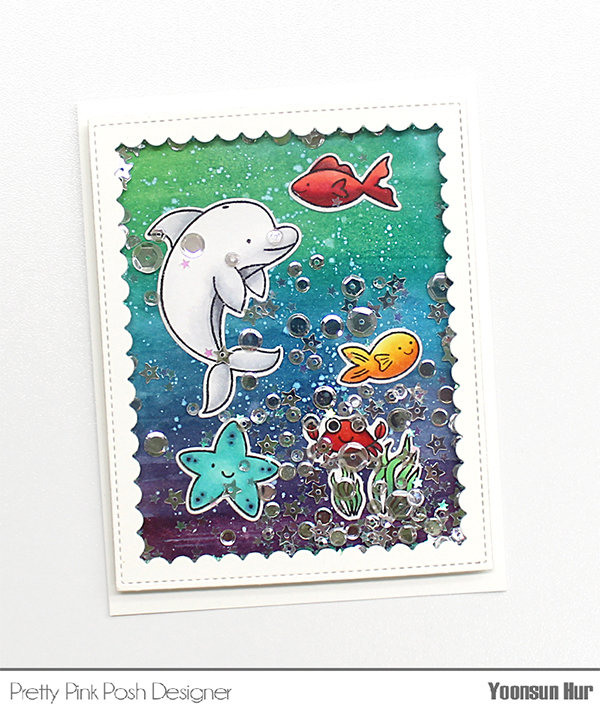
 Thank you so much for stopping by. Happy crafting!


