SSS Love

Hello crafty friends, I hope you had a fabulous Christmas!!
Today I want to share with you a couple cards with SSS Valentine themed goodies.

YoonsunHur-20151228-SSS-001
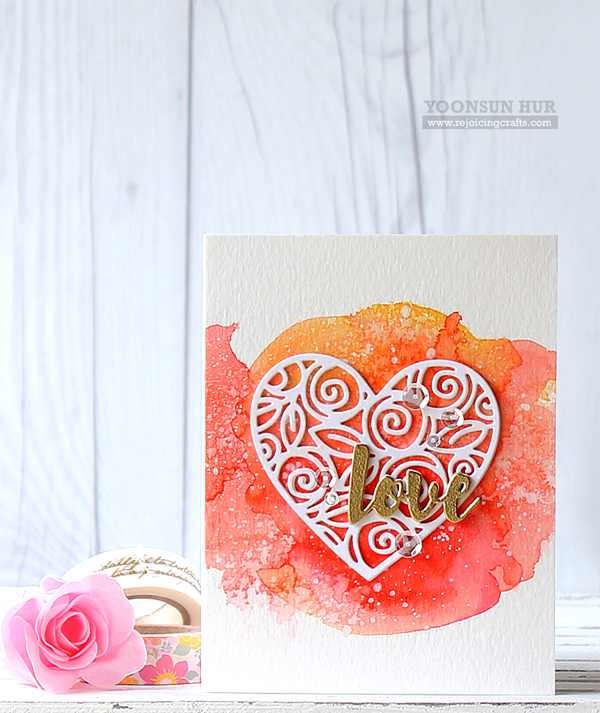
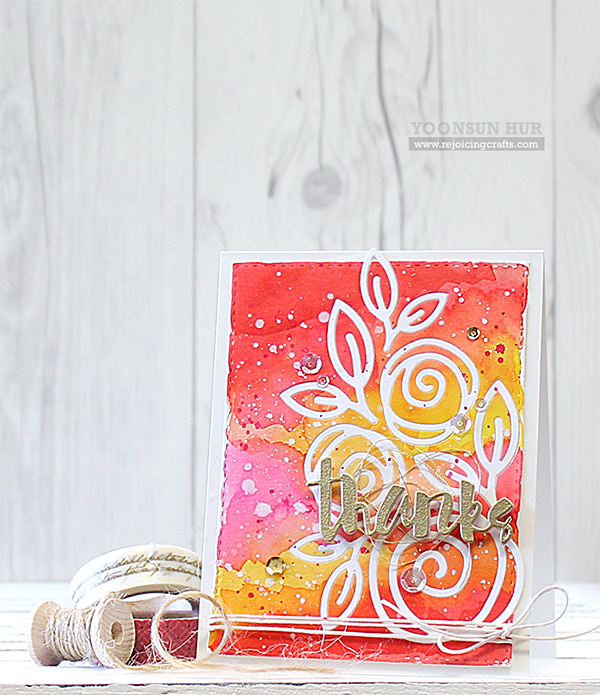
For my first card, I used Love Bouquet and I Love You Word dies. For my background, I used watercolour smooshing technique onto watercolour paper with Distress inks: Festive Berries, Wild Honey, Abandoned CoralWorn Lipstick Distress inks. Regarding watercolour smooshing technique, I followed Kristina Werner’s instructions. I then spritzed Ranger Perfect Pearls Mist over the watercoloured panel, added some opaque white ink splatters. I die cut the word “Love” from white card stock five times using I Love You Word dies, glued them together, then gold heat embossed. I die cut Love Bouquet from white card stock as well. Lastly, I mounted all elements as shown to A2 size white card base, then embellished with a few PPP clear sequins.
YoonsunHur-20151228-SSS-003
YoonsunHur-20151228-SSS-004For my second card, I used the same technique and colour scheme like the first one. but, I used Heart Of Roses instead of Love Bouquet die.
YoonsunHur-20151228-SSS-005

That’s it for today. Thank you so much for stopping by. Have a wonderful day!!

Keep smiling and be blessed! God bless you all!
Love Love Love RejoicingCrafts

http://static.inlinkz.com/ppr.js

SSS Stacking Animals

Hello crafty friends, I am just popping in to show you my fun (and hopefully, sweet) card with SSS You Have My Heart Stacking Animals stamp set.
SSS-20151222-YHMH
Let’s just imagine! A little mouse, named Mickey, is very sad… and he needs a lot of comforting at the moment. So, his animal friends are gathering by twos and threes to give him hugs and kisses :D
YoonsunHur-20151222-SSS-001
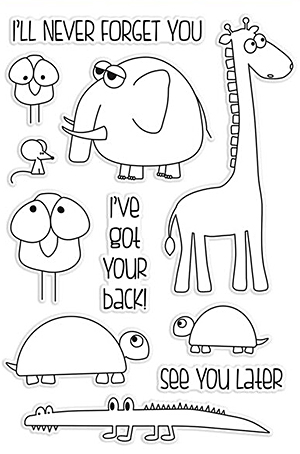
Oh, I LOVE the Stacking Animals stamp set!!! These critters are super adorable!!
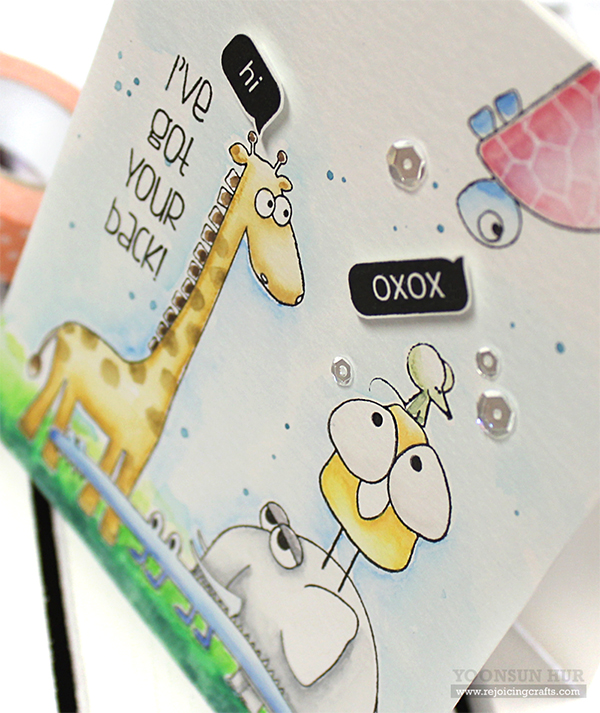
To create the card, I 1) Stamped the animals from Stacking Animals set onto watercolour paper using black pigment ink. I used masking paper, stamped them in one layer. 2) Coloured them with Derwent Watercolor Pencils, added some ink splatters. 3) For the bubble talks, I used Texting You stamp set. 4) Mounted the watercoloured panel on A2 size white card base using double-sided tape. 5) Embellished with a few PPP clear sequins.
YoonsunHur-20151222-SSS-003

Thank you so much for stopping by and HAPPY CHRISTMAS EVERYONE!!!

Keep smiling and be blessed! God bless you all!
Love Love Love RejoicingCrafts

http://static.inlinkz.com/ppr.js

SSS You Have My Heart Release

Hello crafty friends, happy Thursday!
SSS-YouHaveMyHeart-BannerSimon Says Stamp released Valentine themed products in this week, called “You Have My Heart!” Oh, it’s so romantic, isn’t it? I love them all dearly and even particularly love the Roses For You stamp set.
SSS-Roses

Here is what I came up with:
YoonsunHur-20151217-SSS-002With the Roses For You set, I made a flower bouquet card. First I 1) Stamped the roses onto watercolour paper using embossing ink, white heat embossed. 2) Coloured the roses with Distress inks using a waterbrushSpun Sugar(mostly I used), Picked RaspberryWorn Lipstick, and Festive Berries. 3) Coloured the leaves with Distress markers: Mowed Lawn, Cracked PistachioPeacock Feathers, and Evergreen Bough. 4) Stamped the heart from Roses For You set on watercolour paper, coloured it with Festive Berries and Fired Brick Distress inks using a waterbrush, then fussy cut it. I used it as flower wrapping paper. 5) Die cut the “Love” words five times from white card stock, glued them together, then gold heat embossed. 6) Mounted the watercoloured panel on A2 size white card base using double-side tape at first, then mounted the sentiment die cut and heart cut as shown to the watercoloured panel using dimensional foam tape. 7) Embellished with a few 4mm clear sequins.
YoonsunHur-20151217-SSS-003Make sure to check out Simon Says Stamp blog for more inspiration with the new You Have My Heart release products!

Thank you so much for stopping by. Happy crafting!!

Keep smiling and be blessed! God bless you all!
Love Love Love RejoicingCrafts

You Have My Heart Release:

What I used:

http://static.inlinkz.com/ppr.js

SSS Jingle Snowflakes

Hello crafty friends!
We are still making Christmas cards, right?! So I’m sharing with you my Christmas card using SSS Jingle Snowflakes Die.

YoonsunHur-20151216-SSS-001
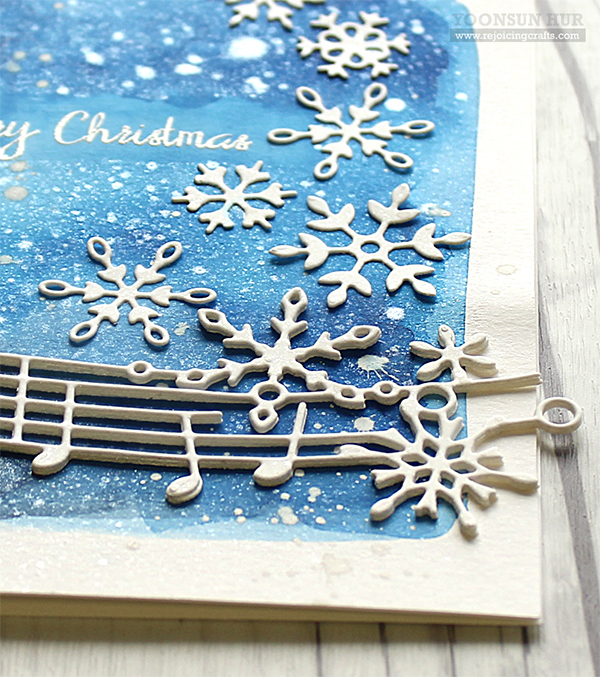
I believe watercolour background in blue makes white die cuts stand out, especially in winter time :D

First I 1) Coloured on A2 size watercolour paper panel with blue colours using a wet paintbrush. 2) Spritzed Ranger Perfect Pearls Mist all over the watercoloured background, added Studio Calico Opaque White ink splatters. 3) Die cut Jingle Snowflakes four times from white card stock and glued them together. 4) Die cut small snowflakes from white card stock using Stitched Flakes Die. 5) Stamped the sentiment from Simon And Dexter set on watercoloured panel using embossing ink, white heat embossed. 6) Mounted the watercolour background on white card base using double-sided tape at first, then affixed all die cuts as shown to the watercolour card using fine tip glue pen.
YoonsunHur-20151216-SSS-002YoonsunHur-20151216-SSS-003

Thank you so much for stopping by and happy holiday crafting!!

Keep smiling and be blessed! God bless you all!
Love Love Love RejoicingCrafts

http://static.inlinkz.com/ppr.js

SSS DieCember™ – Floral Cards

Hello crafty friends!
Today I want to share with you my couple of floral themed cards using Simon Says Stamp DieCember™ release!
SSS-DieCember-Banner
DieCember™ dies are so delicate and beautiful, and I especially love (you can guess) Single Roses dies :D
YoonsunHur-20151211-SSS-001For my first card, I used the new Stitched Dress Up Tags, Single Roses Dies, and Painted Hugs Die. First I 1) Die cut Stitched Dress Up Tag from watercolour paper. 2) Coloured onto the tag with Festive BerriesFired Brick, Wild HoneyMustard Seed, and Picked Raspberry Distress ink using a wet paintbrush. Then I spritzed Ranger Perfect Pearls Mist all over the watercoloured tag, added some opaque white ink splatters. 3) Die cut roses and leaves from white card stock using Single Roses dies, then positioned Single Roses dies on the watercoloured tag in place, die cut them from it. 4) Applied adhesive to the back of the tag, then inlaid all the pieces of coloured & white die cut together. 6) Die cut the “Hugs” word from white card stock (5 times), glued them together, then heat embossed with gold embossing powder. 7) Stamped the sentiments from the Big Scripty Greetings stamp set randomly on Ivory card base using Fog Gray dye ink. 8) Mounted the tag as shown to the Ivory card base using dimensional foam tape.
YoonsunHur-20151211-SSS-002YoonsunHur-20151211-SSS-003

YoonsunHur-20151211-SSS-004For my second card today, I used the same Single Roses Dies and color scheme but it’s slightly different in design. For the sentiment, I used the new (and gorgeous) Painted Thanks Die!
YoonsunHur-20151211-SSS-005
YoonsunHur-20151211-SSS-006

That’s it for today. Thank you so much for stopping by and have a fabulous weekend!!

Keep smiling and be blessed! God bless you all!
Love Love Love RejoicingCrafts

http://static.inlinkz.com/ppr.js