Hello crafty friends, happy weekend!
Today I have a couple of summery cards with the Your Light stamp set and the Clouds For Days stencil.
 (Left: Your Light Stamp Set / Right: Clouds For Days Stencil)
I made two similar cards but one is a summer day and another is a summer night card. :D

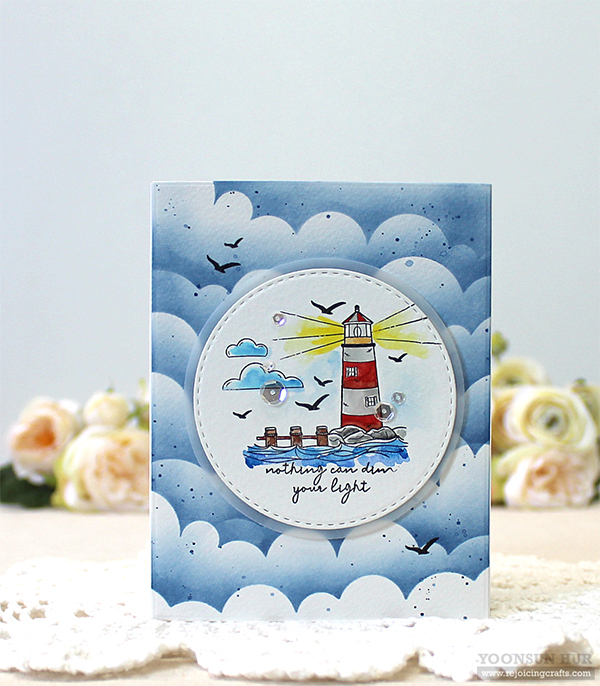
 With the Clouds For Days stencil, I used Mermaid Lagoon Distress ink & Picket Fence Studios Life Changing Blender Brush.
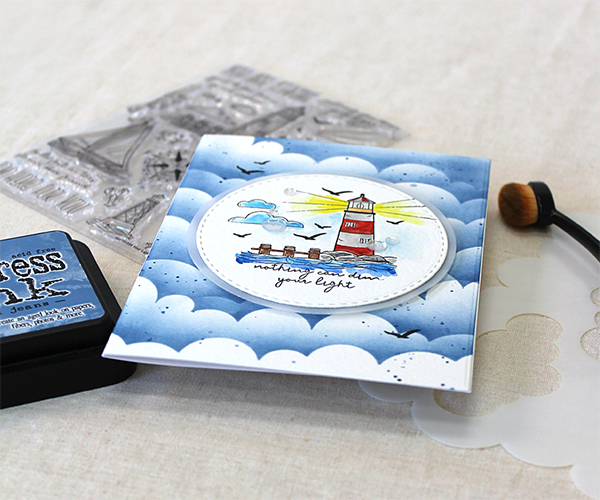 And this card, I used Faded Jeans Distress ink.
 I die cut a stitched circle panel from watercolour paper using the Stitched Circles die first, and then stamped yacht, clouds, seagulls and sentiment from the Your Light set on it using VersaFine Onyx Black. I then watercoloured them with Hero Arts Watercolor Wheel.
 For a summer night card, I stamped lighthouse, clouds, seagulls and sentiment from the Your Light set on it using VersaFine Onyx Black, then also watercoloured them.

 I love these two encouragement sentiments so much!!
Thank you so much for stopping by. Have a fabulous day!!
Keep smiling and be blessed! God bless you all!
Love Love Love RejoicingCrafts

 I die cut the
 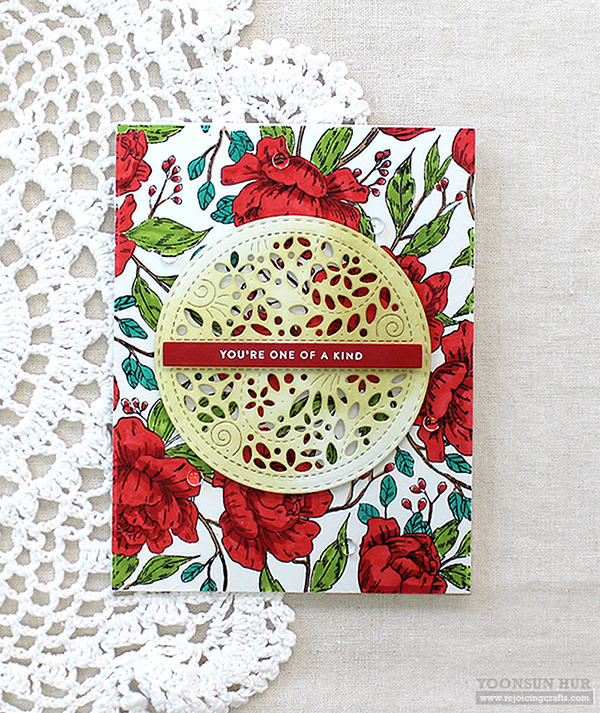 I stamped the
  For the sentiment, I heat embossed it from the
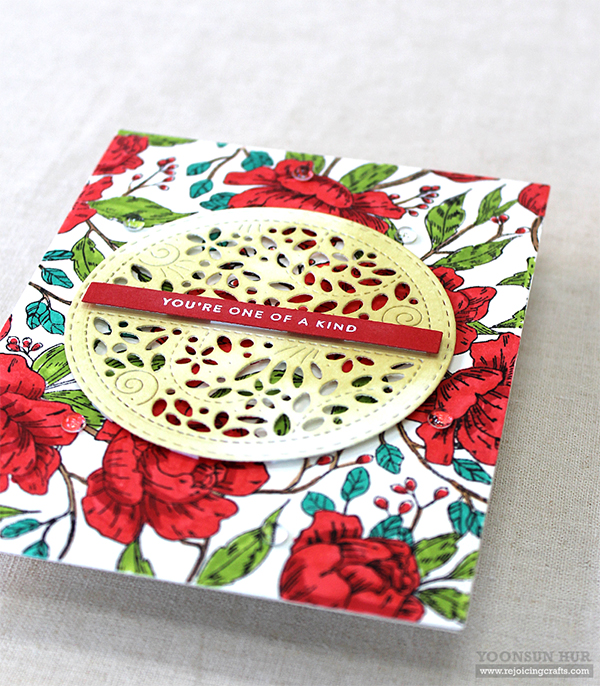

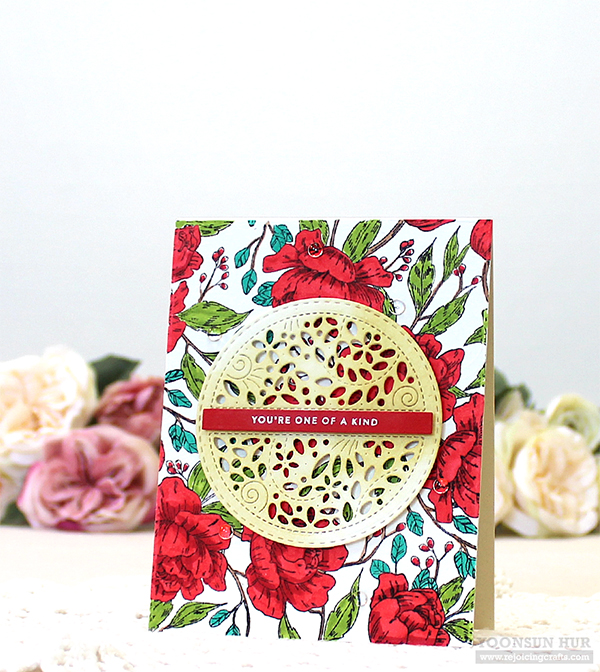
 For my second card, I used the
  I die cut stitched square panel from thick (300gsm) white card stock using the
 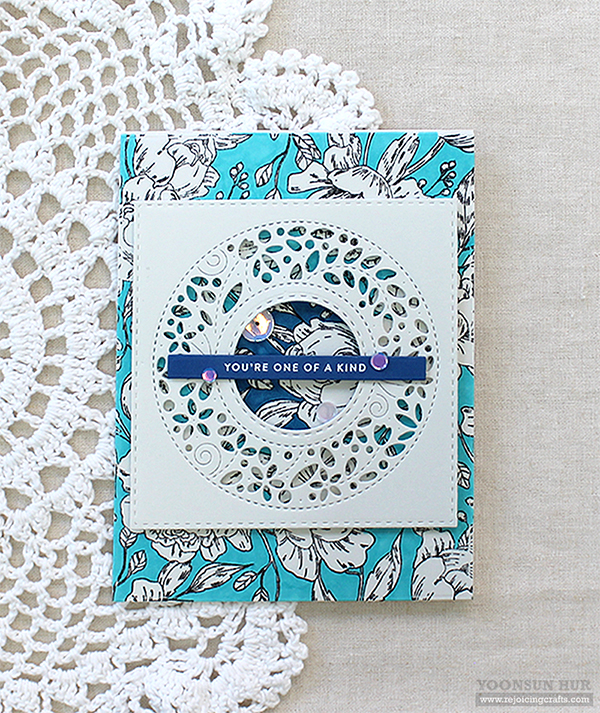 For this floral background, I stamped the
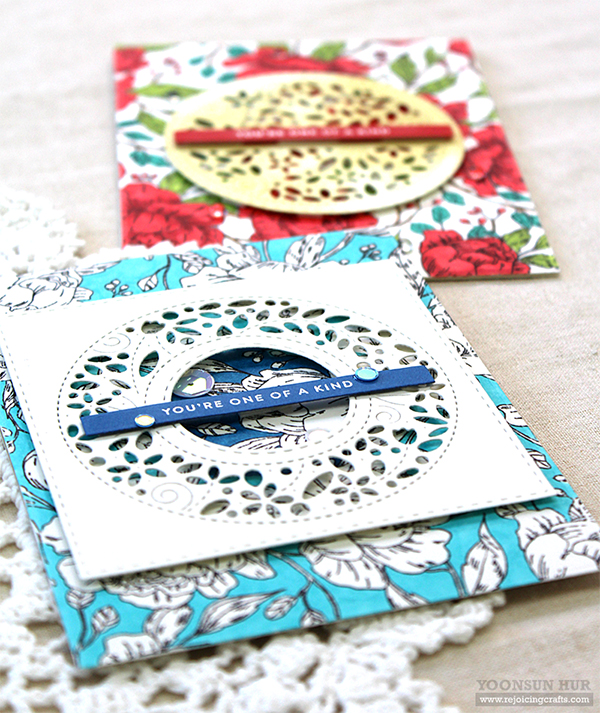

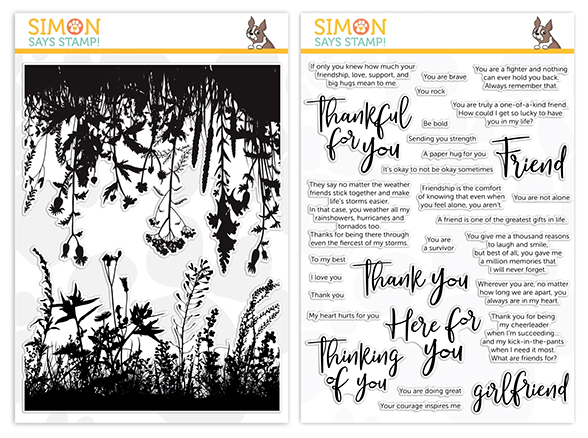 (Left:
 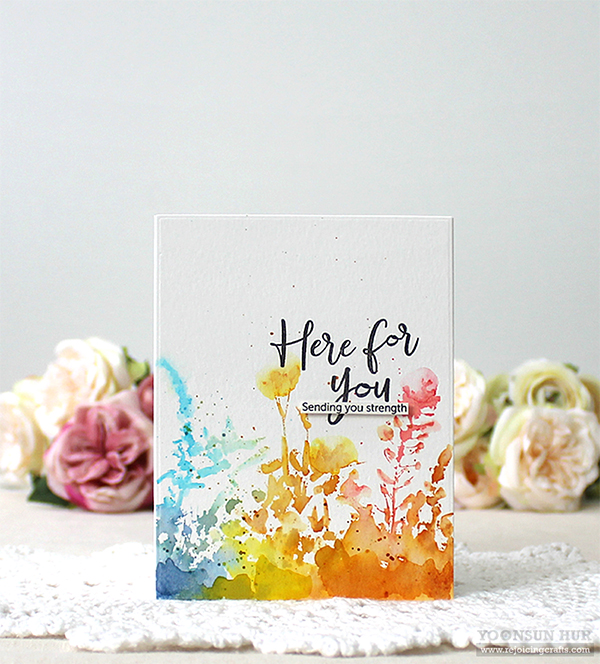 For my first card, I used several Distress inks as watercolours. I applied some Distress inks to one of flower silhouette image in the
  Next, I brushed to all stamped images with a wet paint brush – Distress inks react with water! I added ink splatters. For the sentiment, I used the
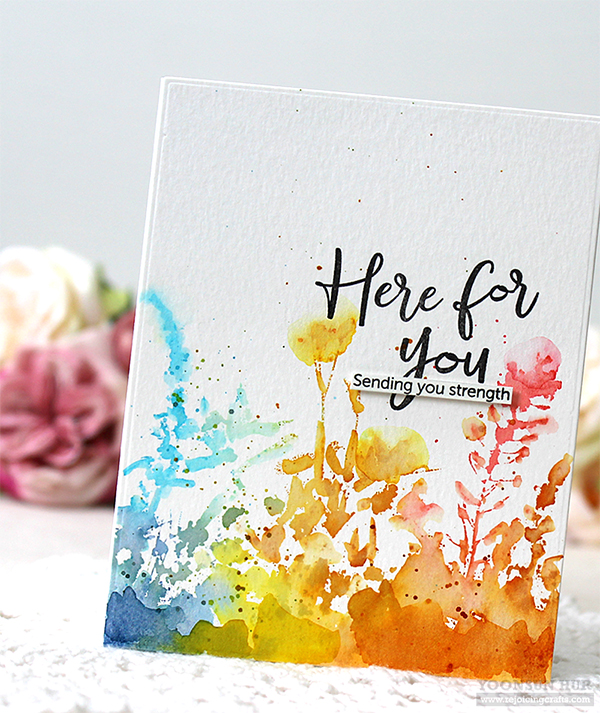

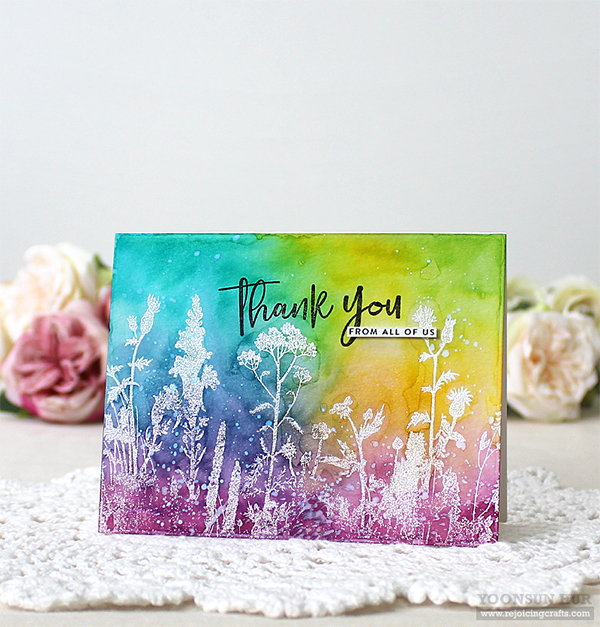 Here is another watercoloured floral card with the
  I freely brushed all over the panel with a wet paint brush, added
 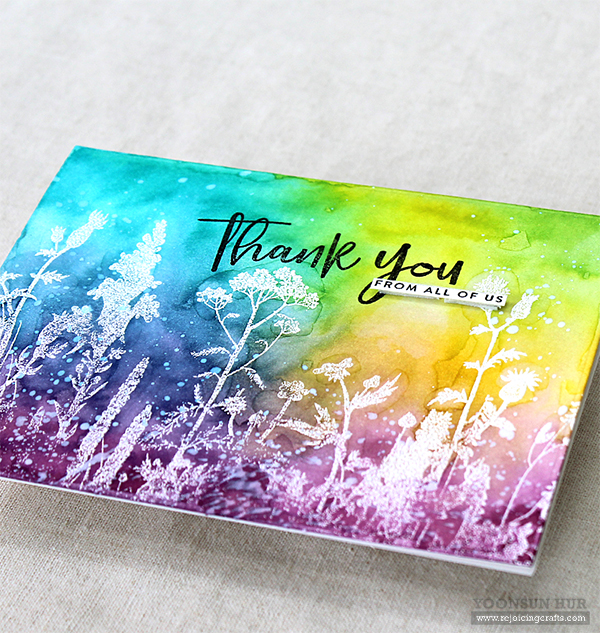 Distress ink is definitely one of great watercolour mediums!!
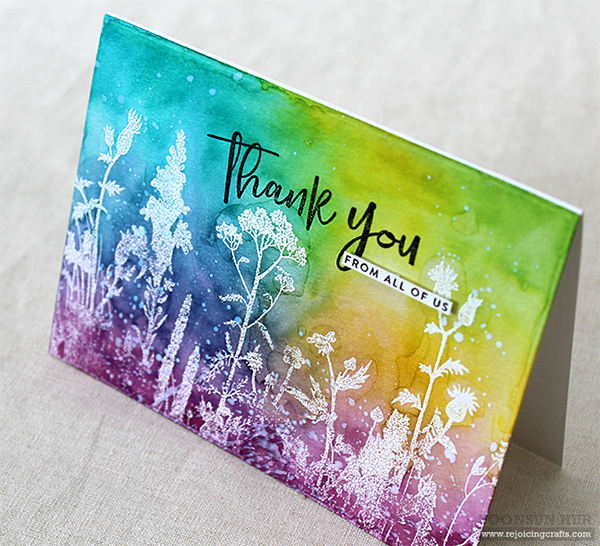

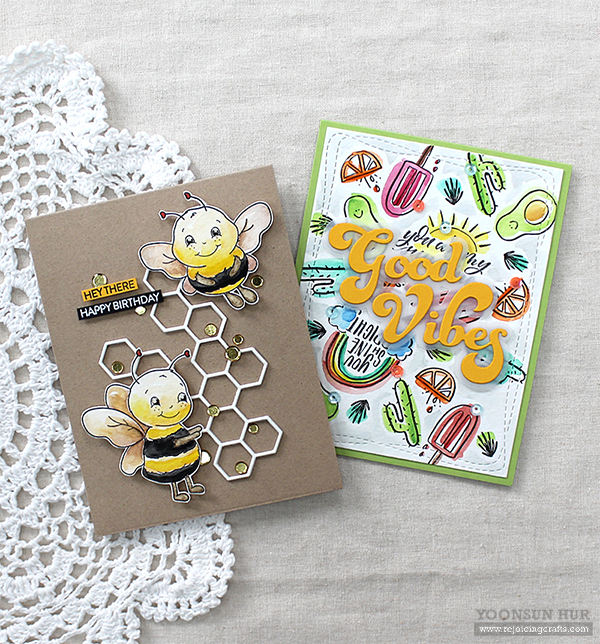
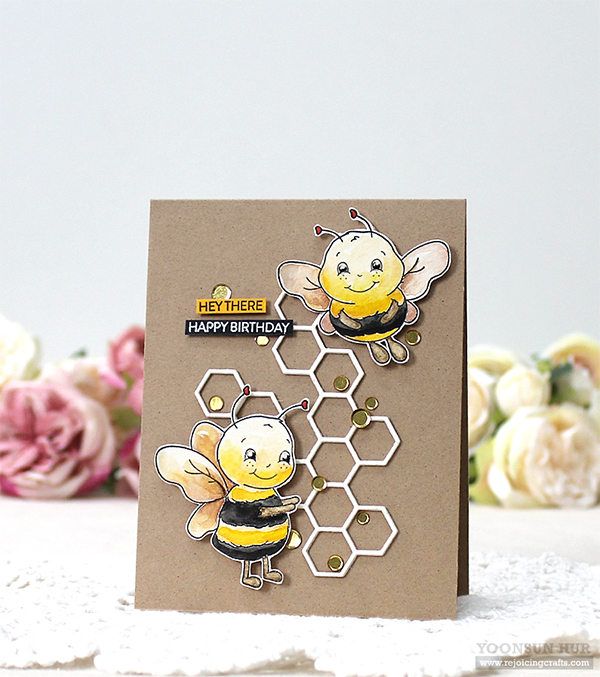 I started by stamping adorable bees from the
 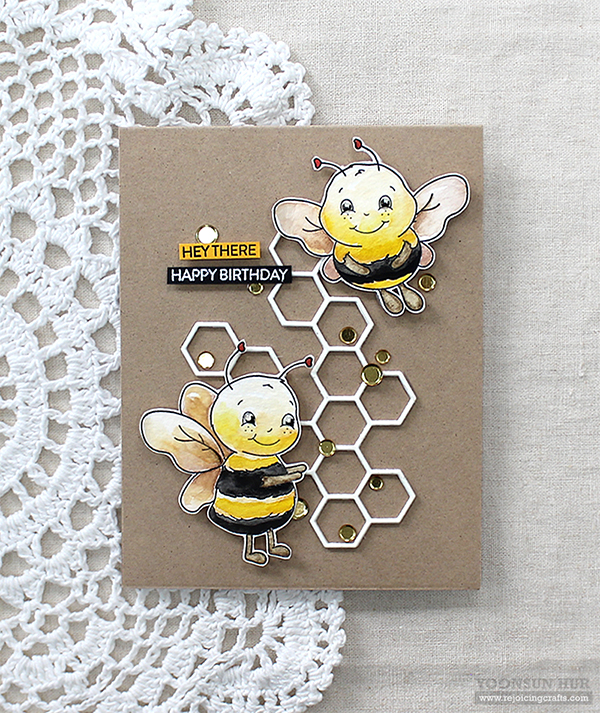 I die cut the
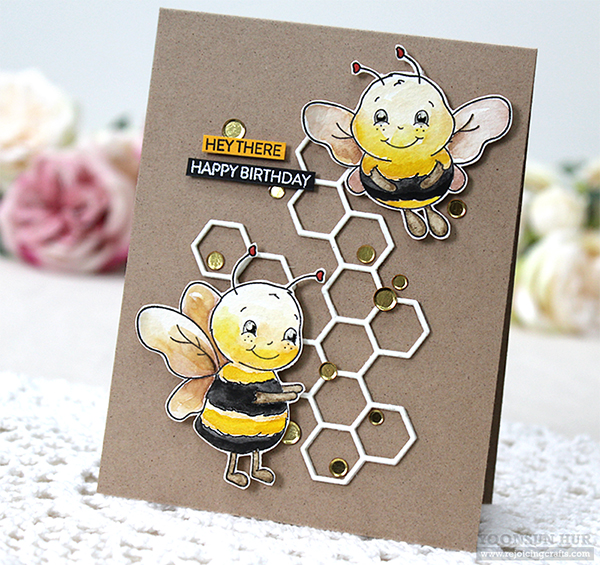
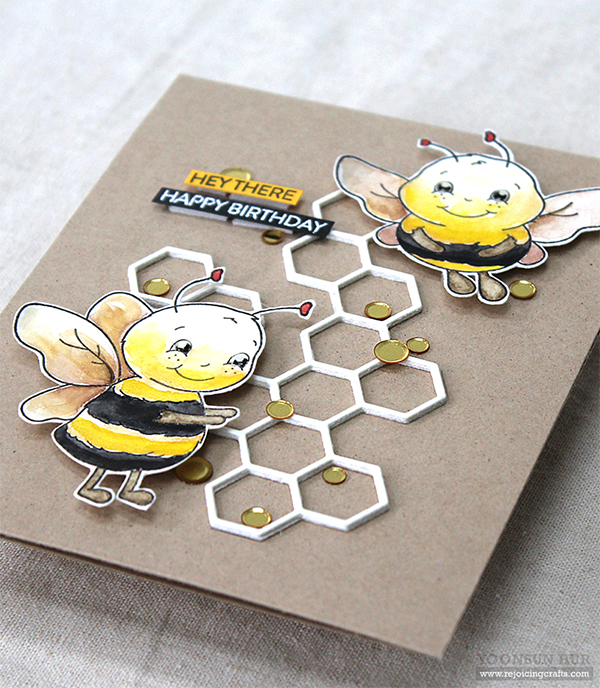

 I die cut the
 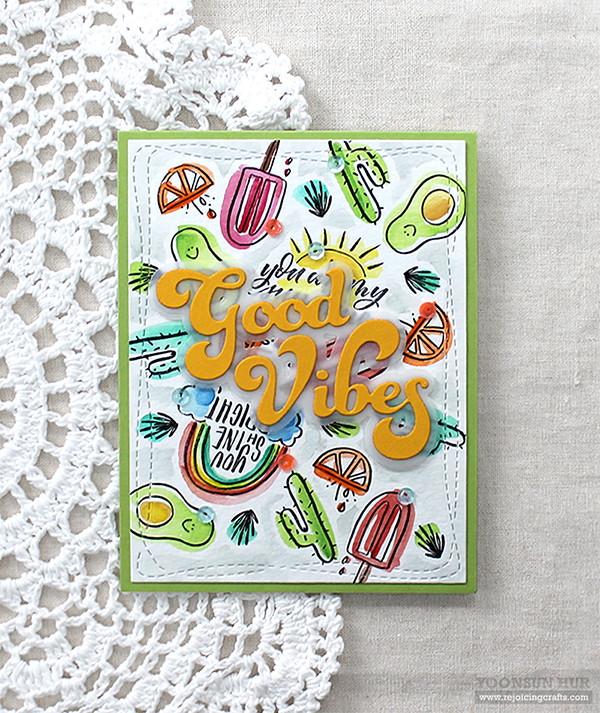 I freely watercoloured the stamped panel with
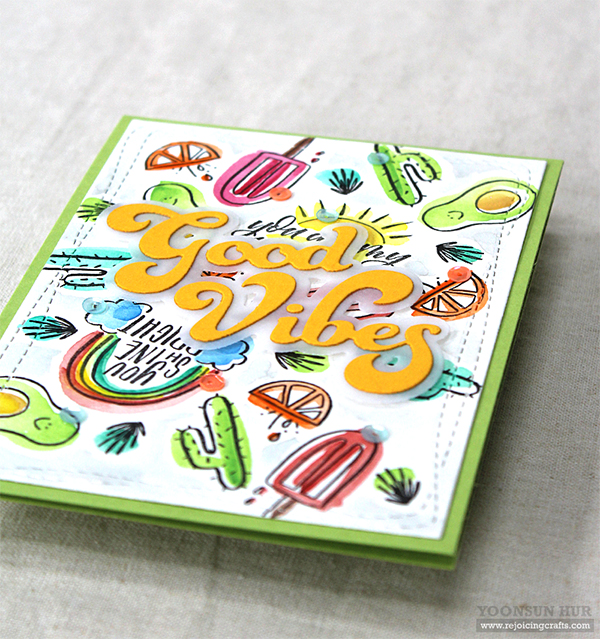

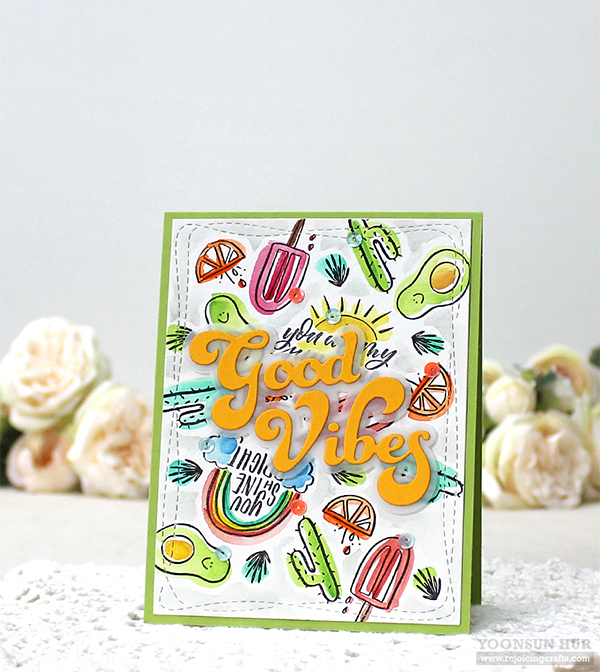
 I started by die cutting
  I watercoloured the stamped background with
  Once the background panel was dry, I mounted it on white card base using double-sided tape first, and then added all elements using foam tape. I embellished with a few