Hello crafty friends!
It’s Time! The Beautiful Butterflies Card Kit is available in the MFT Store now!!

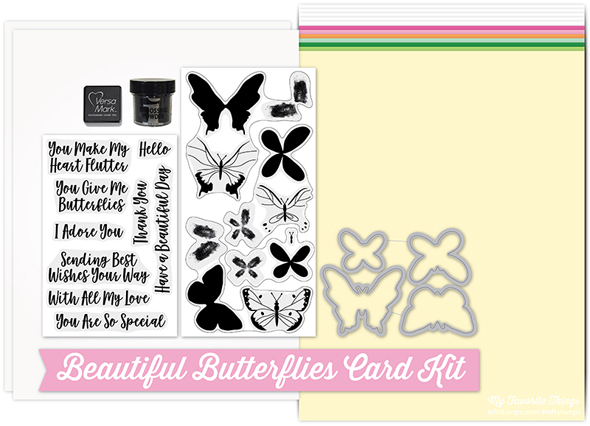 Beautiful Butterflies Card Kit
Beautiful Butterflies Stamp Set
You Give Me Butterflies Stamp Set
Beautiful Butterflies Die-namics
Card Stock: Cotton Candy, Field Day, Lemon Chiffon, Orange Fizz, Ripe Raspberry, Sour Apple, Spearmint, Smooth White (5 sheets)
2 Sheets Translucent Vellum
Versamark Cube
Black Embossing Powder
New Mid Month Free with $60 Die-namics is the Sentiment Label Strip Die-namics.
 I love the new MFT Butterflies, especially the largest one!! So today’s card, I made watercolour butterflies with only the largest image in the Beautiful Butterflies stamp set.
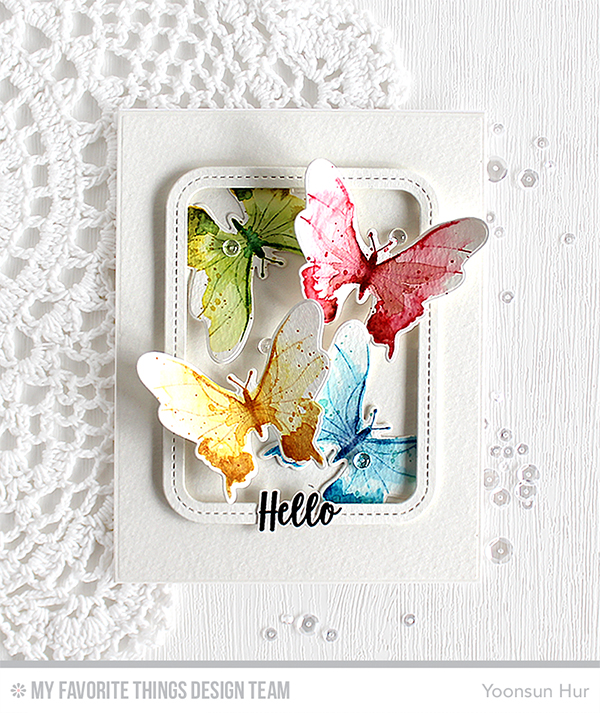 To create this card, I 1) Die cut 4 same shaped butterflies from watercolour paper using the Beautiful Butterflies Die-namics. 2) Stamped outlined image from the Beautiful Butterflies set on each die cut using Distress inks: (Red) Festive Berries & Fired Brick, (Yellow) Mustard Seed & Wild Honey, (Green) Mowed Lawn & Crushed Olive, (Blue) Mermaid Lagoon & Faded Jeans. 3) Brushed the stamped butterflies gently with a wet paint brush – Distress inks work the best as they react so well with water!! 4) Added ink splatters to each butterfly using the same colour. 5) Die cut the rounded rectangle frame from watercolour paper using the Single Stitch Line Rounded Rectangle Frames Die-namics. 6) Stamped the sentiment from the You Give Me Butterflies set in Black Licorice hybrid ink, then fussy cut it. 7) Mounted all elements as shown to A2 watercolour card base using foam tape. 8) Embellished with a few PPP 4mm clear droplets.
 Did I mention these butterflies are stunning? Oh yes! I’m so in love with them and you will do :D
Make sure to check out MFT Blog for all the info for today along with links to all the other DT member’s blog posts.
Thank you so much for stopping by. Happy crafting!!
Keep smiling and be blessed! God bless you all!
Love Love Love RejoicingCrafts


 To create the card, I 1) Die cut a piece of watercolor paper using A2 sized
 Thank you so much for stopping by. Happy crafting!!


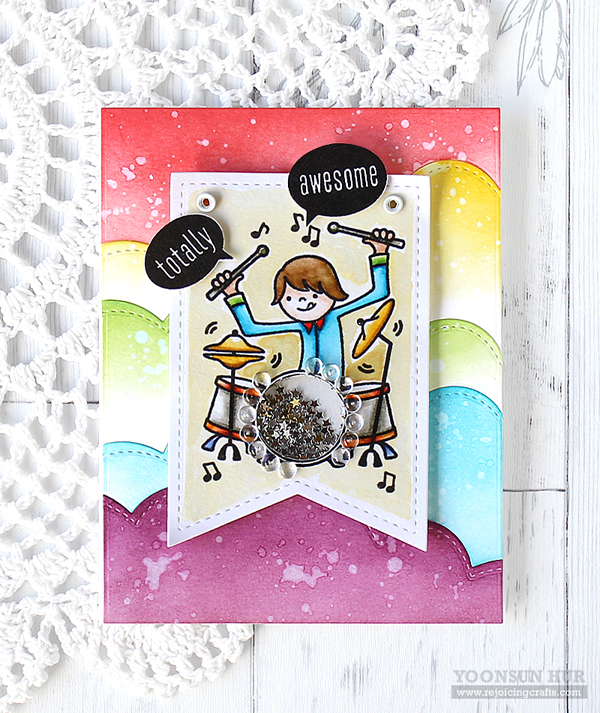
 For my first card, I made a fun shaker card with the
 Here is another happy card for you! I 1) Die cut the rainbow stripes from white card stock using the


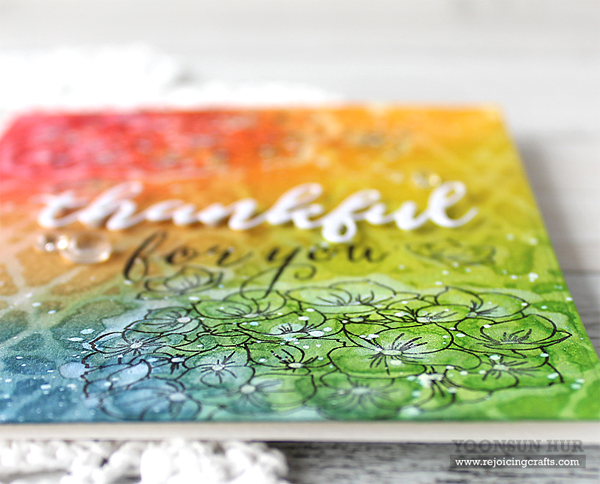
 To start, I created my own colourful background with the PPP
 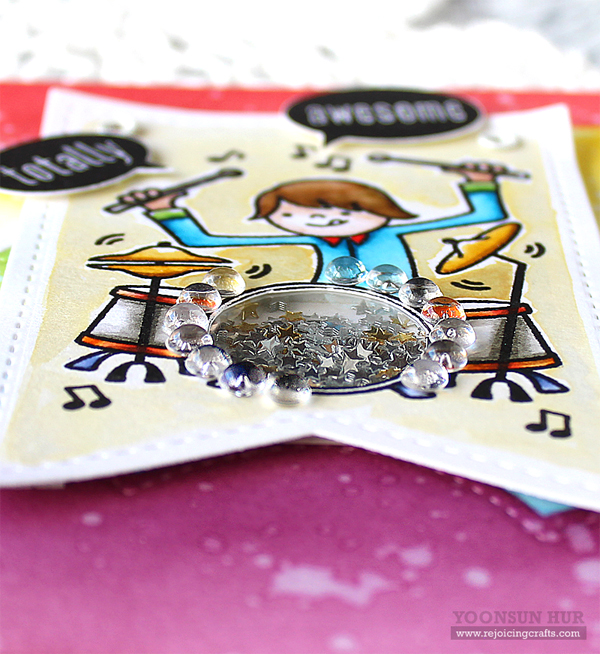 Your next stop on the hop is super amazing


 For my card today, I turned the sketch on its side. To start, I created my own background with the
  Thank you so much for stopping by. Happy crafting!!


