Hello crafty friends, happy weekend!
Welcome to the My Favorite Things October Release Countdown Day 4.

Today I want to share with you a couple cards I’ve made using so cheerful Christmas goodies: Santa Suit Die-namics, Santa’s Elves stamp set, and Hand Lettered Holiday stamp set.
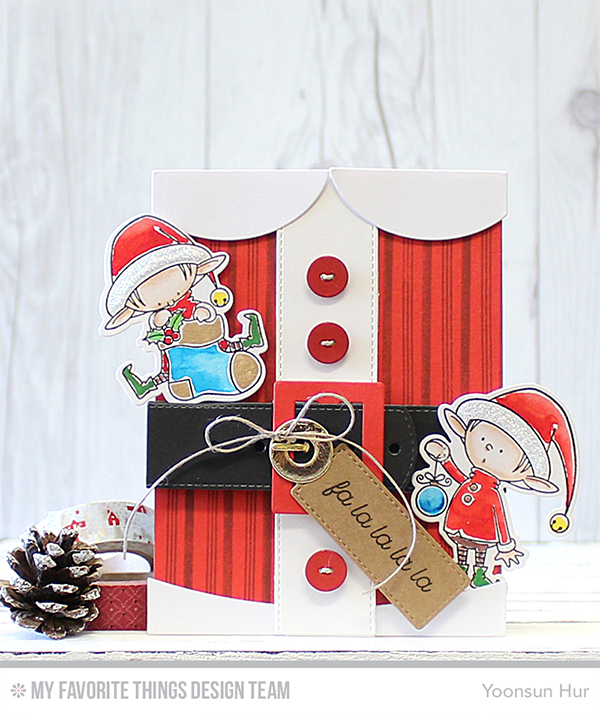 Ho! Ho! Ho! here he comes! Santa is on his way wearing his bright red suit with black belt :D
To create the card, I 1) Stamped the Candy Stripes Background on red card stock using Paver Red hybrid ink. 2) Die cut Santa Suit from white, red, black, and foil gold card stocks. 3) Stamped the elves from the Santa’s Elves stamp set on watercolour paper using black pigment ink, coloured them with Red Hot, Lush Lagoon, Lemon Drop, Field Day, and Chocolate Brown dye inks using waterbrush. And then die cut them with Santa’s Elves Die-namics. 4) Stamped the sentiment from the Trim the Tree stamp set using Black Licorice hybrid ink, die cut it with Tag Builder Blueprints 4 Die-namics. 5) Mounted all elements as shown to white card base.
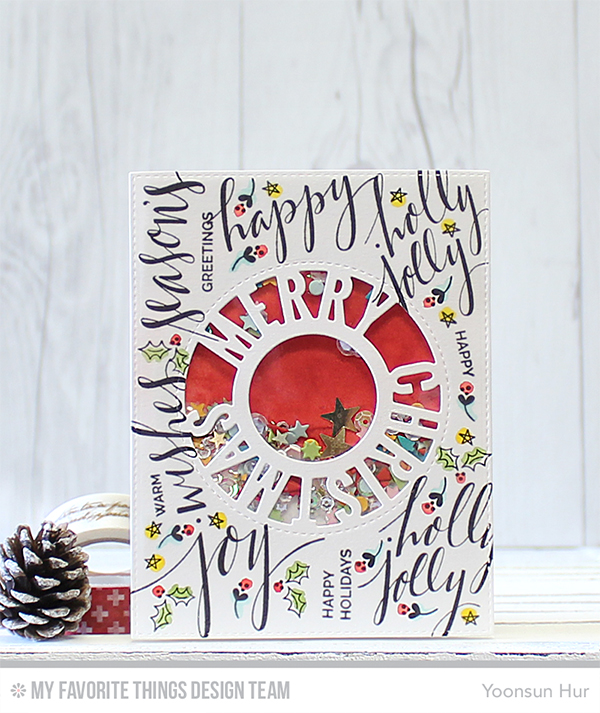 For my second card, I made a fun shaker card. First I 1) Die cut circle merry Christmas from the centre of white paper panel using Merry Christmas Centerpieces Die-namics. 2) Stamped the Christmas greetings and other tiny images to the front of the circle window using black pigment ink, added a touch of colours. 3) Filled the mixed clear sequins, tiny paper embellishments inside the window panel and then mounted it on red ink blended card base using dimensional foam tape.
Make sure to check out MFT Blog for all the info for today along with links to all the other DT member’s blog posts.
See you tomorrow for more countdown fun! Have a wonderful weekend!
Keep smiling and be blessed! God bless you all!
Love Love Love RejoicingCrafts


 Christmas is coming! And there’s no doubt about that! MFT will no doubt lead you into the world of Sparkle & Shine in October to help you get ready to celebrate! Here are full of awesome holiday stamps and dies to show off your creativity!! Are you ready to have fun?!
 I love (I think everyone loves) Christmas tag hanging from the gift box. The tag itself gives me a great treat!!
 My second example with


 These two sets are perfect for each other, don’t you think?
 For my first card, I made a nature themed card.
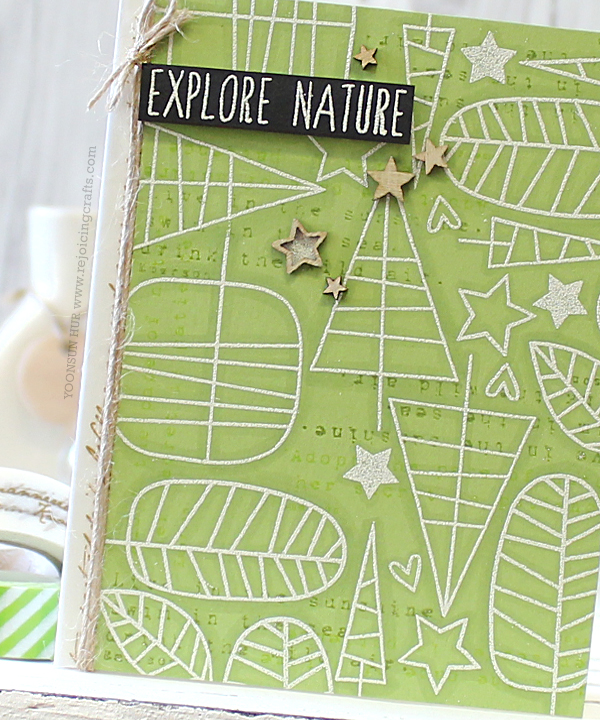
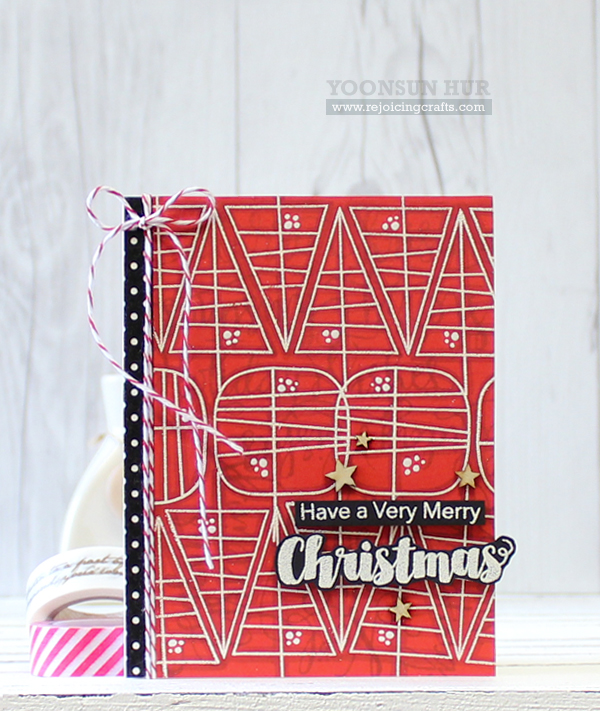 It is the same technique with my first card here, but different themed – CHRISTMAS!!
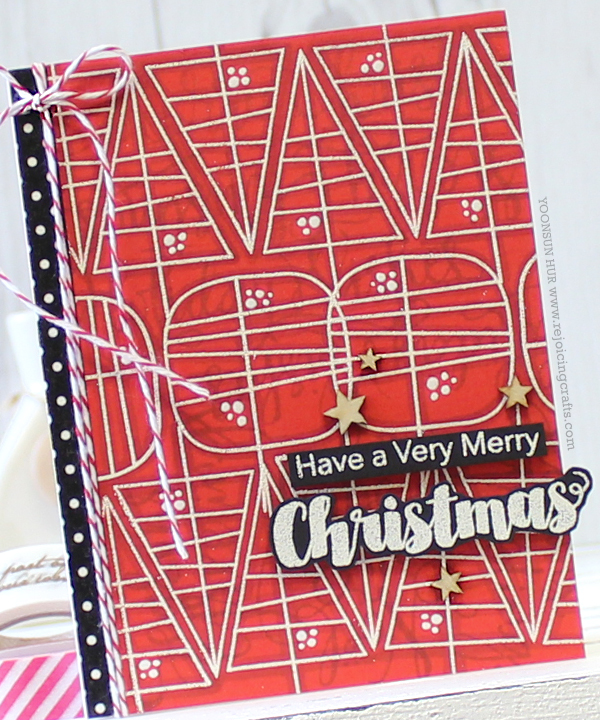 Hope my two cards inspire you to combine your new and older sets together!


 To create this card, I 1) Stamped the fun images from the
  Oh YES!! I think Santa is ready to GO for a surf!! And… the next?!
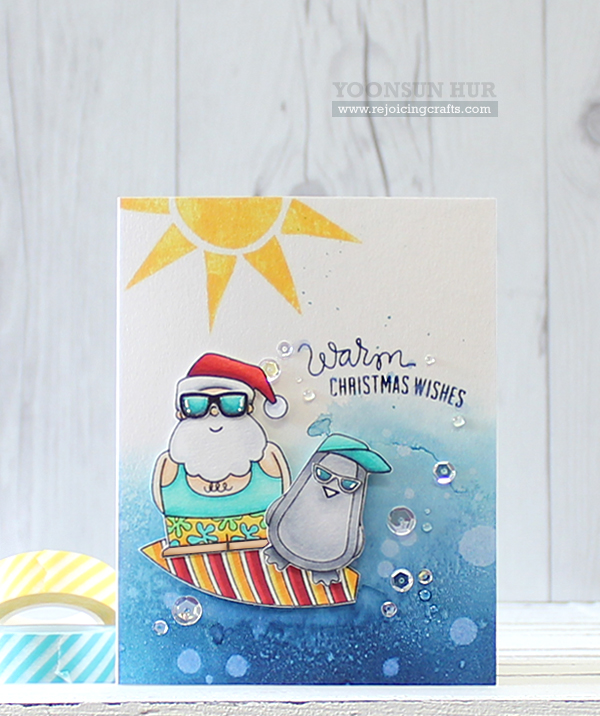 Yee haw! he’s enjoying surfing with his surfer dude on the waves!!
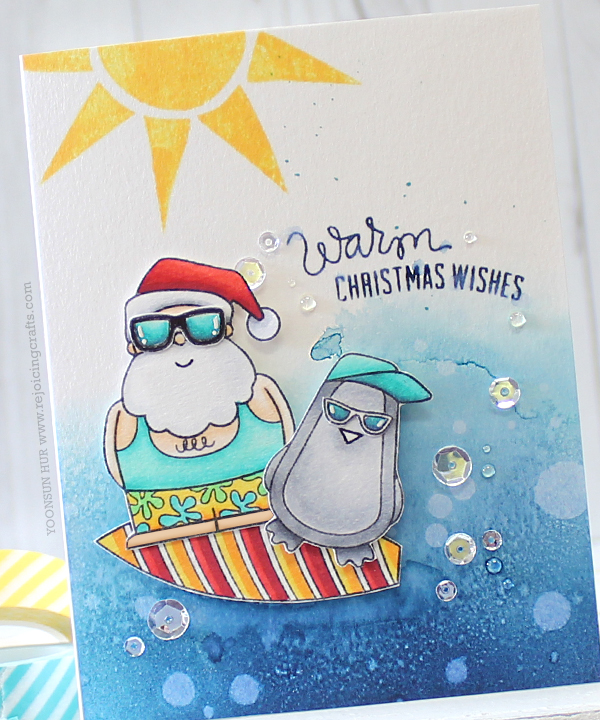 Oh, it was SO fun to make these Beach Christmas Cards :D


