SSS Ornament Wreath

Hello crafty friends, I hope you had a wonderful weekend!
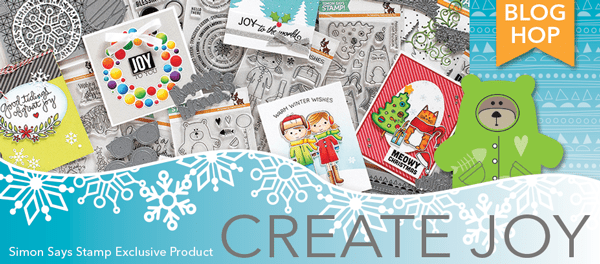
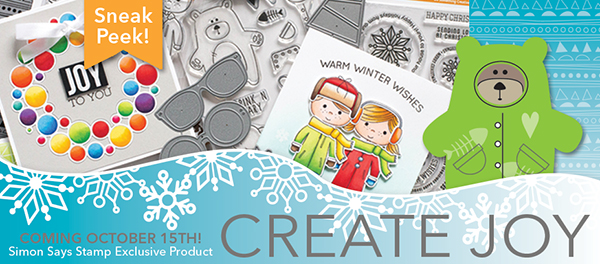
Today I want to share with you a couple Christmas cards I’ve made using SSS Create Joy Ornament Wreath Dies.
SSS-Ornament-Wreath
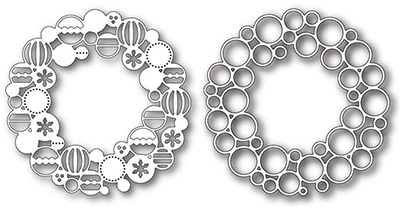
These brand-new wreath dies are so versatile and inspirational!! We can create a lot of different styles of cards with them.

YoonsunHur-20151019-SSS-CreateJoy01-600pxFor my first card, I used Ring Wreath Die. For my sparkly ring wreath, I 1) Die cut Ring Wreath from A2 size white paper panel, then adhered the sticky paper to the back of the negative die-cut panel. 3) Inlaid the positive ring wreath die cut securely in place to the negative die-cut panel. 4) filled in all the little circles with several colours of glitter powders.
YoonsunHur-20151019-SSS-CreateJoy02-600pxOh, I love it so much! There is a whole lot of sparkle going on, don’t you think?!

YoonsunHur-20151019-SSS-CreateJoy03-600pxFor my second card, it was no different to the way I made it the first card. But this time, I used Ornament Wreath Die and several colours of card stocks instead of glitter powders.
YoonsunHur-20151019-SSS-CreateJoy04-600px
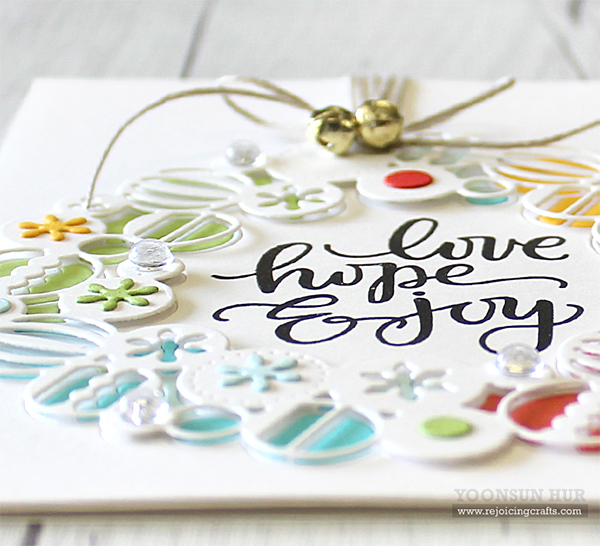
I wanted to show you how great these 2 wreath dies look on cards–they are the perfect size!

Thank you so much for stopping by and happy crafting!!

Keep smiling and be blessed! God bless you all!
Love Love Love RejoicingCrafts

http://static.inlinkz.com/ppr.js

SSS Create Joy Blog Hop

Hello, hello crafty friends and welcome to the most awesome event in the universe, Simon Says Stamp Create Joy Blog Hop! Hooray!!
SSS-CREATE-JOY-BannerSimon Says Stamp always amaze me and these winter holiday goodies are (I promise!) beyond amazing! Just WOW!!

YoonsunHur-20151016-SSS-CreateJoy-BHop-A01-600px
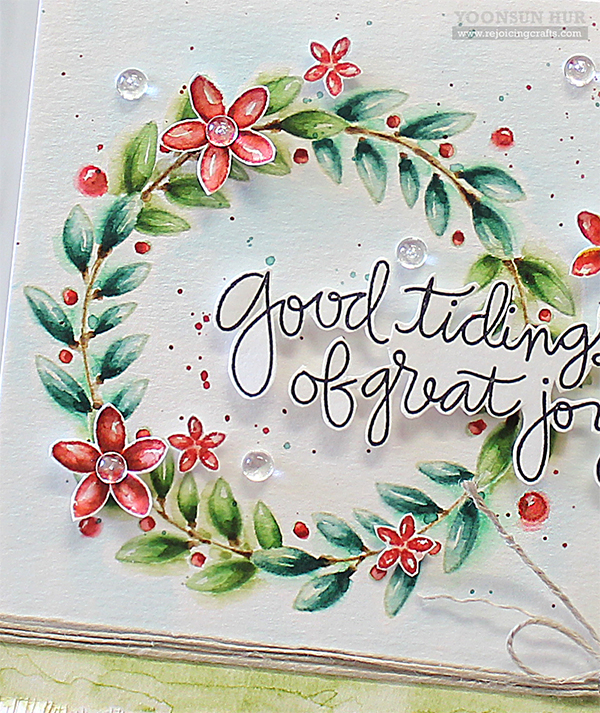
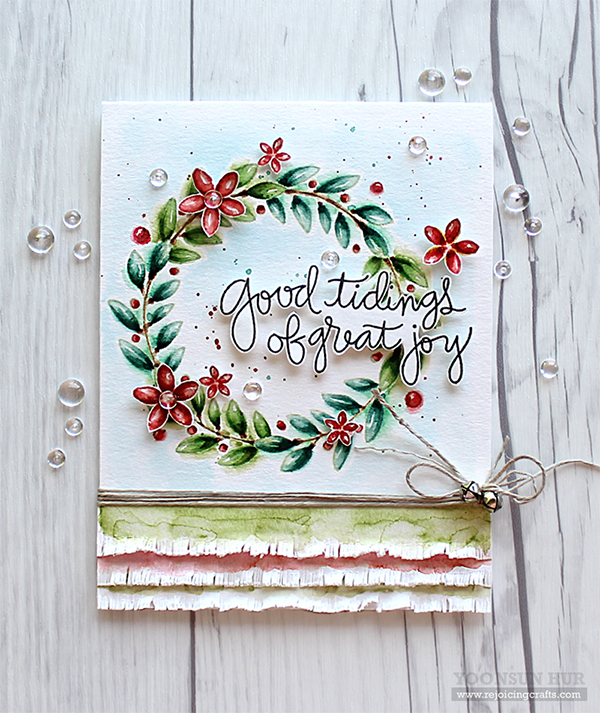
For my first card, I made a watercolour Christmas wreath card. SSS For To Us stamp set, It led me straight into the watercolour project!

To create my own Christmas wreath, I 1) Traced the circle on watercolour paper panel with watercolor pencil. 2) Stamped the leaves repeatedly along the circle line with Bundled Sage Distress ink, then brushed them using waterbrush. 3) Coloured the wreath with several colours of Distress markers using waterbrush, then added ink splatters.
YoonsunHur-20151016-SSS-CreateJoy-BHop-A02-600pxYoonsunHur-20151016-SSS-CreateJoy-BHop-A03-600px
YoonsunHur-20151016-SSS-CreateJoy-BHop-B01-600px
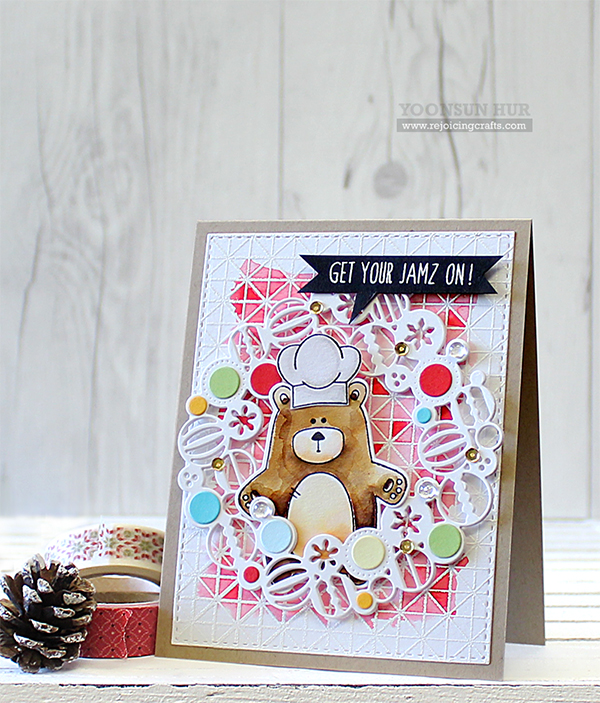
Oh, I love this super adorable chef bear! He doesn’t just simply cook food – he creates holiday magic using his own magical powers ;)

To create the card, I 1) Stamped Lattice Grid Background on watercolour paper panel using embossing ink, heat embossed with white embossing powder. 2) Coloured on the stamped panel with Festive Berries Distress ink using a wet paintbrush. 3) Stamped the chef bear, Bear Necessities stamp set, on watercolour paper using black pigment ink, then coloured them with Distress markers and then die cut them with the matching dies. 4) Die cut Ornament Wreath from white card stock (3 times) and then affixed them together using find tip glue pen -I made ornament wreath die cut thicker. 5) Die cut Ring Wreath out of scrapes of SSS coloured card stock -I just used the small circle die cuts. 6) Mounted all elements as shown to the kraft card base using dimensional foam tape. 7) Embellished with a few PPP clear droplets and gold sequins. YoonsunHur-20151016-SSS-CreateJoy-BHop-B02-600px
YoonsunHur-20151016-SSS-CreateJoy-BHop-C01-600px
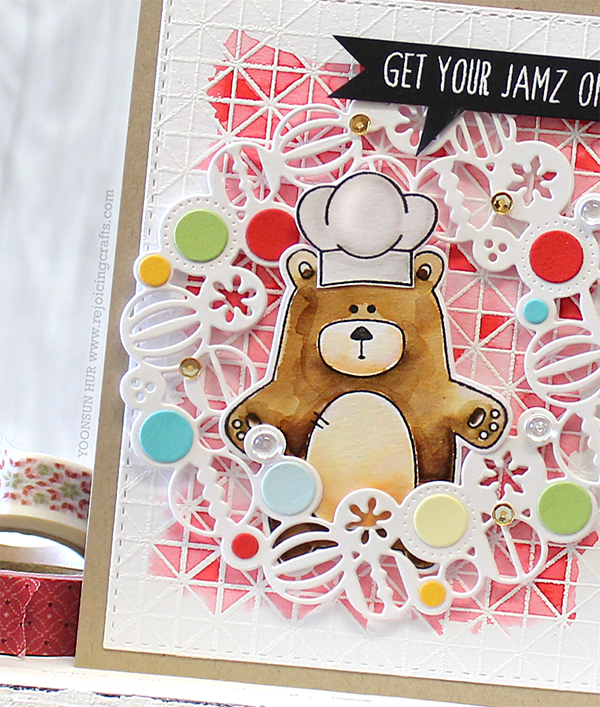
For my last card, I used oh-so-cute Christmas Cats and awesome Doodle Background Stamps. For my own rainbow background, I 1) Stamped Doodle Background on watercolour paper panel using embossing ink, heat embossed with white embossing powder. 2) Coloured the stamped panel with (from top to bottom) Fired Brick, Wild HoneyCrushed OlivePeacock Feathers, and Faded Jeans Distress inks using a wet paintbrush. For these lovely cats, I coloured them with Copic markers.
YoonsunHur-20151016-SSS-CreateJoy-BHop-C02-600pxOnce again, Simon Says Stamp winter release is truly amazing! I really want to see your wonderful creations with them.

Simon Says Stamp is giving away a prize package on each stop of the hop, so leave a comment for your chance to WIN. Winners will be selected on October 19.

Your next stop on the hop is so sweet and beautiful Sarah Moerman. We hope you have all enjoyed the new release blog hop! If you’ve missed any of the stops along the way, please head over to the Simon Says Stamp blog to find all the links of the hop.

Thank you so much for stopping by. Have a fabulous weekend!

Keep smiling and be blessed! God bless you all!
Love Love Love RejoicingCrafts

What I used:

Create Joy Release:

http://static.inlinkz.com/ppr.js

Pretty Pink Posh – October Release Blog Hop!

Hello crafty friends!
Welcome to the Pretty Pink Posh October Product Release Blog Hop! You should have arrived from Pretty Pink Posh blog.
Banner-PPP-OctReleaseIn October, Pretty Pink Posh have three oh-so-cute die sets, along with new sequin mixes and a brand new clear droplets -I love anything clear by PPP and these clear droplets are so precious!!

YoonsunHur-20151015-PPP-BlogHop-A01For my first card, I used Mini Tags die set. Using these adorable stitched tags is perfect for sending as many messages as possible.

To create the card, I 1) Stamped Sketched Chevron Background on SSS Lipstick Red card stock using MFT Red Hot hybrid ink, trimmed it with MFT Blueprints 25 Die-namics. 2) Die cut 5 different shaped tags out of scraps of white card stock using a new Mini Tags die set, then stamped holiday greetings from the MFT Gift Tag Greetings, Hand Lettered Holiday stamp sets using VersaFine Onyx Black. 3) Mounted all tags on the stamped panel using dimensional foam tape. 4) Embellished with a few PPP clear droplets.
YoonsunHur-20151015-PPP-BlogHop-A02
YoonsunHur-20151015-PPP-BlogHop-B01For my second card, I used Storybook 2 Dies. This is so versatile same as Storybook 1 Dies. First I 1) Stamped Sketched Chevron Background onto watercolour paper panel using embossing ink, white heat embossed. 2) Coloured the stamped panel with several colours of MFT dye inks using a wet paintbrush. 3) Once dry, die cut Storybook 2 in the watercoloured background panel – I didn’t use the positive pieces so kept them for future use. 4) Die cut Storybook 2 from watercolour paper, then made a snowy winter scene. 5) Mounted each piece in place using dimensional foam tape. 6) Embellished a few clear sequins & droplets.
YoonsunHur-20151015-PPP-BlogHop-B02Your next stop on the hop is so very talented Carissa Wiley. We hope you have all enjoyed this inspiration blog hop!

Pretty Pink Posh blog
Yoonsun Hur (Me!!)
Carissa Wiley
Liz Sarkisyan
Nina- Marie Trapani
Lisa Elton
Joni Andaya
Heather Hoffman
Amy Kolling
Nichol Magouirk
Jeanne Jachna
Julia Altermann
Gayatri Murali
Nicole Picadura
Yuki Yoshioka

GIVEAWAY ALERT!
There are 2 $25 gift certificates up for grabs. Winners will be picked randomly along the blog hop. (Comments must be left by 11:59 PM PDT on 10/18/2015. Winners will be announced on the PPP blog)

Thank you so much for stopping by. Happy crafting!!

Keep smiling and be blessed! God bless you all!
Love Love Love RejoicingCrafts

Pretty Pink Posh Store

Simon Says Stamp Store

http://static.inlinkz.com/ppr.js

MFT – Happy Holiday Card

Hello crafty friends!
Today I want to share with you a happy holiday card I’ve made using Merry Christmas Centerpieces Die-namics.
PrintMy Favorite Things is celebrating the joys of a Handcrafted Holiday! And today’s question is “What’s your best advice for a stress-free holiday?” My answer? As a handmade card maker, it’ll have to be: to make a card fast and easy – totally stress-free!!

Here is what I came up with:
YoonsunHur-20151013-MFT-Promo-B01As promised, I made simple and easy holiday card! First I 1) Die cut A2 size stitched rectangle from white card stock using Blueprints 25 Die-namics. 2) Die cut 4 confetti stripes (twice) from white paper panel using Merry Christmas Centerpieces Die-namics, then tied the bottom part of the die cut panel with a natural twine. 2) Adhered Cherry Crisp card stock on white card base, then mounted the die cut panel using dimensional foam tape. 3) Stamped “Christmas” from the Hand Lettered Holiday stamp set on white paper using Black Licorice hybrid ink, fussy cut and then affixed it on die cut panel to finish it off.

We can’t wait to hear about what you love to create this time of year and how you cope. And of COURSE there will be prizes up for grabs. Join us every day this week and be inspired for a wonderful holiday season! Come and share your story on our Facebook page and Instagram!!

Thank you so much for stopping by. Happy holiday crafting!

Keep smiling and be blessed! God bless you all!
Love Love Love RejoicingCrafts

http://static.inlinkz.com/ppr.js

SSS Snowflakes

Hello crafty friends, I hope you are doing very well and have good time to read my post!
Today I want to share with you a Christmas card I’ve made using Simon Says Stamp holiday goodies.
YoonsunHur-20151013-SSS-Snowflakes01-600px
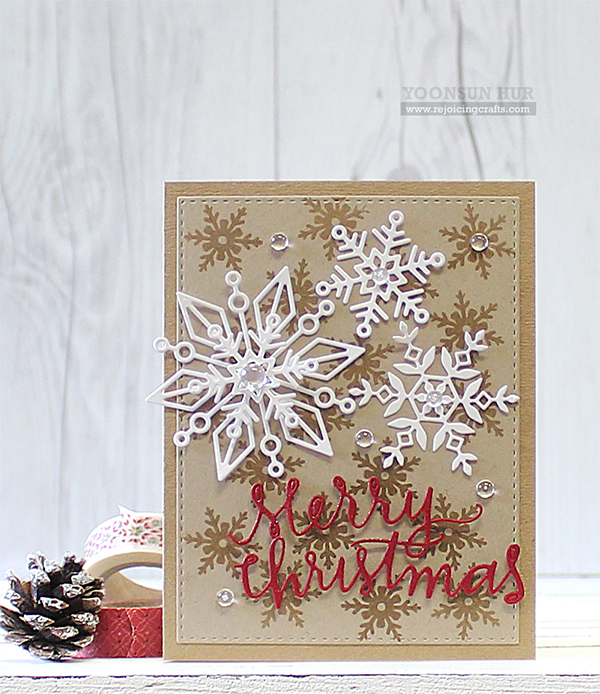
I love to see snowflake cards and one thing for sure, it’s NEVER boring in winter season!! And I also love making Christmas cards with different shapes of the snowflakes :D

I made so simple Christmas card with old & new SSS Snowflake dies. First I 1) Stamped the snowflake from the Holiday Banners on kraft paper panel using embossing ink, clear heat embossed 2) Affixed the stamped panel on kraft card base using double-sided tape. 3) Die cut the snowflakes from white card stock using (from left to rightNadineMaryanneKate Snowflake dies. 4) Die cut “Merry Christmas” from SSS Schoolhouse Red card stock using Merry Christmas Ornament Die – I just took sentiment part from the ornament die cut today. 5) Mounted all elements as shown to the stamped base using dimensional foam tape. 6) Embellished with a few PPP clear droplets for finishing touches.
YoonsunHur-20151013-SSS-Snowflakes02-600px
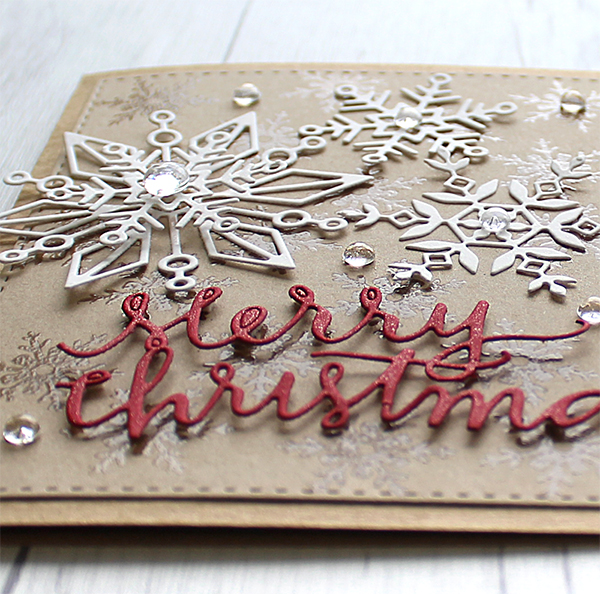
I love the red and white on kraft, it always reminds me of a romantic holiday.
YoonsunHur-20151013-SSS-Snowflakes03-600px
My Christmas will definitely be filled with laughter and joy because of this ;)
SSS-201510-CreateJoy-BannerSimon Says Stamp will release the most wonderful holiday products THIS week! WOOT!!

Thank you so much for stopping by. Have a wonderful day!

Keep smiling and be blessed! God bless you all!
Love Love Love RejoicingCrafts

http://static.inlinkz.com/ppr.js