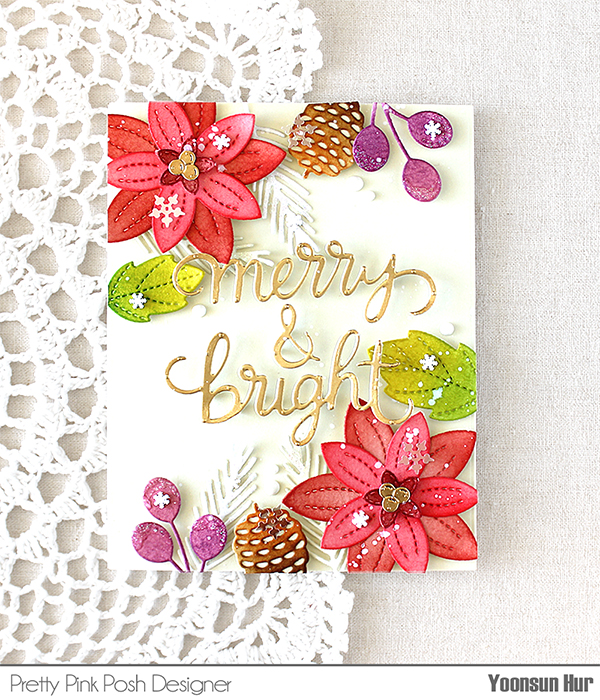
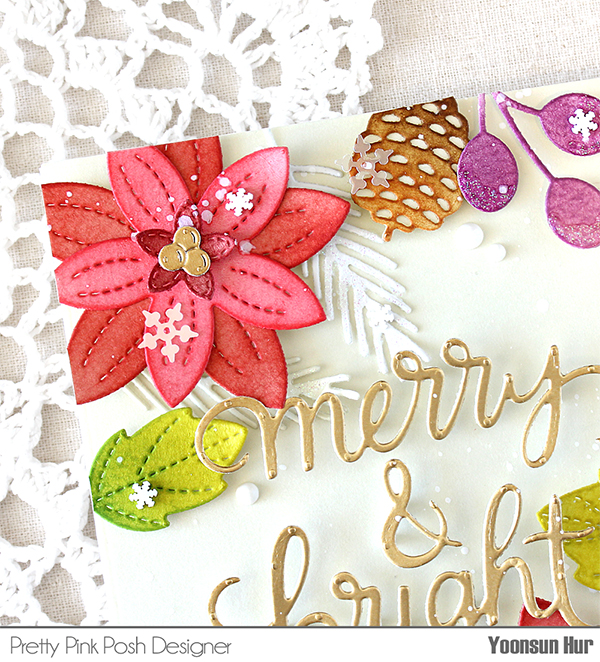
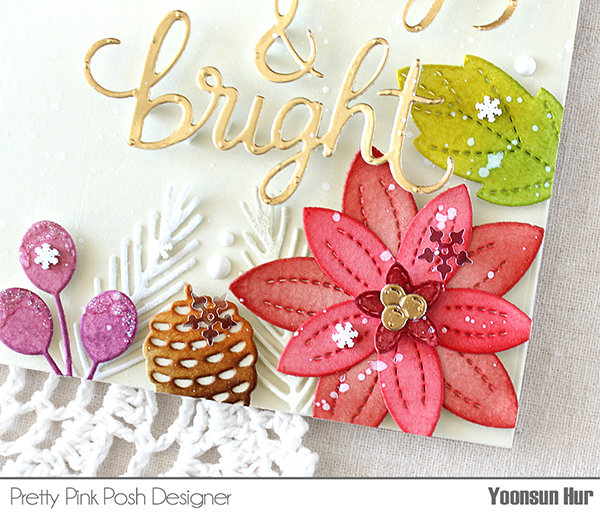
Hello crafty friends! Welcome to Day 3 of the Pretty Pink Posh October 2022 Product Release Blog Hop. If you arrived here from the super talented Melody Rupple‘s blog you are on the right track. For my first Christmas card, I am featuring brand new Winter Foliage and Merry & Bright Script dies. I started by die cutting winter flowers, leaves and pine cones from watercolour paper using the Winter Foliage die set. I applied Distress inks to all die cuts using blending brushes. I then die cut the Merry & Bright Script from metallic gold cardstock. I adhered all winter flowers & leaves on the top & bottom parts of the A2 sized panel using foam tape as shown in the picture. I added the sentiment on the centre of the card using foam tape as well.
Here is a closer look: I decorated the card with adorable snowflakes in the Winter Snowflakes Clay Confetti. Of course, I spritzed opaque white ink all over the panel. :)
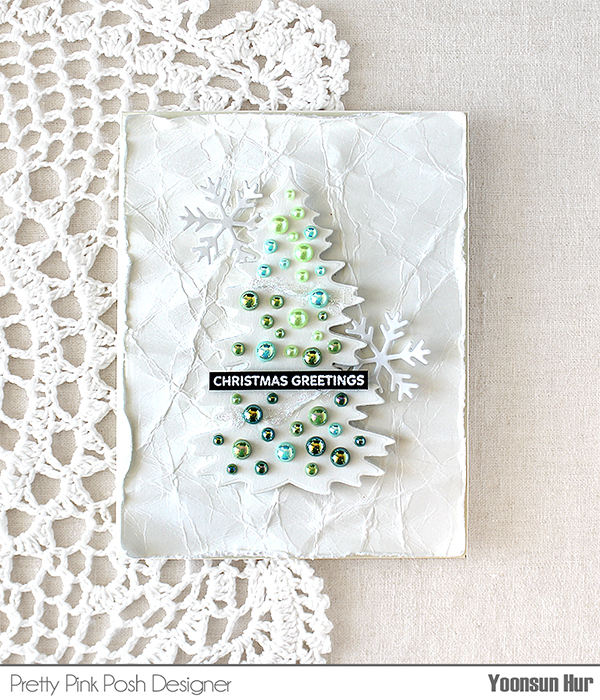
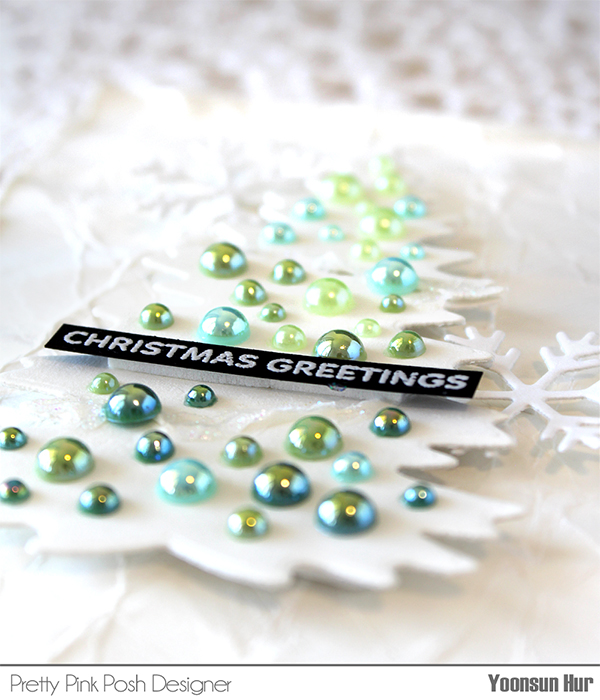
For my second card for the hop, I used the new Pine Trees die set along with green coloured pearls. For the background, I cut an A2 sized panel from white cardstock, then crumpled the paper, distressed all edges. I don’t know why but it feels like a snowy winter, lol! :) I die cut the largest Pine Tree from white cardstock using the Pine Trees die set, snowflakes using the Winter Mug die set. I adhered the pine tree on the centre of the card using foam tape, and then decorated it with Limeade, Blue Sky, Pistachio and Pine Green Pearls. For the sentiment, I used the Holiday Sentiments stamp set. The Christmas project always excites me! YAY!!
GIVEAWAY!! There are 3 $30 gift certificates up for grabs (one winner each day). Winners will be picked randomly along the blog hop. Comments must be left by 11:59 PM PST on 10/24/2022. Winners will be announced on the PPP blog.
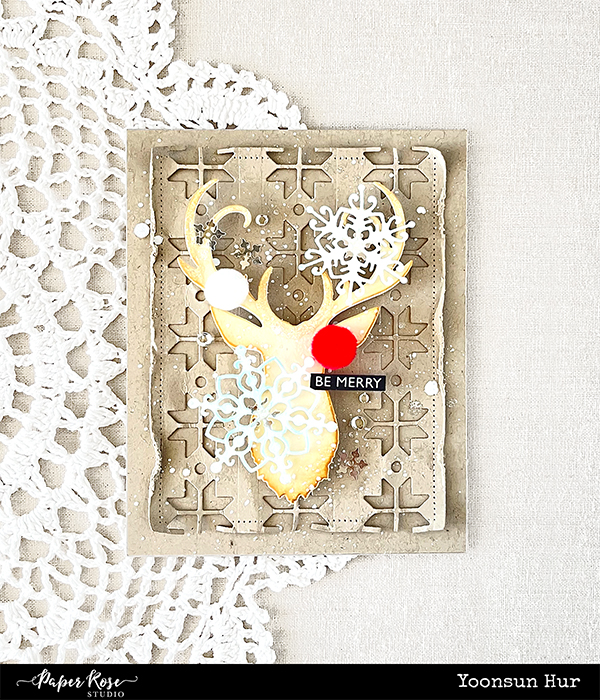
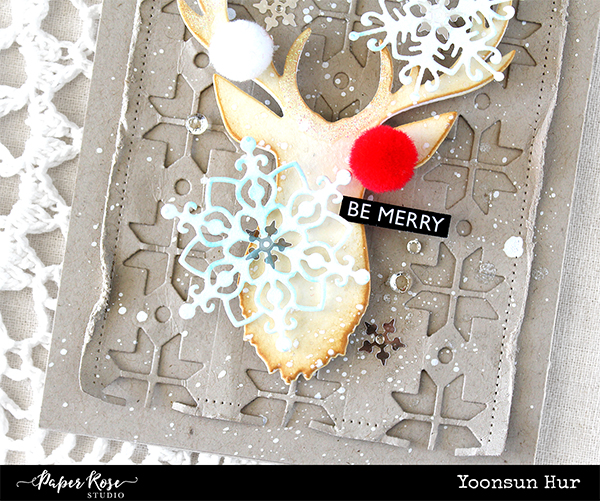
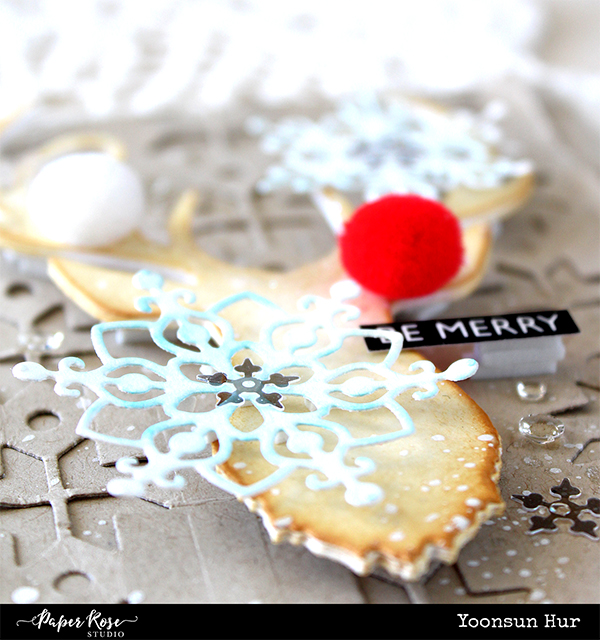
Hello crafty friends. Hope you had a great weekend! Here is another Christmas card with Paper Rose Studio Deer Head die along with other Christmas-themed die sets. Deer Head Metal Cutting Die I started by die cutting the Deer Head from thick white cardstock five times and glued them together – it is like thick chipboard. I die cut the 9cm x 12cm Pierced Rectangle panel from Neenah Smooth Desert Storm cardstock, applied the Scandi Border to the panel and then distressed all edges of the panel as shown in the picture. I mounted the Scandi patterned panel onto the same kraft card base using double-sided tape first, and then added the raindeer head on the centre of the card front using foam tape. I added snowflakes from the Snowflake Trio dies, white & red pompoms and clear crystals.
Thank you so much for stopping by. Have a great day.
Keep smiling and be blessed! God bless you all! Love Love Love RejoicingCrafts
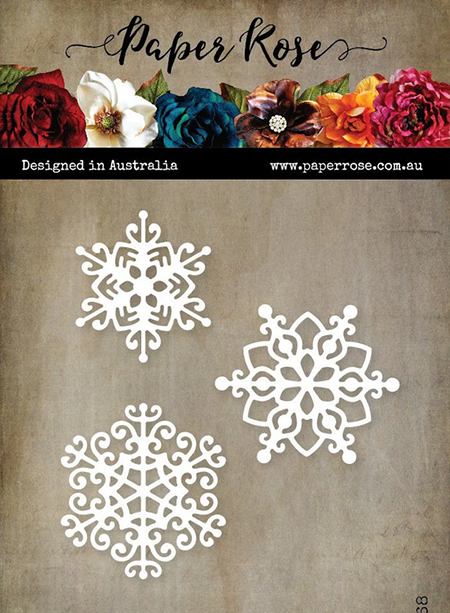
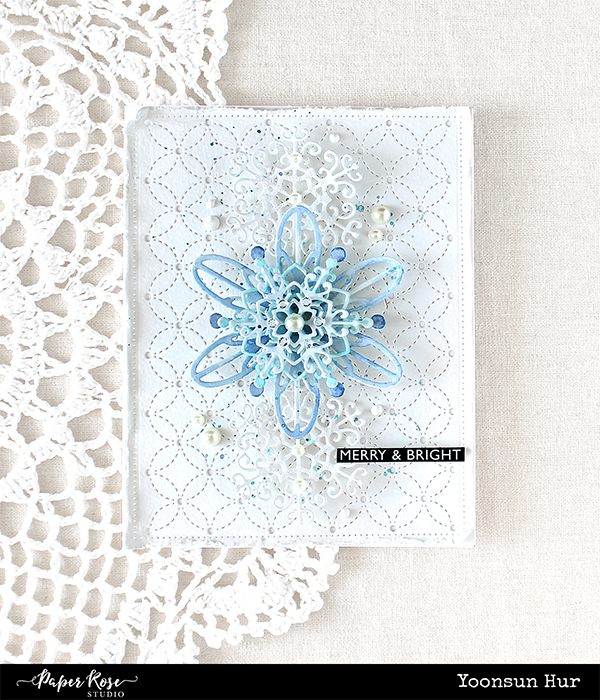
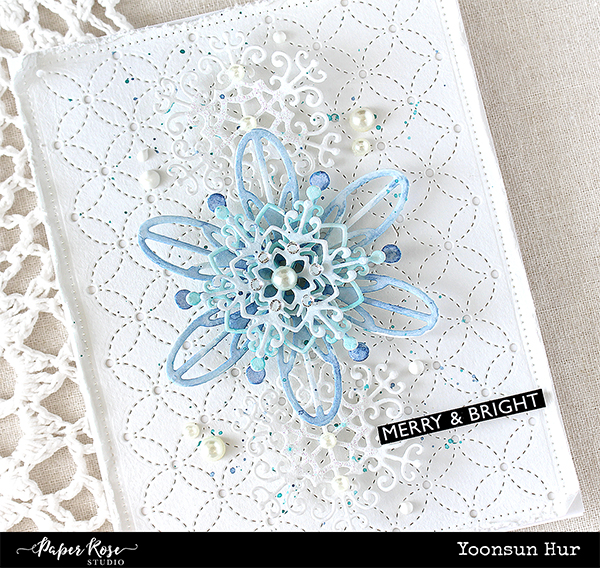
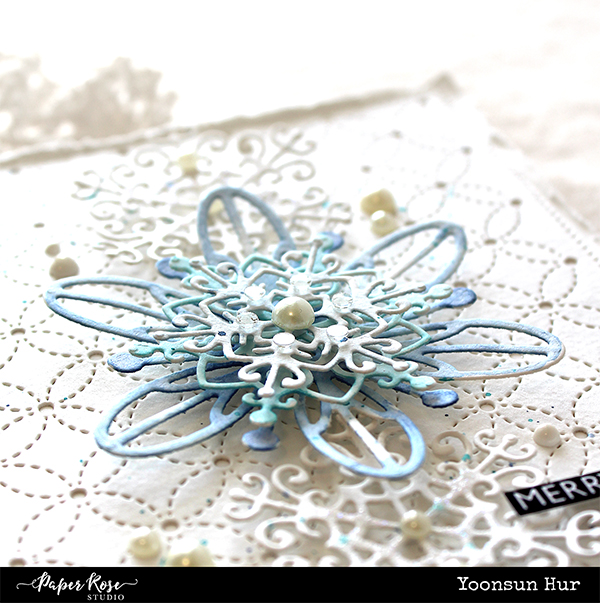
Hello crafty friends. Happy weekend! Today I have another snowflakes card with the Paper Rose Studio Snowflake Trio die set. Snowflake Trio Metal Die Set I started by die cutting snowflakes from watercolour paper using the Snowflake Trio and Snowflake Set 2 die sets. I then lightly coloured them with Peacock Feathers and Faded Jeans Distress inks. For the background, I made patterns using the Hand Stitching Coverplate die and then distressed all edges of this panel. I layered 3 watercoloured snowflakes as shown in the picture and decorated the card with white pearls and Clear Crystal Mix. :) Thank you so much for stopping by. Have a great day.
Keep smiling and be blessed! God bless you all! Love Love Love RejoicingCrafts
Hello crafty friends! Welcome to Day 2 of the Pretty Pink Posh September 2022 Product Release Blog Hop. If you arrived here from the super talented Jeanne Jachna‘s blog you are on the right track. There are full of beautiful autumn-themed products in September. As we all know, it’s the best season to make many romantic cards, yay!!
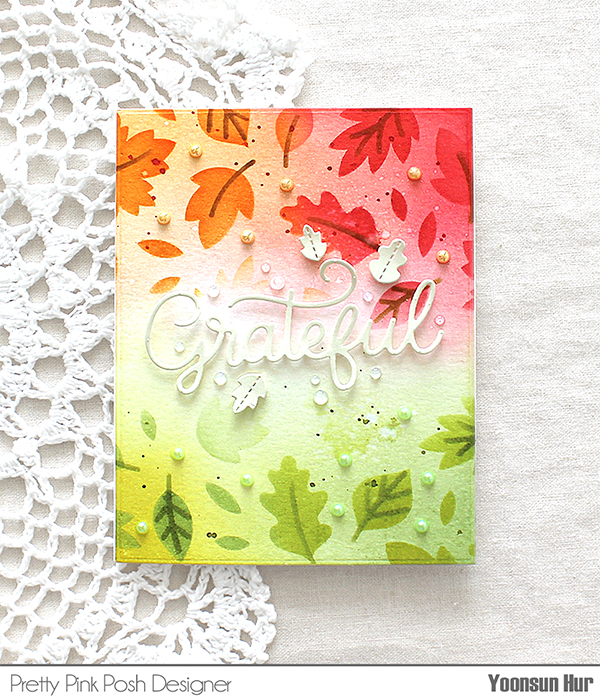
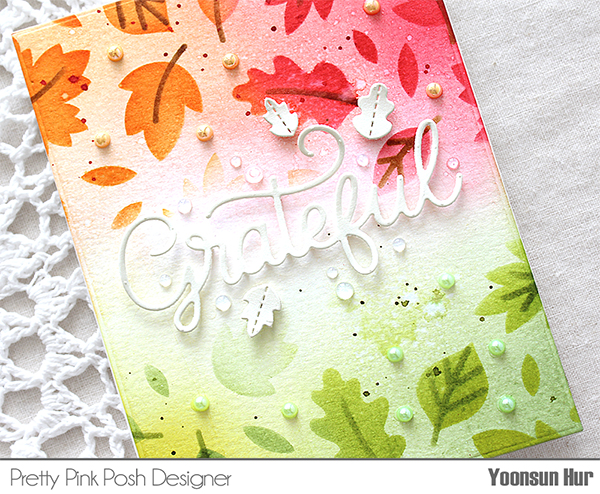
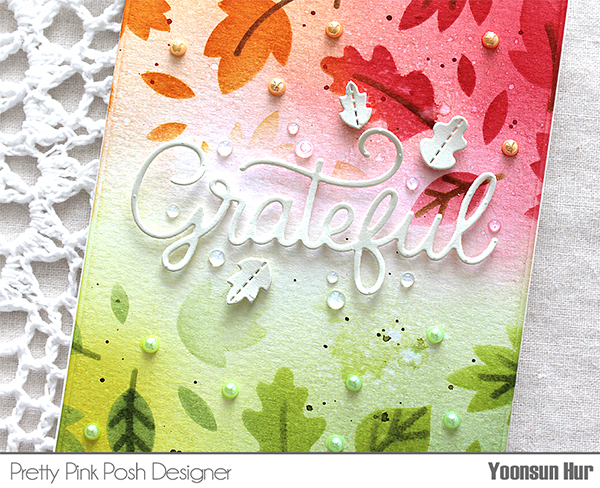
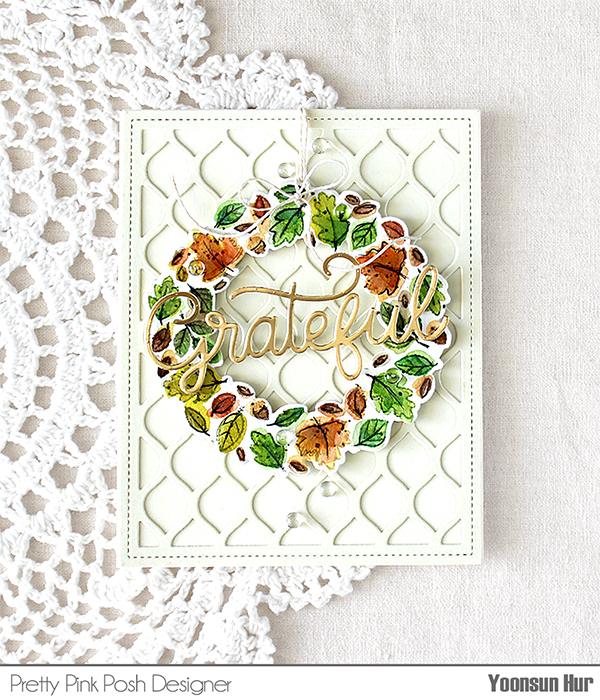
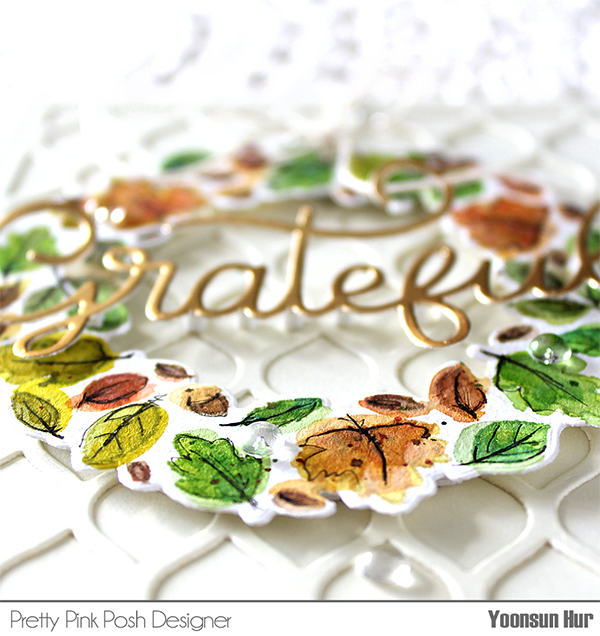
For this card, I used brand new Layered Foliage stencil and Grateful Script die. I laid stencil on watercolour paper panel without wavering, inked autumn coloured Distress inks on the top and bottom part of the panel. I die cut the Grateful Script from thick white cardstock and also die cut some tiny leaves from the same white cardstock using the Fall Tree die set. I mounted the autumn foliage panel on white card base first, and then adhered the sentiment & tiny leaves on the centre of the card using form tape. I decorated the card with Creamsicle & Limeade Pearls. For my second card, you might see it on the PPP blog as a sneak peek card. I used the Autumn Leaf Wreath set. I made a watercoloured autumn foliage wreath, die cut the word “Grateful” from metallic gold cardstock and then mounted them on the Pretty Petals Background panel. GIVEAWAY!! There are 3 $30 gift certificates up for grabs (one winner each day). Winners will be picked randomly along the blog hop. Comments must be left by 11:59 PM PST on 9/21/2022. Winners will be announced on the PPP blog.