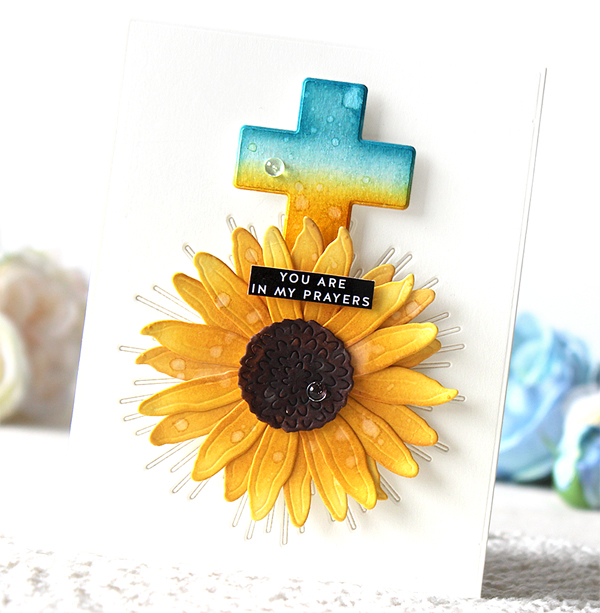
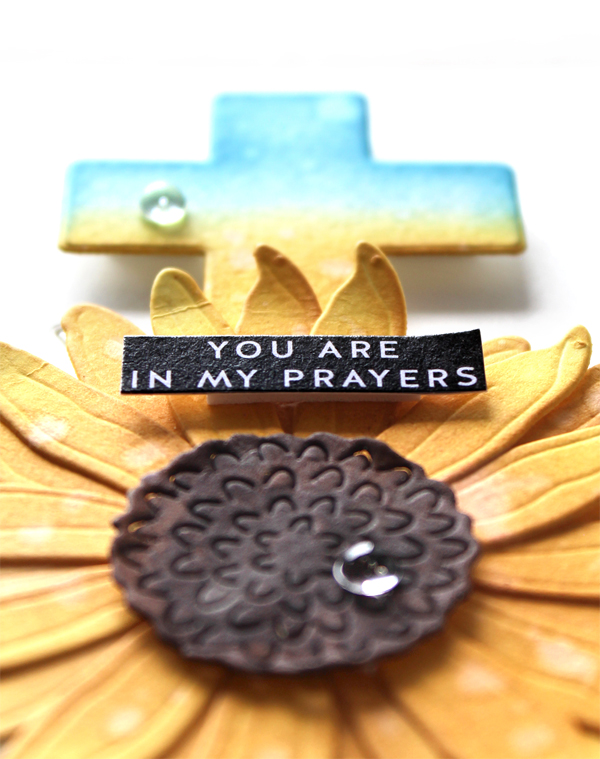
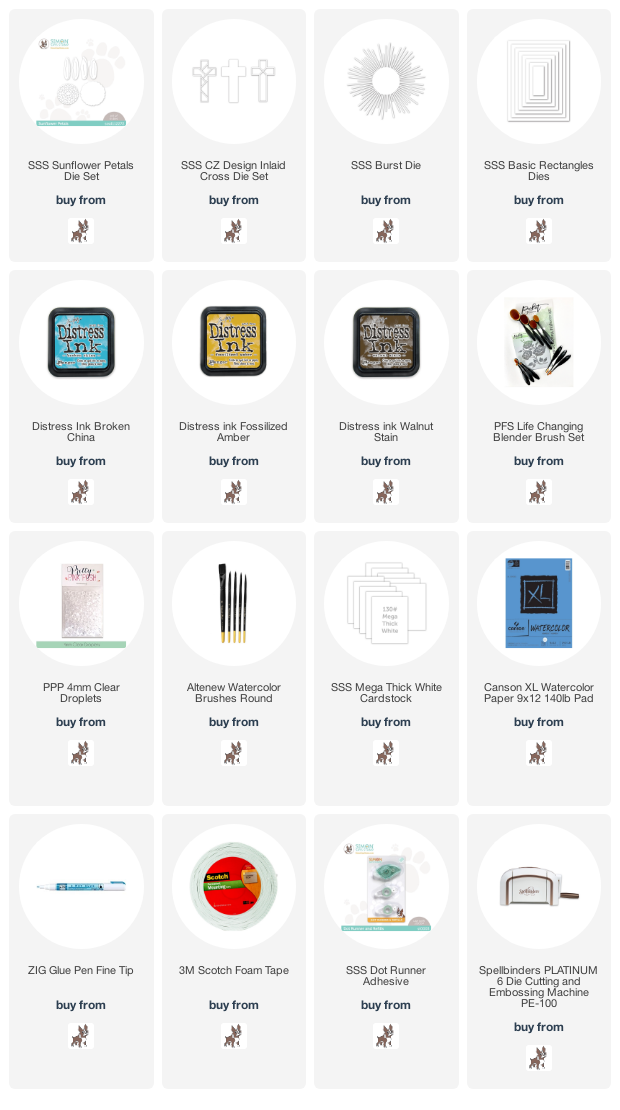
Hello crafty friends! As you know, the sunflower is the national flower of Ukraine so I decided to use the Simon Says Stamp Sunflower Petals die set for this week’s Floral Friday! Simon Says Stamp Sunflower Petals Die Set I die cut petals and disk from watercolour paper using the Sunflower Petals dies first, applied Fossilized Amber Distress ink to all petals, coloured the centre of the sunflower with Walnut Stain Distress ink, and then assembled all pieces. I die cut the cross from watercolour paper using the CZ Design Inlaid Cross die set, applied Broken China (Blue) and Fossilized Amber (Yellow) Distress inks. I added water drops. Sending my love and prayers to all innocent people of Ukraine!
Keep smiling and be blessed! God bless you all! Love Love Love RejoicingCrafts
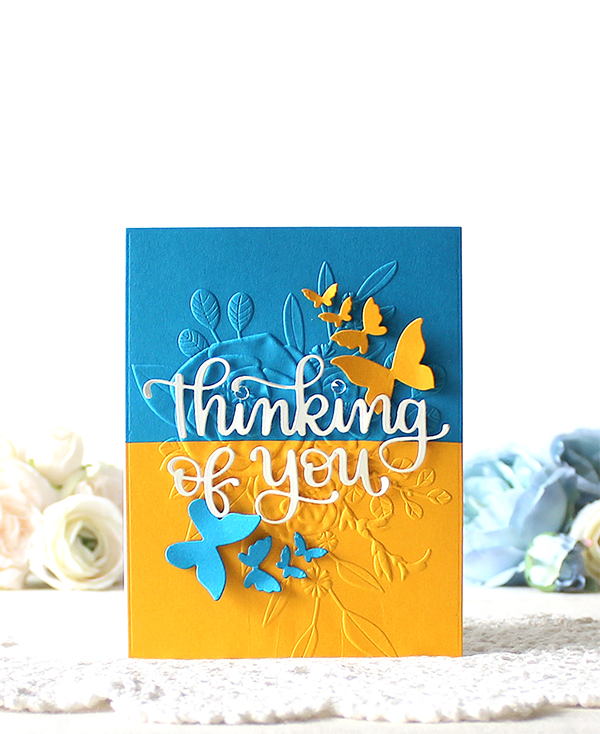
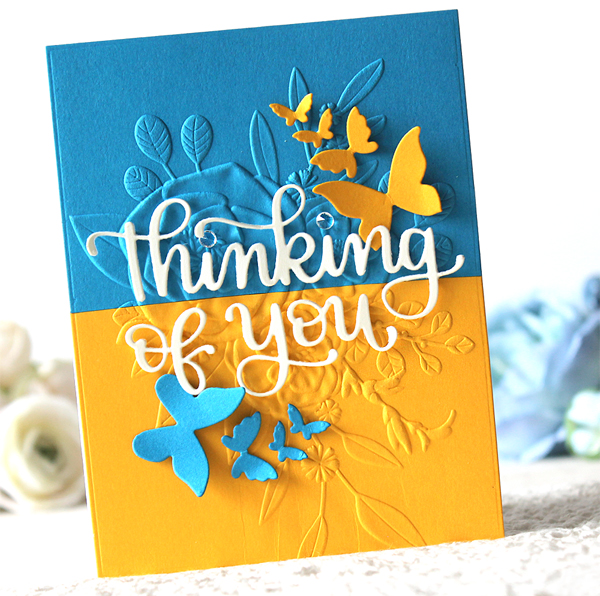
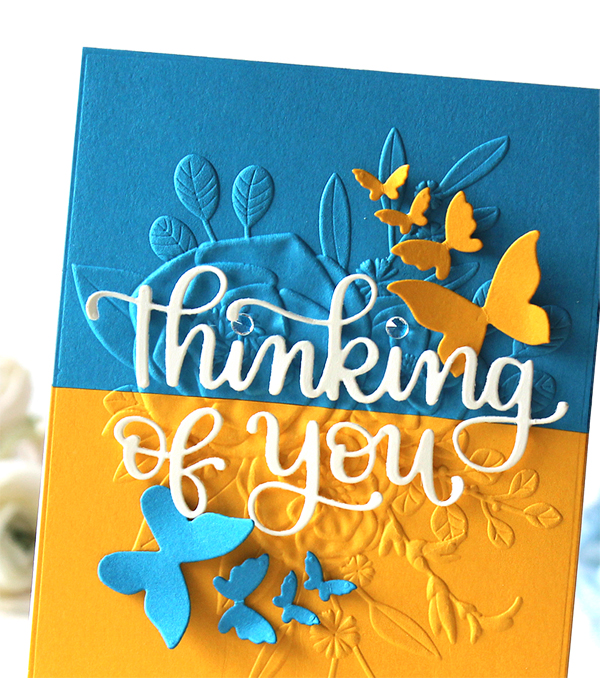
Hello crafty friends! I’ve been thinking about Yana all weekend.. how afraid would she be now.. how sad would it be.. how painful would it be.. I kept praying for Yana, her families and her country, Ukraine – all the card makers around the world would have been the same as me. So I made a “Thinking of You” card with my prayers and love. I used blue and yellow coloured cardstock. The reason is because we all know well. I dry embossed to an A2 sized panel using beautiful Roseville Bouquet embossing folder, and then added the “Thinking of You” sentiment & butterflies. Please visit Yana’s blog. We can know how we can support Ukraine!!
NO WAR PLEASE!!!
Thank you so much for stopping by. Have a peaceful day!
Keep smiling and be blessed! God bless you all! Love Love Love RejoicingCrafts
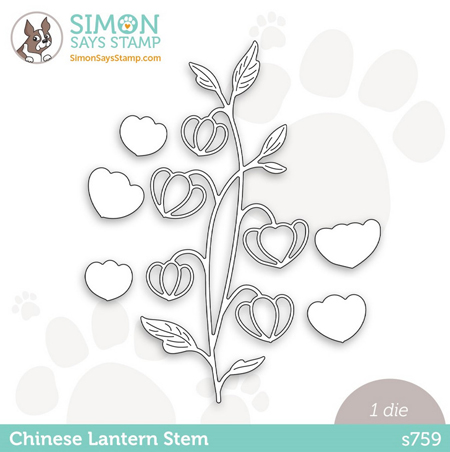
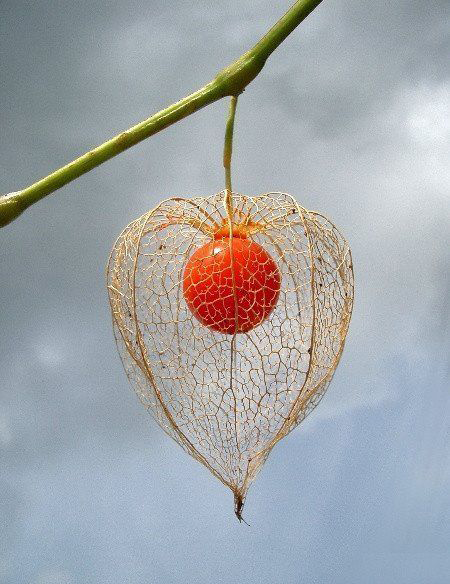
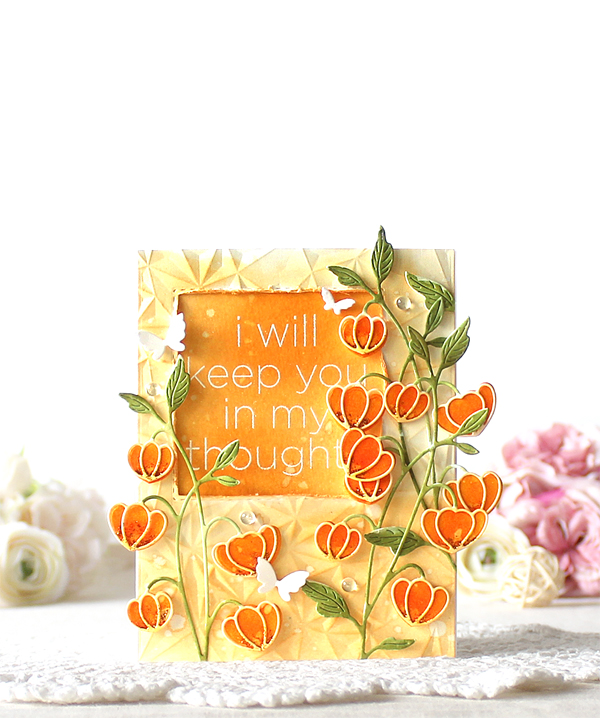
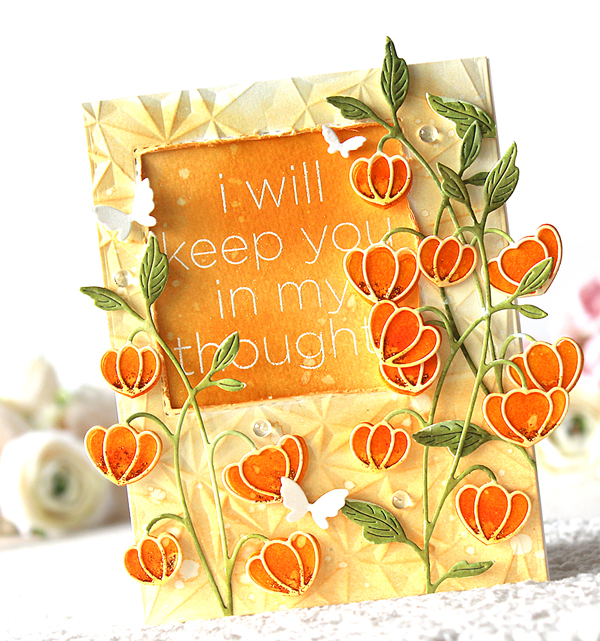
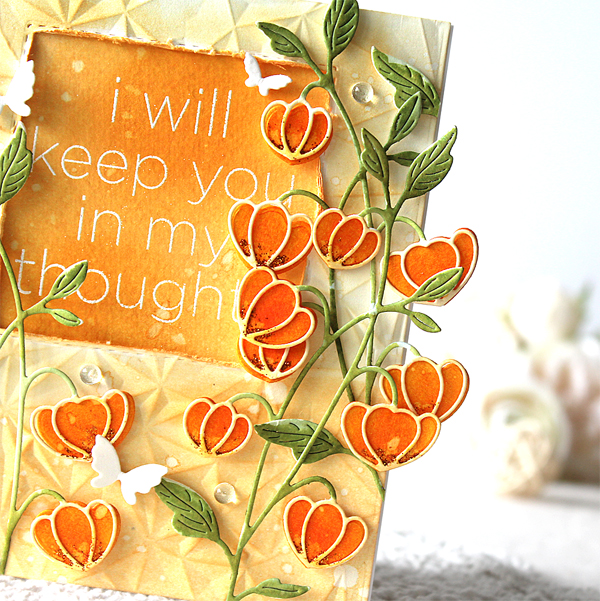
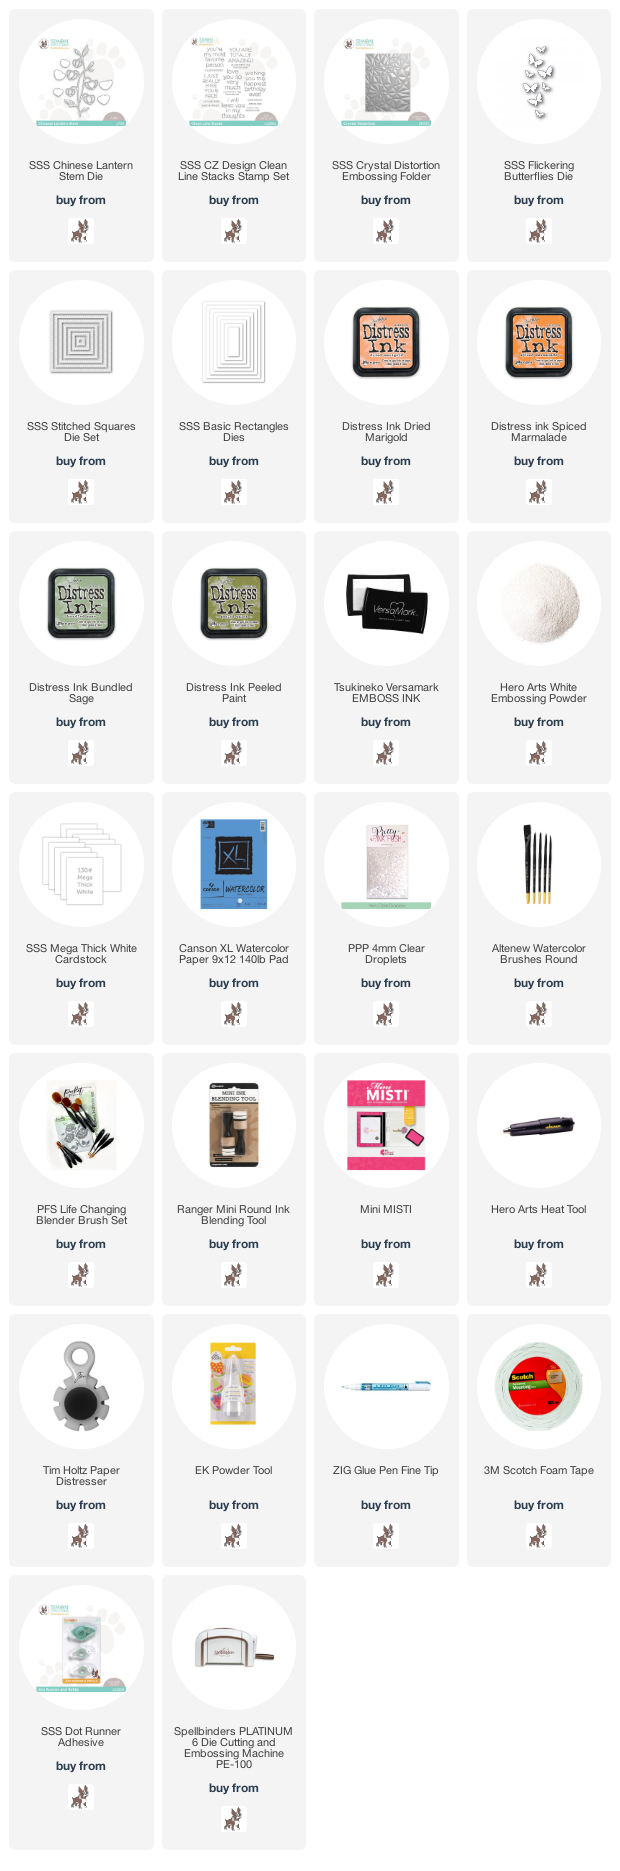
Hello crafty friends! Today I have an encouragement card with SSS Chinese Lantern Stem die. The Chinese Lantern Stem is recently released from Simon Says Stamp Good Luck Charm. It’s very popular!! Simon Says Stamp Chinese Lantern Stem Die Chinese Lantern flower means safety, comfort and protection so I decided to make an encouragement card with it. :D At first I die cut the Chinese Lantern Stem from watercolour paper. I then coloured all die cuts with Distress inks: Flowers: Dried Marigold & Spiced Marmalade Leaves and stems: Bundled Sage & Peeled Paint. Next, I dry embossed an A2 sized watercolour paper panel using the Crystal Distortion embossing folder, applied Dried Marigold Distress ink to the panel, and then made a square window on the top left part of the panel. I heat embossed the sentiment from the CZ Design Clean Line Stacks set onto watercolour paper in white, inked onto it with Spiced Marmalade Distress ink. I then adhered the sentiment panel to the back of the background panel. I mounted the background panel and the Chinese Lantern Stems on the card as shown in the picture, and then decorated the card with tiny butterflies & 4mm clear droplets. :D
Thank you so much for stopping by. Have a wonderful weekend!
Keep smiling and be blessed! God bless you all! Love Love Love RejoicingCrafts
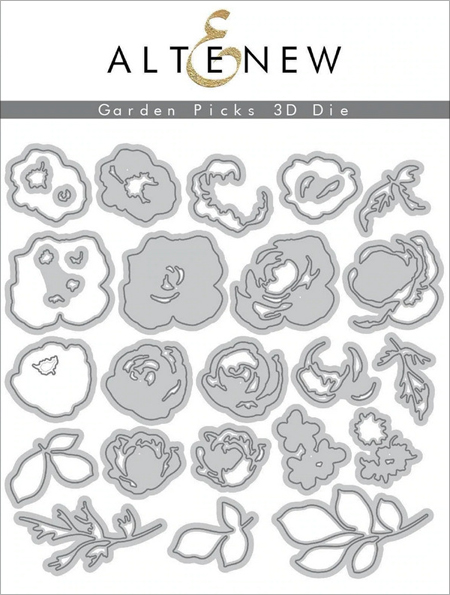
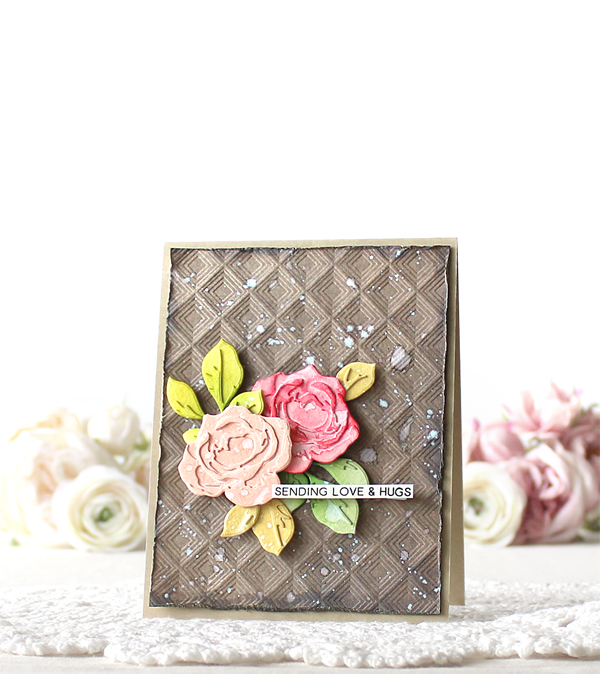
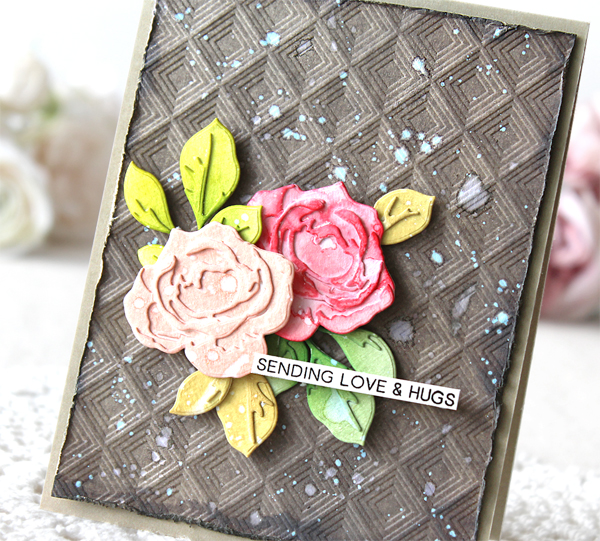
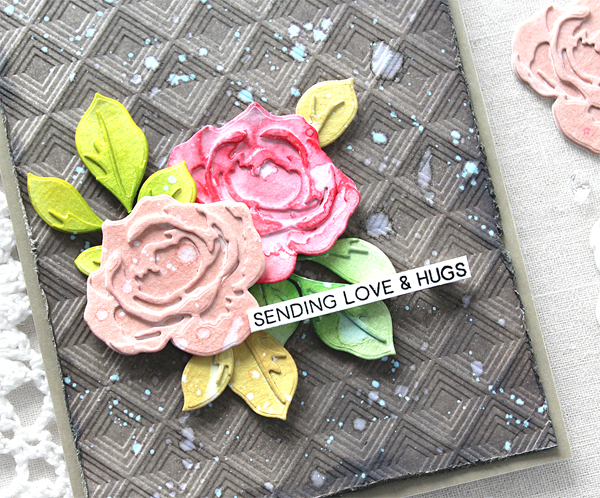
Hello crafty friends! Today I have a floral card with Altenew Garden Picks 3D die set. Altenew has many stunning layered floral dies and the Garden Picks is definitely one of beautiful layered die sets! Altenew Garden Picks 3D Die Set To make this card, I started by die cutting the roses and leaves from watercolour paper using the Altenew Garden Picks 3D dies. I then assembled pieces together using fine tip glue pen – I made layered roses & leaves. I applied Distress inks to each die cut using mini blending tools & blending brushes: Roses: Tattered Rose (pale pink) & Festive Berries (red) Leaves: Bundled Sage (muted green), Crushed Olive (bright green) and Antique Linen (vintage yellow). For the background panel, I inked onto watercolour paper panel with Pumice Stone Distress ink first, and then dry embossed the panel with the Altenew Mod Squares 3D Embossing Folder – I love this patterns so much!! I then distressed the edges of the panel using Tim Holtz Paper Distresser. I mounted all elements on khaki card base using foam tape, and then added waterdrops & white ink splatters all around the card. I’m so satisfied with the vintage look! :D
Thank you so much for stopping by. Have a wonderful weekend!
Keep smiling and be blessed! God bless you all! Love Love Love RejoicingCrafts
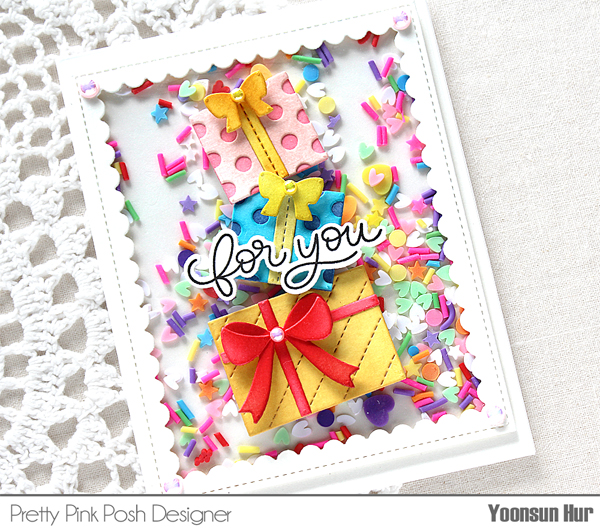
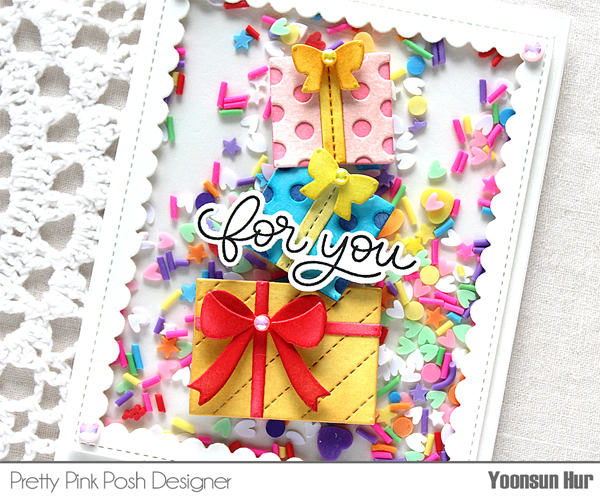
Hello, hello crafty friends, happy weekend! Welcome to the last day of the Pretty Pink Posh 8th Birthday Celebration Blog Hop. Pretty Pink Posh turned 8! I bet you guys are enjoying this 3 days celebration for fun, inspiration and surprises, right?!! Pretty Pink Posh released so many awesome new birthday-themed products and today I will focus on the Build A Gift die set & Layered Presents stencils among them. :D
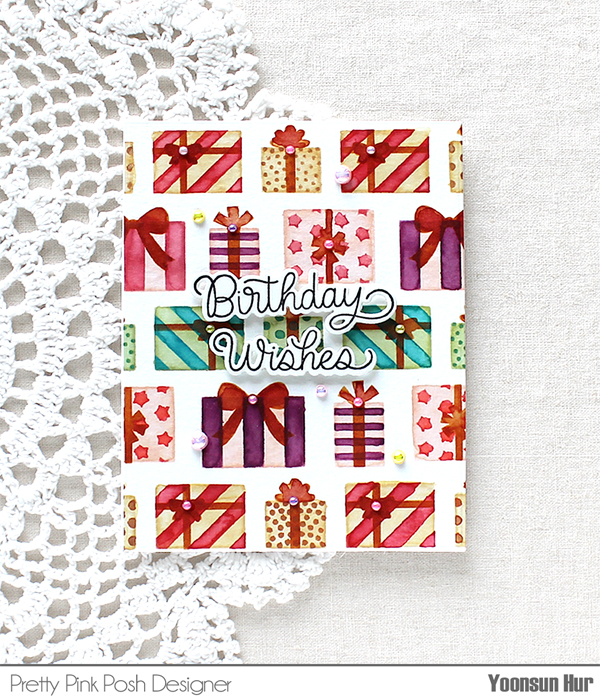
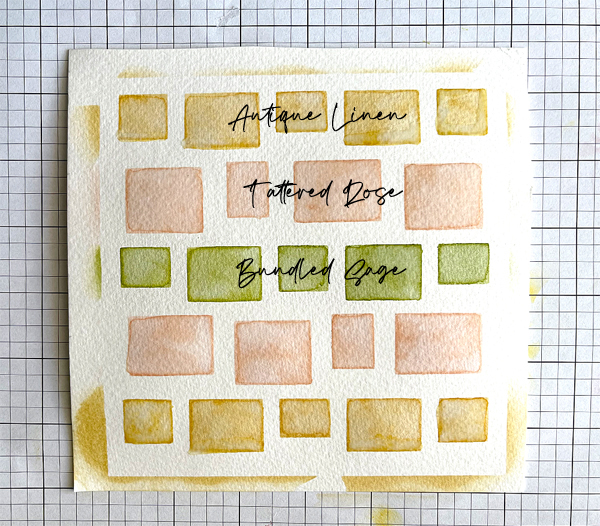
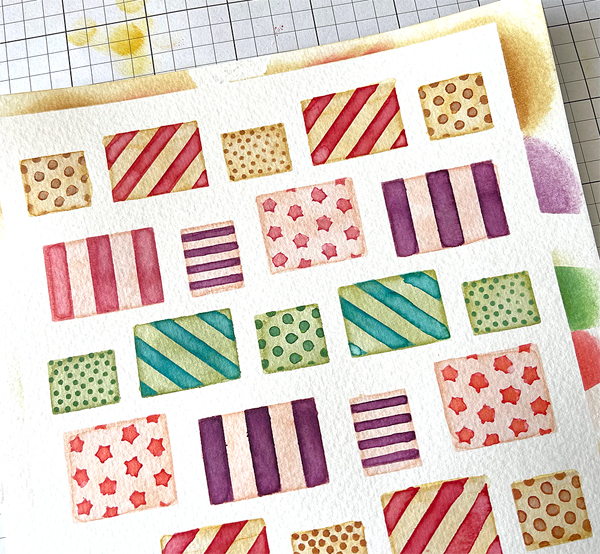
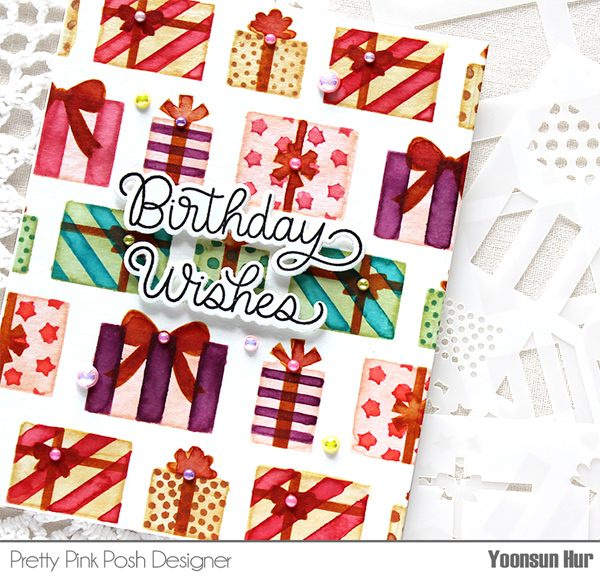
For my first card, I used the Layered Presents stencils along with the Birthday Scripts set. I laid the first, the base of present images, stencil on watercolour paper, applied soft coloured Distress inks first. I lightly brushed each box image with clean water to look like watercolour images. I added the stripes, dots and starts from second layer, the ribbons from third layer with Distress inks.
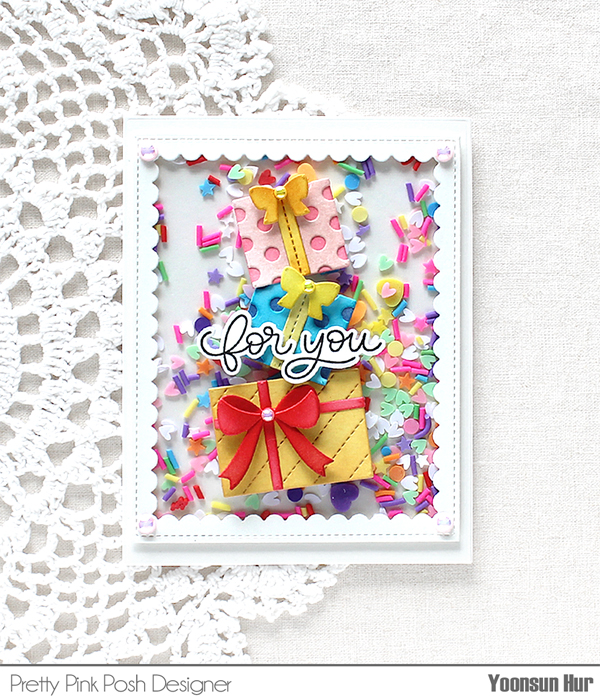
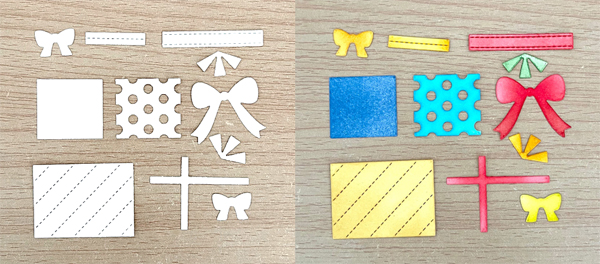
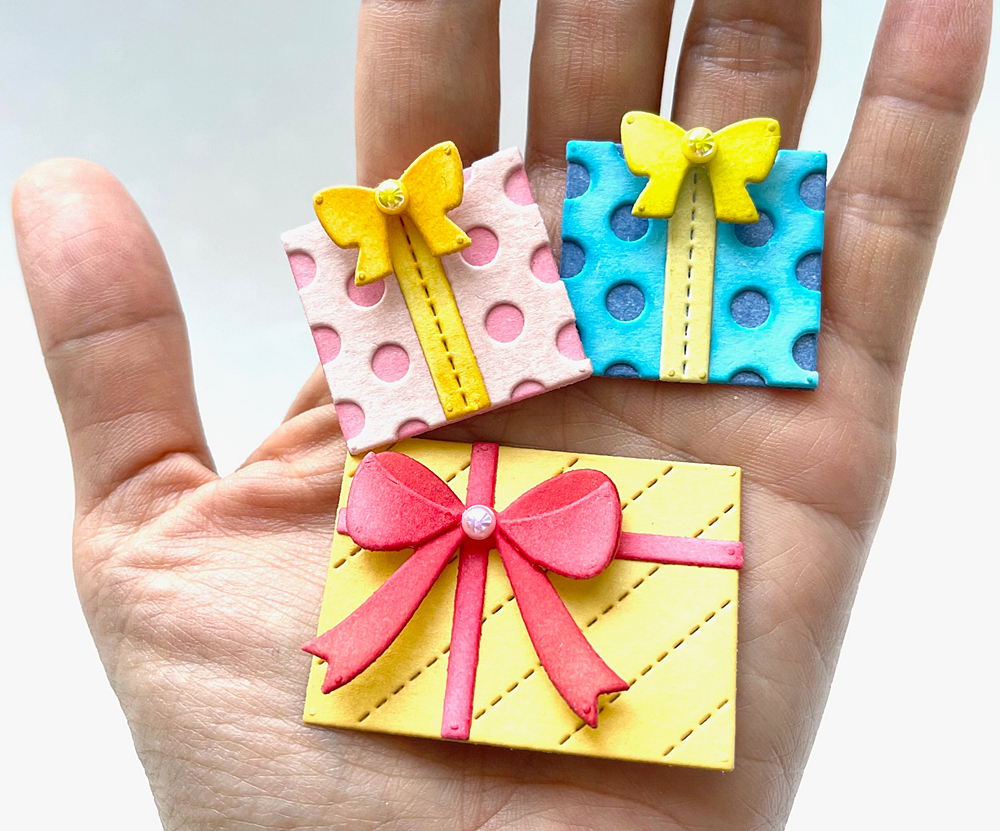
For the second card for the hop, I used the Build A Gift die set. I die cut pieces from watercolour paper using the Build A Gift die set. I then inked all pieces. Ta-da! Look at these cuties!! I added lots of new birthday confettis inside the shaker panel – I love them so much! GIVEAWAY!! Pretty Pink Posh is giving away 3 $50 gift certificates up for grabs (one winner each day). Winners will be picked randomly along the blog hop. Comments must be left by 11:59 PM PST on 2/16/2022. Winners will be announced Pretty Pink Posh blog.