Hello crafty friends!
Finally the beautiful Sensational Stitched Flowers Card Kit is available in the MFT Store now!!

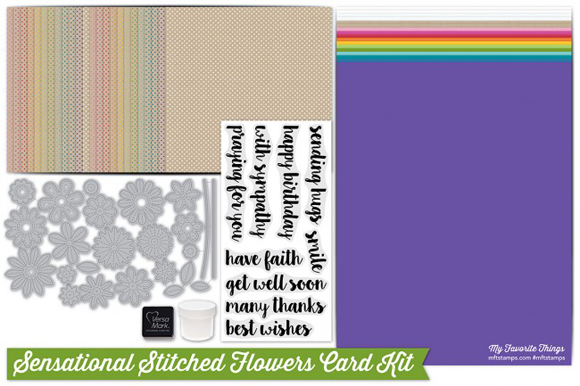 Sensational Stitched Flowers Card Kit
All Occasion Sentiments Stamp Set
Stitched Flowers Die-namics
Kraft Collection – Itsy Bitsy Polka Dots Patterned Paper
Card Stock – Cotton Candy, Razzle Berry, Cherry Crisp, Orange Zest, Daffodil, Sour Apple, Gumdrop Green, Blu Raspberry, Tropical Teal, Cornflower, Boysenberry, Kraft (2 sheets), Smooth White (2 sheets), Translucent Vellum (2 sheets)
Versamark Cube & White Detail Embossing Powder
NEW FREE with $60 Die-namics:
Starting in August, we have a new free with $60 die available for our customers with every kit release. It will be the free die (while supplies last) for the duration of the month until the next release. The new Free with $60 die for August is the Thanks Die-namics.
 For my first card, I made my own floral background with the Stitched Flowers Die-namics in the kit.
 To start, I die cut the stitched flowers and leaves from watercolour paper using the Stitched Flowers Die-namics, and then adhered them on an A2 sized watercolour paper panel using double-sided tape and fine tip glue pen.
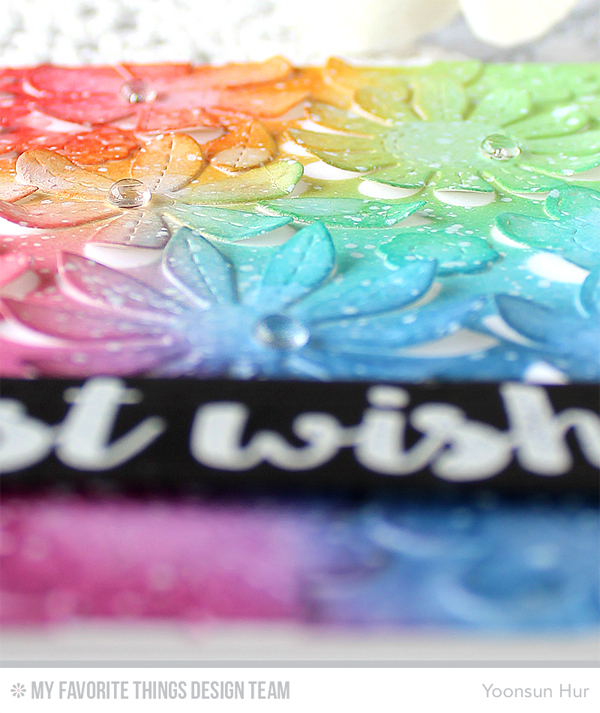
 I trimmed the edges of the panel, then ink blended on it with Distress inks using mini ink blending tool – I used Festive Berries, Wild Honey, Worn Lipstick, Twisted Citron, Peacock Feathers, Faded Jeans, and Seedless Preserves Distress inks. After doing some ink bleding, I spritzed with perfect pearls mist, added some white ink splatters all over the panel – I wanted to add a bit of shine and sparkle to my card.
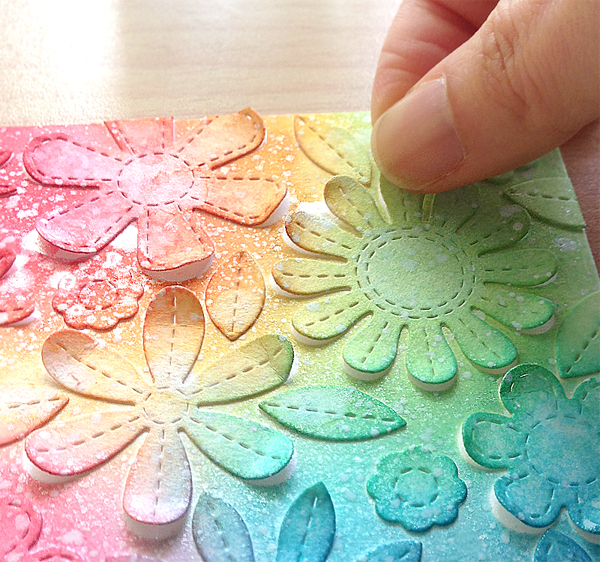 Once the panel was completely dry, I mounted it on an A2 sized white card base using double-sided tape, and then lifted each petal using my fingertips for beautiful 3D effects!
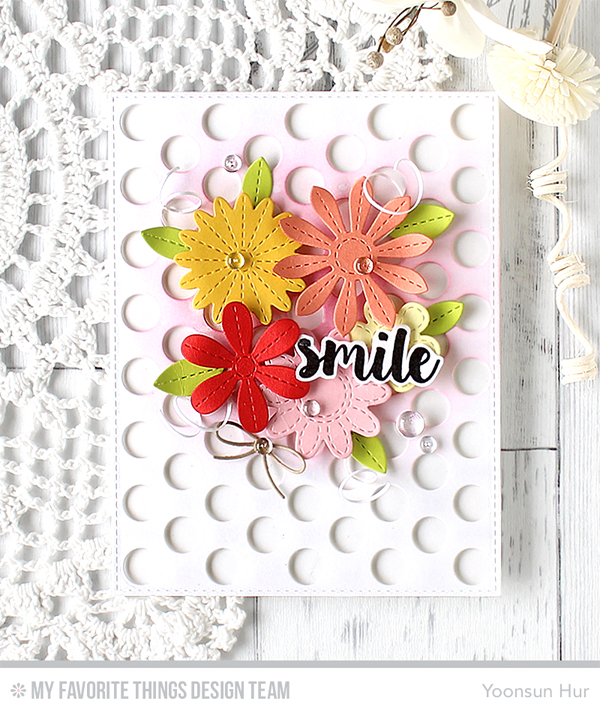 For my second card, I made a beautiful bouquet with the Stitched Flowers Die-namics. First, I cut the Peek-a-Boo Polka Dots Die-namics from white card stock. I then die cut the flowers and leaves from colour card stocks using the Stitched Flowers Die-namics. I mounted the panel on white card base using foam tape first, and then arranged all flowers and leaves, adhered them using foam tape.

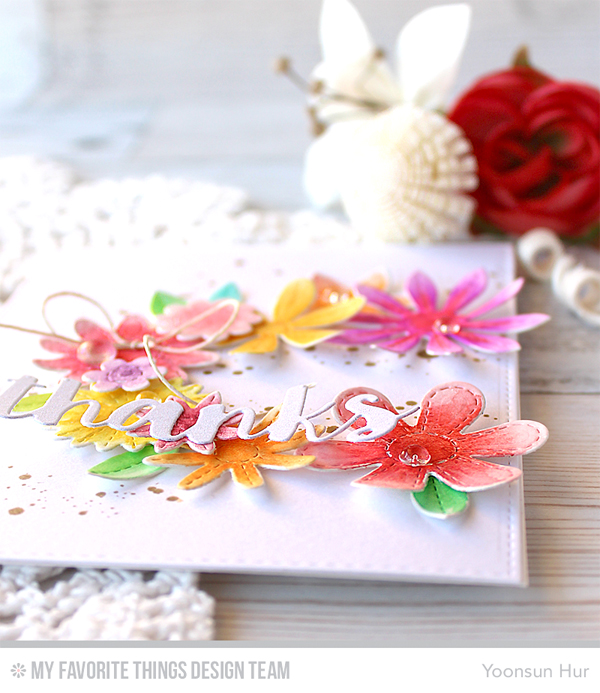
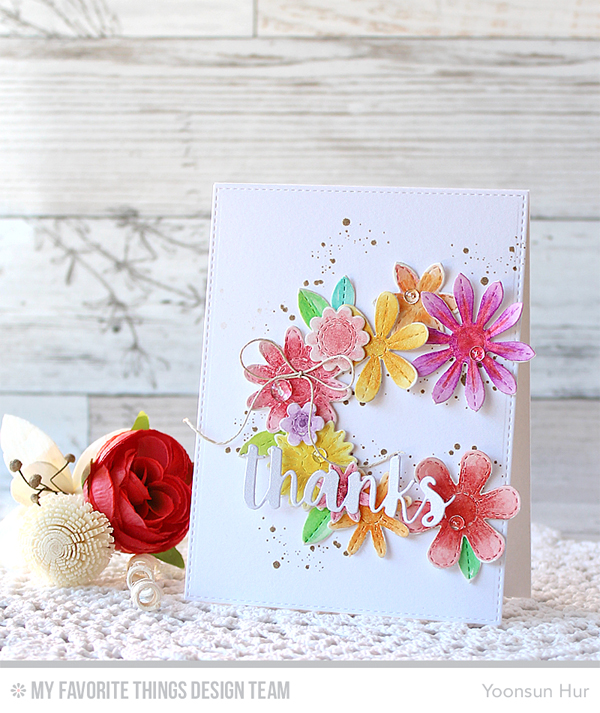 For my last card, I made a floral wreath with the Stitched Flowers Die-namics – I loooove these dies!! I coloured the flowers & leaves with watercolour pencils. For the sentiment, I used the Thanks Die-namics (the free with $60 die for August).
Make sure to check out MFT Blog for all the info for today along with links to all the other DT member’s blog posts.
Thank you so much for stopping by. Have a lovely day!!
Keep smiling and be blessed! God bless you all!
Love Love Love RejoicingCrafts
Card 1
Card 2
Card 3
https://static.inlinkz.com/ppr.js
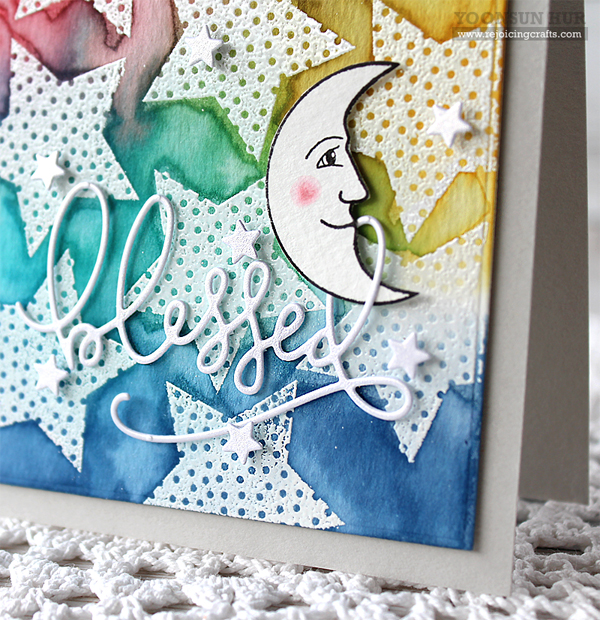
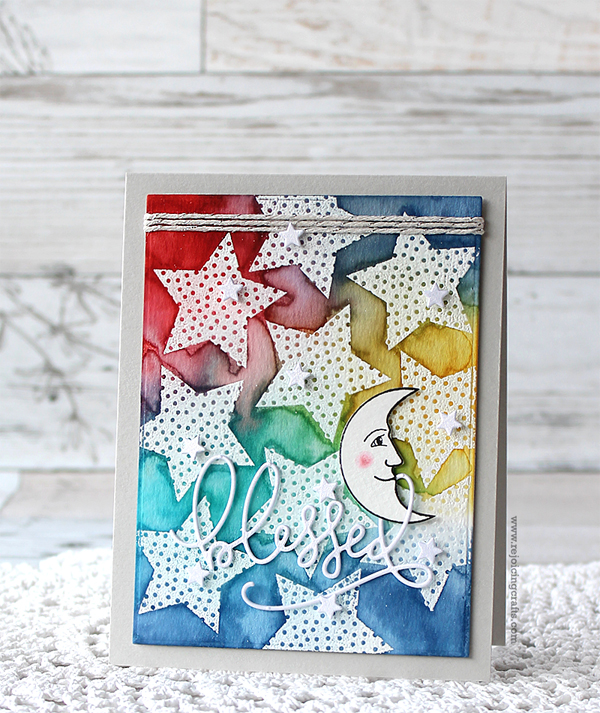 To start, I randomly stamped one of the star images in the Shine On set onto cold press watercolour paper panel using VersaMark embossing ink. I ink blended on it with several Distress inks using mini ink blending tool: Fired Brick, Wild Honey, Peacock Feathers, and Faded Jeans. I then added clean water over the blended panel using a wet paint brush. For the sentiment, I cut the word “blessed” out of white card stock. For the moon, I stamped it from the Shine On set on white card stock using VersaFine Onyx Black, then coloured the cheek using Worn Lipstick Distress marker. For those tiny stars, I die cut the Stacked Stars from white card stock and then used the mini star cuts not the panel. I mounted all elements as shown to the top-folded Fog Gray card base using foam tape.
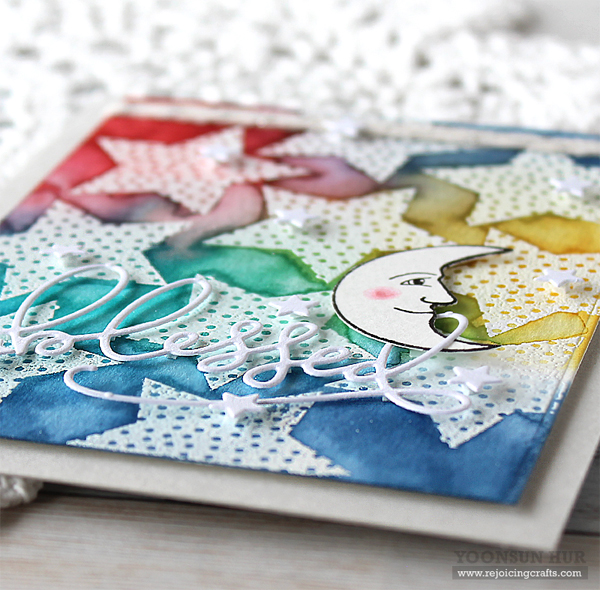
 Baby is a blessing from Heaven!! :D


 To start, I stamped the flowers and leaves from the
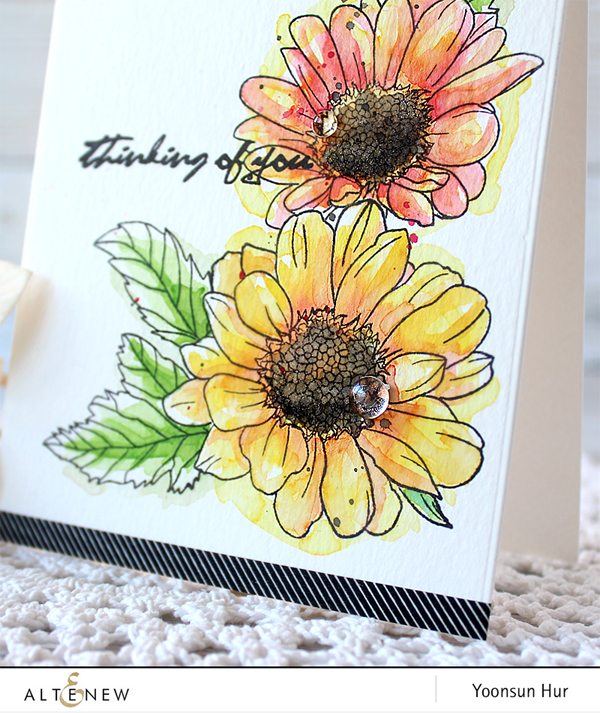
 Thank you so much for stopping by. Have a lovely day!


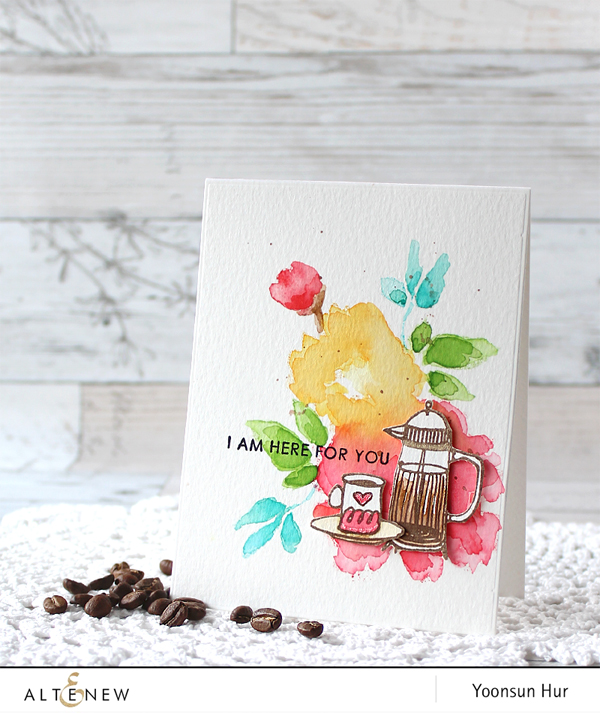 To create the card, I combined three Altenew stamp sets:
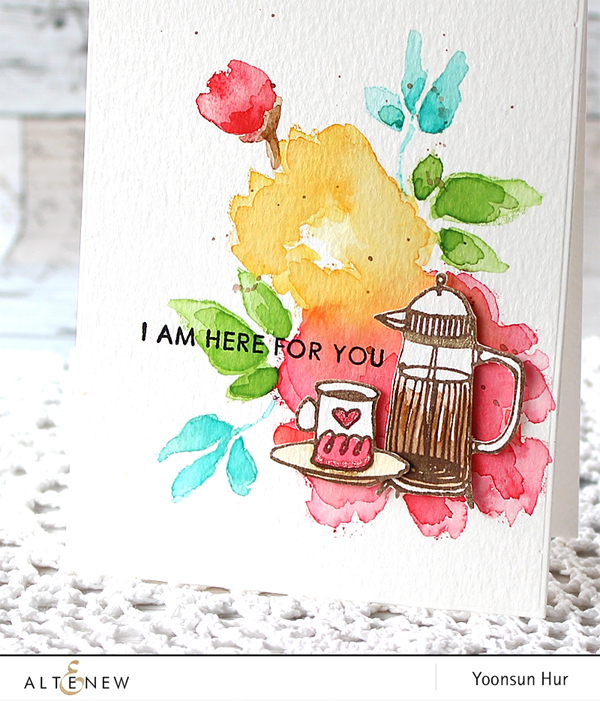
 Here is another card with the
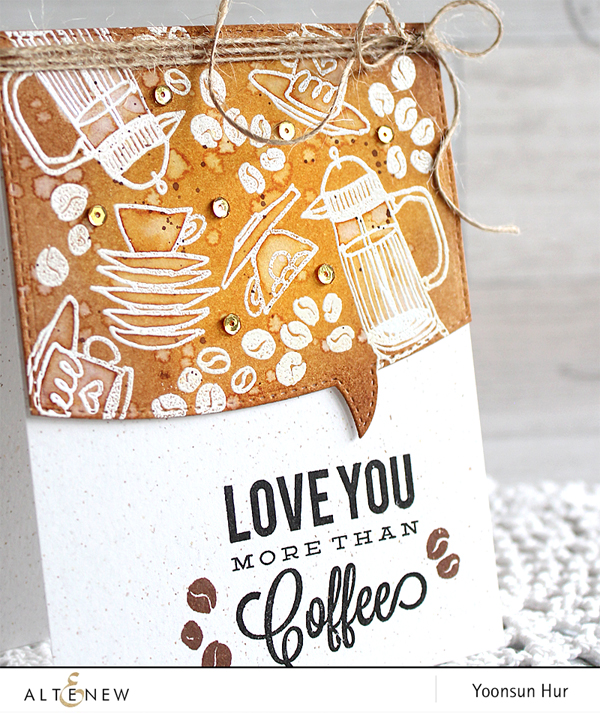
 Thank you so much for stopping by. Have a wonderful day!


 For my first card, I made a fun shaker card with the
 Here is another happy card for you! I 1) Die cut the rainbow stripes from white card stock using the


