Clearly Besotted September Release Teaser Time Day 2

Hello crafty friends!
I am guest designing with Clearly Besotted September Release this week. I have always loved Stephanie’s beautiful flower drawings. They are SO precious!! And now, for me to be a part of her amazing team, ‘Clearly Besotted’, is really, a dream come true! I am so happy and honoured to be part of this team in September!

Today I am sharing with you a couple of Autumn themed cards using In Stitches Autumn and Little Things stamp sets.
YoonsunHur-20150902-CB-A01
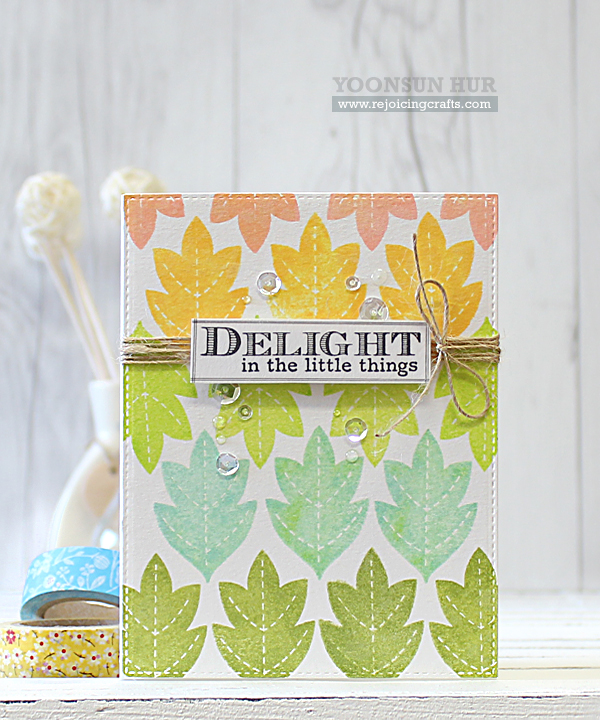
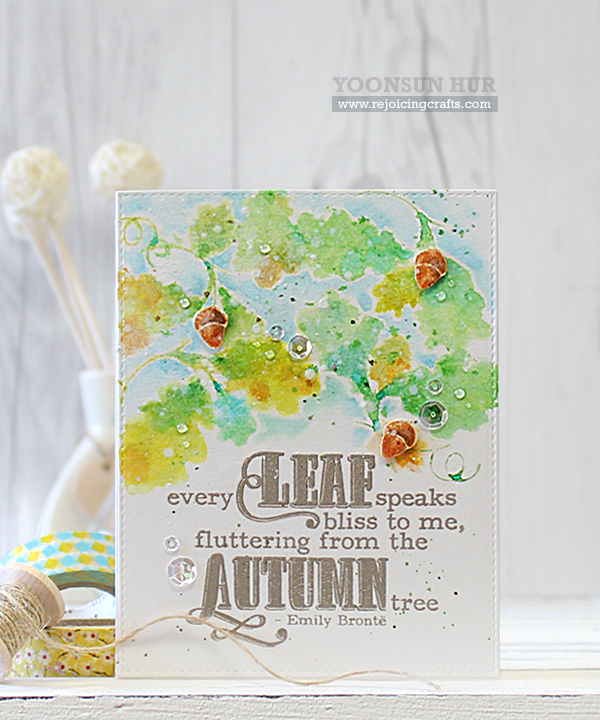
To create this card, I 1) Inked directly leaf stamp from the Little Things stamp set using several colours of Distress ink, spritzed the inked stamp with water using a Mini Mister and then stamped it onto the watercolour panel – stamped it multiple times with the same technique. 2) Heat embossed the sentiment from the In Stitches Autumn stamp set on the watercolour panel using Liquid Platinum embossing powder. 3) Mounted the watercolour panel on the white card base. 4) Embellished with a few clear sequins.
YoonsunHur-20150902-CB-A02
YoonsunHur-20150902-CB-B01
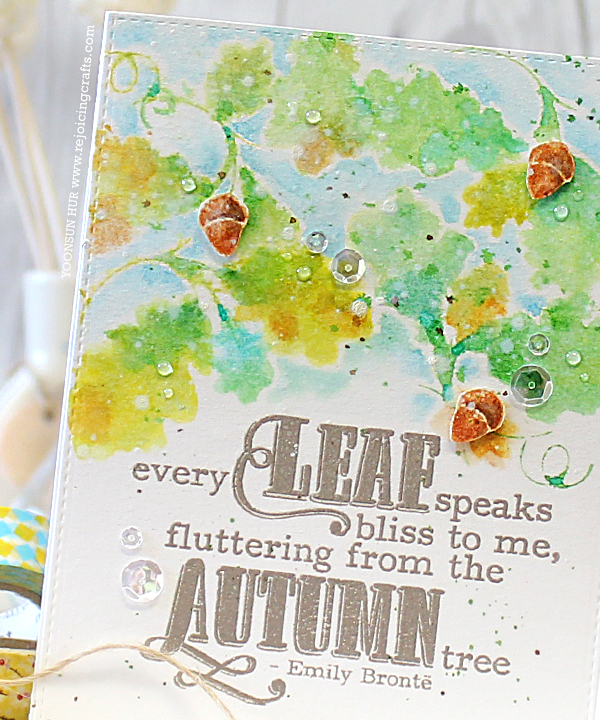
For my second card, I made simple feminine card. We can easily make a pretty patterned background with lovely stitched leaves from the new In Stitches Autumn stamp set.

I 1) Stamped the stitched leaf from the In Stitches Autumn stamp set on the white paper panel using SSS Hybrid inks. 2) Stamped the sentiment from the Little Things stamp set with black pigment ink. 3) Wrapped a part of the stamped panel with a natural twine before the stamped panel is attached to the white card base. 4) Mounted all elements as shown to the card base. 5) Embellished with a few clear sequins.

Make sure to check out Clearly Besotted Blog for more inspiration from the fabulous Design Team!!

Thank you so much for stopping by. Have a great day!

Keep smiling and be blessed! God bless you all!
Love Love Love RejoicingCrafts

http://static.inlinkz.com/ppr.js

SSS Time for a PARTY!

Hello crafty friends!
Today I am sharing with you a fun shaker card using Simon Says Stamp Exclusives.
YoonsunHur-20150830-SSS-Hooray01To create this card, I 1) Stamped the sentiment diagonally on the white card stock using Fog Gray dye ink, trimmed it with Stitches Rectangles Die. 2) Stamped ‘HOORAY’ letters from the Game Tile Letters Stamp Set on the white card stock using black pigment ink, fussy cut them. 3) Stamped the cute critters from the Baby Party Animals Stamp Set on the watercolour paper using Antique Linen Distress ink, coloured them with Distress markers – I used no-line watercoloring technique – and then die cut them with the matching dies. 4) Stamped the heart balloon from the Lila’s Heart Stamp Set on the white card stock using Hero Arts Neon Red, fussy cut it. 5) Die cut a stitched circle in the stamped panel – I made the shaker window – and then adhered the acetate to the back side of that panel, added mixed sequins and then covered it with shaker window panel. 6) Mounted all elements as shown to the front of the shaker window panel using dimensional foam tape.
YoonsunHur-20150830-SSS-Hooray02  
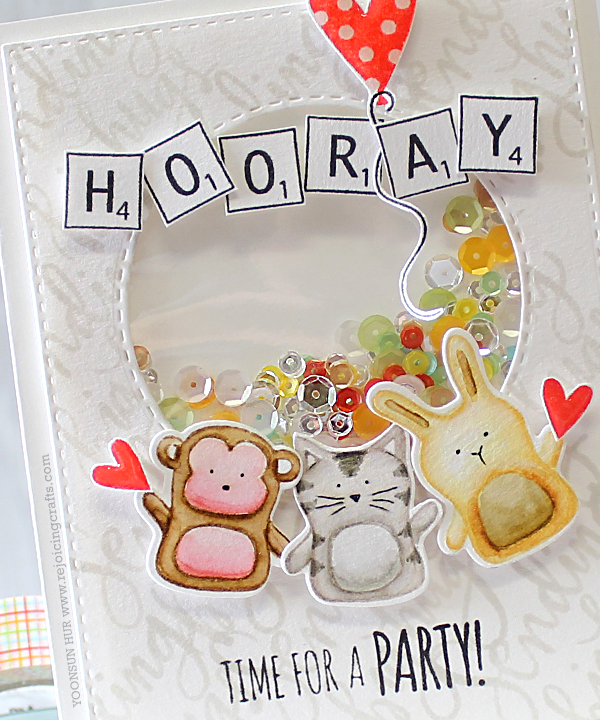
HOORAY!! Time for a PARTY!! It is to celebrate Simon Says Stamp STAMPtember®!! I am SO thrilled and excited about STAMPtember!!

StamptemberSTAMPtember® is a month-long event! There are full of awesome goodies, inspirations, and super happy celebrations in September!!

Thank you so much for stopping by. Have a wonderful day!

Keep smiling and be blessed! God bless you all!
Love Love Love RejoicingCrafts

http://static.inlinkz.com/ppr.js

SSS Thanks Card

Hello crafty friends, I hope you are doing very well and have good time to read my post!
Today I am sharing with you a beautiful ‘Thanks’ card using Simon Says Stamp Exclusives.

YoonsunHur-20150825-SSS-Butterfly01I really love the big and bold script font and SSS Hand Lettered Encouragements would perfect stamps for a gorgeous patterns into our cards.

To create the card, I 1) Stamped the sentiments from the Hand Lettered Encouragements Stamp Set diagonally onto the white card stock using Avery Elle Fog pigment ink, trimmed it with Stitches Rectangles Die and then added some pearl gold ink splatters. 2) Coloured directly on a large butterfly stamp from the Friendship Butterflies Stamp Set with Peacock Feathers Distress ink using water brush. 3) Spritzed the inked stamp with water several times using a Mini Mister and then stamped it onto the watercolour paper. 4) Die cut the butterfly with matching die and then added torn edges for an extra point. 5) Die cut ‘Thanks’ from the white card stock using Thanks Die. 5) Mounted the stamped panel on the linen white card base at first and then all elements as shown to the stamped panel using dimensional foam tape. 6) Embellished with a few clear sequins.
YoonsunHur-20150825-SSS-Butterfly02
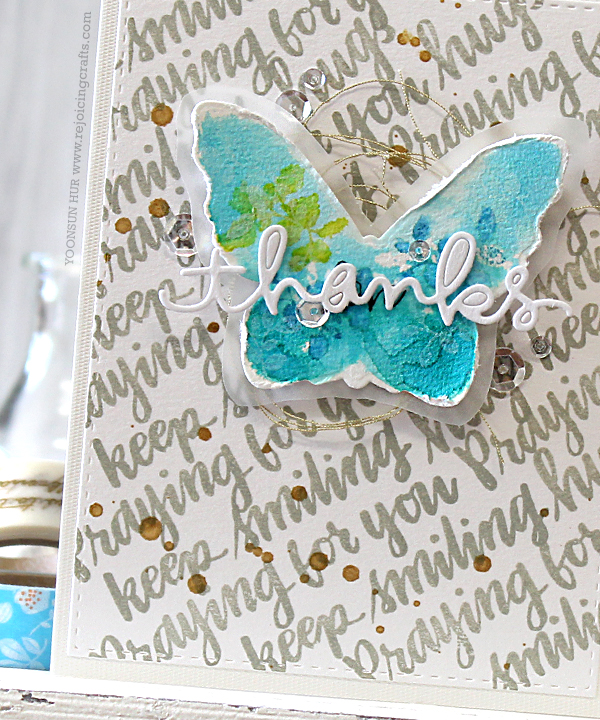
A bright colour is a great way to add pop to a neutral background!

StamptemberYay! Yahoo!! Hooray!!! Wowowowow!!!!
Are you ready to join STAMPtember®?!! As all of you know well, it is a month-long event! There are full of awesome goodies, inspirations, and super happy celebrations in September -It is just around the corner! Yaaaaaaaay!!

Thank you so much for stopping by. Have a wonderful day!

Keep smiling and be blessed! God bless you all!
Love Love Love RejoicingCrafts

http://static.inlinkz.com/ppr.js

SSS Rainbow Diamonds Background

Hello crafty friends, I hope you are having a great weekend!
Today I am sharing with you my rainbow watercolour diamonds background with Simon Says Stamp Diamonds Stencil.

YoonsunHur-20150822-SSS-01SSS Best Mom Ever is my all time favourite stamp set and… Game Tile Letters set is so clever!! I can make any words using it!!

To create the card, I 1) Laid the Diamonds stencil over the watercolour panel, sponged with several Distress inks using sponge daubers. 2) Removed the stencil and then spritzed water on this inked panel for a natural watercolour stains on it. 3) Once dry, mounted it to the Fog Gray card stock. 4) Stamped the flowers and leaves from the Best Mom Ever Stamp Set, ‘Love U’ words from the Game Tile Letters Stamp Set using black pigment ink and then fussy cut them. 5) Mounted all elements as shown to the watercolour panel. 6) Embellished with a few clear sequins for finishing touches.
YoonsunHur-20150822-SSS-02

Thank you so much for stopping by. Have a fabulous weekend!!

Keep smiling and be blessed! God bless you all!
Love Love Love RejoicingCrafts

http://static.inlinkz.com/ppr.js

SSS Rainbow Grid Background

Hello crafty friends, I hope you are doing well and have good time to read my post.
Today I am sharing with you my rainbow watercolour grid background with Simon Says Stamp Grid Stencil.

YoonsunHur-20150819-SSS-Hello01
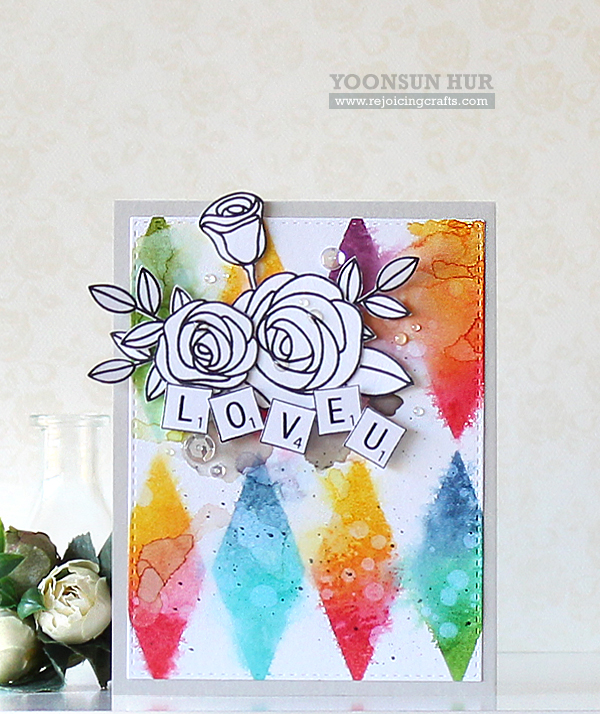
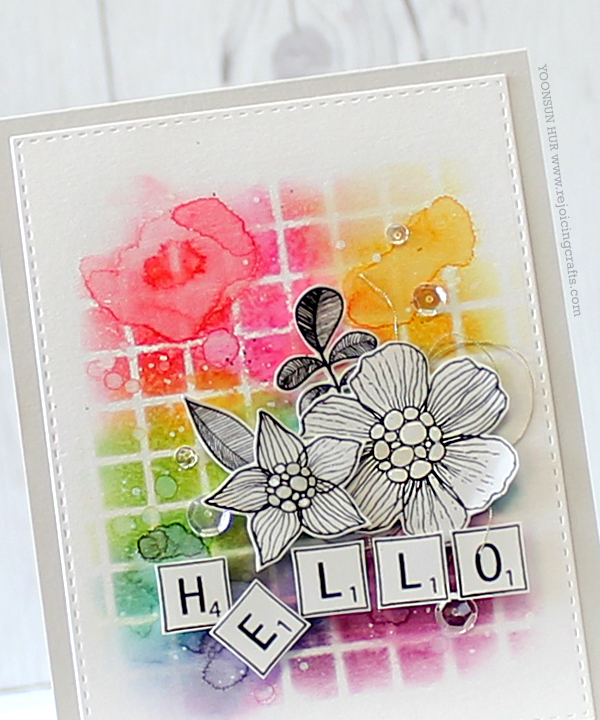
I love rainbow colours and flowers!! I can’t get enough of flowers over the rainbow watercolour background :D

To create the card, I 1) placed the Grid stencil over the watercolour paper, sponged it with Distress inks in rainbow order using sponge daubers. 2) Removed the stencil, spritzed a bit water using Mini Mister. 3) Trimmed the inked paper with Stitches Rectangles Die. 4) Stamped the flowers and the tile letters on the white card stock using black pigment ink, fussy cut them. 5) Mounted the watercolour grid background to the Fog Gray card stock at first and then all elements as shown to the watercolour panel. 6) Embellished with a few PPP clear sequins.
YoonsunHur-20150819-SSS-Hello02
Thank you so much for stopping by. Have a wonderful day!!

Keep smiling and be blessed! God bless you all!
Love Love Love RejoicingCrafts