Hello crafty friends, blessed Sunday!
Welcome to the My Favorite Things October Release Countdown Day 3.
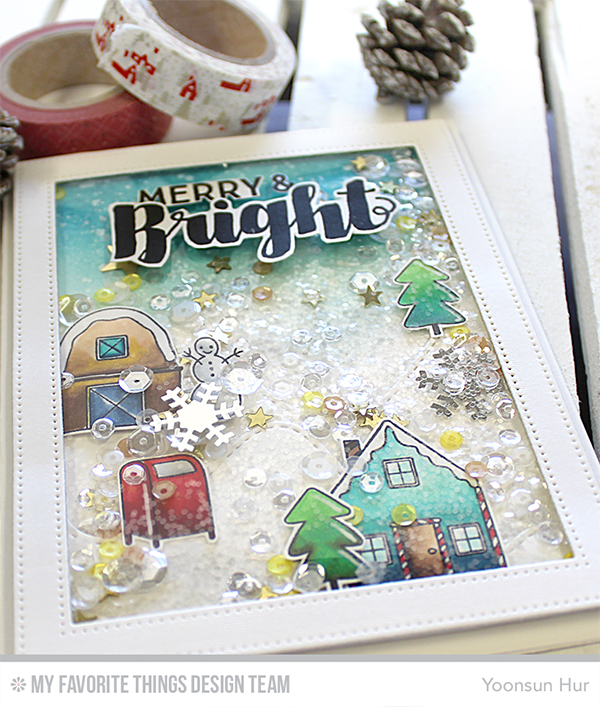
 Today I want to share with you the cards I’ve made using Winter Wonderland stamp set, and Snow Drifts Cover-Up Die-namics.
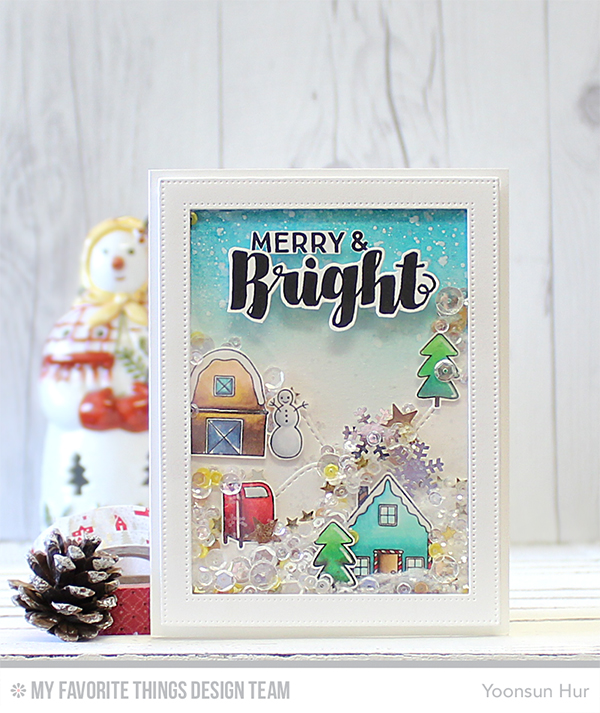 Look out the window and see the snowflakes fall!! Ohhh.. I love a snowy Christmas! And a new Winter Wonderland is the perfect stamp for making a beautiful snowy town.
To create this shaker card, I 1) Stamped the images from the Winter Wonderland stamp set on white card stock using Black Licorice hybrid ink, coloured them with Copic markers, then fussy cut them. 2) Blended the top of white card base with Summer Splash & Lush Lagoon dye inks using mini blending tool, added white ink splatters. 3) Die cut Stitched Mountain Range from white card stock and then adhered them on ink blended card base. 4) Mounted all coloured images over the Stitched Mountains using dimensional foam tape. 5) Die cut Pierced Rectangle Frame from white card stock, back the rectangle frame with acetate, then added mixed sequins & clear glitter powders inside then covered with frame. 6) Stamped the sentiment from the Joyous Christmas Sentiments stamp set with Black Licorice hybrid ink, fussy cut, then layered it over the frame with mounting tape.
 For my second card, I made “loose watercolour landscapes”. I used some post-it notes to mask the house images to stamp them overlapping. I masked and stamped houses with black pigment ink from the bottom of watercolour paper panel and then coloured them with Peerless watercolours.
 For my last card today, I 1) Die cut Snow Drifts Cover-Up from white card stock and coloured the negative cuts with several colours of dye inks –(from the top) Summer Splash, Sour Apple, Lemon Drop, Bubblegum, Persimmon, Red Hot, Gumdrop Green, and Lush Lagoon dye inks. 2) Affixed all die cuts to the sticky base and then randomly stamped the snowflakes using embossing ink, white heat embossed. 3) Die cut the tag from red card stock using the Tag Builder Blueprints 4 Die-namics, white heat embossed the sentiment from the Hand Lettered Holiday stamp set, topped with natural twines.
Make sure to check out MFT Blog for all the info for today along with links to all the other DT member’s blog posts.
See you tomorrow for more countdown fun! Have a wonderful day!
Keep smiling and be blessed! God bless you all!
Love Love Love RejoicingCrafts
http://static.inlinkz.com/ppr.js
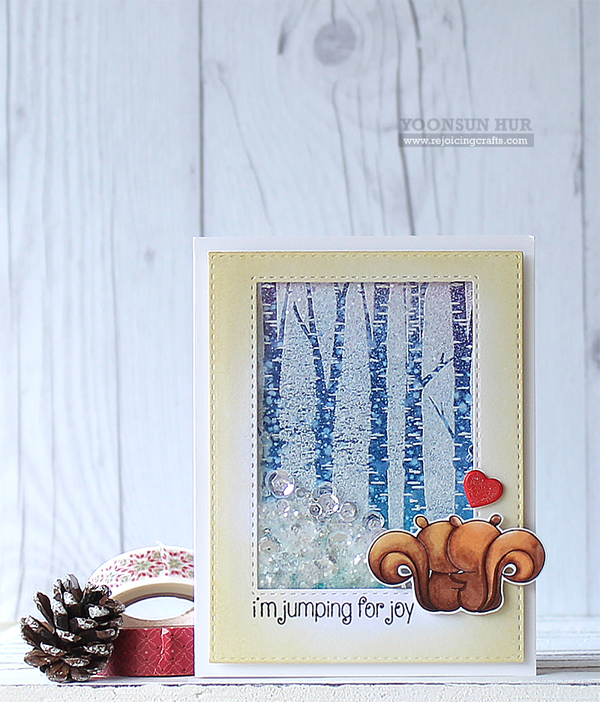 If you looking for a beautiful Christmas scene card ideas, I strongly recommend this sweet Birch Background mini stamp set!
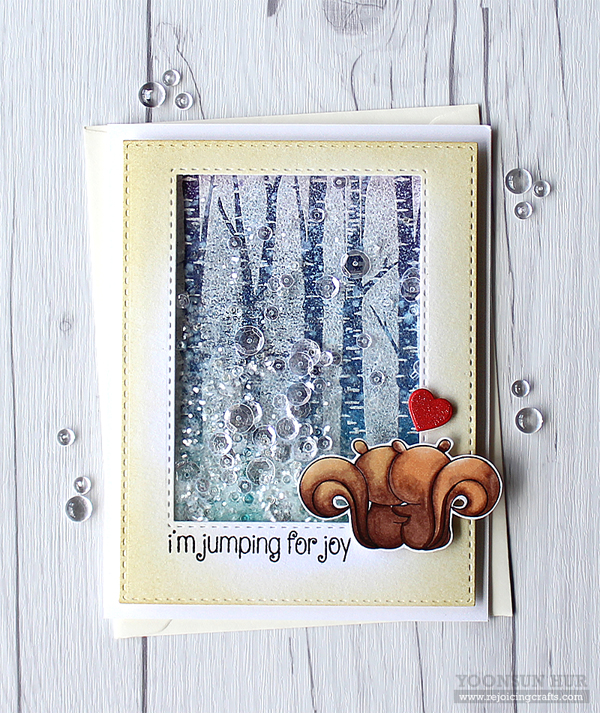 Make sure to check out Clearly Besotted Blog for more inspiration from the fabulous Design Team!!


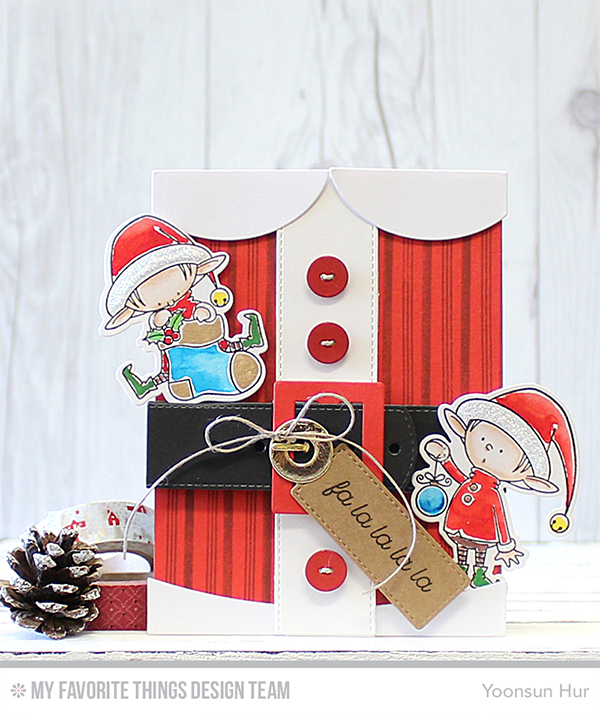 Ho! Ho! Ho! here he comes! Santa is on his way wearing his bright red suit with black belt :D
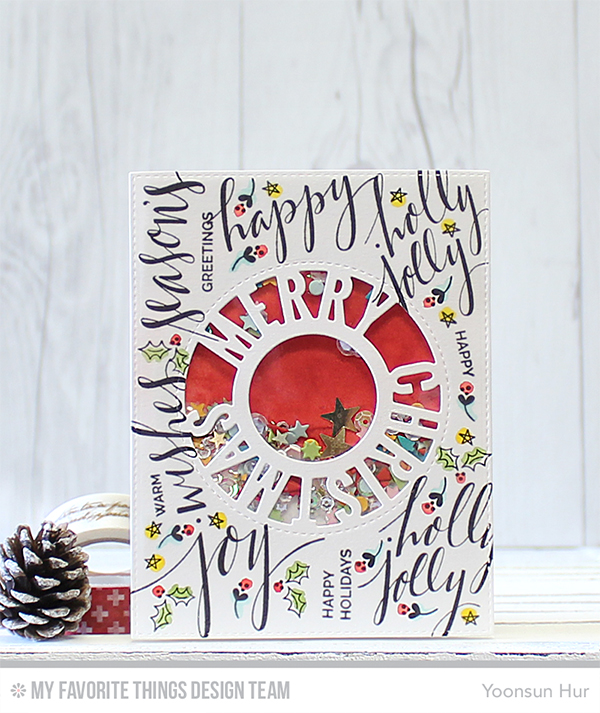 For my second card, I made a fun shaker card. First I 1) Die cut circle merry Christmas from the centre of white paper panel using


 To create this card, I 1) Stamped the sentiment diagonally on the white card stock using
 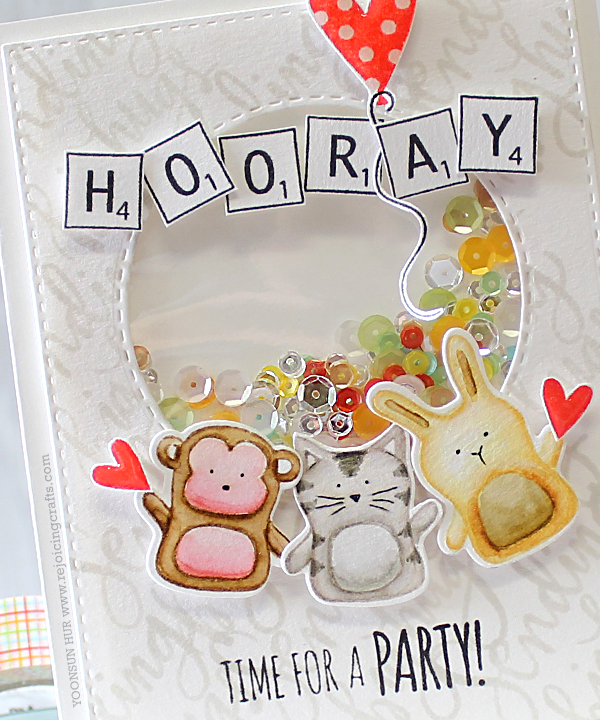 HOORAY!! Time for a PARTY!! It is to celebrate Simon Says Stamp STAMPtember®!! I am SO thrilled and excited about STAMPtember!!
 STAMPtember® is a month-long event! There are full of awesome goodies, inspirations, and super happy celebrations in September!!


 If you want to see more just click to the


