MFT September Release – New Product Launch

Hello crafty friends!
Welcome to the My Favorite Things new product launch! The wait is over!! All of the new products we’ve been sharing all week are officially available in the MFT Boutique now! I can’t wait to see what you guys create with them :D
NewProductLaunchIn September, I am featuring the new Star Strips Die-namics, Paris Skyline Die-namics.

For my first card, I made it with the Star Strips Die-namics.
YoonsunHur-MFT-SeptemberRC-NPL-B01To create the card, I 1) Die cut Star Strips from several pieces of coloured card stock – Cherry Crisp, Tickled PinkDaffodilLimelightSummer SplashWild Wisteria, and Lemon Chiffon. 2) Positioned these Star Strips die cuts on the Grout Gray panel, added machine stitches and white ink splatters. 3) Die cut ‘Stars’ word and star shapes from the white card stock using Stars & Wishes Die-namics and Lucky Stars Die-namics. 4) Stamped the sentiment from the Count the Stars Stamp Set on the black paper using embossing ink, white heat embossed. 5) Mounted all elements as shown to the star decorative panel, embellished with a few clear sequins.
YoonsunHur-MFT-SeptemberRC-NPL-B02YoonsunHur-MFT-SeptemberRC-NPL-B03
For my second card, I made it with the Paris Skyline Die-namics.
YoonsunHur-MFT-SeptemberRC-NPL-A01What is the first thing that pops into your mind when you think of the Paris? For me, it’s MUSIC!! Paris is a city of art and music – and there’s no way you can separate them!

To create this card, I 1) Stamped Music Background onto the watercolour paper using embossing ink, white heat embossed. 2) Blended on the stamped panel with Red Hot, Tickled Pink, Lemon Drop, Limelight, Summer Splash, Lush Lagoon, and Pure Plum dye inks in rainbow order using mini blending tool, added water droplets. 3) Die cut the Paris Skyline from the white card stock, stamped the sentiment from the Thanks so Very Much Stamp Set on the bottom part of the die cut. 4) Mounted the ink blended panel on the white card base at first and then adhered the Paris Skyline over the background using dimensional foam tape. 5) Embellished with a few clear sequins.YoonsunHur-MFT-SeptemberRC-NPL-A02

GIVEAWAY ALERT!
Don’t forget to check out the MFT blog to see all of the amazing projects the creative team has created. You can leave a comment on all of the designer’s New Product Launch posts for a chance to WIN one of two $100 gift vouchers!

Thank you so much for stopping by. Happy crafting!!

Keep smiling and be blessed! God bless you all!
Love Love Love RejoicingCrafts

1) Star Strips

2) Paris Skyline

SSS Rainbow Diamonds Background

Hello crafty friends, I hope you are having a great weekend!
Today I am sharing with you my rainbow watercolour diamonds background with Simon Says Stamp Diamonds Stencil.

YoonsunHur-20150822-SSS-01SSS Best Mom Ever is my all time favourite stamp set and… Game Tile Letters set is so clever!! I can make any words using it!!

To create the card, I 1) Laid the Diamonds stencil over the watercolour panel, sponged with several Distress inks using sponge daubers. 2) Removed the stencil and then spritzed water on this inked panel for a natural watercolour stains on it. 3) Once dry, mounted it to the Fog Gray card stock. 4) Stamped the flowers and leaves from the Best Mom Ever Stamp Set, ‘Love U’ words from the Game Tile Letters Stamp Set using black pigment ink and then fussy cut them. 5) Mounted all elements as shown to the watercolour panel. 6) Embellished with a few clear sequins for finishing touches.
YoonsunHur-20150822-SSS-02

Thank you so much for stopping by. Have a fabulous weekend!!

Keep smiling and be blessed! God bless you all!
Love Love Love RejoicingCrafts

http://static.inlinkz.com/ppr.js

SSS Rainbow Grid Background

Hello crafty friends, I hope you are doing well and have good time to read my post.
Today I am sharing with you my rainbow watercolour grid background with Simon Says Stamp Grid Stencil.

YoonsunHur-20150819-SSS-Hello01
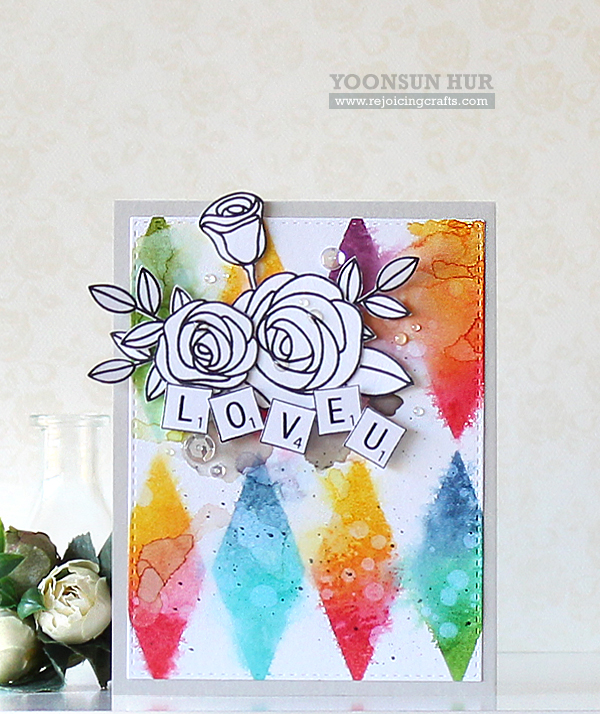
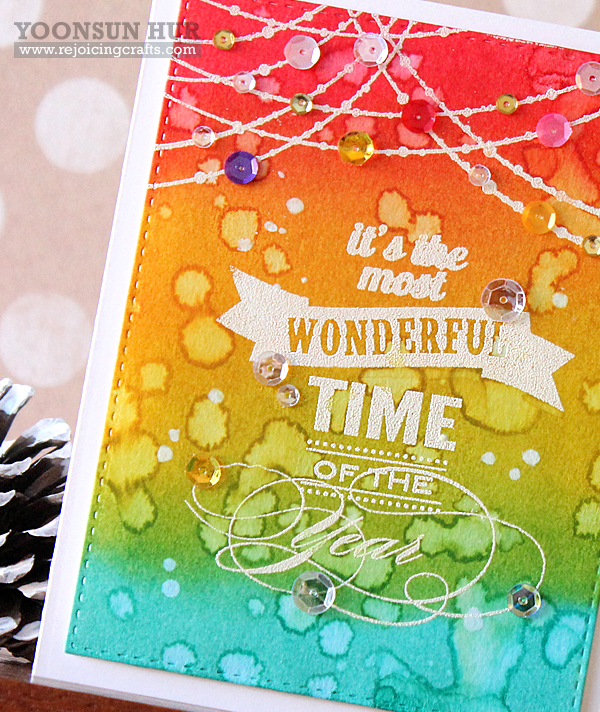
I love rainbow colours and flowers!! I can’t get enough of flowers over the rainbow watercolour background :D

To create the card, I 1) placed the Grid stencil over the watercolour paper, sponged it with Distress inks in rainbow order using sponge daubers. 2) Removed the stencil, spritzed a bit water using Mini Mister. 3) Trimmed the inked paper with Stitches Rectangles Die. 4) Stamped the flowers and the tile letters on the white card stock using black pigment ink, fussy cut them. 5) Mounted the watercolour grid background to the Fog Gray card stock at first and then all elements as shown to the watercolour panel. 6) Embellished with a few PPP clear sequins.
YoonsunHur-20150819-SSS-Hello02
Thank you so much for stopping by. Have a wonderful day!!

Keep smiling and be blessed! God bless you all!
Love Love Love RejoicingCrafts

MFT July Release Countdown – Day 3

Hello crafty friends, blessed Sunday!
Welcome to the My Favorite Things July Release Countdown Day 3.
NewReleaseCountdown_Day3
Have you ever seen a person dressed up as a clown, handing out balloons to children at parks? I can still remember the moment I first received a balloon. Oh, how exciting it was!!YoonsunHur-MFT-20150705-Day3-01
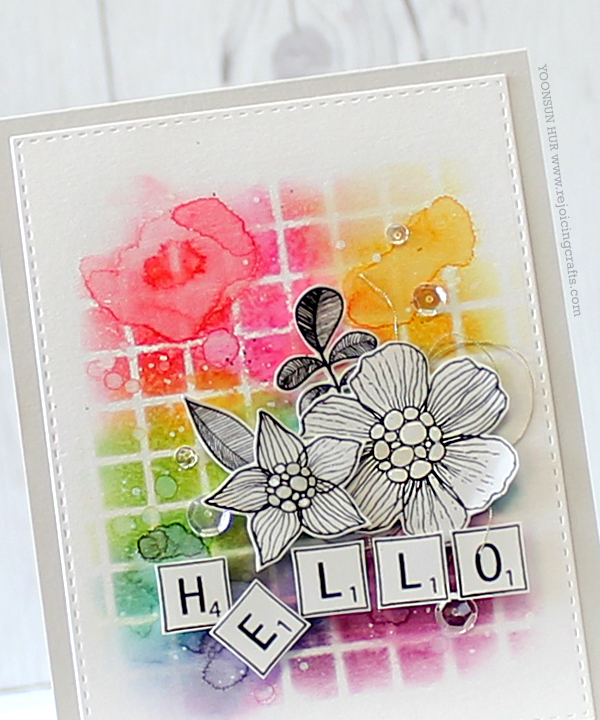
To create the card, I used Clowning Around Stamp set, Balloon Strings Background Stamp, and Blueprints 26 Die-namics. 1)I stamped the clown on the white card stock with Black Licorice hybrid ink, coloured it with Copic markers and then die cut it with matching die. 2)I coloured each piece of watercolour paper with Wild Cherry, Lemon DropSour Apple, Lush Lagoon, Grape Jelly dye inks using a wet paintbrush and then die cut balloons using Blueprints 26 Die-namics. 3)For the background, I stamped Balloon Strings Background Stamp on the white card stock using Black Licorice hybrid ink. 4)For the sentiment, I stamped ‘celebrate’ from the Brushstroke Birthday Stamp set with Black Licorice hybrid ink, fussy cut it. 5)To finish it off, I mounted all elements as shown to the stamped panel and added some clear sequins.
YoonsunHur-MFT-20150705-Day3-02

YoonsunHur-MFT-20150705-Day3-03
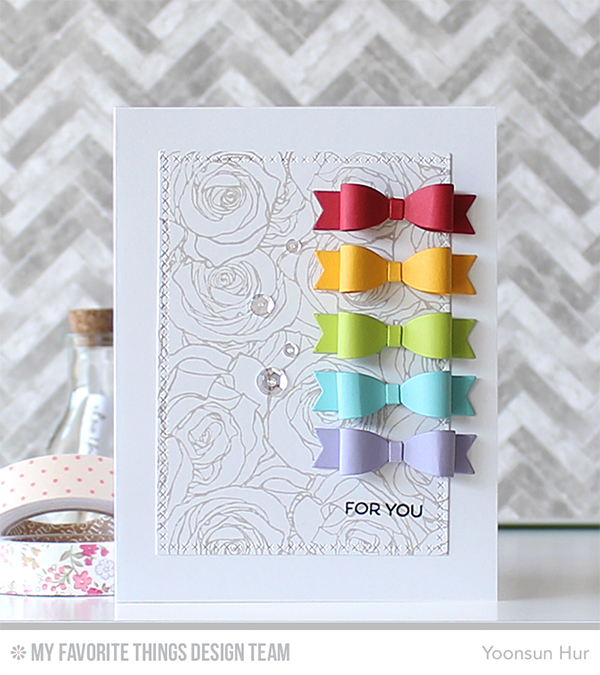
We can make cute bows, stitched clips with a new Creative Clips Die-namics. I just simply love it!!

To create the card, 1)I stamped Roses All Over Background Stamp on the white card stock using Grout Gray dye ink, die cut it with Cross-Stitch Rectangle STAX Die-namics. 2)I die cut the bow set from several pieces of colour card stock using Creative Clips Die-namics and then made bows. 3)For the sentiment, I used it from Birthday Bears Stamp set. 4)To finish it off, I mounted all elements as shown to the white card base, added some clear sequins.
YoonsunHur-MFT-20150705-Day3-04

Make sure to check out MFT Blog for all the info for today along with links to all the other DT member’s blog posts.

See you tomorrow for more countdown fun! Have a wonderful day!

Keep smiling and be blessed! God bless you all!
Love Love Love RejoicingCrafts

Penny Black Christmas in July Day 5. Merry Christmas

Hello crafty friends, TGIF!
Today is my last day with Penny Black Christmas in July.
(This is my second post of the day, for the MFT July Release Countdown Day 5, click HERE.)
PennyBlack-Banner
Today’s theme is MERRY CHRISTMAS!!
YoonsunHur-2015July-PennyBlack-Day5-A01For my card today, I used Wonderful & Jolly Stamp set. First of all, I stamped the sentiment and Christmas lights on the watercolour panel with embossing ink, white heat embossed. I then blended on the stamped panel with Distress inks Festive Berries, Mustard Seed, Mowed Lawn, Peacock Feathers using mini blending tool, added some water droplets because I wanted to express the falling snow. To finish it off, I embellished different colours of sequins.
YoonsunHur-2015July-PennyBlack-Day5-A02
Oh wow! It was a very enjoyable journey during this week and what I want to say to all of you is: MERRY CHRISTMAS!!

Thank you so much for stopping by. Have a wonderful weekend!

Keep smiling and be blessed! God bless you all!
Love Love Love RejoicingCrafts