MFT April Release – New Product Launch

Hello crafty friends!
Welcome to the My Favorite Things new product launch! It’s Time!! All of the new products we’ve been sharing all week are officially available in the MFT Store now! I can’t wait to see what you guys create with them :D
NewProductLaunchIn April, I am showcasing the amazing Build-able Bouquet Stamp & Die-namics.
Print
YoonsunHur-201604-MFTRC-NPL
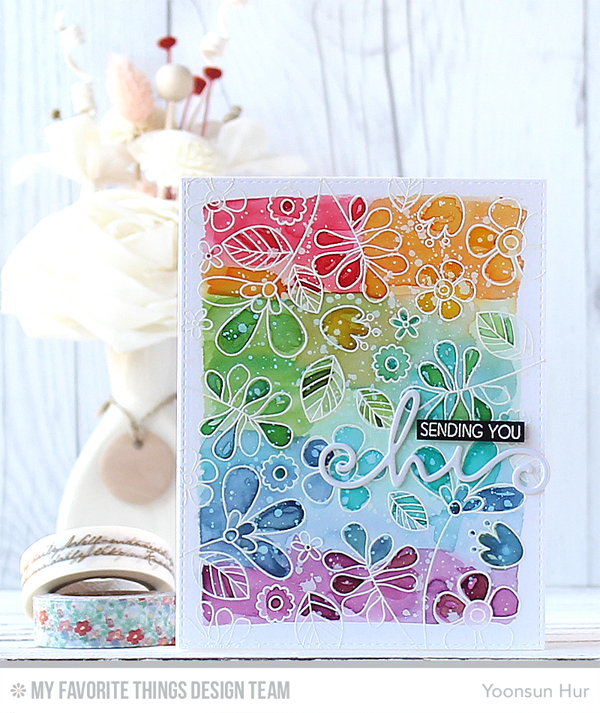
Build-able Bouquet set is so versatile. We can create a number of different styles of flower bouquets with the long-stemmed flowers or simply one layer flower card.

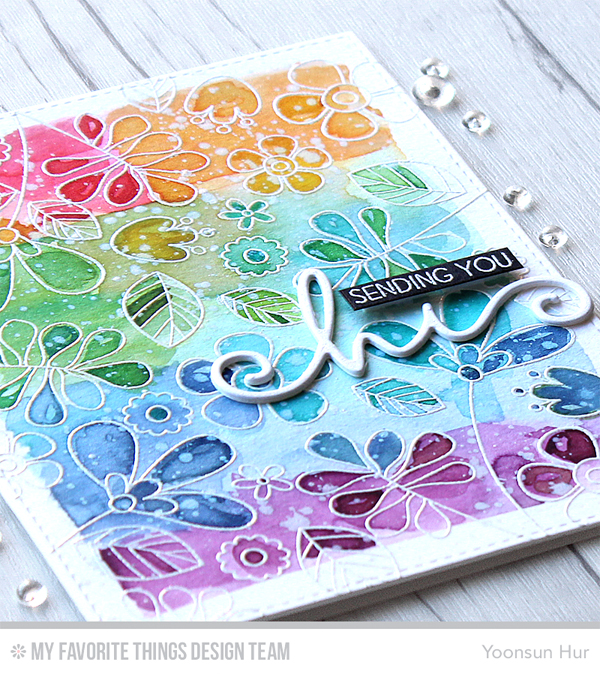
To create this card, I 1) Stamped the flowers and leaves from Build-able Bouquet set randomly onto watercolour paper panel using VersaMark Embossing ink, heat embossed with white embossing powder. 2) Watercoloured the stamped panel with several colours of Distress ink in rainbow order – I used Festive BerriesWild HoneyMowed LawnEvergreen BoughPeacock FeathersStormy Sky, and Seedless Preserves Distress inks. 3) Added some opaque white ink splatters. 4) Die cut the word “Hi” from white card stock using Happy Hellos Die-namics three times, then glued them together using a fine tip glue pen. 5) Mounted all elements as shown to A2 white card base using double-sided tape.
YoonsunHur-201604-MFTRC-NPL-Detail
YoonsunHur-201604-MFTRC-DAY1-A001And, I want to show you this card once more. I created my own flower bouquet with the Build-able Bouquet Stamp & Die-namics.

Don’t forget to check out the MFT blog to see all of the amazing projects the creative team has created. You can leave a comment on all of the designer’s New Product Launch posts for a chance to WIN one of two $100 gift vouchers!

Thank you so much for stopping by. Happy crafting!!

Keep smiling and be blessed! God bless you all!
Love Love Love RejoicingCrafts

Watercolour flower card:

http://static.inlinkz.com/ppr.js

MFT April Release Countdown – Day 3

Hello crafty friends, blessed Sunday!
Welcome to the My Favorite Things April Release Countdown Day 3.
NewReleaseCountdown_Day3Today I am featuring the Loads of Thanks and I’m Tweet on You stamp sets.
YoonsunHur-201604-MFTRC-DAY3-A001MFT-Cloud
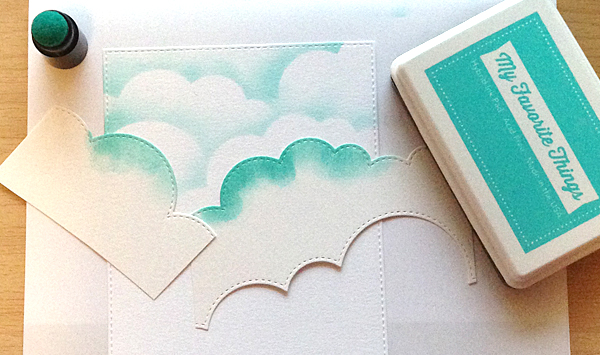
For the cloud background, I die cut Stitched Cloud Edges from white card stock and used it as a stencil. I inked it up with Summer Splash hybrid ink using sponge daubers. Next, I stamped the flowers from Fly-By Friends set onto this inked panel using Black Licorice hybrid ink, coloured them with Peerless watercolors. I then stamped others, girl from Loads of Thanks set and butterflies from Fly-By Friends set, on a separate watercolour paper with Black Licorice hybrid ink, coloured them with Peerless watercolors, then die cut them with matching dies. Finally I mounted all elements as shown to A2 white card base using dimensional foam tape.

YoonsunHur-201604-MFTRC-DAY3-B001
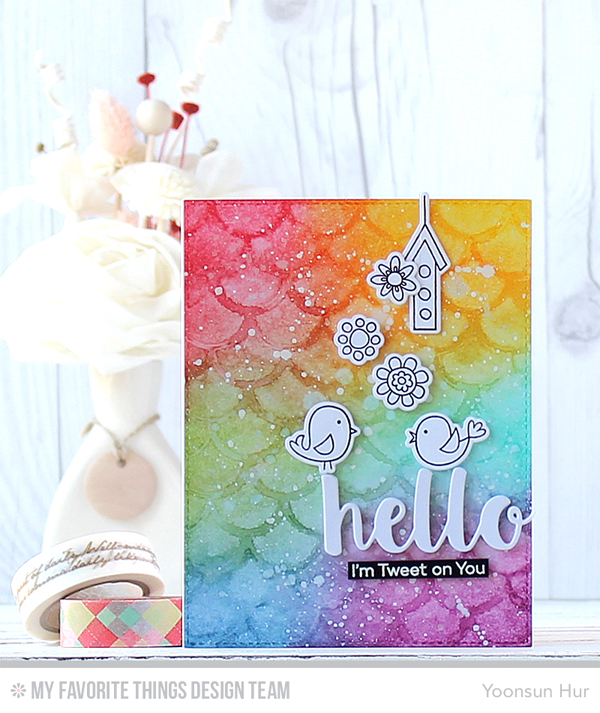
For my second card, I used I’m Tweet on You stamp set, Hello There Die-namics, and Cascading Scallop stencil. First off I blended the watercolour paper panel with several colours of Distress ink in rainbow order, placed Cascading Scallop stencil over the inked panel, dabbed away to remove colours using wet tissues, then added some white ink splatters. I stamped the birds, flowers, and bird house from I’m Tweet on You set on white card stock using Black Licorice hybrid ink, then die cut them with I’m Tweet on You Die-namics. I die cut the word “hello” from white card stock using Hello There Die-namics. Finally I mounted all elements as shown to A2 white card base using dimensional foam tape.   YoonsunHur-201604-MFTRC-DAY3-B002

Make sure to check out MFT Blog for all the info for today along with links to all the other DT member’s blog posts.

See you tomorrow for more countdown fun! Have a wonderful day!

Keep smiling and be blessed! God bless you all!
Love Love Love RejoicingCrafts

http://static.inlinkz.com/ppr.js

SSS Rainbow Flowers

Hello crafty friends!
Today I want to share with you my rainbow watercolour card with SSS Simple Poinsettia Cutouts Die.
SSS-Flower-DIeHere is what I came up with:
YoonsunHur-20160129-SSS001
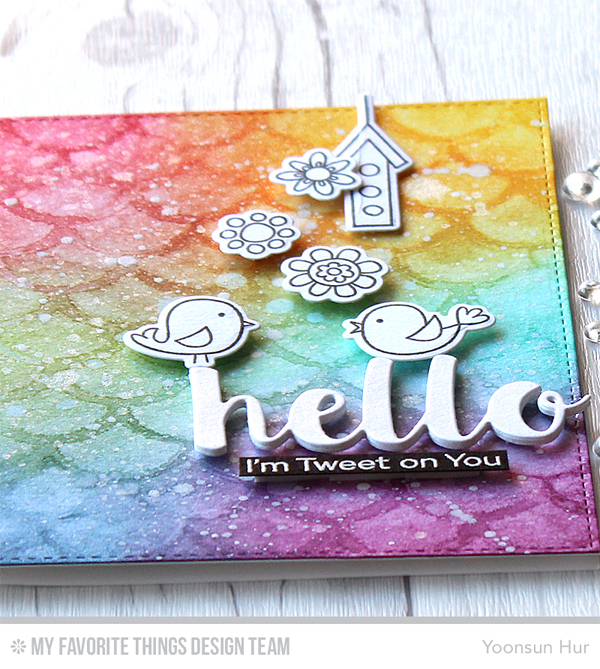
To create the card, I 1) Die cut Simple Poinsettia Cutouts at the top & bottom part of watercolour paper panel – I die cut the panel using a Stitched Rectangle die. 2) Coloured the panel with Distress inks using a flat brush: I used Festive Berries, Mustard SeedPeacock Feathers, and Faded Jeans. 3) Spritzed over the panel with Ranger Perfect Pearls Mist. 4) Stamped the sentiment from Flowers On My Mind set on this panel in pigment black. 5) Mounted the watercoloured panel on top-folded Fog Gray card base using dimensional foam tape. 6) Embellished with a few PPP clear sequins.
YoonsunHur-20160129-SSS002
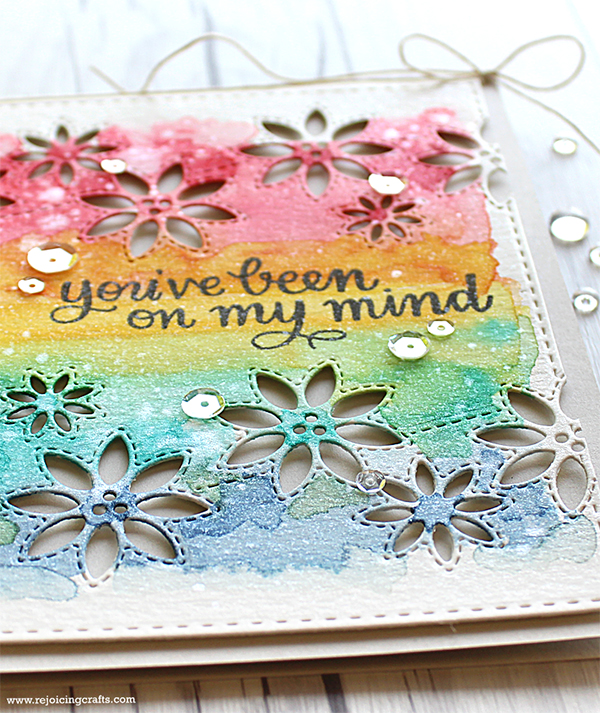
It’s so sleek and shiny, isn’t it?
YoonsunHur-20160129-SSS003

 That’s it for today. Thank you so much for stopping by. Have a fabulous day!

Keep smiling and be blessed! God bless you all!
Love Love Love RejoicingCrafts

http://static.inlinkz.com/ppr.js

MFT January Release Countdown – Day 2

Hello crafty friends, I hope you had a wonderful weekend!
Welcome to the My Favorite Things January Release Countdown Day 2.
NewReleaseCountdown_Day2
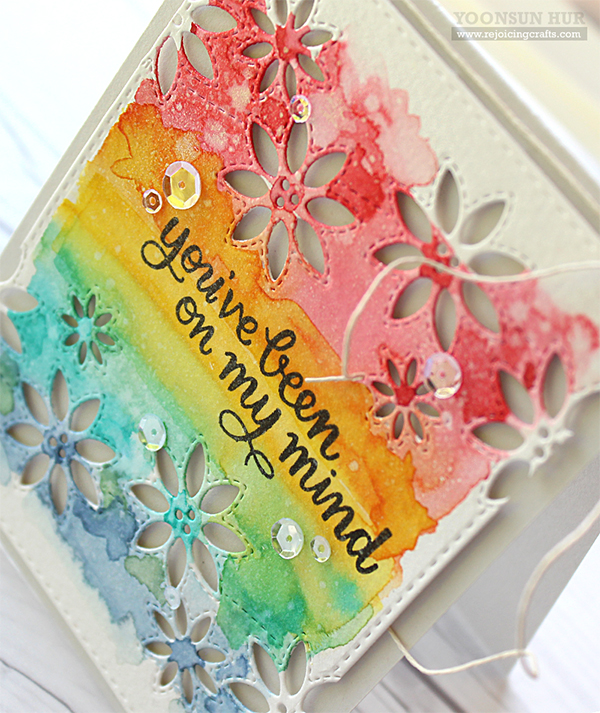
Today I want to share with you a couple cards that I’ve made using Undeniable Chemistry stamp setChemistry Set Die-namics, and Diamonds Die-namics.
YoonsunHur-201601-MFTRC-DAY2-B001For my first card, I 1) Stamped chemical elements from Undeniable Chemistry set onto watercolour paper panel using embossing ink, white heat embossed. 2) Blended on the stamped panel with MFT dye inks: (from the top left-hand corner) Red HotLemon DropSour AppleSummer SplashBlueberry, and Pure Plum. 3) Added water droplets and opaque white ink splatters. 4) Die cut Chemistry Set from white card stock, inked them with Razzle Berry and Blu Raspberry dye inks. 5) Mounted all elements as shown to A2 size white card base using double-side tape.

YoonsunHur-201601-MFTRC-DAY2-A001
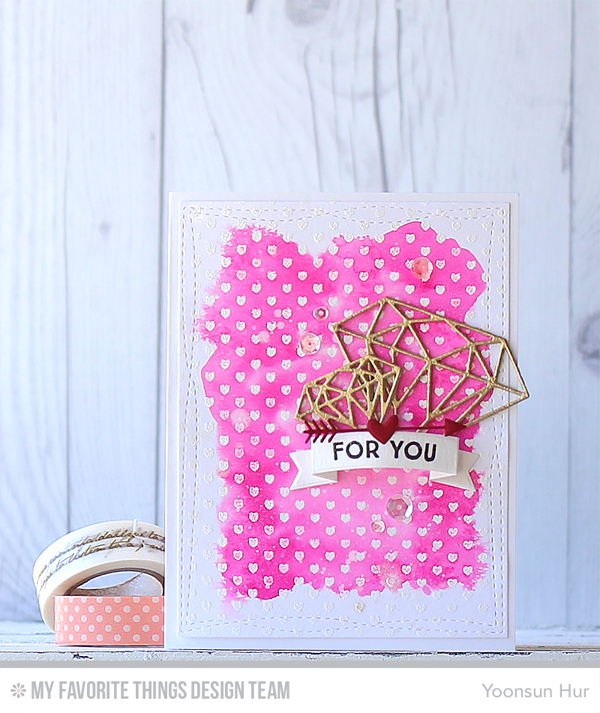
For my second card, I 1) Stamped Mini Hearts Background onto watercolour paper using embossing ink, white heat embossed. 2) Trimmed it with Wonky Stitched Rectangle STAX Die-namics. 3) Watercoloured the stamped panel with Picked Raspberry Distress ink. 4) Die cut Diamonds from white card stock five times each, made two thicker diamond die cuts, then gold heat embossed. 5) Stamped the sentiment from So Much Love set on white card stock using Black Licorice Hybrid ink, die cut it with Tag Builder Blueprints 5 Die-namics. 5) Mounted all elements as shown to A2 size white card base. 6) embellished with a few PPP clear sequins.
YoonsunHur-201601-MFTRC-DAY2-A002

Make sure to check out MFT Blog for all the info for today along with links to all the other DT member’s blog posts.

See you tomorrow for more countdown fun! Have a wonderful day!

Keep smiling and be blessed! God bless you all!
Love Love Love RejoicingCrafts

http://static.inlinkz.com/ppr.js

SSS STAMPtember® – Band Camp

Hello crafty friends, I hope you had a wonderful weekend!
Stamptember-Wplus9Today I want to share with you a couple cards I’ve made using so precious Band Camp stamp set. It is made in collaboration with Wplus9 for STAMPtember®!!
Stamptember-Wplus9
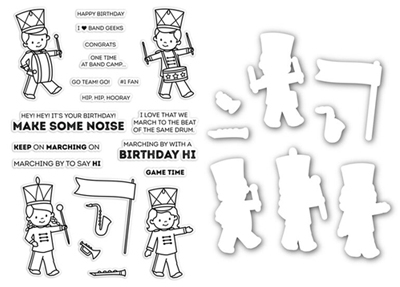
The band camp stamp set took my breath away when I first saw it. These 4 adorable kids in the set looked like Christmas toy soldiers and it reminded me of my warm Christmas memories. Oh! I really, truly love it!!

YoonsunHur-20150921-SSS-Stamptember01
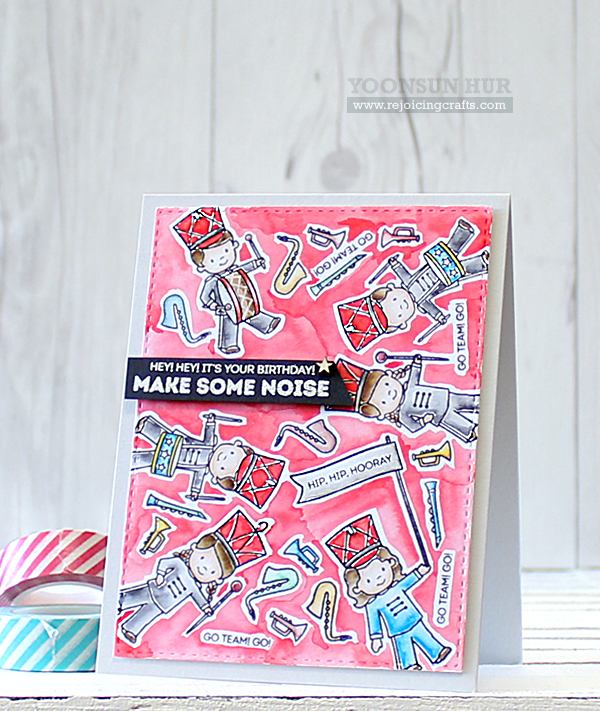
To create my first card, I 1) Stamped lots of images onto the watercolour panel randomly using VersaFine pigment ink Onyx Black. 2) Coloured them with Distress markers and then coloured the rest areas with Festive Berries Distress ink. 3) Stamped the sentiment on the black card stock using embossing ink, white heat embossed. 4) Mounted all elements as shown to the Fog Gray card stock.
YoonsunHur-20150921-SSS-Stamptember02
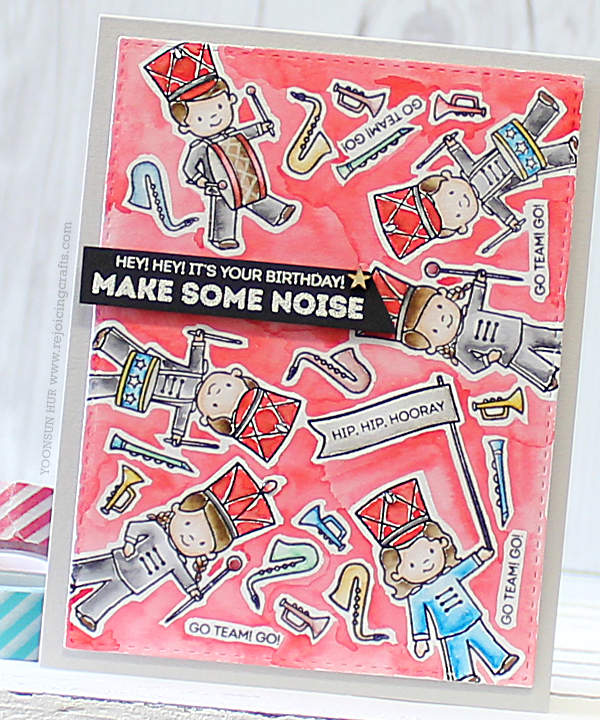
I will definitely use it again with Christmas sentiments during Christmas season!

YoonsunHur-20150921-SSS-Stamptember03
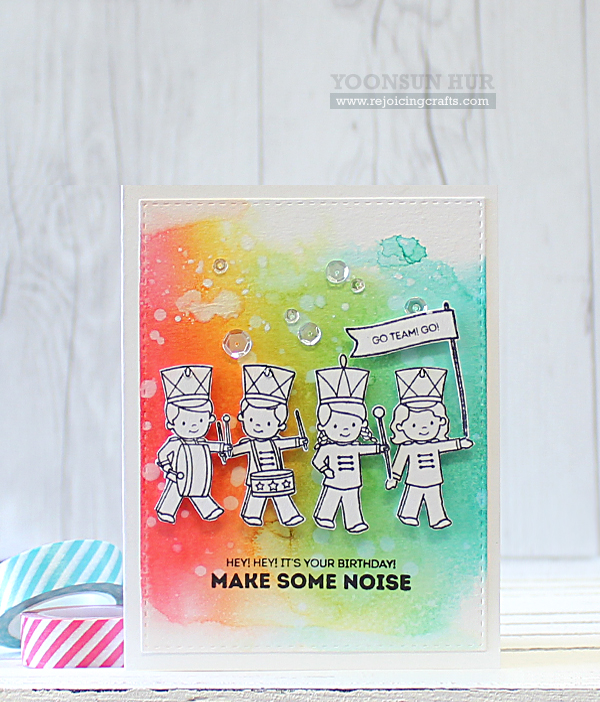
For my second card, I was totally inspired by super talented Debby Hughes’s watercolor rainbow card. She (absolutely) blew me away with her watercolour masterpiece!!

To create the card, I 1) Blended on the watercolour panel with Festive Berries, Mustard SeedMowed Lawn, and Peacock Feathers Distress inks using mini blending tool. 2) Spritzed the inked panel with water and added water droplets. 3) Stamped the kids and banner from the Band Camp set on the white card stock using black pigment ink and then fussy cut them. 4) Stamped the sentiment at the bottom of the inked panel and then mounted it on the white card base. 5) Adhered the kids and banner as shown to the inked base using dimensional foam tape. 6) Embellished with a few clear sequins.

That’s it for today. Thank you so much for stopping by. Happy STAMPtember®!!!

Keep smiling and be blessed! God bless you all!
Love Love Love RejoicingCrafts

http://static.inlinkz.com/ppr.js