Hello crafty friends!
I am so delighted (and excited!) to be a guest designer on Virginia’s View challenge blog today, with Kathy Racoosin. I am so honoured to be there with Kathy! I can’t believe it’s real!
Virginia’s View is definitely one of the most famous challenges, and I know that there are tons of sweet fans out there (and of course, I am one of them).
I hope you enjoy my post today. Have a good read!
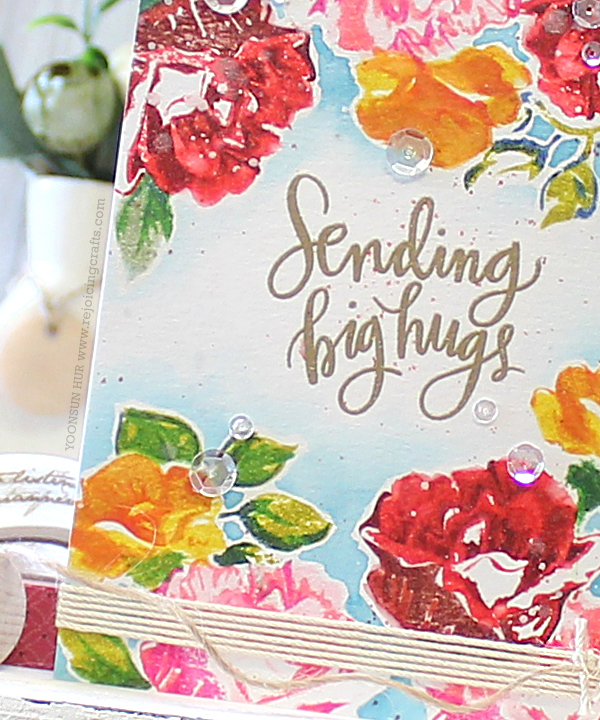
 Today is all about COLOUR! I believe that flowers are the best way to show all the colours of the rainbow. In additions, the layered petals of flowers are perfect for expressing different colours on one spot.
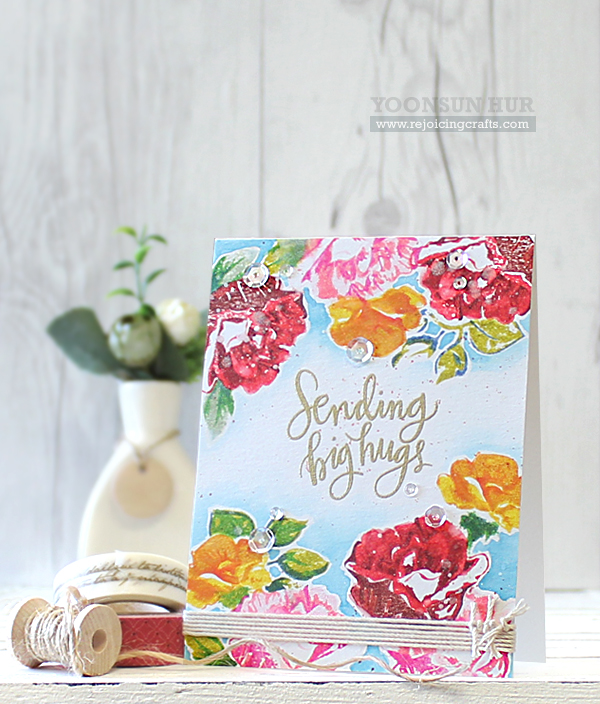 To create the card, I 1) Stamped layered flowers and leaves on watercolour paper panel using several colours of Distress inks (Red flowers: Festive Berries, Fired Brick, Aged Mahogany / Pink flowers: Spun Sugar, Worn Lipstick, Picked Raspberry / Yellow flowers: Mustard Seed, Wild Honey, Spiced Marmalade / Leaves: Crushed Olive, Mowed Lawn). 2) Stamped the sentiment at the centre of that using VersaMark embossing ink, gold heat embossed. 3) Coloured loosely around the flowers with Broken China Distress ink using waterbrush. 4) Spritzed with a Perfect Pearls Mist over the flowers. 5) Tied the bottom of the stamped panel using natural twine. 6) Mounted the panel on white card base using double-sided tape and then embellished with a few PPP clear sequins.
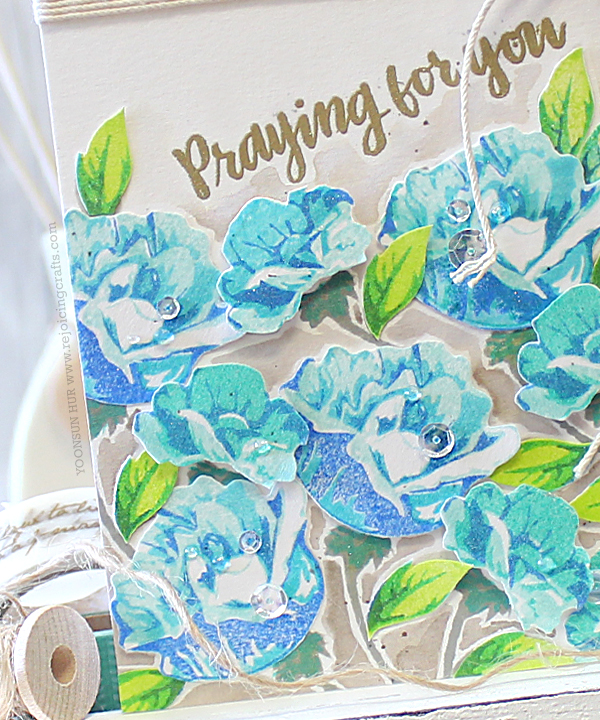
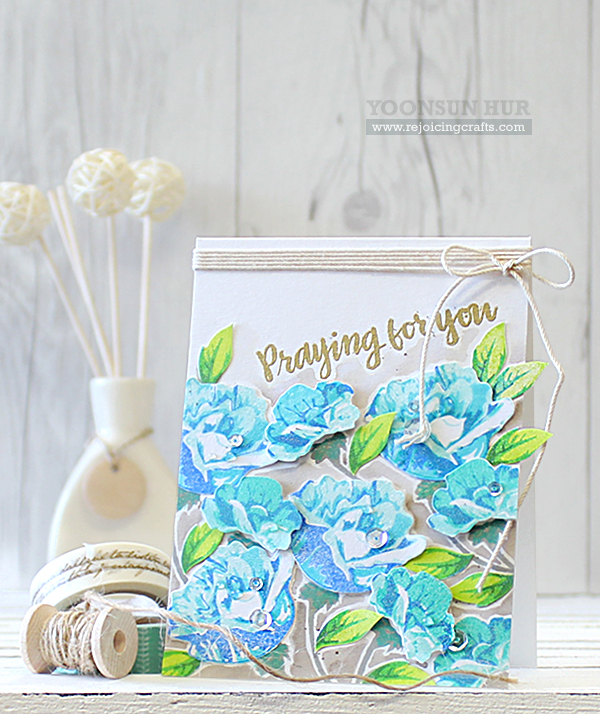 How did I make my second card? Well, it was no different to the way I made it the first card. But this time, I used cool colours instead of warm colours. I stamped the first layer of these blue flowers with SSS Lake shores hybrid ink, second layer with Audrey Blue dye ink and then the last layer with Blue Jay hybrid ink. For the leaves, I stamped the first layer with SSS Jellybean, second layer with Scuba and the last layer with Blue Jay hybrid inks.
Thank you so much for stopping by and Happy crafting!!
Keep smiling and be blessed! God bless you all!
Love Love Love RejoicingCrafts


 Oh, I love, love, love flower themed projects! LOVE making beautiful things :D
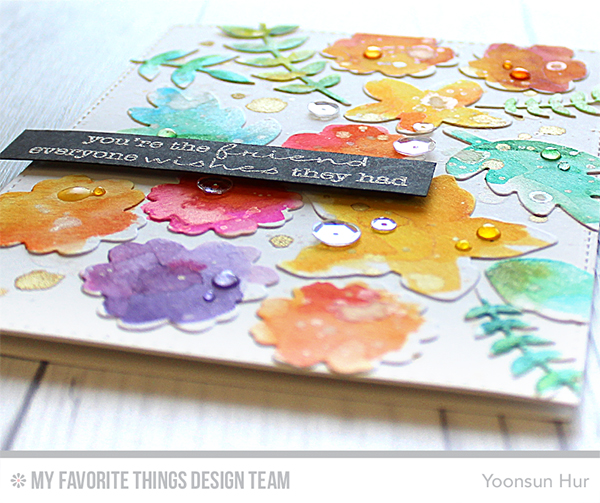 Sparkly gold ink splatter is the perfect way to add a little bit of chic to the colourful flowers!
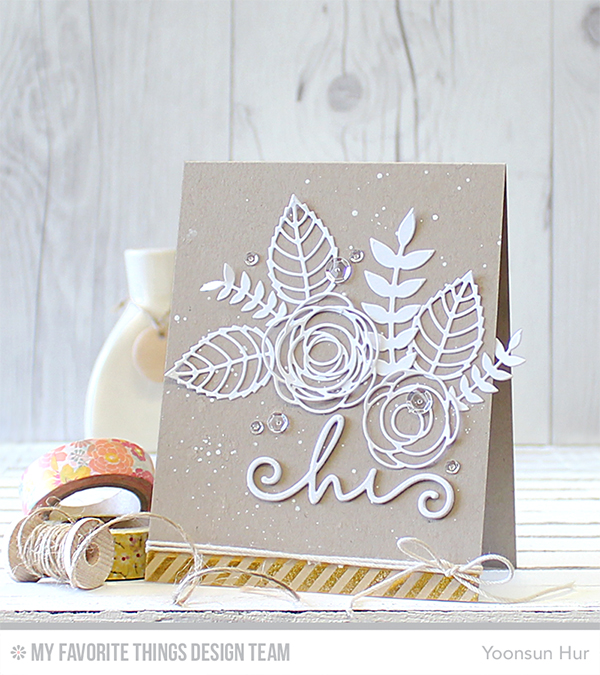 I love the combination of the colours used in this card, especially the white decoration on kraft base. It’s so simple, yet so elegant and classy! I die cut flowers, leaves, and sentiment from the white card stock using


 Today I want to share with you a couple cards I’ve made using so precious
 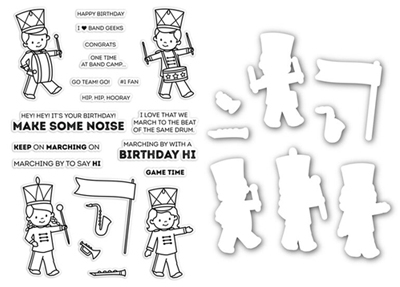 The band camp stamp set took my breath away when I first saw it. These 4 adorable kids in the set looked like Christmas toy soldiers and it reminded me of my warm Christmas memories. Oh! I really, truly love it!!
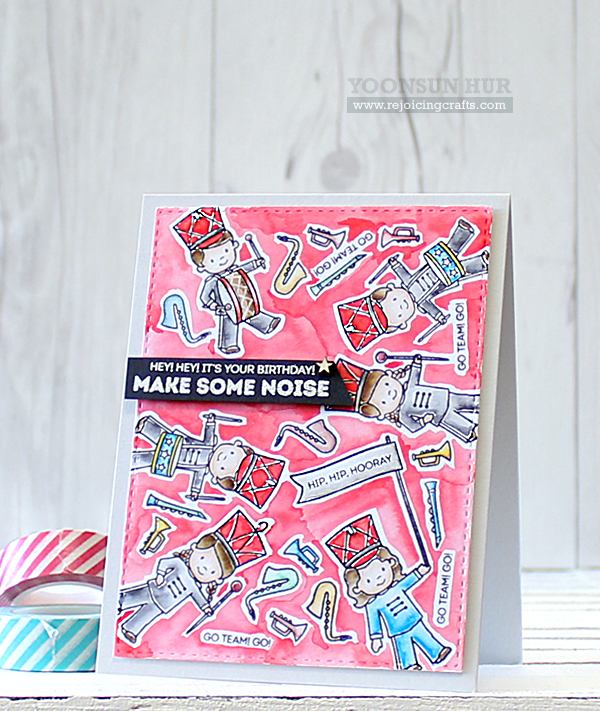 To create my first card, I 1) Stamped lots of images onto the watercolour panel randomly using
 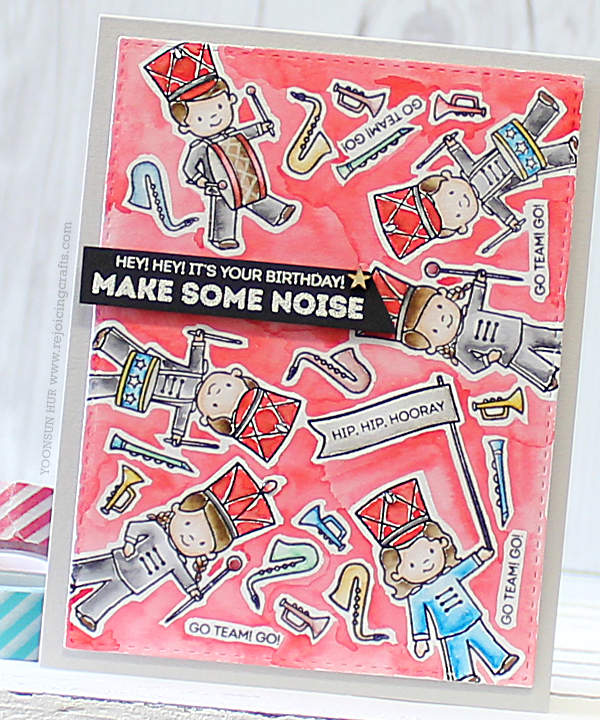 I will definitely use it again with Christmas sentiments during Christmas season!
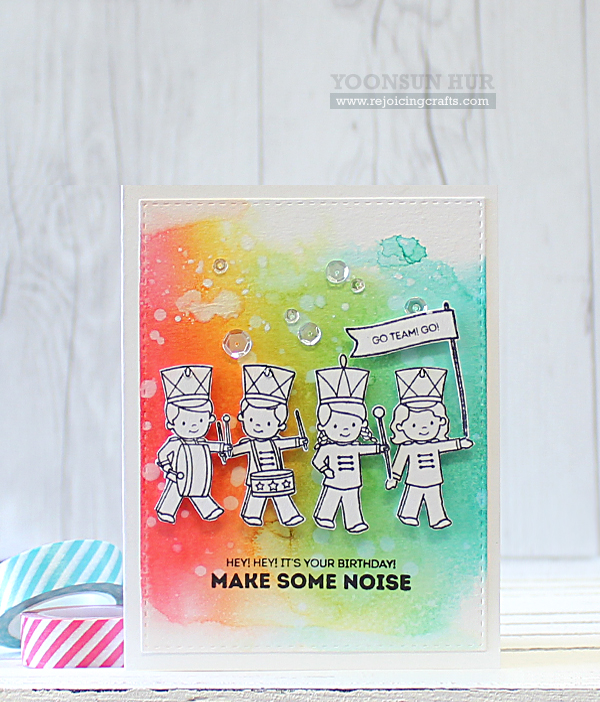 For my second card, I was totally inspired by super talented


