Hello crafty friends, happy weekend!
Welcome to the My Favorite Things September Release Countdown Day 4.

Today I am sharing with you a couple cards using so sweet Birdie Brown Mon Chéri and Harvest Mouse Stamp Sets. If you’re a Birdie Brown lover, today’s your day! For my first card, I made a shaker card with Mon Chéri Stamp Set. 1) I stamped the girl on the watercolour paper using black pigment ink, coloured it with Peerless watercolours and then die cut it with Mon Chéri Die-namics. 2) I stamped the Eiffel Tower on the watercolour paper with embossing ink, white heat embossed and then blended on the stamped paper with Red Hot, Lush Lagoon dye inks using mini blending tool -Blue, white, and red are the symbolic colors of the French National flag. 3) For my card front, I repeatedly stamped “Oh La La” on the Primitive White card stock using Steel Grey dye ink. 4) I mounted the blended panel on the Primitive White card base at first, added mixed sequins and then covered it with Stitched Oval Frame. 5) Lastly, I mounted the girl and the sentiment on top of the card using dimensional foam tape.

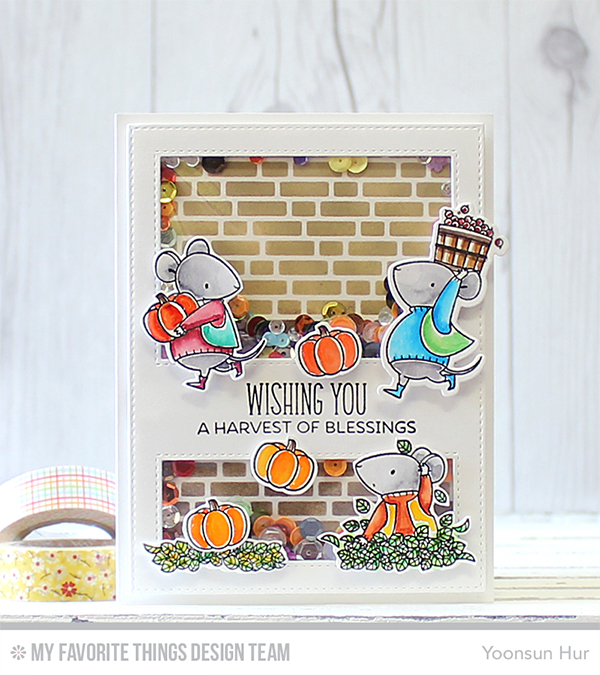 For my second card, I used Harvest Mouse Stamp Set as my main supply. First, I 1) Stamped all cute images from the Harvest Mouse Stamp Set onto the watercolour paper using black pigment ink, coloured them with Peerless watercolours and then die cut them with Harvest Mouse Die-namics. 2) Die cut Stitched Cover-Up Vertical from the white card stock, stamped the sentiment from the Harvest Mouse Stamp Set using black ink. 3) Laid the English Brick Wall Stencil over the white card stock and then inked it with Kraft, Chocolate Brown hybrid inks using sponge daubers. 4) Adhered the brick wall panel on the white card base at first, added mixed sequins and then covered it with Stitched Cover-Up Vertical Frame. 5) Mounted all watercoloured images as shown to the sentiment panel using dimensional foam tape.

Make sure to check out MFT Blog for all the info for today along with links to all the other DT member’s blog posts.
See you tomorrow for more countdown fun! Have a wonderful weekend!
Keep smiling and be blessed! God bless you all!
Love Love Love RejoicingCrafts


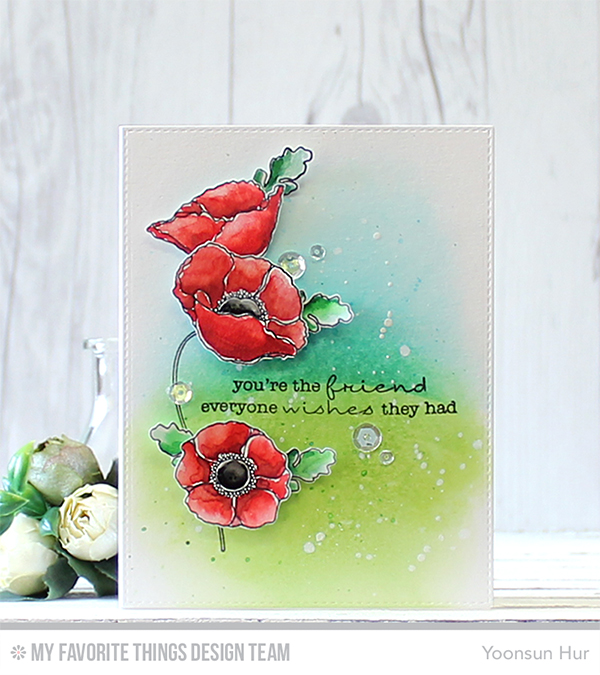 For my first card, I 1) Blended onto the
 For my second card, I made watercolour flower pattern. These days I am obsessed with making my own pattern papers. I don’t know why I like it, but it is so much fun and looks so pretty :D
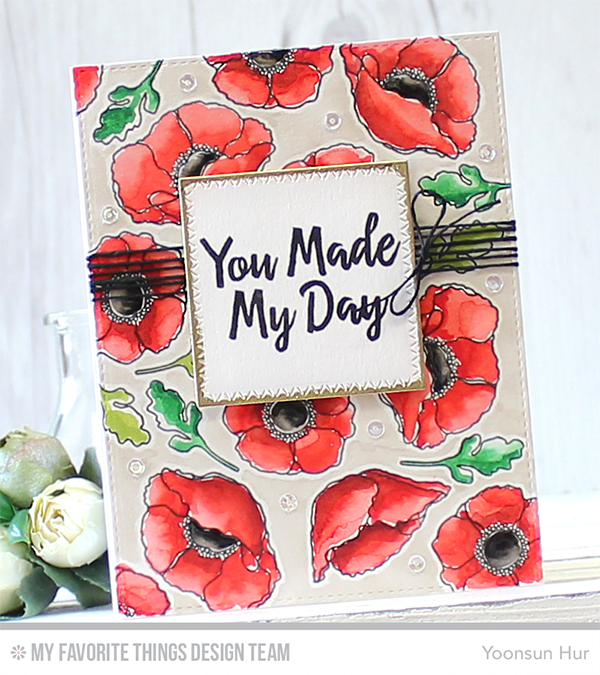
 For my last card, I used so beautiful


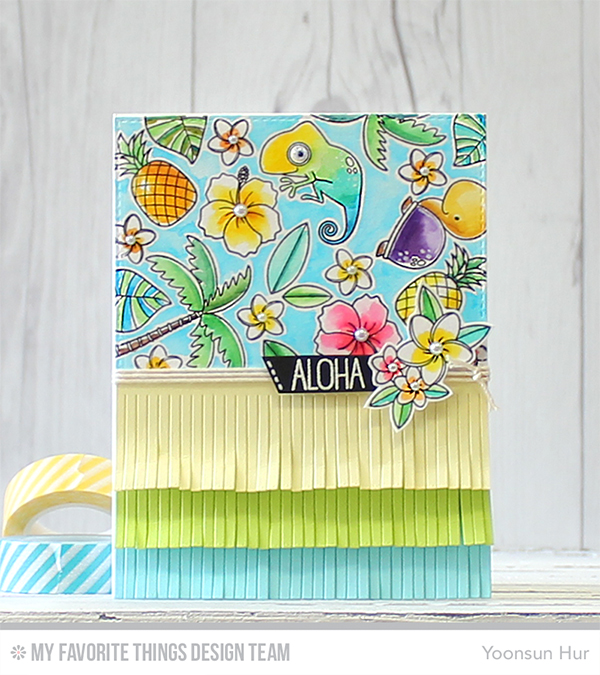 To create the card, I 1) Stamped the tropical images from the


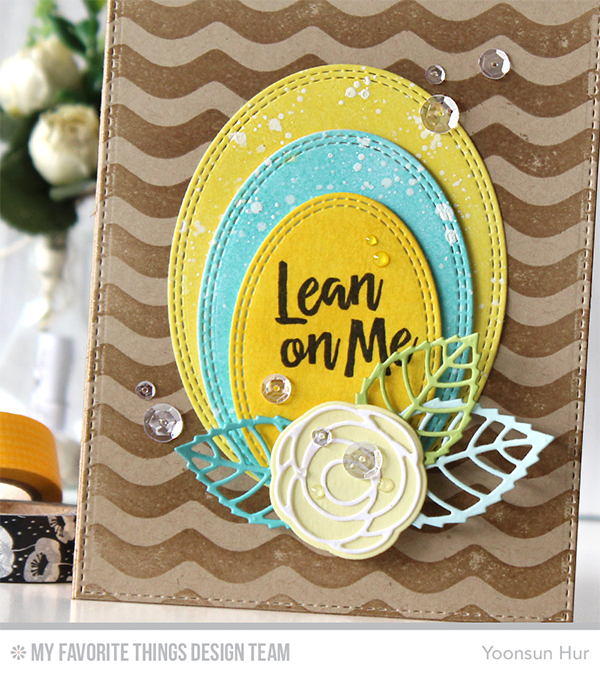
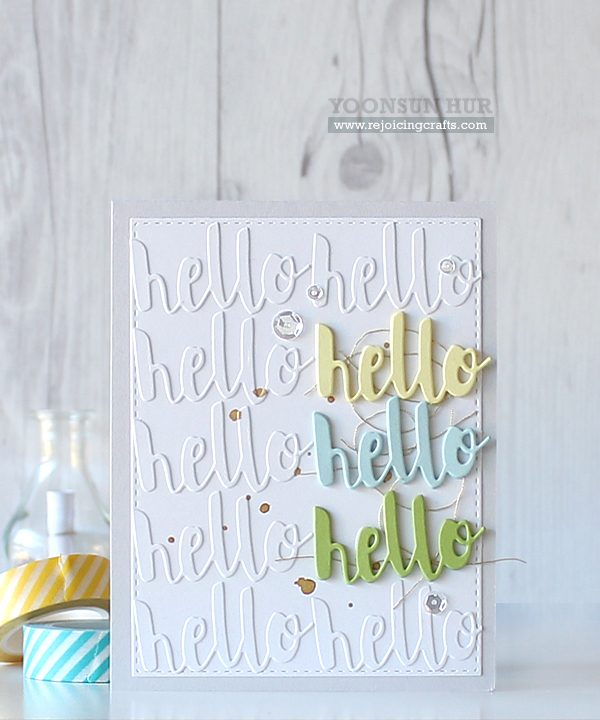 For my first card, I made a subtle tone-on-tone background. I 1) Die cut ‘
 For my second card, I used ‘


 We can see lots of gorgeous STAX Die-namics, and even