Virginia’s View Challenge – All Things Colored

Hello crafty friends!
I am so delighted (and excited!) to be a guest designer on Virginia’s View challenge blog today, with Kathy Racoosin. I am so honoured to be there with Kathy! I can’t believe it’s real!

Virginia’s View is definitely one of the most famous challenges, and I know that there are tons of sweet fans out there (and of course, I am one of them).

I hope you enjoy my post today. Have a good read!
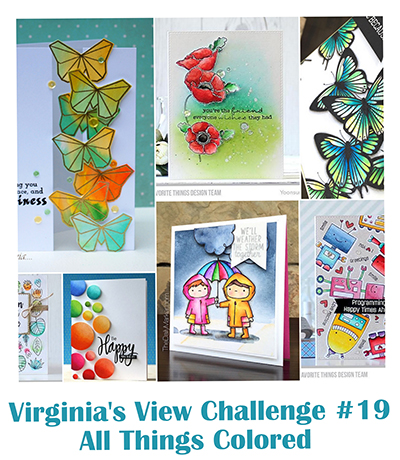
VirginiaViewBannerToday is all about COLOUR! I believe that flowers are the best way to show all the colours of the rainbow. In additions, the layered petals of flowers are perfect for expressing different colours on one spot.
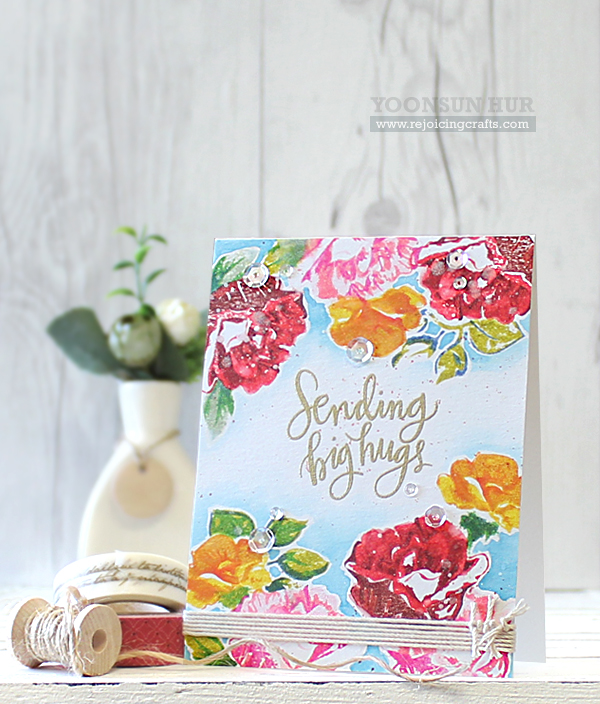
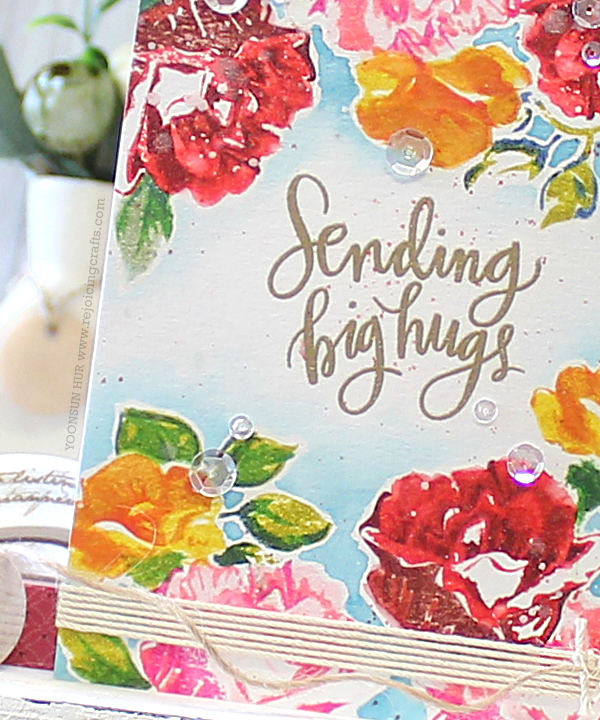
YoonsunHur-VirginiaView-ATo create the card, I 1) Stamped layered flowers and leaves on watercolour paper panel using several colours of Distress inks (Red flowers: Festive Berries, Fired Brick, Aged Mahogany / Pink flowers: Spun Sugar, Worn Lipstick, Picked Raspberry / Yellow flowers: Mustard Seed, Wild Honey, Spiced Marmalade / Leaves: Crushed Olive, Mowed Lawn). 2) Stamped the sentiment at the centre of that using VersaMark embossing ink, gold heat embossed. 3) Coloured loosely around the flowers with Broken China Distress ink using waterbrush. 4) Spritzed with a Perfect Pearls Mist over the flowers. 5) Tied the bottom of the stamped panel using natural twine. 6) Mounted the panel on white card base using double-sided tape and then embellished with a few PPP clear sequins.
YoonsunHur-VirginiaView-A02
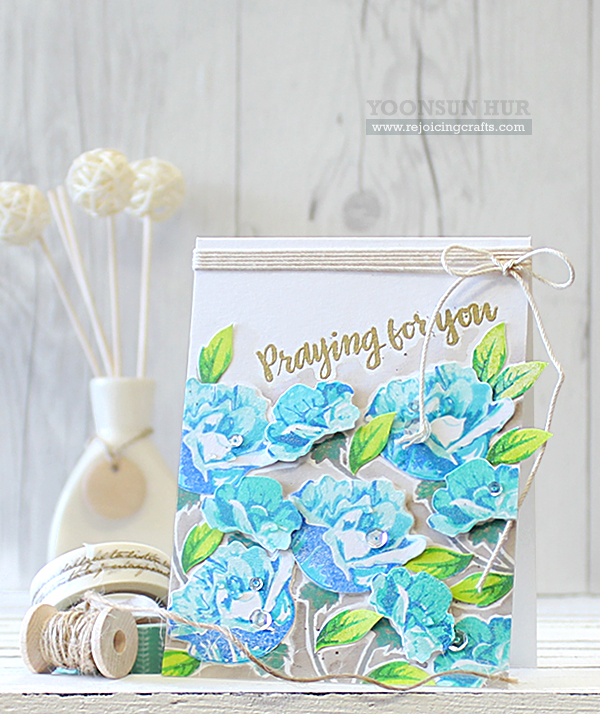
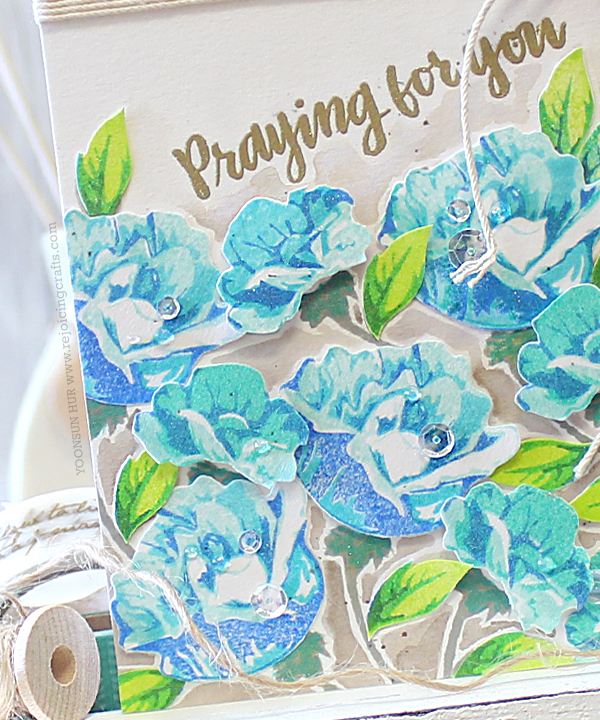
YoonsunHur-VirginiaView-BHow did I make my second card? Well, it was no different to the way I made it the first card. But this time, I used cool colours instead of warm colours. I stamped the first layer of these blue flowers with SSS Lake shores hybrid ink, second layer with Audrey Blue dye ink and then the last layer with Blue Jay hybrid ink. For the leaves, I stamped the first layer with SSS Jellybean, second layer with Scuba and the last layer with Blue Jay hybrid inks.
YoonsunHur-VirginiaView-B02
Thank you so much for stopping by and Happy crafting!!

Keep smiling and be blessed! God bless you all!
Love Love Love RejoicingCrafts

http://static.inlinkz.com/ppr.js

SSS STAMPtember® – Layered Flowers

Hello crafty friends, I hope you had a great weekend!
exclusiveheros_altnewToday I want to share with you the card I’ve made using so very beautiful STAMPtember® Altenew collaboration Layered Flowers stamp set.
SSS-Stamptember-AltenewAltenew layered flower stamps look very much like real flowers and this time was no exception!!

Here is what I came up with:
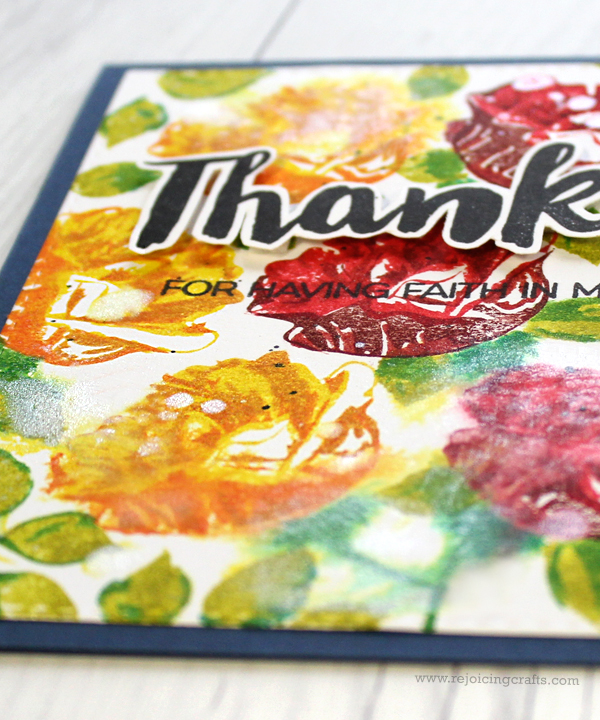
YoonsunHur-20150928-SSS-Stamptember01To create the card, I 1) Stamped the layering flowers from the Layered Flowers stamp set on the watercolour panel using several colours of Distress inks – Red flower: Festive Berries, Fired Brick, Aged Mahogany / Yellow flower: Mustard Seed, Wild Honey, Spiced Marmalade / Leaves: Crushed Olive, Mowed Lawn. 2) Spritzed the stamped panel with Ranger Perfect Pearls Mist. 3) Stamped ‘Thanks’ from the Thanks For Being There stamp set on the white card stock using black pigment ink and then fussy cut it. 4) Mounted all elements as shown to the SSS Soft Navy card stock.
YoonsunHur-20150928-SSS-Stamptember02

Make sure to check out the Simon Says Stamp blog for more inspiration!

Thank you so much for stopping by. Happy STAMPtember®!!!

Keep smiling and be blessed! God bless you all!
Love Love Love RejoicingCrafts

http://static.inlinkz.com/ppr.js

MFT September Die-namic Design – Flowers and Foliage

Hello crafty friends!
Welcome to My Favorite Things September Die-namics Design! This month’s theme is Flowers and Foliage.
MFT-DienamicsDesignOur collection of Flowers and Leaves Die-namics runs the gamut from lovely layers to rolled dimensional delights; romantic, vintage, bold & graphic. There is a design for virtually any application and our team is sharing a little bit of everything with us for today’s Die-namics Design Challenge.

YoonsunHur-20150922-MFTDD-A01 Oh, I love, love, love flower themed projects! LOVE making beautiful things :D

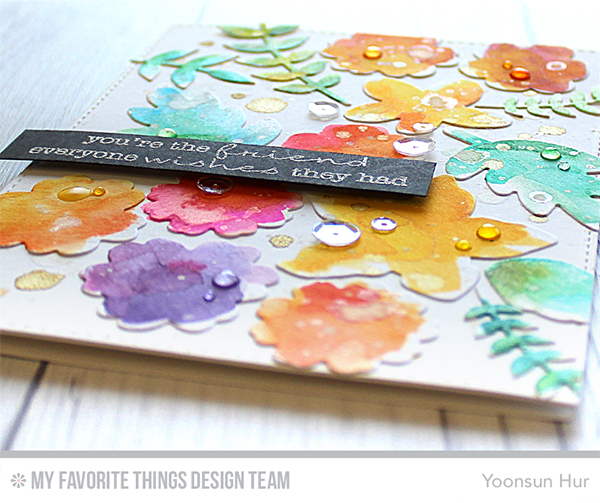
For my first card, I made watercolour flower card with several flower die cuts. First I 1) Die cut flowers & leaves from the watercolour paper using Modern Blooms and Wild Greenery Die-namics. 2) Coloured them with Peerless watercolours. 3) Mounted all die cuts as shown to the A2 size white panel and then added gold & white ink splatters. 4) Stamped the sentiment from the Delicate Pretty Poppies stamp set on the black card stock using embossing ink, white heat embossed. 5) Adhered the sentiment banner on the watercoloured panel using dimensional foam tape. 6) Embellished with a few clear sequins.
YoonsunHur-20150922-MFTDD-A03Sparkly gold ink splatter is the perfect way to add a little bit of chic to the colourful flowers!

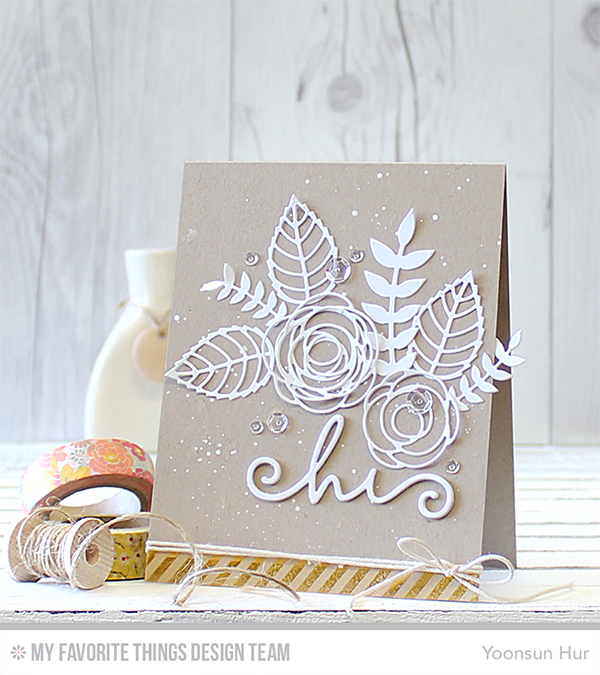
YoonsunHur-20150922-MFTDD-B01I love the combination of the colours used in this card, especially the white decoration on kraft base. It’s so simple, yet so elegant and classy! I die cut flowers, leaves, and sentiment from the white card stock using Scribble Roses Overlay, Wild Greenery, Layered Leaves, and Happy Hellos Die-namics. I then mounted all die cuts on the kraft card base using fine tip glue pen. To finish it off, I added white ink splatters and a few clear sequins.

Make sure to head over to the MFT blog today for more great projects from the design team for this months Die-namics Design.

Thank you so much for stopping by. Have a wonderful day!!

Keep smiling and be blessed! God bless you all!
Love Love Love RejoicingCrafts

http://static.inlinkz.com/ppr.js

MFT September Creative Challenge – Gold Glitz

Hello crafty friends, welcome to My Favorite Things September Creative Challenge!
PrintFrom specialty papers and heat embossing, to luscious texture mediums and sequins…the addition of a hint of gold to your crafting is sure to inject some glitz and glamour into your projects. This month our team is going glam sharing shiny new projects that boast the most precious of crafting accents. Go for the gold with MFT!

A Touch of Gold makes flower cards more lively and beautiful!!
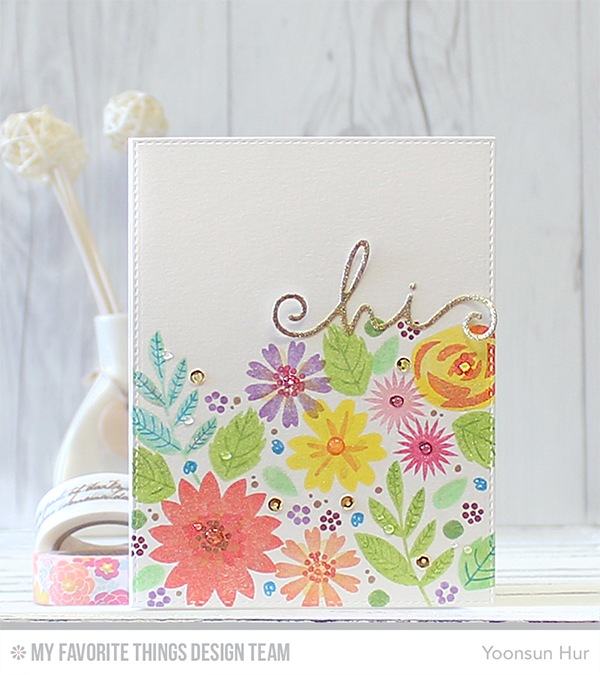
YoonsunHur-20150915-MFTCC-A01For my first card, I used glittery gold die cut sentiment. First I 1) Stamped flowers & leaves from the Modern Blooms stamp set using various colours of hybrid inks on the white paper panel. 2) Die cut ‘Hi’ from the glittery gold paper using Happy Hellos Die-namics. 3) Embellished with a few 4mm gold sequins.

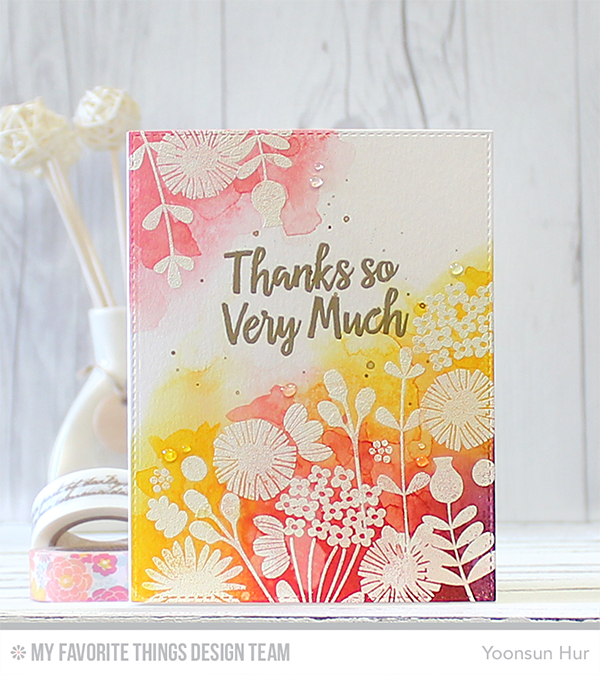
YoonsunHur-20150915-MFTCC-B01For my second card, I gold heat embossed the sentiment onto the watercolour panel. I 1) Stamped the flowers from the newly released Fall Florals stamp set onto the watercolour paper panel using embossing ink, white heat embossed them. 2) Coloured around the stamped areas with Lemon Drop, Bubblegum, Wild Cherry, and Pure Plum dye inks using a wet paintbrush. 3) Stamped the sentiment from the Thanks so Very Much stamp set using embossing ink, gold heat embossed. 4) Added some pearl gold ink splatters.
YoonsunHur-20150915-MFTCC-B02
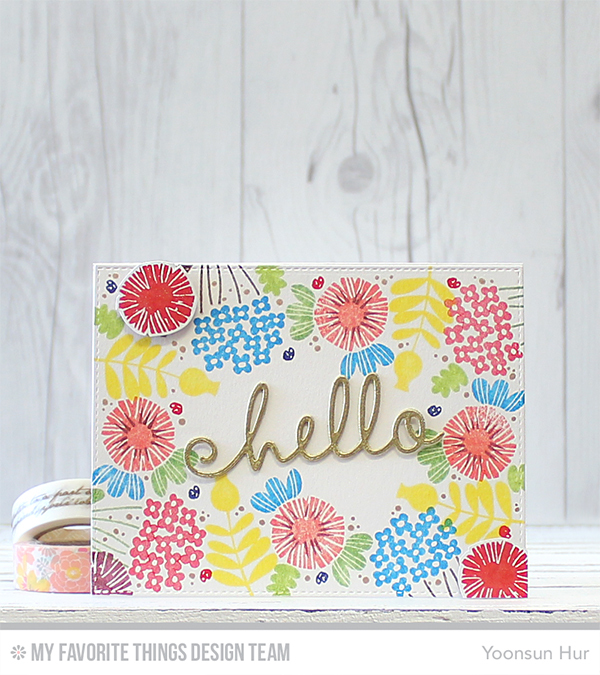
YoonsunHur-20150915-MFTCC-C01For my last card today, I heat embossed the die cut sentiment in gold embossing powder and then adhered it at the centre of the stamped panel. I stamped flowers & leaves from the Fall Florals stamp set and die cut ‘hello’ word from the Happy Hellos Die-namics.

Make sure to head over to the MFT blog today for more great projects from the design team for this months challenge.

Thank you so much for stopping by. Have a wonderful day!!

Keep smiling and be blessed! God bless you all!
Love Love Love RejoicingCrafts

http://static.inlinkz.com/ppr.js

MFT WSC244 – Happy Birthday

Hello crafty friends!
Today I want to share with you the card that I made for My Favorite Things Weekly Sketch Challenge.
MFT-WSC244
Here is what I came up with:
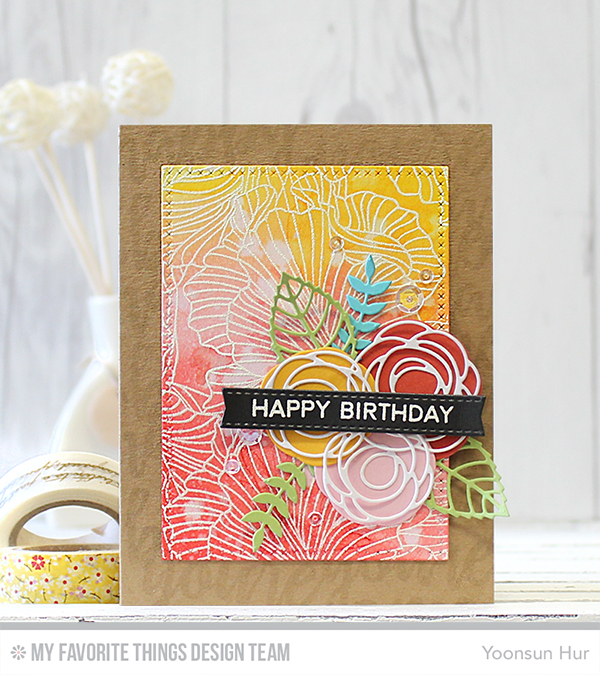
PrintFlower is my all time favourite item and a new MFT Etched Flower Background stamp is definitely one of my faves!!

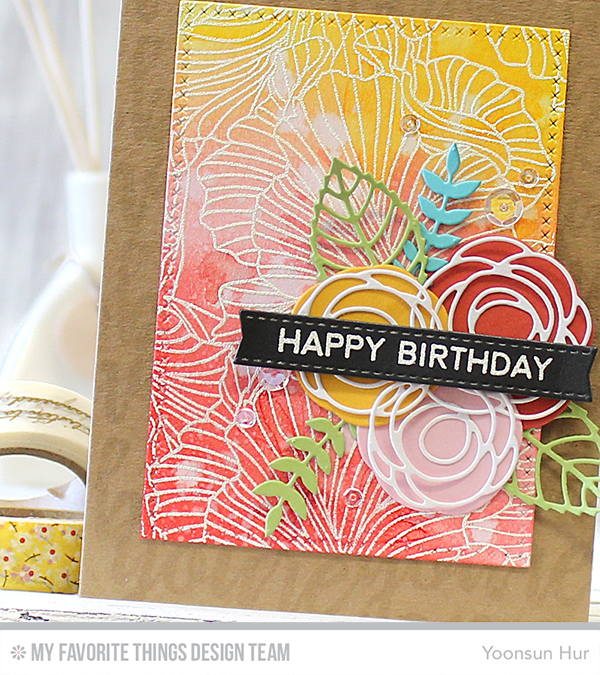
To create this card, I 1) Stamped the Etched Flower onto the watercolour paper using embossing ink, white heat embossed it. 2) Trimmed the stamped paper using Cross-Stitch Rectangle STAX Die-namics. 3) Blended onto it with Lemon Drop, Tickled Pink, Bubblegum, and Wild Cherry dye inks using mini blending tool, added water droplets. 4) Die cut flowers and leaves from the colour card stocks, combined all die cuts together. 5) Stamped the sentiment from the Soda Pop stamp set on the black banner using embossing ink, white heat embossed. 6) Mounted all elements as shown to the kraft card base. 7) Embellished a few clear sequins.
Print
Thank you so much for stopping by. Have a wonderful day!!

Keep smiling and be blessed! God bless you all!
Love Love Love RejoicingCrafts

http://static.inlinkz.com/ppr.js