Hello crafty friends!
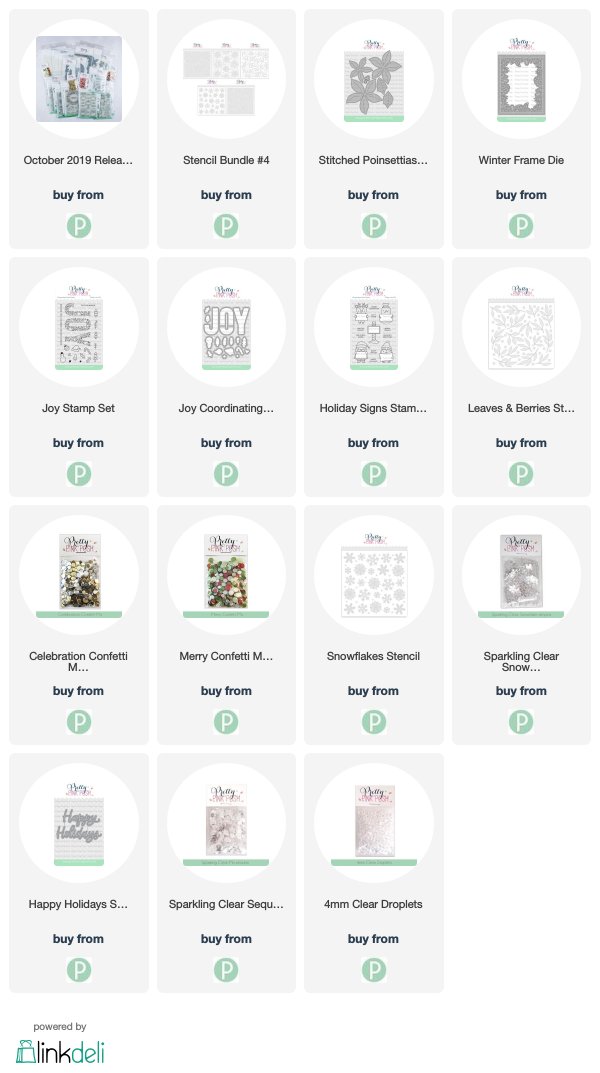
Welcome to the first day of the Pretty Pink Posh October 2019 Product Release Blog Hop. There are full of amazing Christmas products in October. Woohoo!! If you arrived here from the Debbie Olson’s blog you are on the right track.

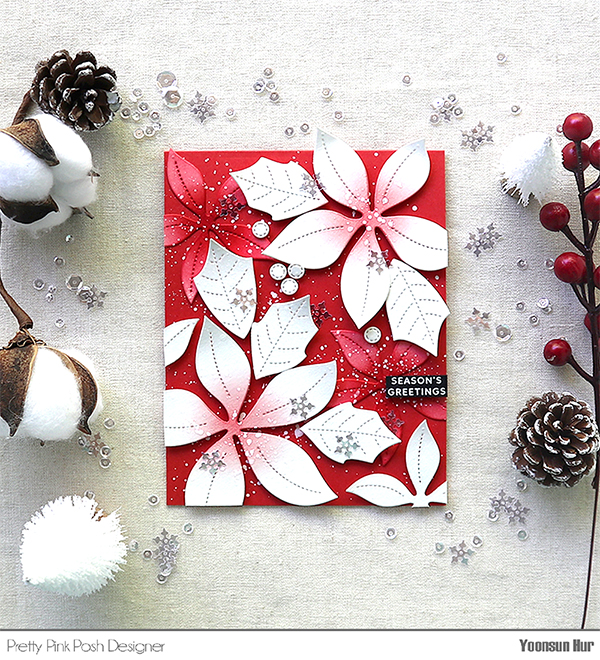 For my first card, I used the Stitched Poinsettias die set – my most favourite among the entire new products!
 I die cut Stitched Poinsettias from watercolour paper first. I then applied Festive Berries Distress ink to two small sized poinsettias as shown in the picture.
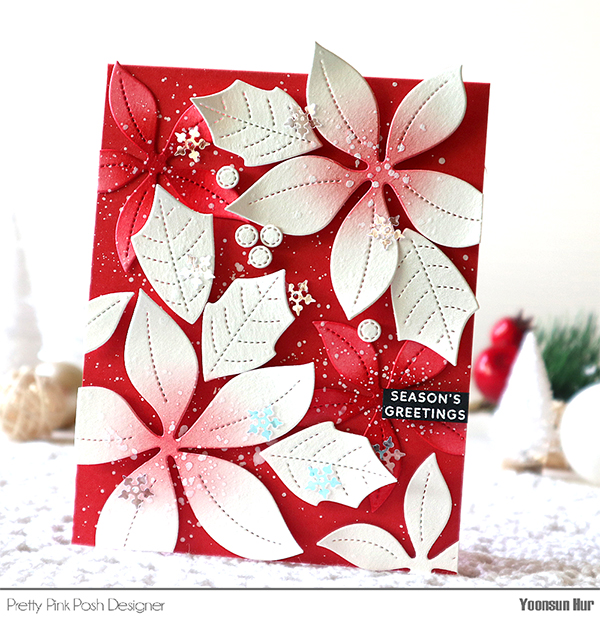 I adhered poinsettias on red card base using foam tape, and then added opaque white ink splatters all over the card because it’s Christmas!! For the sentiment, I used the Holiday Signs stamp set.
 Sparkling Clear Snowflake Sequins enhance my Christmas poinsettia card. :D
 My second card is a shaker card! I die cut the Winter Frame from watercolour paper, then applied Distress inks to the frame using blender brush. I also die cut the Stitched Poinsettias from watercolour paper, coloured them with red & green Distress inks. I adhered acetate sheet to the back of the Winter Frame.
 Behind the shaker window frame, I placed the Snowflakes stencil over the white card front, used blender brush to apply Tumbled Glass Distress ink over the stencil. I then added white ink splatters.
 On the inside of the shaker window, I poured lots of sequins – Celebration Confetti Mix, Merry Confetti Mix, Sparkling Clear Snowflake Sequins Mix and Sparkling Clear Sequins Mix.

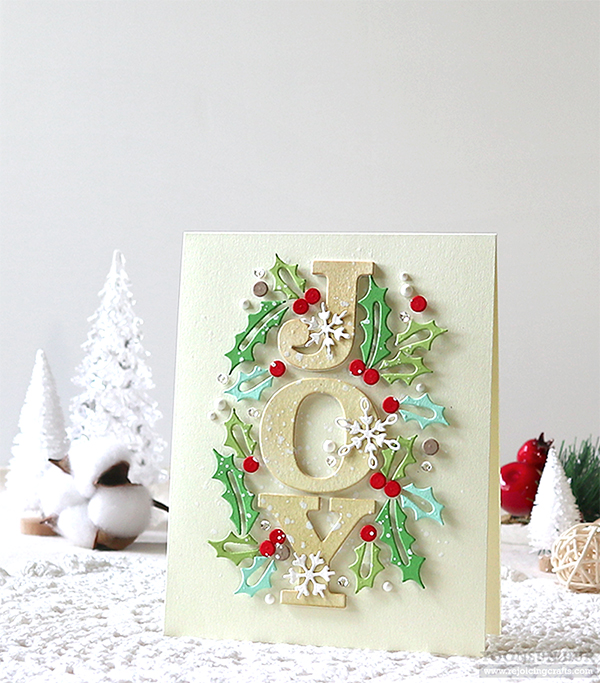
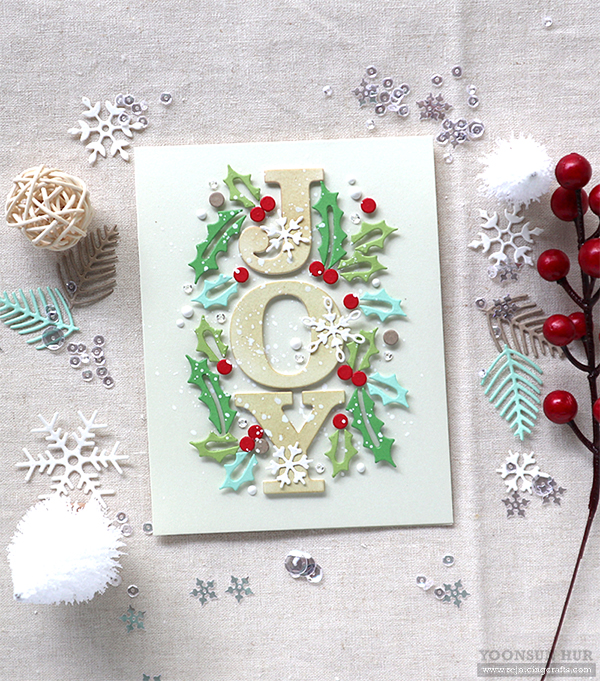
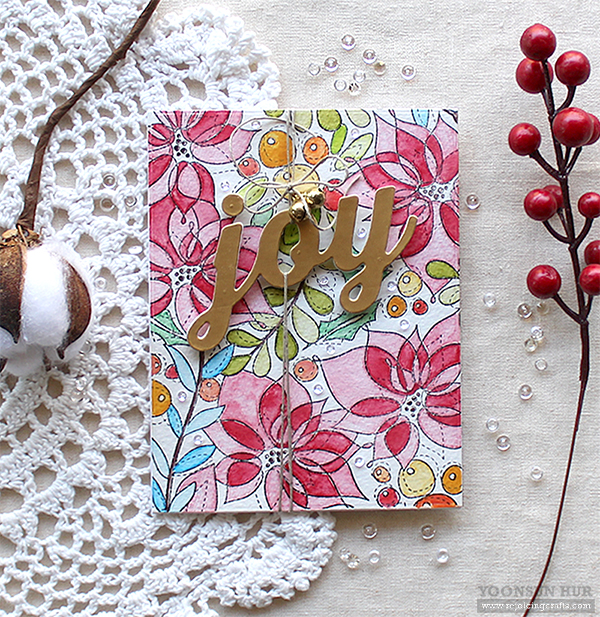
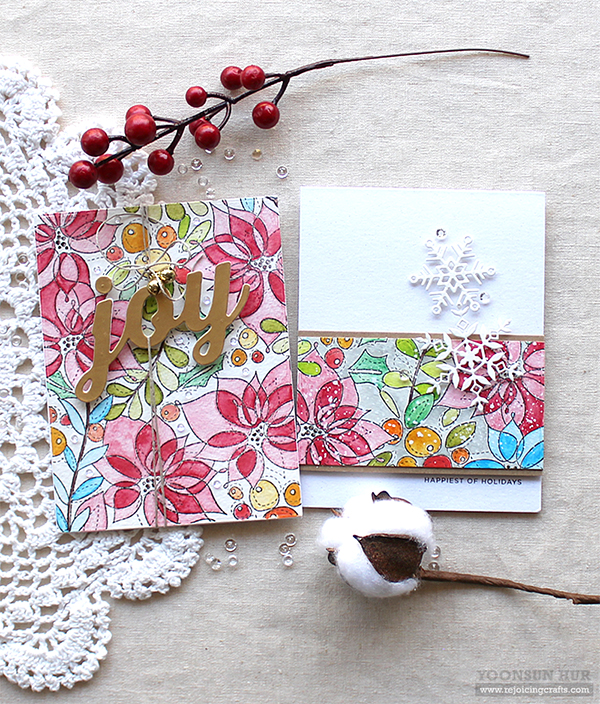
 One more card here! You might see it on the PPP blog a few days ago. I heat embossed the word “JOY” & Santa hat in gold onto watercolour paper, partially coloured the stamped images with Festive Berries & Evergreen Bough Distress inks, and then die cut it with the matching dies.
 I die cut the poinsettia parts from watercolour paper, applied Distress inks onto them using blender brush, and then glued the layers together using foam tape. I LOVE this new Stitched Poinsettias so much!! :D
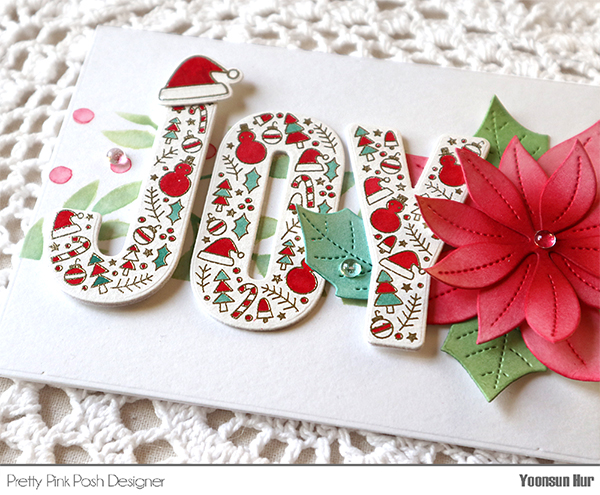 I mounted all elements as shown in the picture using foam tape, then embellished with a few clear droplets.

GIVEAWAY!!
There are 4 $25 gift certificates up for grabs (two winners each day). Winners will be picked randomly along the blog hop. Comments must be left by 11:59 PM PST on 10/22/2019. Winners will be announced on the PPP blog.
BLOG HOP LIST:
Pretty Pink Posh blog
Jennifer McGuire
Gemma C.
Angelica Conrad
Adelle Emery
Lucia Cao
Suzy Plantamura
Debbie Olson
Yoonsun Hur (Me!!)
Jeanne Jachna
Eloise Blue
Wanda Guess
Kelly Latevola
Thank you so much for stopping by. Have a great day!
Keep smiling and be blessed. God bless you all.
Love Love Love RejoicingCrafts
 For my first card, I used the
  I adhered the word “
 For my second card, I used the
  I stamped images on watercolour paper panel using
 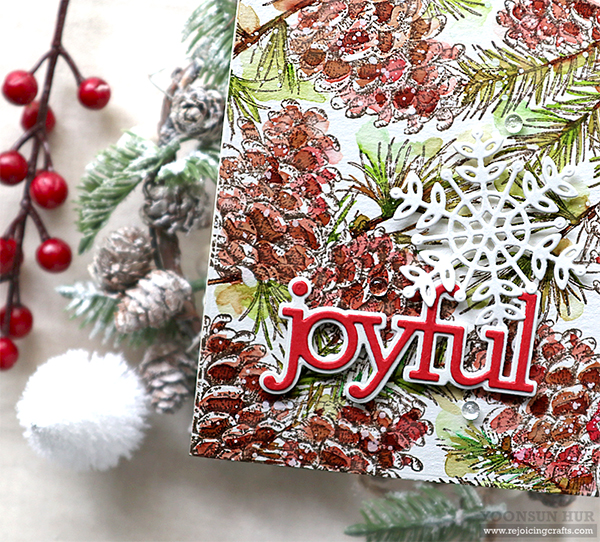 I die cut the
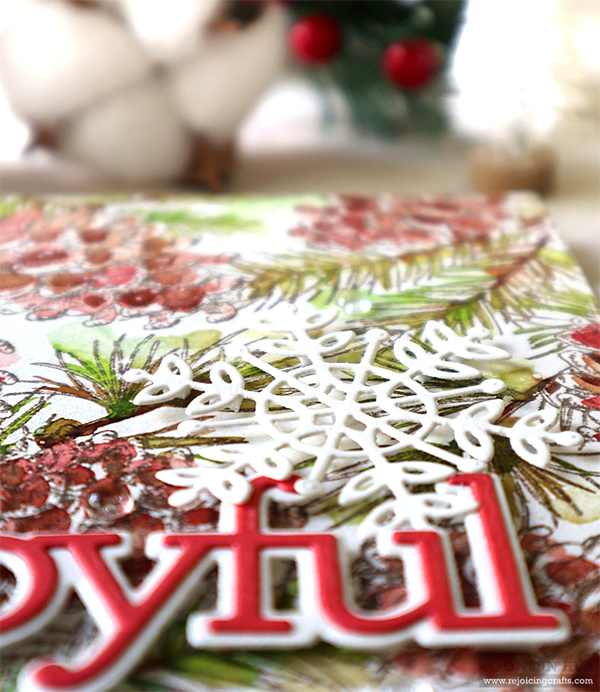

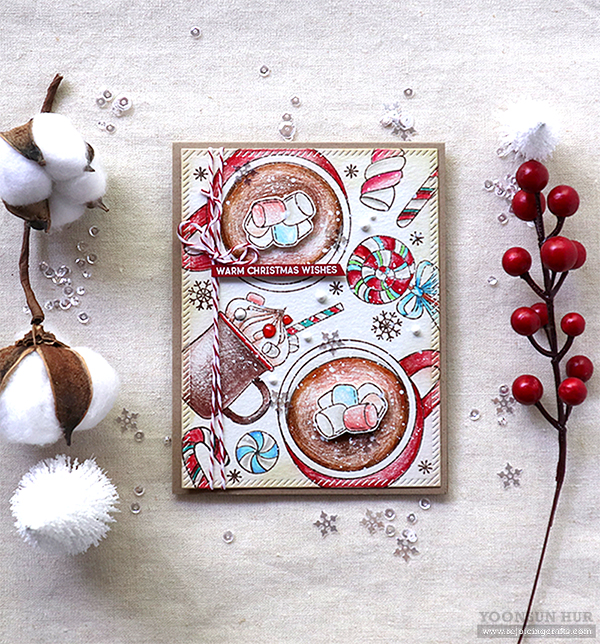
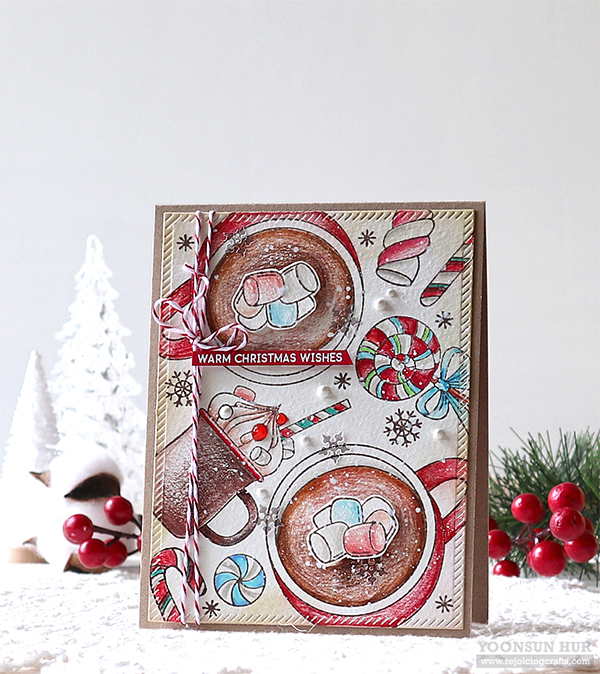 I started by stamping warm cocoa mugs, marshmallow, lots of Christmas lollies from the
 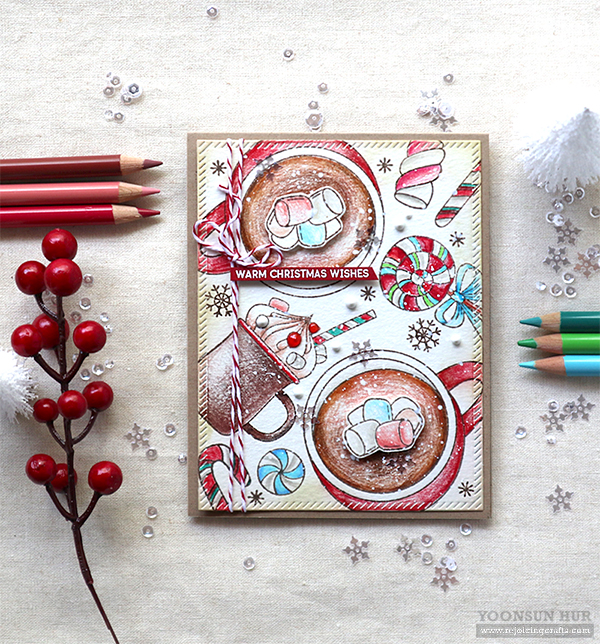 I then coloured all stamped images with polychromos colored pencils. I stamped marshmallows on a separate watercolour paper in dark brown, coloured them with polychromos colored pencils as well, and then fussy cut them out.
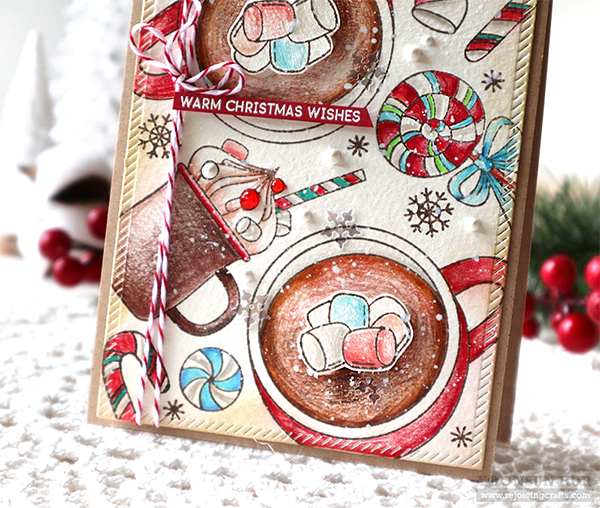 For the sentiment, I heat embossed it in white onto red card stock, trimmed it down as a small banner. I mounted the panel on kraft card base using double-sided tape, then added opaque white ink splatters, red & white bakers twine, clear snowflake sequins and white dots!! :D
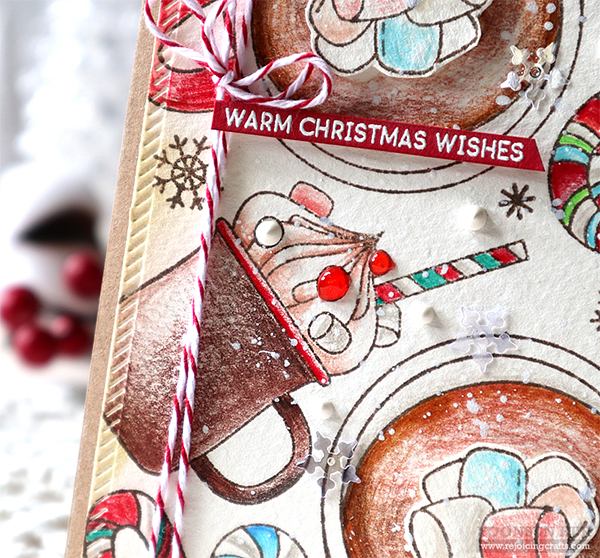

 For my card today, I only used die sets. I die cut the Dala horse from
 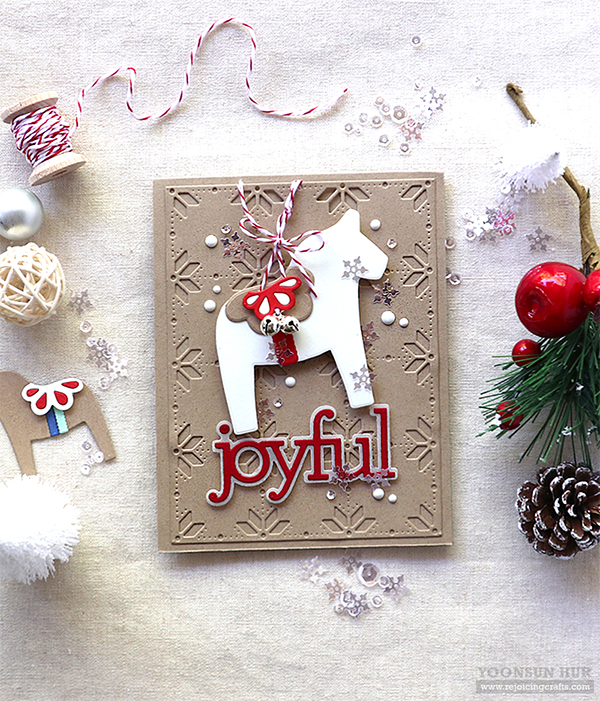 I also die cut the sentiment “
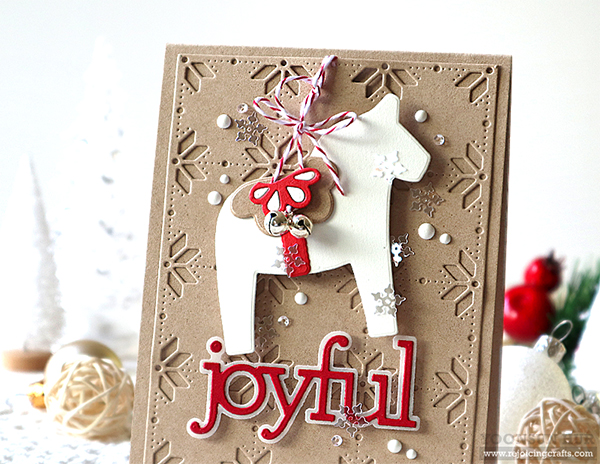
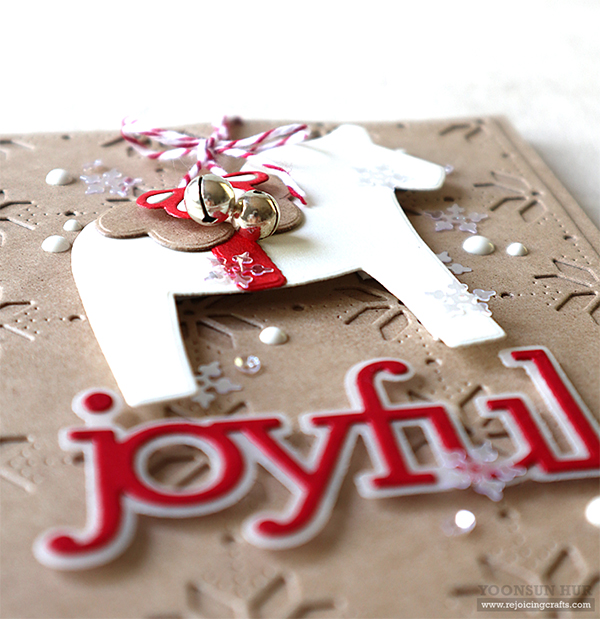 Christmas jingle bells make me feel very warm and cozy, aren’t they?!!
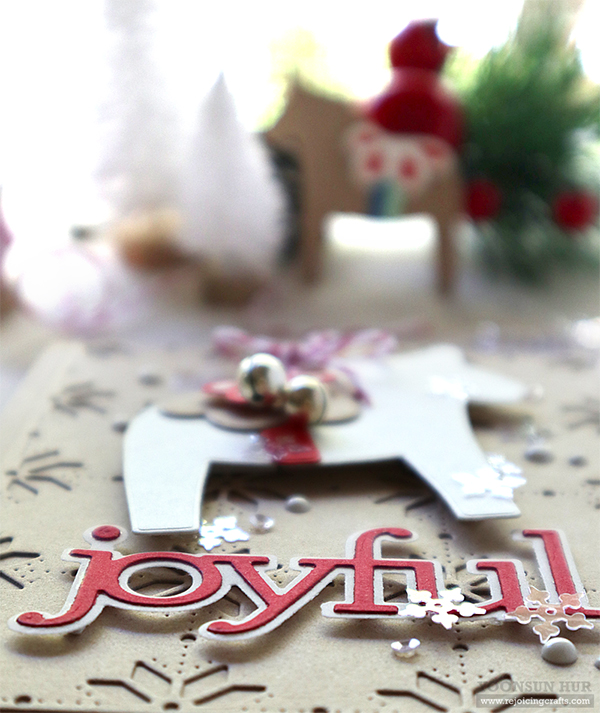


 To create the card, I stamped the
  I coloured all stamped images with watercolour pencils. For poinsettias, I coloured lighter one leaf and darker another leaf one by one with just one red watercolour pencil. I used Derwent watercolour pencils. I then added water to all watercolour penciled images using a wet paint brush.
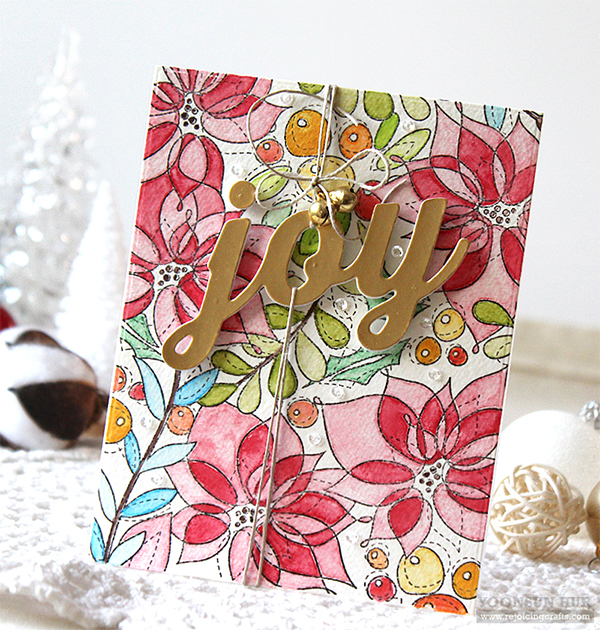 For the sentiment, I die cut the
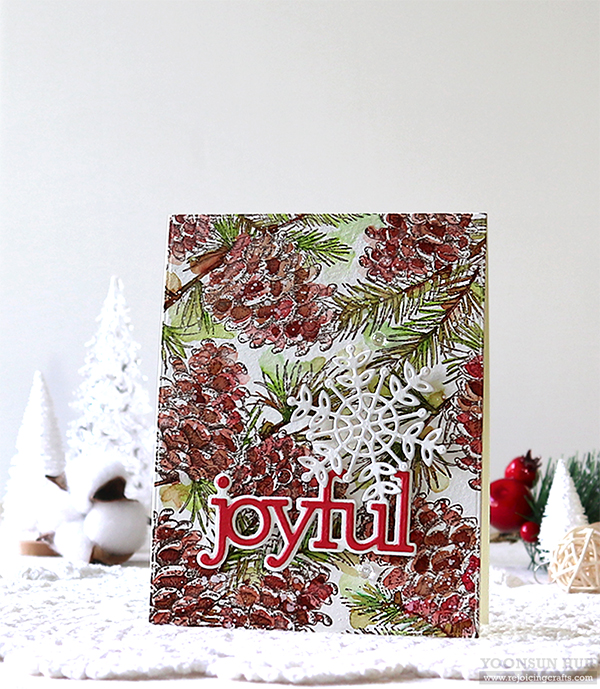
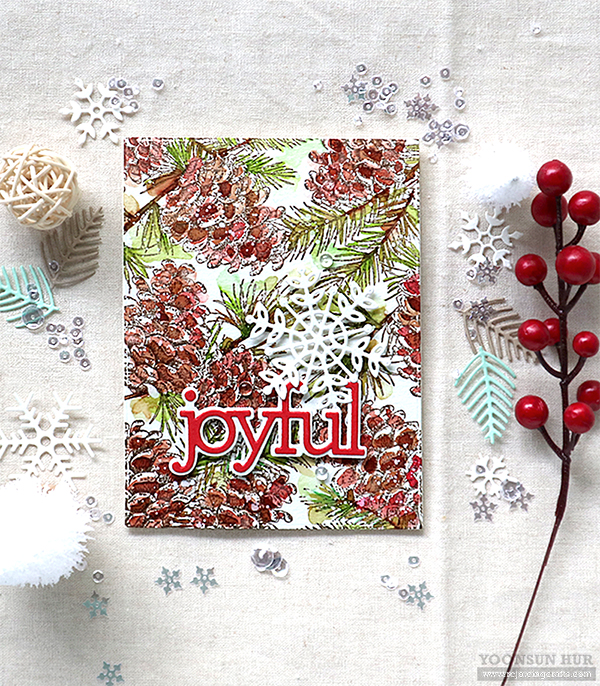
 Here is another card with the
  I stamped & watercoloured the floral images, then added
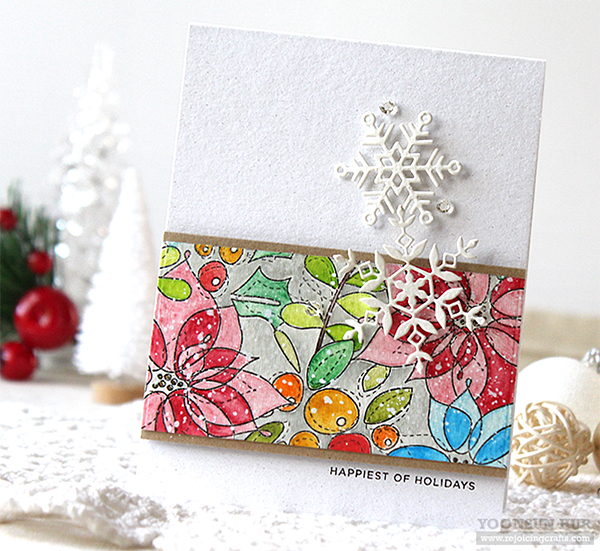
 I added beautiful snowflakes onto the card front – I used the
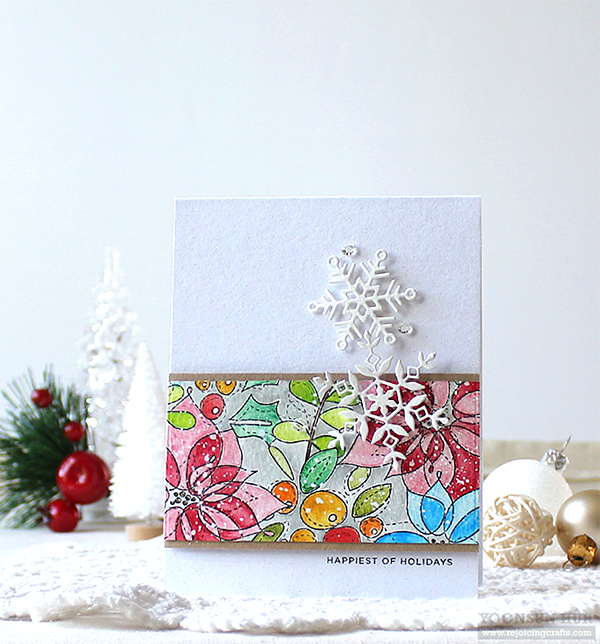
 Making Christmas cards are always so fun and feel very cozy!! I love it so much. :D