SSS You Have My Heart Blog Hop

Hello, hello crafty friends!
I can hardly believe that this year is almost over! Wow, time really flies!! But before I say hello to the year 2016, I want to enjoy the most awesome Simon Says Stamp You Have My Heart Blog Hop with you, YAY!!!
SSS-YHMH-BlogHop
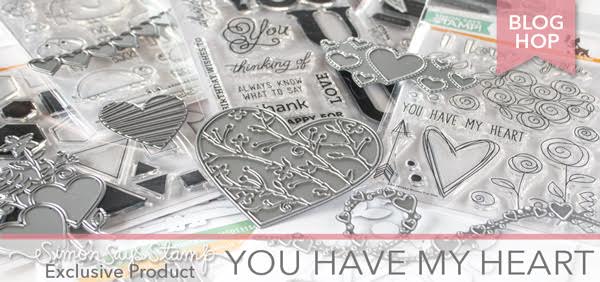
Simon Says Stamp released Valentine themed products in December! And today I want to share with you my cards with them.

YoonsunHur-20151231-SSSBHop-A001
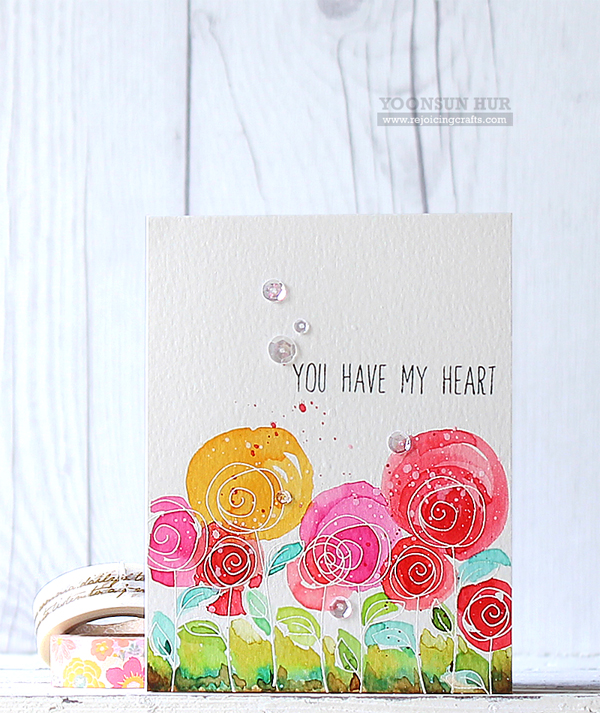
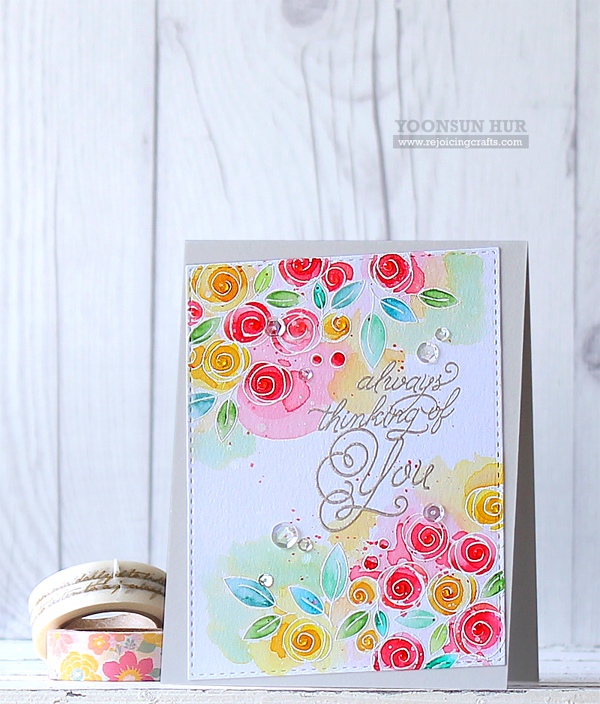
For my first card, I used Roses For You and Big U Words stamp sets. First I 1) Stamped the rolled roses from Roses For You set onto watercolour paper panel using embossing ink, white heat embossed. 2) Coloured the roses with several Distress inks: Festive Berries, Picked Raspberry, Worn Lipstick, Wild Honey, and Mustard Seed. 3) Coloured the leaves with several Distress markers: Mowed Lawn, Peacock Feathers, Cracked Pistachio, Evergreen Bough, and Lucky Clover. 4) Stamped the sentiment from Big U Words set on the watercoloured panel using embossing ink, Liquid Platinum heat embossed. 5) Mounted the watercoloured panel on Fog Gray card base using double-side tape. 6) Embellished with a few PPP clear sequins.
YoonsunHur-20151231-SSSBHop-A002
YoonsunHur-20151231-SSSBHop-B001
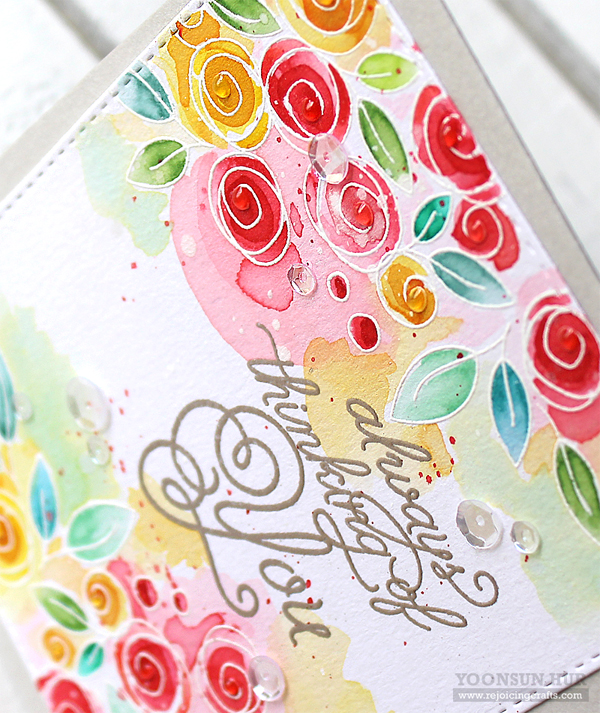
I made another watercolour flower card with Roses For You stamp set. I am so in love with this set :D

YoonsunHur-20151231-SSSBHop-C001
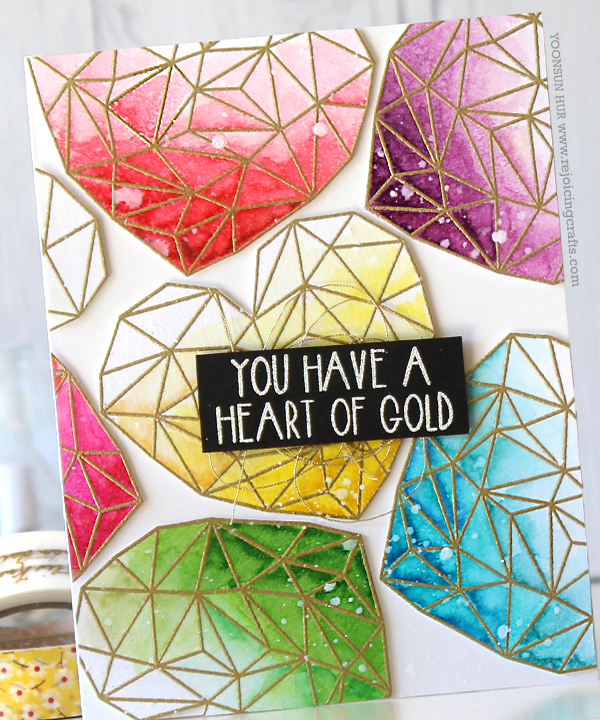
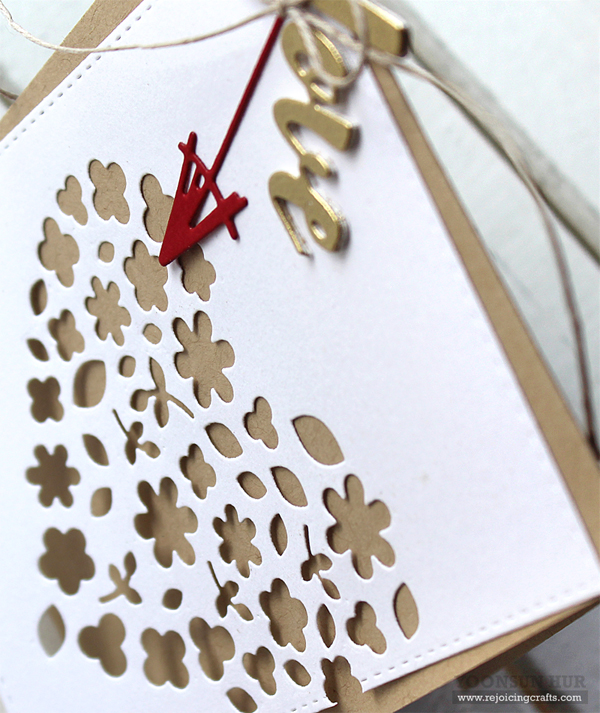
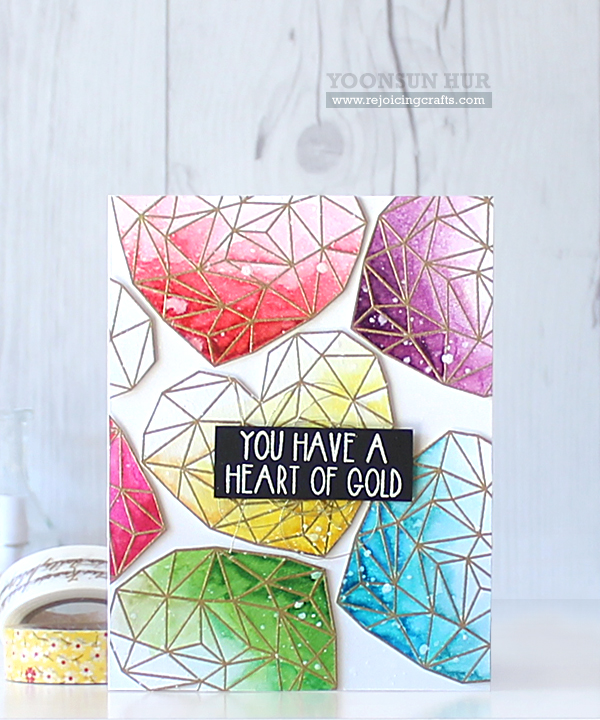
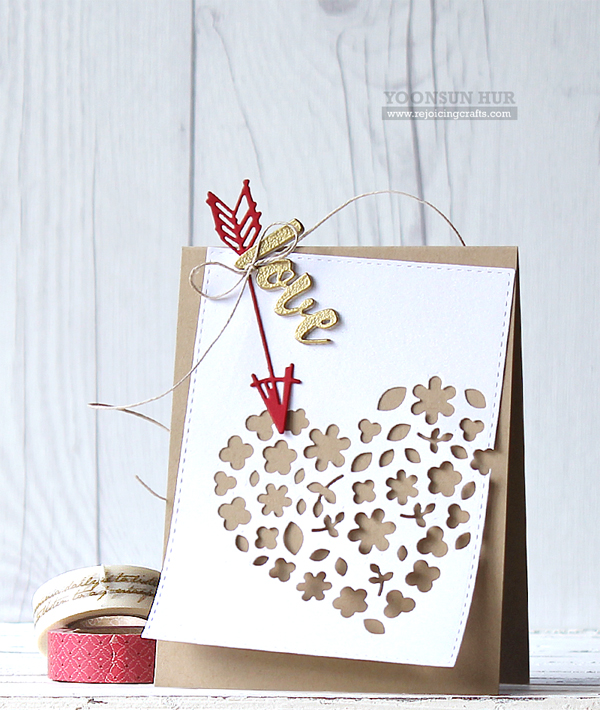
For my last card today, I used Mini Flowers And Leaves dies in a creative way. First I 1) Traced the medium-sized heart shape from Nested Hearts Dies lightly onto white paper panel using a pencil. 2) Positioned Mini Flowers And Leaves dies inside the traced heart, then die cut them. 3) Die cut arrow from Schoolhouse Red card stock using Scribble Heart And Arrow Dies. 4) Die cut the word “Love” from white card stock five times using I Love You Word Dies, glued them together, then gold heat embossed. 5) Mounted all elements as shown to top-folded kraft card base.
YoonsunHur-20151231-SSSBHop-C002

 Simon Says Stamp is giving away a prize package on each stop of the hop, so leave a comment for your chance to WIN. Winners will be selected on Jan 4 2016.

I’m the last stop on the hop! We hope you have all enjoyed the hop! If you’ve missed any of the stops along the way, please head over to the Simon Says Stamp blog to find all the links of the hop.

Now it’s that time to say goodbye to the past and HELLO to a new year!
HAPPY NEW YEAR EVERYONE!!!

Keep smiling and be blessed! God bless you all!
Love Love Love RejoicingCrafts

http://static.inlinkz.com/ppr.js

PPP / Altenew Collaboration Blog Hop

Hello crafty friends and welcome to the Pretty Pink Posh & Altenew collaboration blog hop! You should have arrived from amazingly talented Anna Kossakovskaya.
Banner-PPP-Altenew-CollaboI am so excited to be in this awesome collaboration. I had so much fun playing with those unique and stylish designs by Altenew for today’s project!!

YoonsunHur-20151023-PPP-Altenew-A01For my first card, I made a loose watercolour card. First I 1) Stamped the images from the Altenew Garden Grow stamp set onto watercolour paper panel using black pigment ink, then loosely coloured them with Distress markers using waterbrush and then brushed all images over with Clear Zig Wink of Stella Glitter Brush. 2) Die cut the bottom part of the watercolour panel with PPP Pocket Border Die, then inked it with Fired Brick Distress Ink using mini blending tool. 3) Stamped the sentiment from the Altenew Label Love stamp set on white card stock using black ink, fussy cut it. 4) Mounted all elements as shown to white card base using double-sided tape. 5) Embellished with several colours of 4mm sequins.
YoonsunHur-20151023-PPP-Altenew-A02
YoonsunHur-20151023-PPP-Altenew-B01For my second card, I used Altenew Golden Garden stamp set with PPP Stitched Borders 2 Dies. For my own watercolour floral panel, I stamped the flowers and leaves on watercolour paper panel using embossing ink, heat embossed with gold embossing powder, then loosely coloured them with Distress markers. I die cut Stitched Scalloped Border out of scraps of coloured card stock, mounted them on the bottom side of watercolour panel using double-sided tape, then tied it with a natural twine. To finish it off, I embellished with a few clear sequins.
YoonsunHur-20151023-PPP-Altenew-B02Your next stop on the hop is so very talented Carissa Wiley. We hope you have all enjoyed our fun and inspirational blog hop!
Altenew Blog
Gayatri Murali
Anna Kossakovskaya
Yoonsun Hur (Me!!)
Carissa Wiley
Yana Smakula
Nina-Marie Trapani
Lisa Elton
Marika Rahtu
Joni Andaya
Amy Kolling
Agnieszka Malyszek
Nichol Magouirk
Julia Altermann
May Sukyong Park
Yuki Yoshioka
Amy Gray
Pretty Pink Posh blog

GIVEAWAY ALERT!
There are 2 $30 Pretty Pink Posh gift certificates and 2 $30 Altenew gift certificates up for grabs. Winners will be picked randomly along the blog hop. (Comments must be left by Monday, Oct 26 11:59 EST. Winners will be announced on the PPP and Altenew blogs)

Thank you so much for stopping by. Happy crafting!!

Keep smiling and be blessed! God bless you all!
Love Love Love RejoicingCrafts

Pretty Pink Posh Store

http://static.inlinkz.com/ppr.js

SSS Create Joy Blog Hop

Hello, hello crafty friends and welcome to the most awesome event in the universe, Simon Says Stamp Create Joy Blog Hop! Hooray!!
SSS-CREATE-JOY-BannerSimon Says Stamp always amaze me and these winter holiday goodies are (I promise!) beyond amazing! Just WOW!!

YoonsunHur-20151016-SSS-CreateJoy-BHop-A01-600px
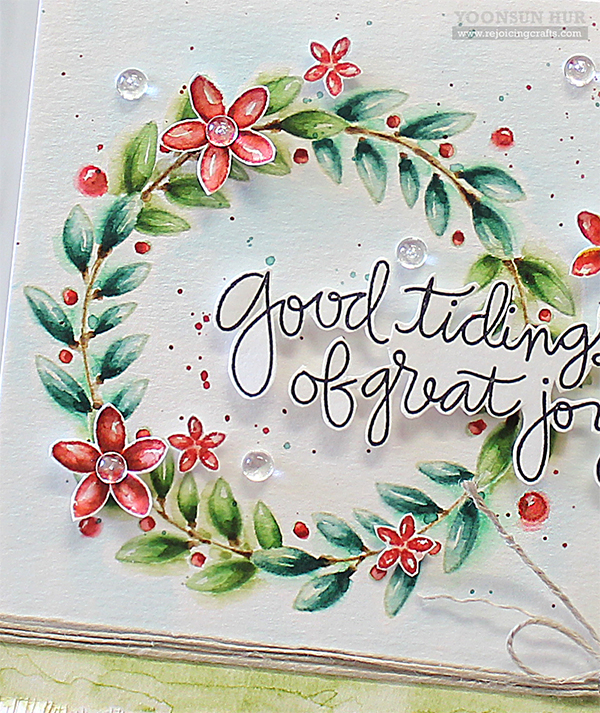
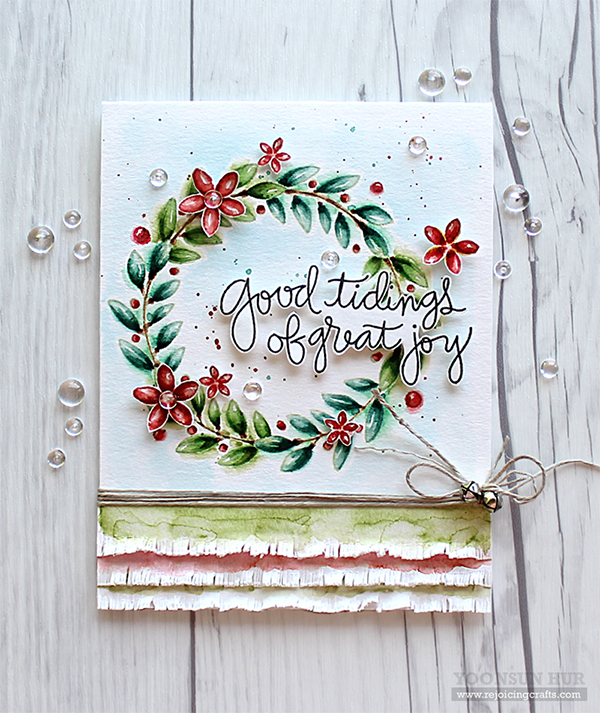
For my first card, I made a watercolour Christmas wreath card. SSS For To Us stamp set, It led me straight into the watercolour project!

To create my own Christmas wreath, I 1) Traced the circle on watercolour paper panel with watercolor pencil. 2) Stamped the leaves repeatedly along the circle line with Bundled Sage Distress ink, then brushed them using waterbrush. 3) Coloured the wreath with several colours of Distress markers using waterbrush, then added ink splatters.
YoonsunHur-20151016-SSS-CreateJoy-BHop-A02-600pxYoonsunHur-20151016-SSS-CreateJoy-BHop-A03-600px
YoonsunHur-20151016-SSS-CreateJoy-BHop-B01-600px
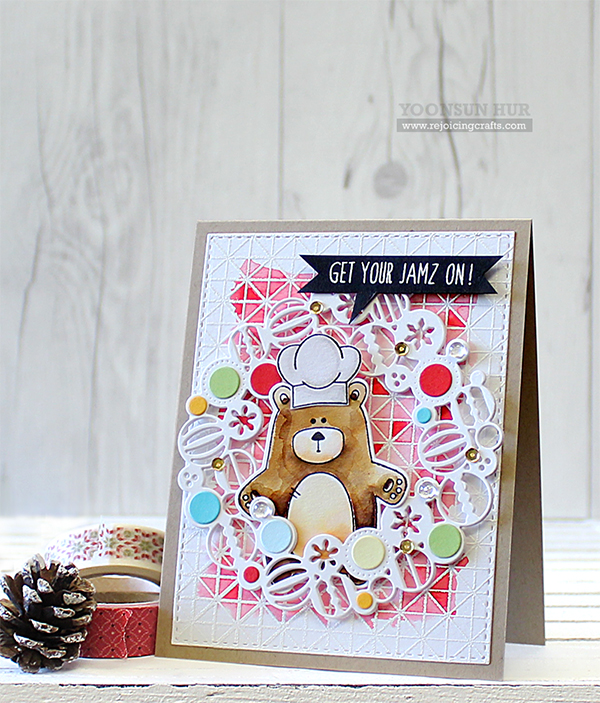
Oh, I love this super adorable chef bear! He doesn’t just simply cook food – he creates holiday magic using his own magical powers ;)

To create the card, I 1) Stamped Lattice Grid Background on watercolour paper panel using embossing ink, heat embossed with white embossing powder. 2) Coloured on the stamped panel with Festive Berries Distress ink using a wet paintbrush. 3) Stamped the chef bear, Bear Necessities stamp set, on watercolour paper using black pigment ink, then coloured them with Distress markers and then die cut them with the matching dies. 4) Die cut Ornament Wreath from white card stock (3 times) and then affixed them together using find tip glue pen -I made ornament wreath die cut thicker. 5) Die cut Ring Wreath out of scrapes of SSS coloured card stock -I just used the small circle die cuts. 6) Mounted all elements as shown to the kraft card base using dimensional foam tape. 7) Embellished with a few PPP clear droplets and gold sequins. YoonsunHur-20151016-SSS-CreateJoy-BHop-B02-600px
YoonsunHur-20151016-SSS-CreateJoy-BHop-C01-600px
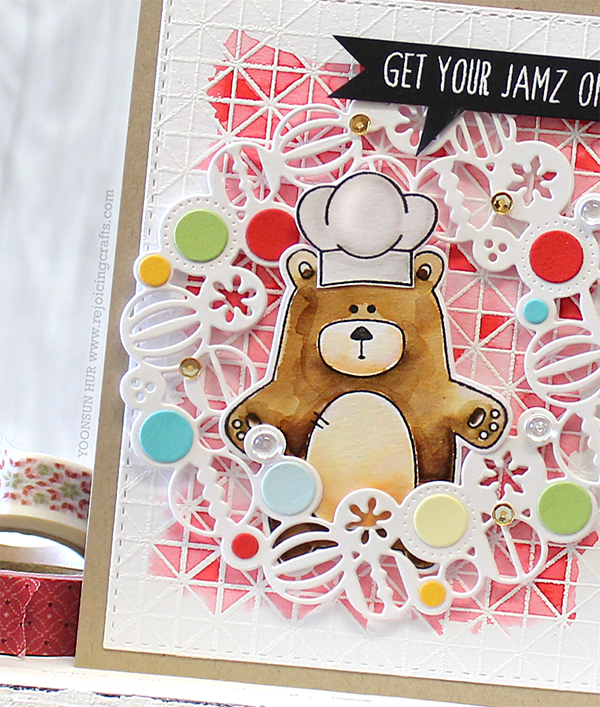
For my last card, I used oh-so-cute Christmas Cats and awesome Doodle Background Stamps. For my own rainbow background, I 1) Stamped Doodle Background on watercolour paper panel using embossing ink, heat embossed with white embossing powder. 2) Coloured the stamped panel with (from top to bottom) Fired Brick, Wild HoneyCrushed OlivePeacock Feathers, and Faded Jeans Distress inks using a wet paintbrush. For these lovely cats, I coloured them with Copic markers.
YoonsunHur-20151016-SSS-CreateJoy-BHop-C02-600pxOnce again, Simon Says Stamp winter release is truly amazing! I really want to see your wonderful creations with them.

Simon Says Stamp is giving away a prize package on each stop of the hop, so leave a comment for your chance to WIN. Winners will be selected on October 19.

Your next stop on the hop is so sweet and beautiful Sarah Moerman. We hope you have all enjoyed the new release blog hop! If you’ve missed any of the stops along the way, please head over to the Simon Says Stamp blog to find all the links of the hop.

Thank you so much for stopping by. Have a fabulous weekend!

Keep smiling and be blessed! God bless you all!
Love Love Love RejoicingCrafts

What I used:

Create Joy Release:

http://static.inlinkz.com/ppr.js

SSS STAMPtember® Blog Hop

Hello, hello crafty friends! Happy STAMPtember®! Yay!!

StamptemberOh my goodness! I am so super excited and extremely honored to be a part of Simon Says Stamp STAMPtember® Blog Hop!!

September is my favourite month of the year other than Christmas for card making and I am ready to enjoy the month-long event, STAMPtember®!! Are you ready?!

YoonsunHur-20150902-SSS-Stamptember-Hop01A new Stitched Leaf Wreath die is so versatile. It makes 9 adorable autumn leaves at a time. It can be used by itself as a negative wreath panel, or positive die cuts with other supplies. I really love it!!

To create this card, 1) I die cut many autumn leaves from the watercolour paper using Stitched Leaf Wreath die, loosely coloured them with Distress inks using waterbrush. 2) For my watercolour background, I blended onto the watercolour panel with several colours of Distress ink using mini blending tool, spritzed with water using Mini Mister. I then added water droplets. 3) I tied the natural twine at the bottom of the background panel and then mounted it on the SSS white top fold scored card base. 4) To finish it off, I mounted all leaves as shown to the watercolour panel using dimensional foam tape and then stamped the sentiments with black ink – ‘Hello’ from the Hello Friend Stamp Set, ‘SENDING LOVE’ from the Best Hugs Stamp Set.    YoonsunHur-20150902-SSS-Stamptember-Hop02
YoonsunHur-20150902-SSS-Stamptember-Hop03
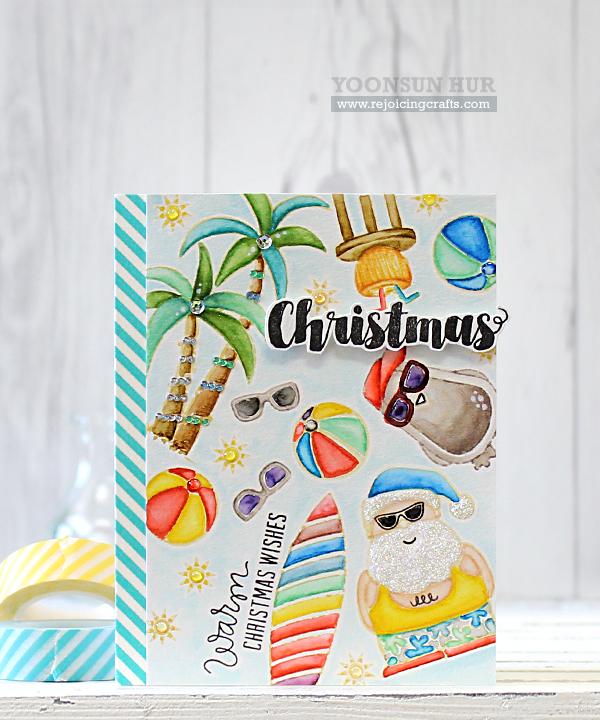
Yee haw! What a FUN Christmas!! I particularly LOVE the Warm Christmas Wishes Stamp Set because it’s really happening in Australia lol!

For my second card – oh, super duper fun – I used no-line watercoloring technique. I 1) Stamped images from the Warm Christmas Wishes Stamp Set onto the watercolour paper using Antique Linen Distress ink, coloured them with Distress markers. 2) Stamped the sentiment from the Christmas Graphic Stamp Set on the white card stock using black pigment ink, fussy cut it. 3) Mounted the watercolour panel on the white card base and then adhered the sentiment on that using dimensional foam tape.

YoonsunHur-20150902-SSS-Stamptember-Hop04For my last card for the hop, I played with warm colours of Hybrid ink cube. These are so soft like pigment inks but quite a juicy like dye inks. SO CHARMING!!

To create my wide striped background, 1) I masked off strips using washi tape and blended with (from the top) Lemon Chiffon dye ink, Twirling Tutu, Rosie cheeks, Apricot, Sunkist hybrid inks, and lastly Sunshine dye ink using mini blending tool. I then stamped images from the Hello Friend Stamp Set on the inked panel using embossing ink, clear heat embossed. I then added machine stitches.
YoonsunHur-20150902-SSS-Stamptember-Hop05

Simon Says Stamp is giving away a prize package on each stop of the hop, so leave a comment for your chance to WIN. Winners will be selected on September 7.

Your next stop on the hop is incredibly talented Yana Smakula. We hope you have all enjoyed the new release blog hop! If you’ve missed any of the stops along the way, please head over to the Simon Says Stamp blog to find all the links of the hop.

Thank you so much for stopping by. Have a fabulous day!

Keep smiling and be blessed! God bless you all!
Love Love Love RejoicingCrafts

I used:

STAMPtember® 2015 release:

http://static.inlinkz.com/ppr.js

Neat and Tangled 3rd Birthday Blog Hop

Hello crafty friends, TGIF!!
I’m SO excited (and so honoured) to be a part of Neat & Tangled’s 3rd Birthday Blog Hop! I believe many of you are also enjoying this happy birthday hop, right?!
Print

YoonsunHur-20150814-NaT-A01So adorable bear, isn’t it? I love Danielle’s hand drawing. She has magic hands!!!

For my first card, I used a newly released Happiest Birthday stamp set. I 1) Stamped bear onto the watercolour panel with black pigment ink, coloured it with Peerless watercolours. 2) Stamped lots of party images on the watercolour paper using black pigment ink, coloured them with Peerless watercolours as well, die cut balloon using MFT Blueprints 26 Die-namics. 3) Mounted all elements as shown to the white card base, embellished with enamel dots to finish it off.

YoonsunHur-20150814-NaT-A02
YoonsunHur-20150814-NaT-A03
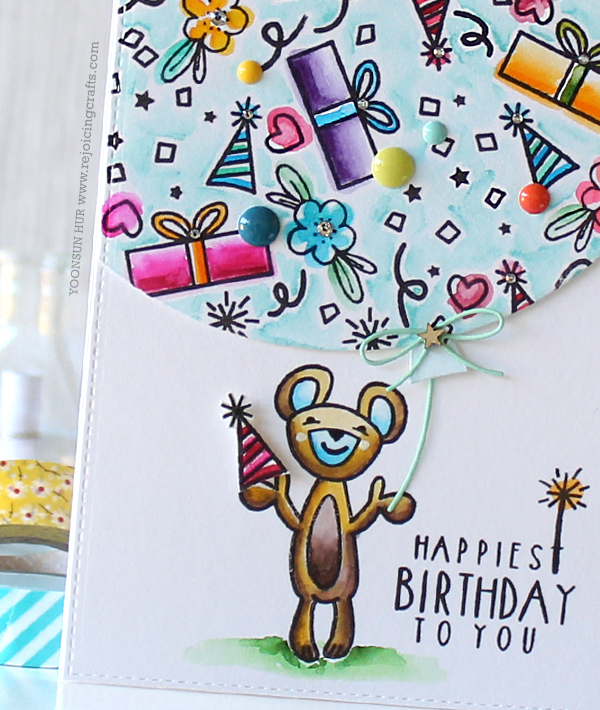
For my second card, I used so beautiful Heart of Gold Stamp Set. I 1) Stamped faceted hearts onto the watercolour paper using embossing ink, gold heat embossed. 2) Coloured them with Distress markers using waterbrush and then fussy cut them. 3) Stamped the sentiment on the black paper using embossing ink, white heat embossed. 4) Mounted all elements as shown to the white card base, added white ink splatters for finishing touches.
YoonsunHur-20150814-NaT-A04
Your next stop on the hop is super, super talented Debby Hughes. We hope you have all enjoyed the happiest birthday blog hop!

GIVEAWAY ALERT!
There are prizes to be had, yay! (1) $100 gift certificate to the Neat and Tangled shop and (2) $50 gift certificates to the Neat and Tangled shop will be given away. Winners will be chosen from comments all along the hop all week long. Hope you join us!

Happy Birthday to Danielle and Neat and Tangled Team!!

Thank you so much for stopping by. Have a fabulous weekend!

Keep smiling and be blessed! God bless you all!
Love Love Love RejoicingCrafts