Hello crafty friends!!
Welcome to the second day of the Pretty Pink Posh August 2019 Product Release Blog Hop! All brand new products are the right for Autumn crafting! :D If you arrived here from the Caly Person’s blog you are on the right track.

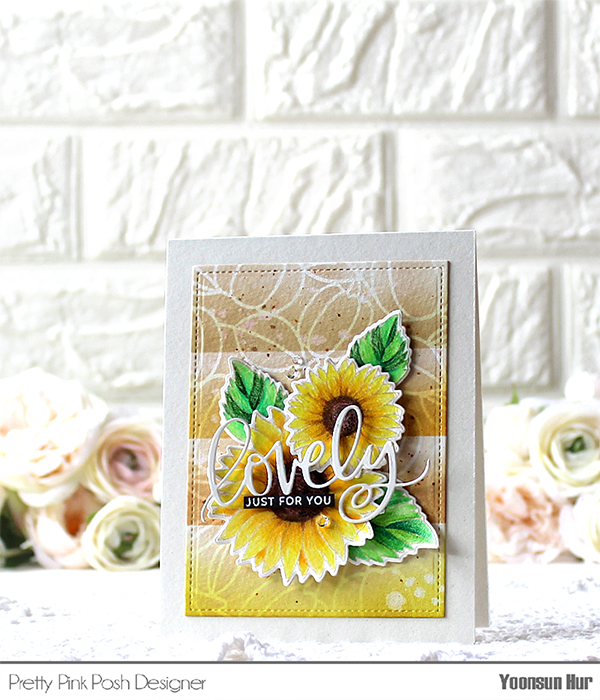 For my first card, I am featuring the Sunflowers Stamp Set and the Pumpkin Background Stencil.
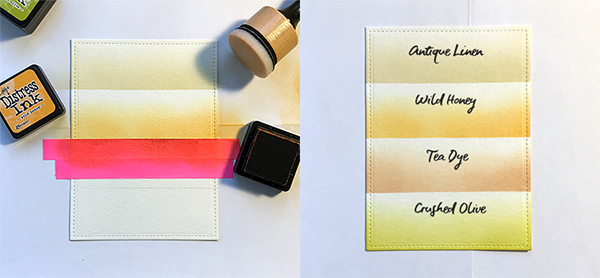 To create the card, I made a autumn coloured background with some Distress inks first – I divided stitched rectangle panel into four parts, and then inked half of each space using Distress inks & mini round ink blending tool.
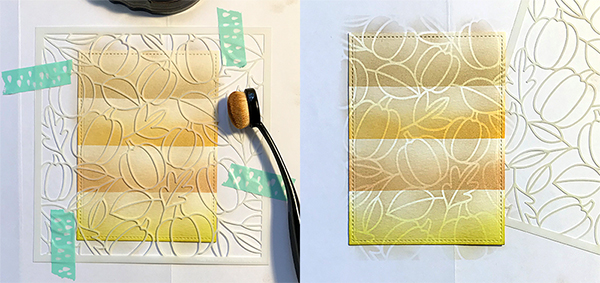 I placed the Pumpkin Background stencil over the inked panel, then brushed with light brown coloured dye ink.
 I stamped sunflowers & leaves from the Sunflowers set on watercolour paper using light coloured dye ink, coloured them with polychromos coloured pencils, then die cut them with the Sunflowers coordinating dies.
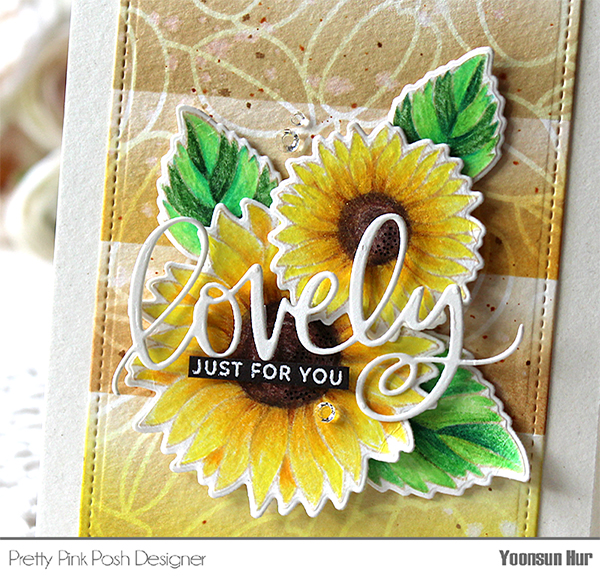 For the sentiment, I die cut the word “Lovely” from thick white card stock, white heat embossed “Just for you” on black card stock.
 I mounted the stenciled background panel on white card base using double-sided tape first, and then added all elements as shown in the picture using foam tape. I embellished with a few Sparkling Clear Jewels.
 For my second card, I am focusing on the Grateful Shaker Die and the Fall Borders Stamp Set.
 I heat embossed Fall Borders on watercolour paper panel using white embossing powder first, and then roughly coloured with watercolours.
 I die cut the Grateful Shaker from kraft card stock, stitched stripe border from burnt orange coloured card stock. Once watercoloured panel was dry, I mounted it on white card base using double-sided tape first, and then added all elements using foam tape. I embellished with a few jewels – Buttercream, Espresso, Raspberry and Spring Green.

 Here is one more card with the new products! (Maybe you’ve seen it before on PPP blog.)
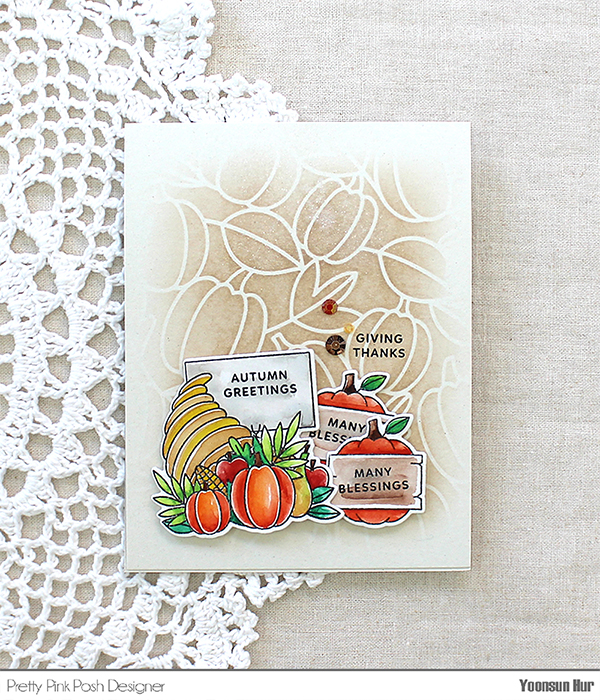 For the background, I placed the Pumpkin Background stencil on ivory card base in place, then brushed with light brown coloured dye ink. I stamped & watercoloured some images from the Fall Signs set, and then die cut them with the Fall Signs coordinating dies. I adhered all watercoloured images on the bottom of the card front using foam tape.


GIVEAWAY!!
There are 4 $25 gift certificates up for grabs (two winners each day). Winners will be picked randomly along the blog hop. Comments must be left by 11:59 PM PST on 8/28/2019. Winners will be announced on the PPP blog.
BLOG HOP LIST:
Pretty Pink Posh blog
Dawn McVey
Kathy Racoosin
Caly Person
Yoonsun Hur (Me!!)
Thi Lam
Adelle Emery
Dana Kirby
Nichol Spohr
Jeanne Jachna
Heather Hoffman
Eloise Blue
Yana Smakula
Thank you so much for stopping by. Have a great day!
Keep smiling and be blessed. God bless you all.
Love Love Love RejoicingCrafts
https://linkdeli.com/widget.js?1559654439292
 For my first card, I made a floral birthday card! I die cut a 4.25″ x 5.5″ rectangle panel from Cream card stock using the Basic Rectangles die set first. I then stamped flowers & leaves from the Bold Flowers set with some SSS dye inks:
 For the sentiment, I stamped it from the Big Birthday Greetings set with VersaFine Onyx Black.
 I added a few clear water droplets using Nuvo Morning Dew Crystal Drops.
 I love this sentiment so much!!
 Here is another “Happy Birthday” card with the Big Birthday Greetings Stamp Set.
 I die cut the Wonky Rectangle Panel from watercolour paper first, and then stamped birthday candles & sentiments on it using VersaFine Onyx Black. I then loosely coloured the stamped candles with Distress inks in rainbow order: Festive Berries, Dried Marigold, Mustard Seed, Mowed Lawn, Faded Jeans and Seedless Preserves.
 I die cut the word “Happy” from white card stock using the Big Happy die set.


 I started by heat embossing the word “THANK YU (except “O”)” from the
 I stamped flower & leaves from the
 I die cut the
 Instead of letter “O”, I used red flower. :D

 Here is another card with the
 For the background, I die cut the


 For my first card, I am featuring the
 I started by stamping
 Once the watercoloured panel was dry, I trimmed it down using 4.25″ x 5.5″
 For the sentiment, I die cut the word “

 For my second card, I used the
 I watercoloured the stamped flowers with


 I love to make floral background card using watercolours so much!!

 For my first card, I used the
 I die cut the
 I die cut the
 I applied

 For my second card, I used the
 I placed the
 I blended to the panel with


