Hello crafty friends!
Today I want to share with you a happy holiday card I’ve made using Merry Christmas Centerpieces Die-namics.
 My Favorite Things is celebrating the joys of a Handcrafted Holiday! And today’s question is “What’s your best advice for a stress-free holiday?” My answer? As a handmade card maker, it’ll have to be: to make a card fast and easy – totally stress-free!!
Here is what I came up with:
 As promised, I made simple and easy holiday card! First I 1) Die cut A2 size stitched rectangle from white card stock using Blueprints 25 Die-namics. 2) Die cut 4 confetti stripes (twice) from white paper panel using Merry Christmas Centerpieces Die-namics, then tied the bottom part of the die cut panel with a natural twine. 2) Adhered Cherry Crisp card stock on white card base, then mounted the die cut panel using dimensional foam tape. 3) Stamped “Christmas” from the Hand Lettered Holiday stamp set on white paper using Black Licorice hybrid ink, fussy cut and then affixed it on die cut panel to finish it off.
We can’t wait to hear about what you love to create this time of year and how you cope. And of COURSE there will be prizes up for grabs. Join us every day this week and be inspired for a wonderful holiday season! Come and share your story on our Facebook page and Instagram!!
Thank you so much for stopping by. Happy holiday crafting!
Keep smiling and be blessed! God bless you all!
Love Love Love RejoicingCrafts


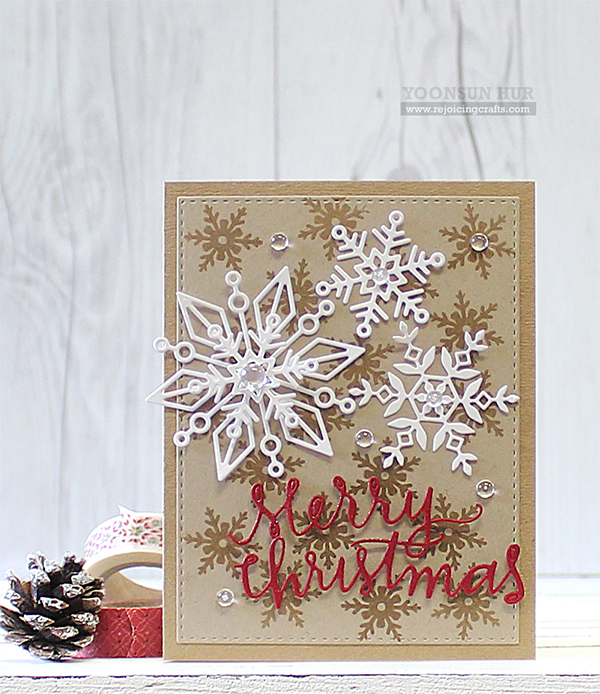 I love to see snowflake cards and one thing for sure, it’s NEVER boring in winter season!! And I also love making Christmas cards with different shapes of the snowflakes :D
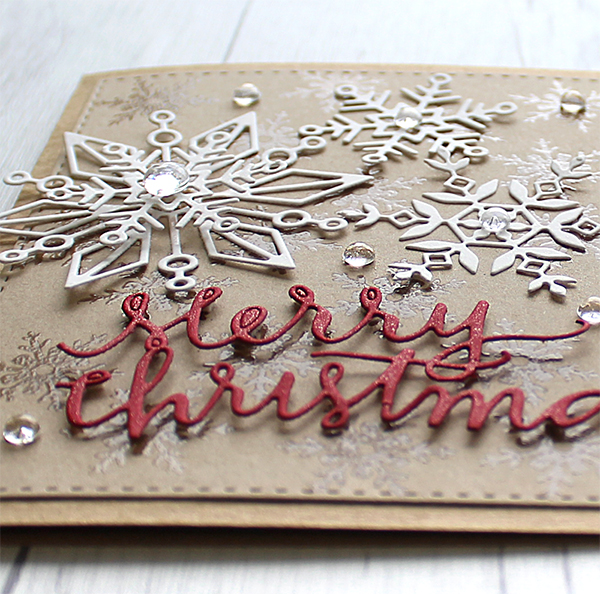 I love the red and white on kraft, it always reminds me of a romantic holiday.
 Simon Says Stamp


 If you want to see more just click to the


 Today is all about COLOUR! I believe that flowers are the best way to show all the colours of the rainbow. In additions, the layered petals of flowers are perfect for expressing different colours on one spot.
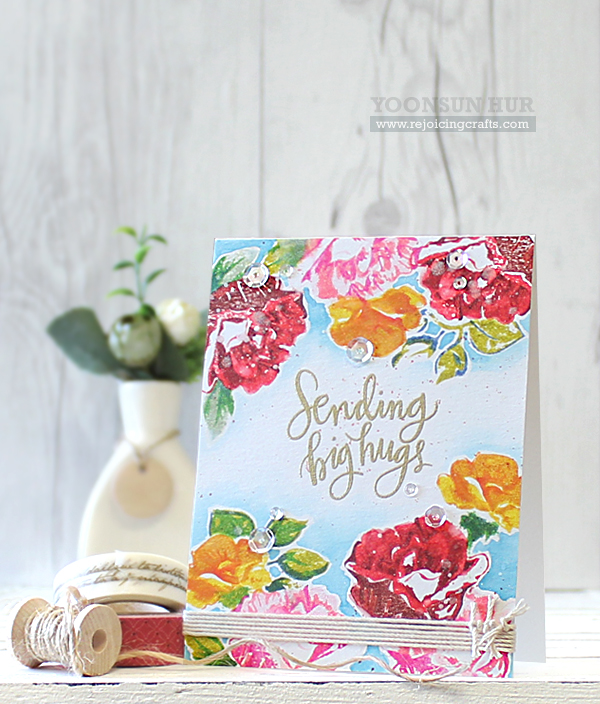 To create the card, I 1) Stamped
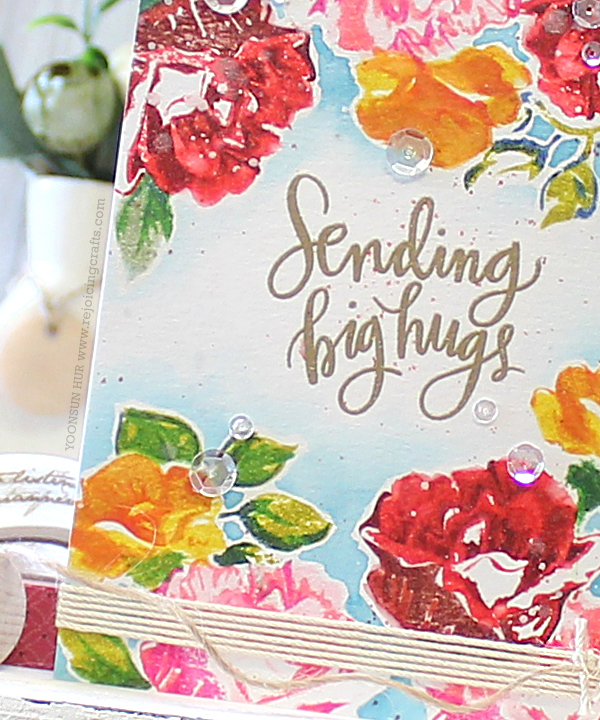
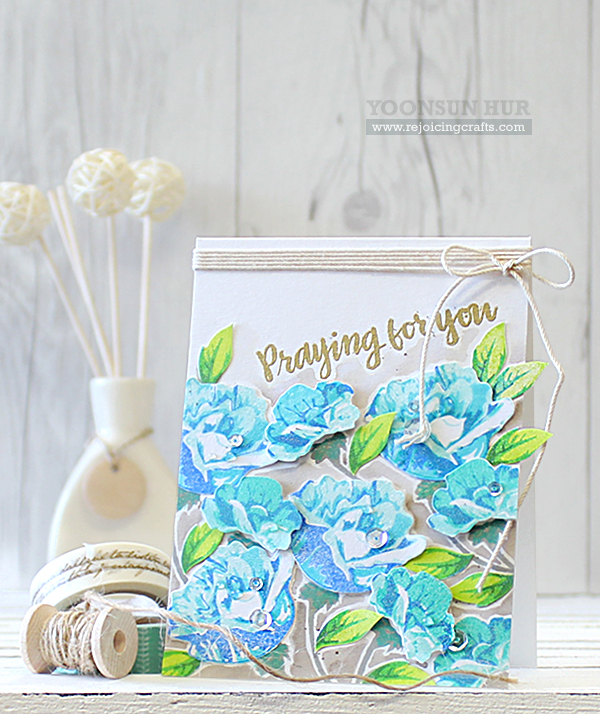 How did I make my second card? Well, it was no different to the way I made it the first card. But this time, I used cool colours instead of warm colours. I stamped the first layer of these blue flowers with
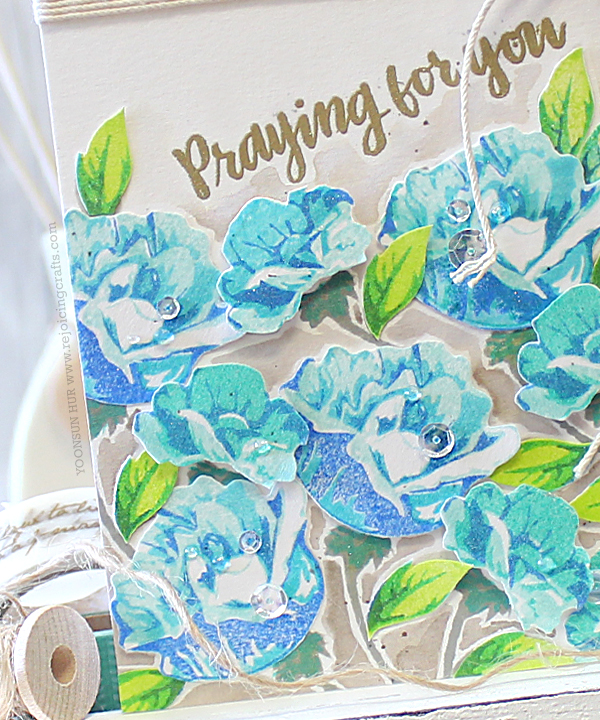


 In October, I am featuring a new
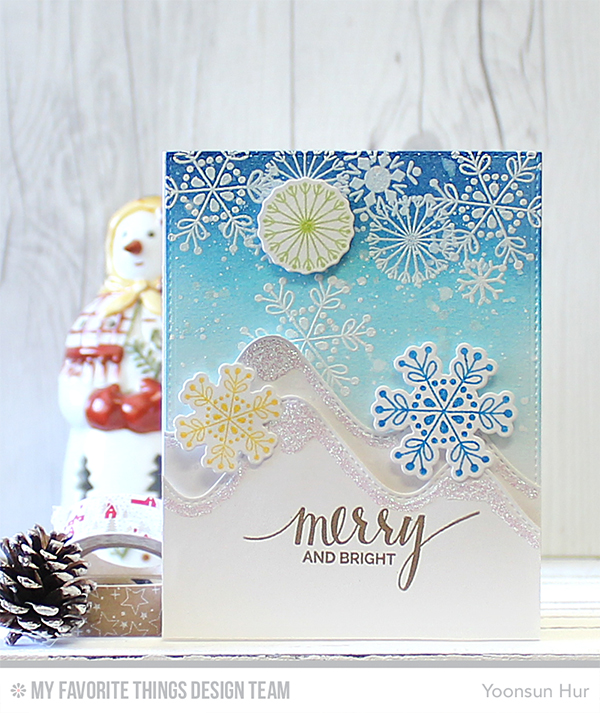 To create the card, I 1) Stamped the snowflakes from the


