Concord & 9th August Liquid watercolours

Hello crafty friends!
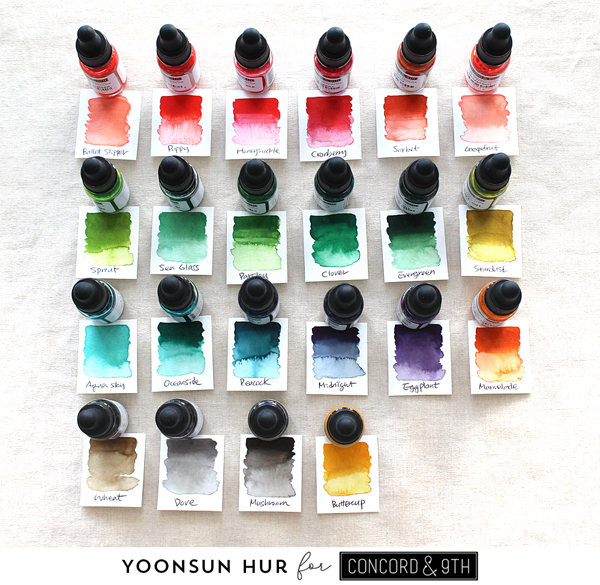
Concord & 9th has been released pigment based liquid watercolours this month and all 22 colours are truly, truly fantastic!
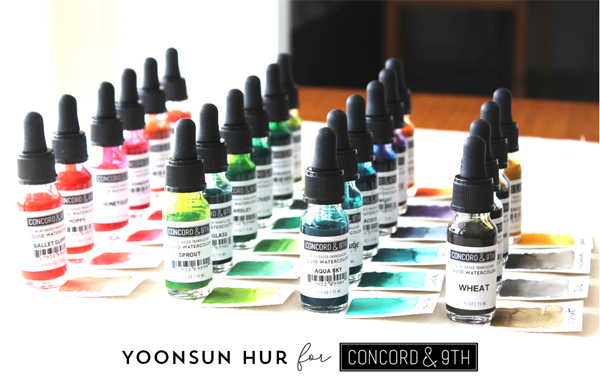
I made colour charts to make it easier for you to see as below:
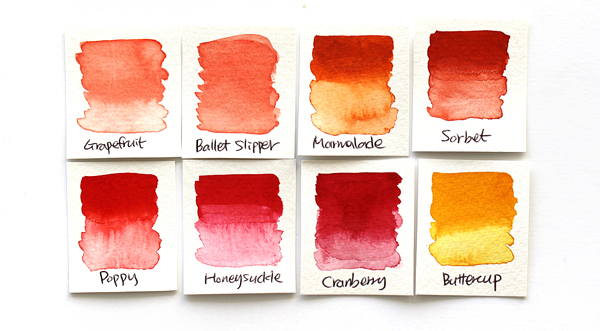
They are so nice warm colours!

These green colours make me want to keep making autumn cards. So gorgeous!!
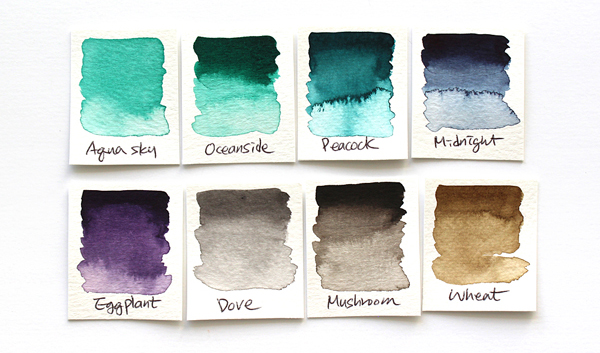
Fantastic, aren’t they?!!
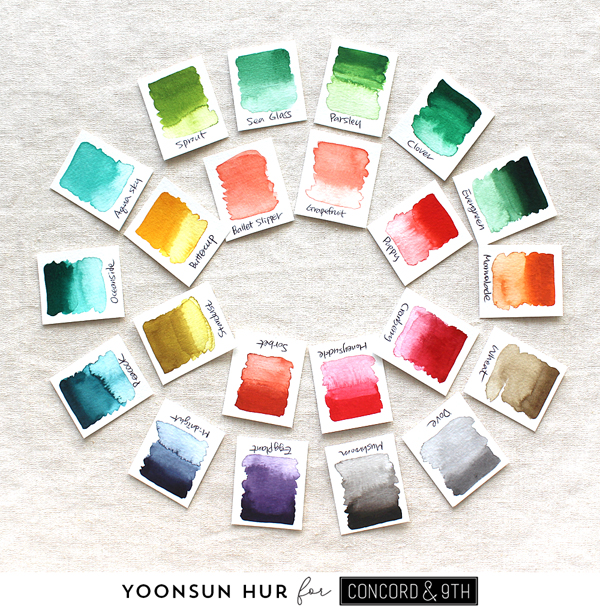
These 22 liquid watercolours are really intense and concentrated by themselves but it’s easy to make various shades of the same colour by adding or reducing the amount of water I used on my brush. And they blend extremely well.

For my card with liquid watercolors, I used the Festive Friends set.
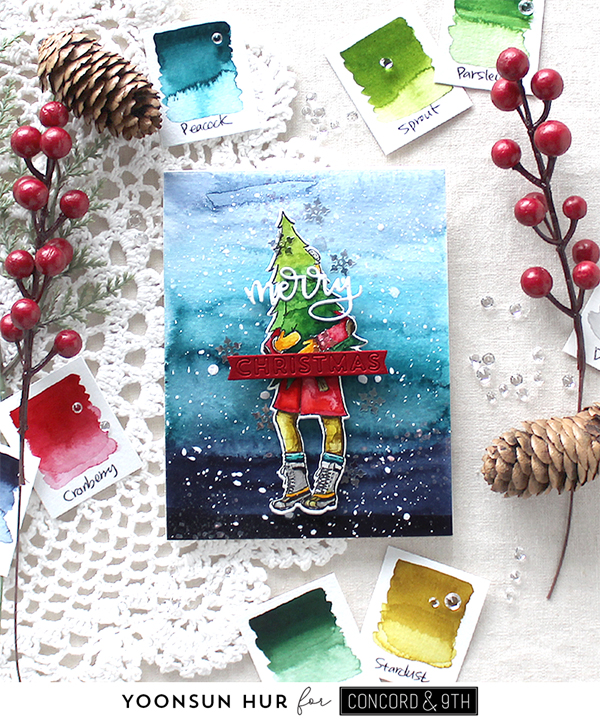
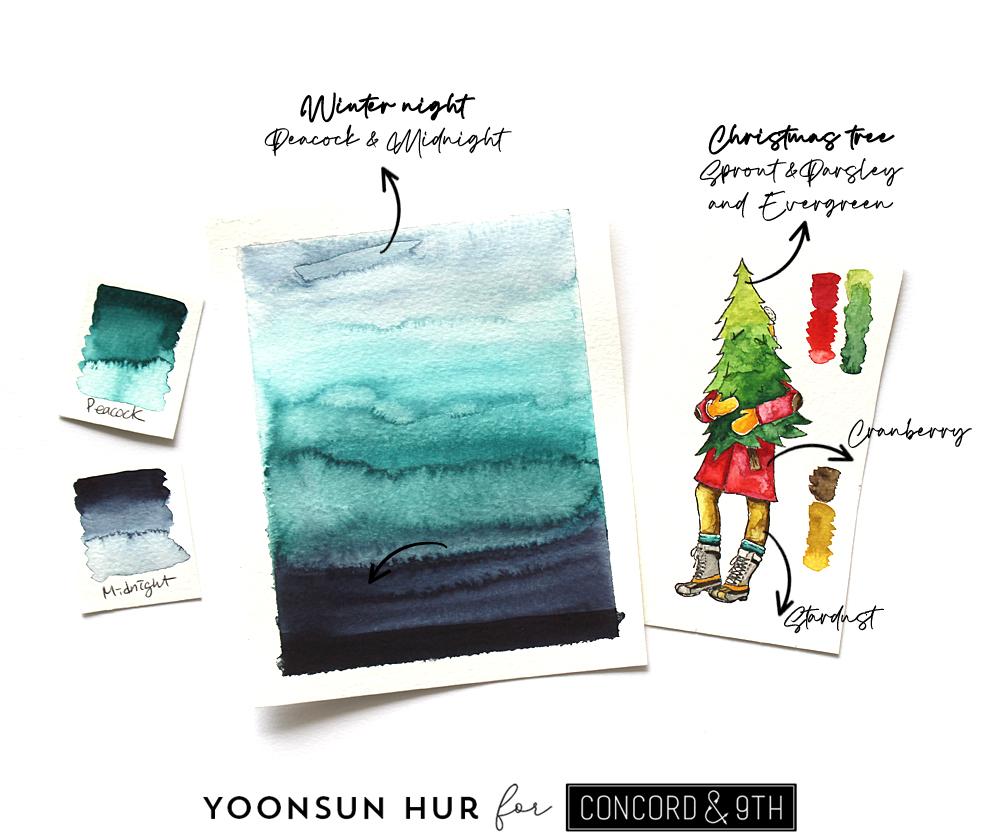

For my snowy winter night background, I used the Peacock & the Midnight liquid watercolour. I just painted Midnight onto the bottom of watercolour panel without water, then painted Peacock mixed with a little water, and then added more water to Peacock and Midnight on top of the panel as shown in the picture. And the woman holding the Christmas tree, I stamped it from the Festive Friends set using pigment black ink, and then coloured it with liquid watercolours.
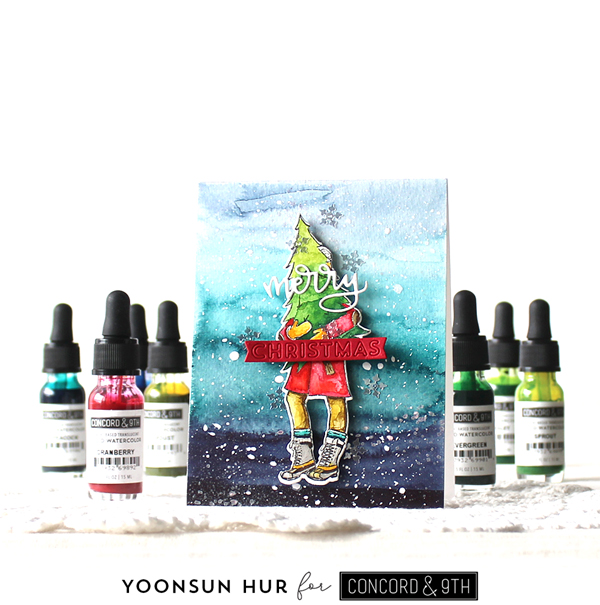
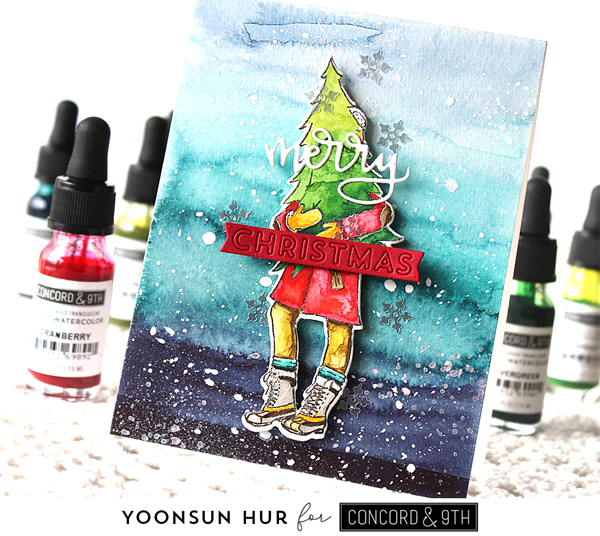
Once the watercoloured panel was dry, I added opaque white ink all around the panel. For the sentiment, I used them in the Festive Friends die set.

For my second watercolour card, I used the Fine Line Florals set.
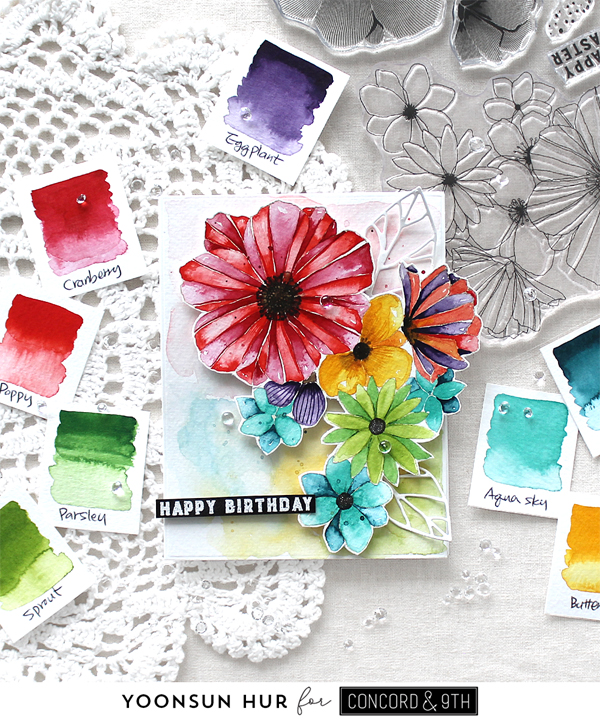
I stamped a large sized flower image from the Fine Line Florals set onto watercolour paper using Wheat dye ink first, and then coloured the stamped image with several liquid watercolours.
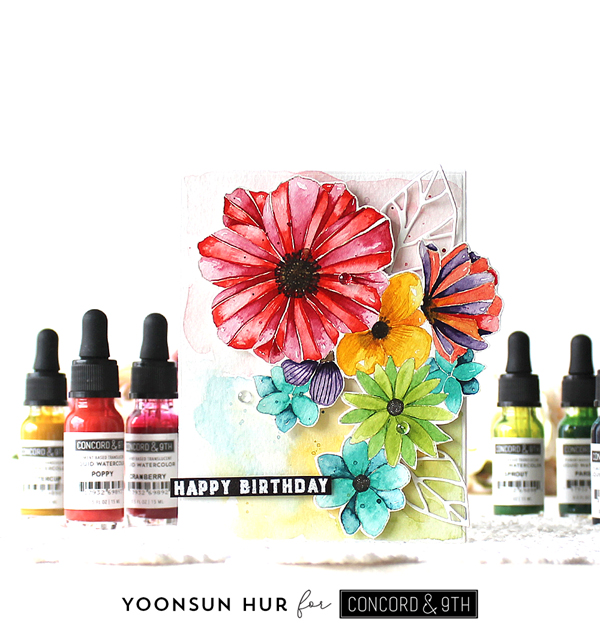
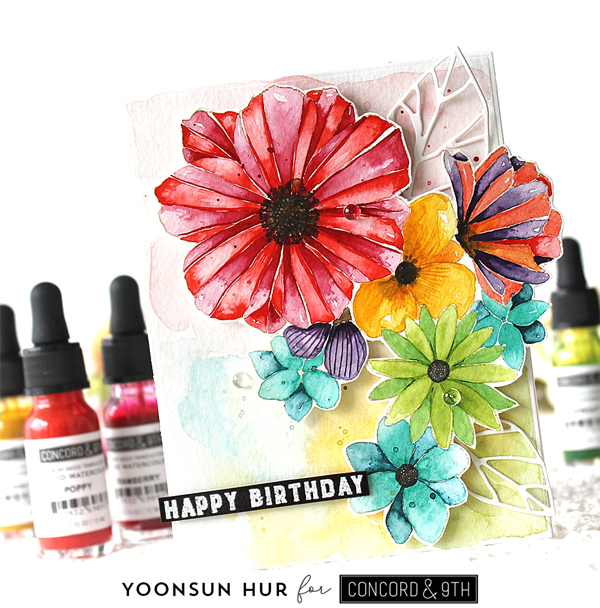


I adore these liquid watercolors so much!!

Thank you so much for stopping by. Have a wonderful day!

Keep smiling and be blessed! God bless you all!
Love Love Love RejoicingCrafts
SSS Painted Flowers

Hello crafty friends!
Today I’m sharing a couple of watercolour flower cards with two beautiful Painted Flowers and Annas Flowers stamp sets. If you know me well, you will know that I absolutely love watercolouring and flowers! :D


For my first card, I made a no-line watercolour flower card with the Painted Flowers stamp set. I stamped solid flowers & leaves from the Painted Flowers set onto watercolour paper using Antique Linen Distress ink at first – I stamped each image fit together as one.

The next step is watercolouring with Distress reinkers! I painted the colours on the stamped images.
Large flowers: Tattered Rose & Victorian Velvet / Small flowers: Scattered Straw (yellow)
Berries: Seedless Preserves / Leaves: Mowed Lawn & Crushed Olive / Twigs: Gathered Twigs
Once it was dry, I drew the details of leaves using Copic Multiliner 0.05 Black Ink Marker.

Here is a closer look:


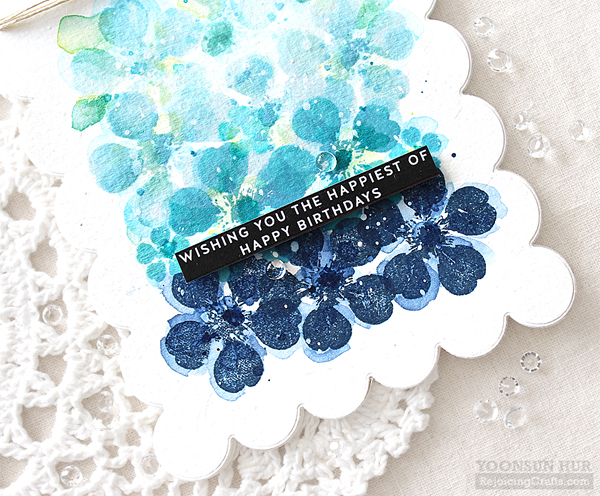
For my second card, I used one small sized solid flower in the Annas Flowers stamp set. I die cut an A2 sized scalloped rectangle panel from watercolour paper using the Chunky A2 Scalloped Rectangles die set at first. I then repeatedly stamped flowers onto the panel using some blue coloured dye inks – I used (from bottom to top) Soft Navy, Audrey Blue, Surf Blue and Sea Glass. I used MISTI for stamping.


I then loosely painted the stamped panel with some blue coloured Distress reinkers as shown in the picture. It was so fun to do! :D

Thank you so much for stopping by. Have a happy week!

Keep smiling and be blessed! God bless you all!
Love Love Love RejoicingCrafts

SSS Rainbow Butterflies

Hello crafty friends! Hope you are having a good weekend.
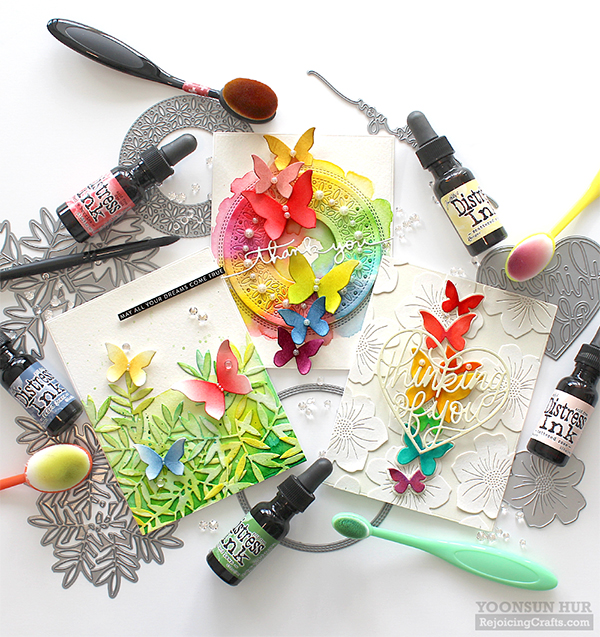
Today I have 3 rainbow coloured butterfly cards with some Simon Says Stamp goodies.


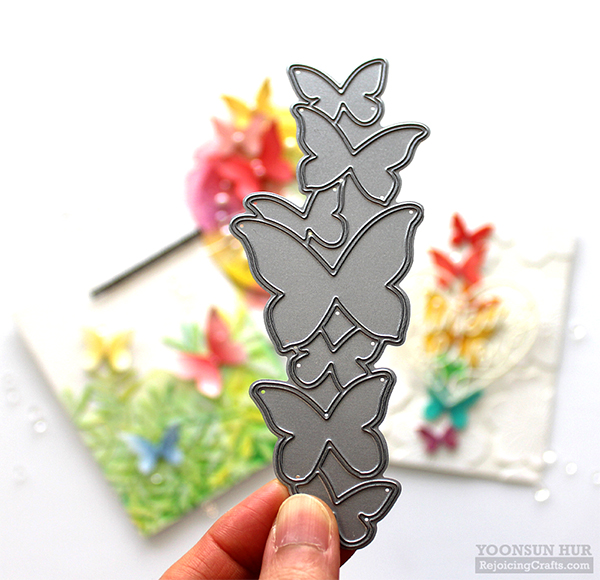
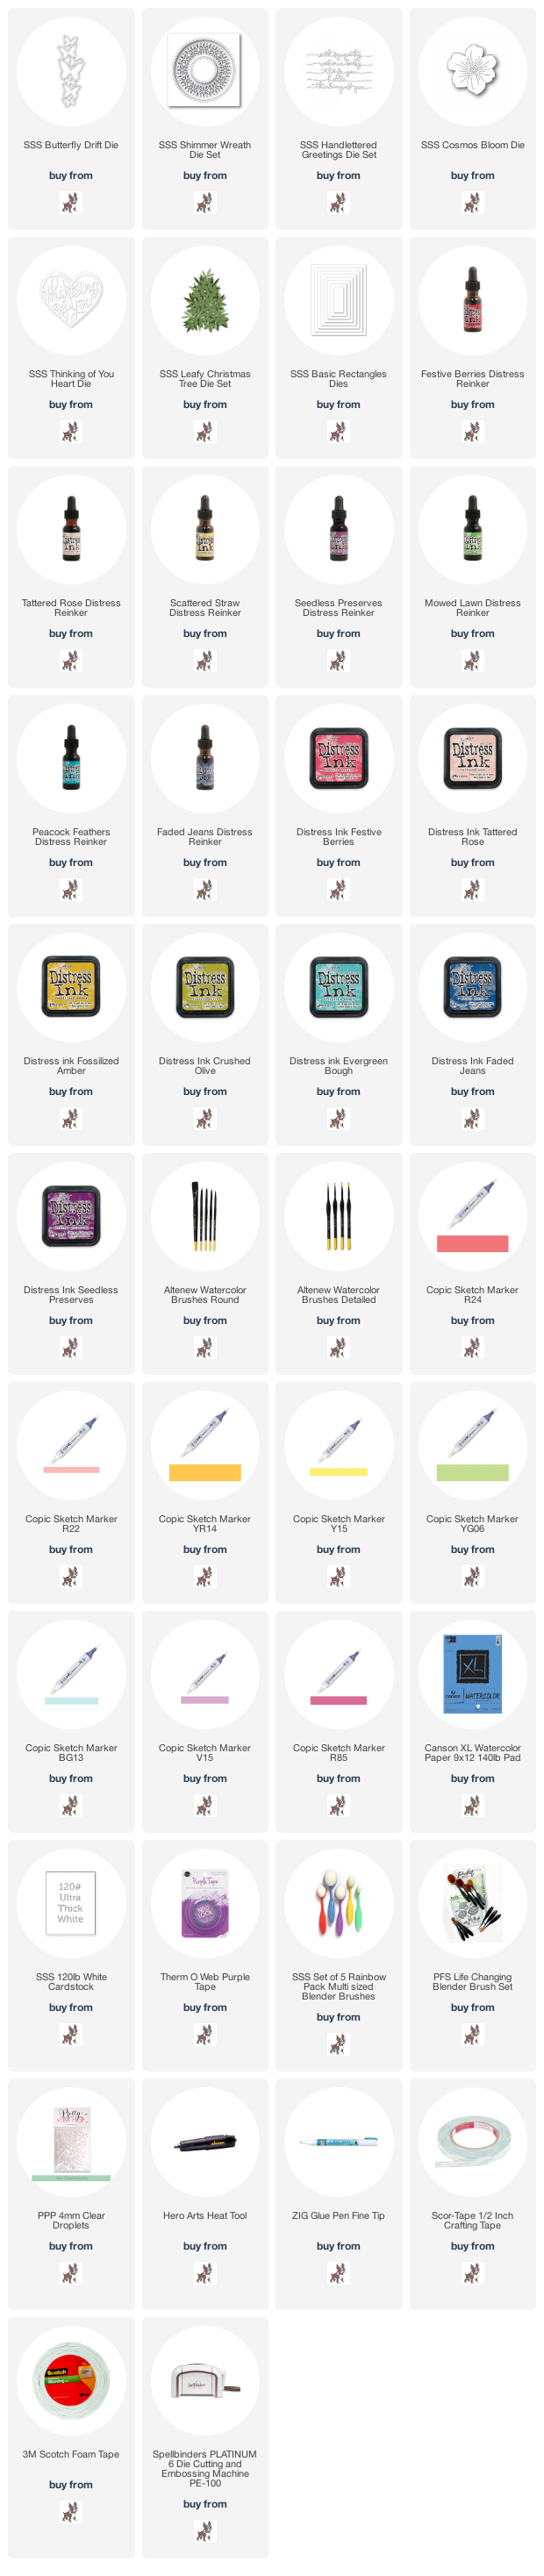
To-da! This Butterfly Drift die is my main supply – it’s definitely my most favourite butterfly die ever!!


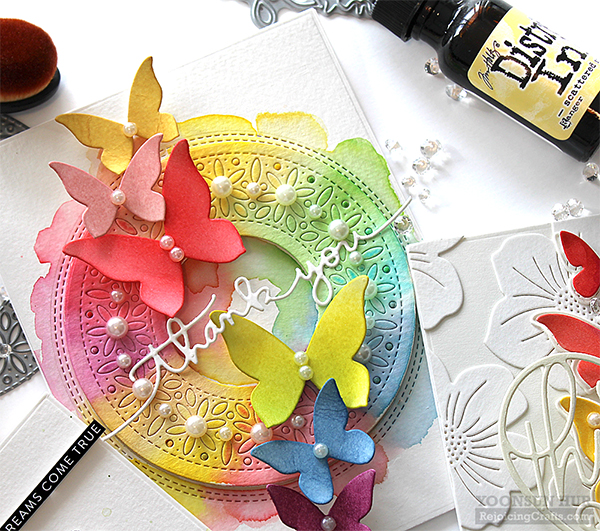
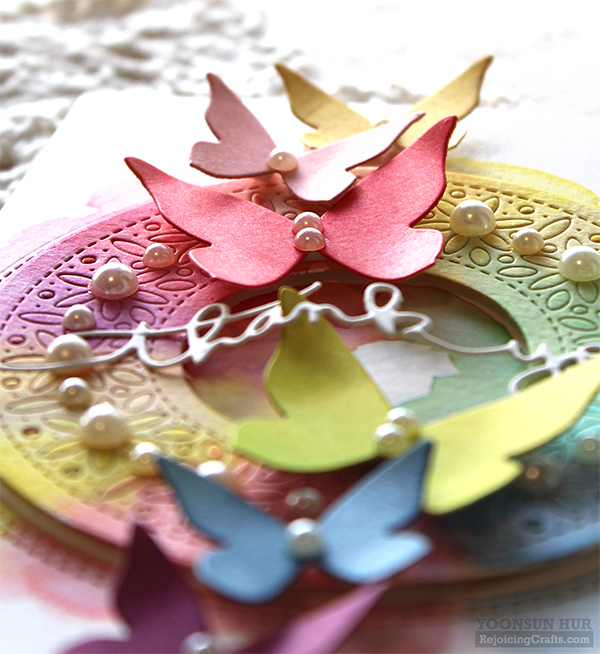
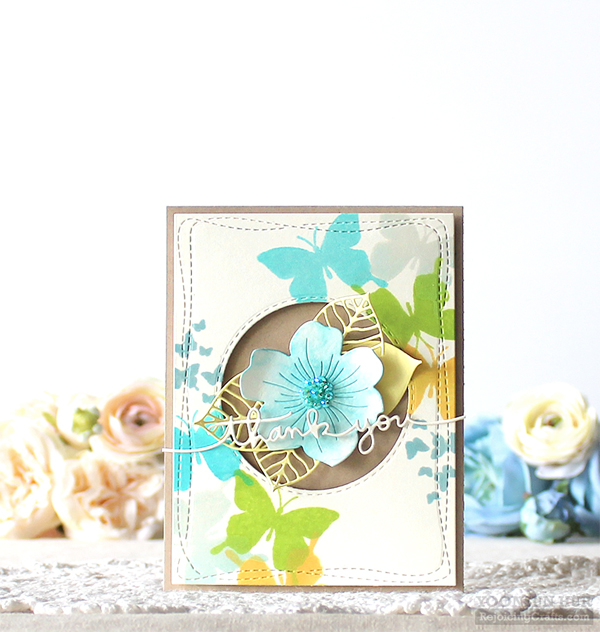
For my first card, I made a watercoloured rainbow butterflies using the Butterfly Drift and the Shimmer Wreath dies. I die cut rectangle panel from watercolour paper using the A2 sized Basic Rectangle die first. I then die cut the centre of the panel using the Shimmer Wreath die. I watercoloured to a floral circle part of the panel as shown in the picture using Distress reinkers in rainbow order. Next, I die cut the Butterfly Drift from watercolour paper, and then applied Distress inks to some butterflies using blending brushes. For the sentiment, I used the word “Thank you” in the Handlettered Greetings die set.

I decorated the card with cream coloured pearls.


For my second card, I made a tone-on-tone floral background with the Cosmos Bloom die first. I die cut several Cosmos Bloom from white cardstock, then adhered them on white card base as shown in the picture.

I die cut the Butterfly Drift from thick white cardstock, then coloured each butterfly die cut with Copic markers:
Red: R24 / Pink: R22 / Orange: YR14 / Yellow: Y15
Green: YG06 / Blue: BG13 / Purple: R85 & V15.
I added the outlined Butterfly Drift die cut on the centre of the card first, then added Copic coloured butterflies in place using foam tape. For the sentiment, I used the Thinking of You Heart die.


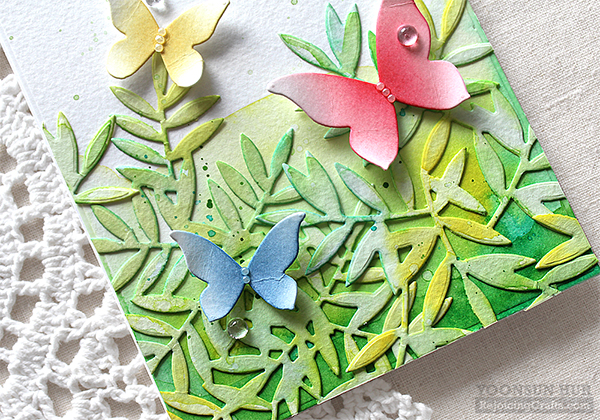
For my last card today, I made a watercoloured leafy background with the Leafy Christmas Tree die set. With Crushed Olive & Mowed Lawn Distress inks, I coloured to the panel & leafy tree die cuts. I die cut the Butterfly Drift from white cardstock, inked them, then added on the card.

I really hope my rainbow butterfly cards make you happy!

Thank you so much for stopping by. Have a safe and restful weekend!

Keep smiling and be blessed. God bless you all.
Love Love Love RejoicingCrafts

SSS Ocean Background

Hello crafty friends! Hope you are having a happy weekend.
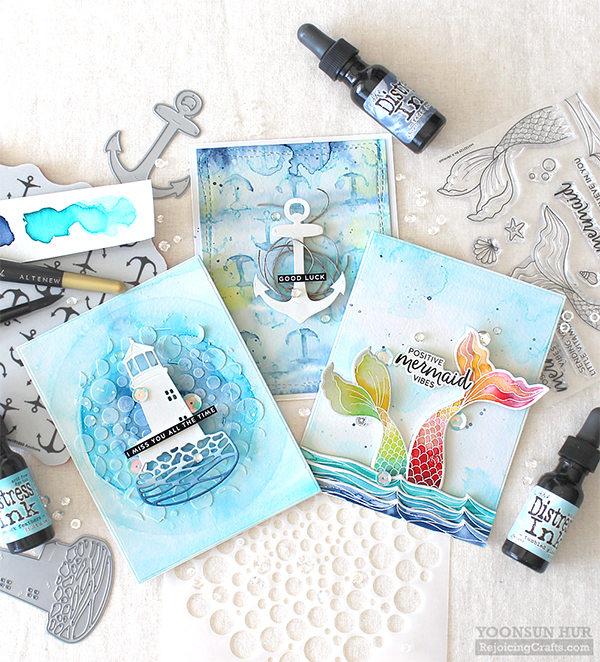
Today I have three ocean-themed cards with some Simon Says Stamp goodies.

I made watercoloured ocean backgrounds with Tumbled Glass, Peacock Feathers and Faded Jeans Distress reinkers – I loooove this blue combo!!


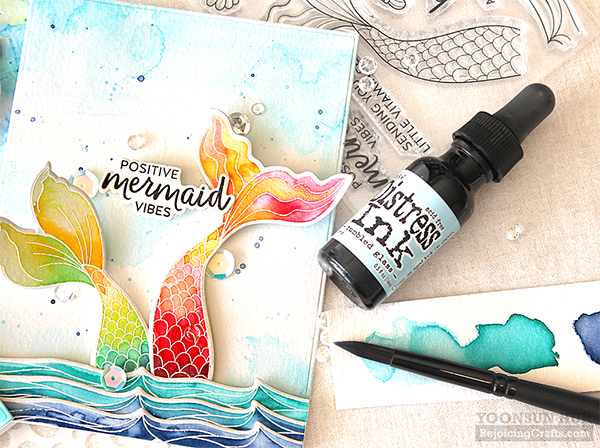
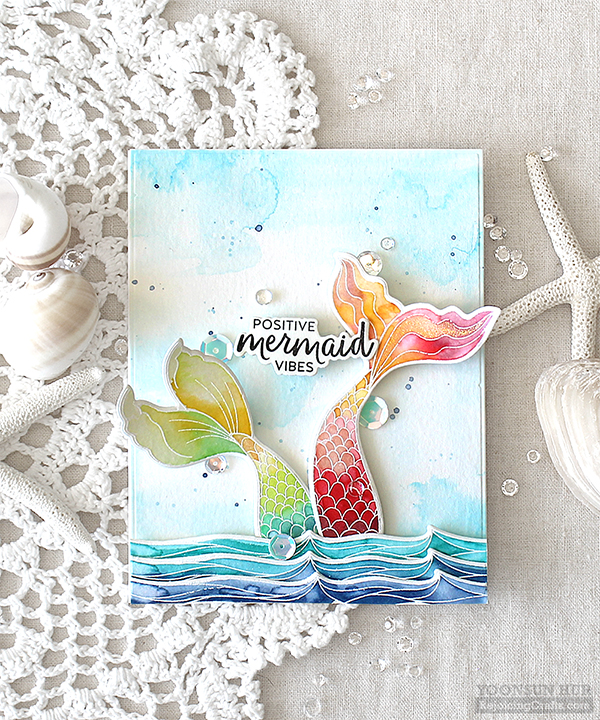
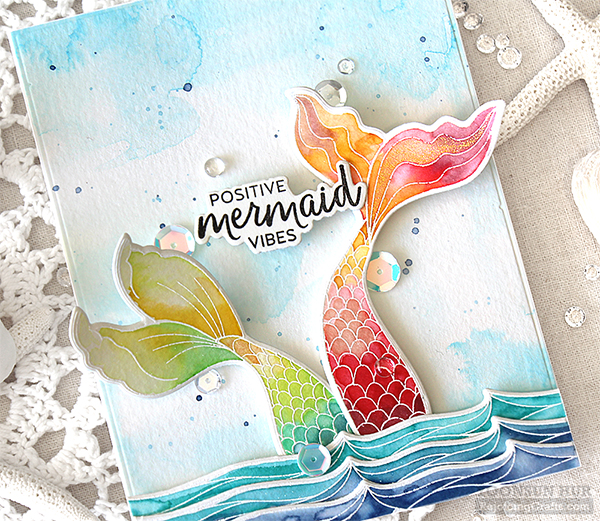
So many crafty friends love my Mermaid 3D standing card I made last month so I used the Be A Mermaid set once again. :D

To make watercoloured ocean background, I fixed the edge of the watercolour paper with purple tape first. I then applied water to the paper before watercolouring. I lightly coloured with Tumbled Glass Distress reinker, then added blue ink splatters. Once it was dry, I trimmed it using A2 sized Basic Rectangle die.

I heat embossed mermaid tails & waves from the Be A Mermaid set in white, coloured them with Distress inks, and then die cut them with the matching dies:
Red mermaid tail: (from bottom to top) Victorian Velvet, Festive Berries, Tattered Rose and Fossilized Amber
Green mermaid tail: Peacock Feathers, Mowed Lawn, Crushed Olive and Fossilized Amber.
I mounted them on white card base, decorated the card with April Showers sequins and Clear Droplets.


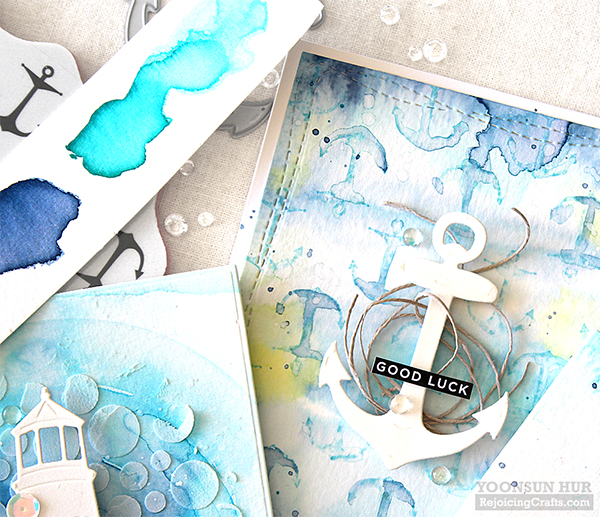
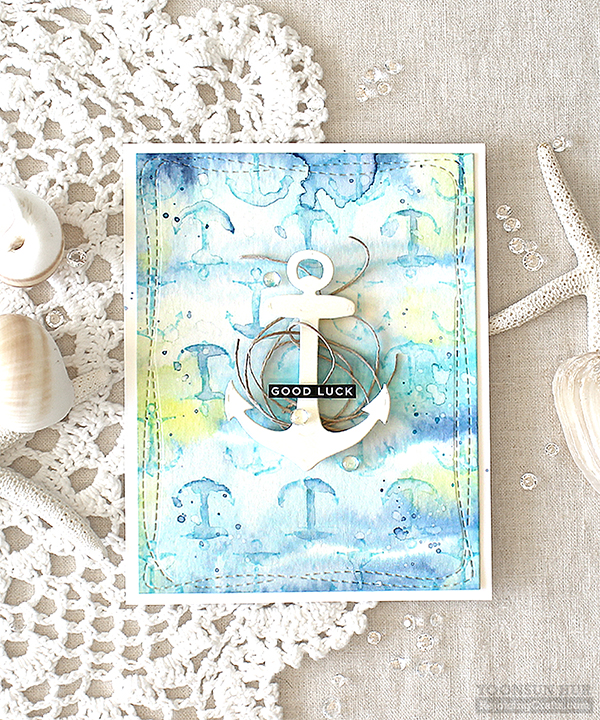
For my second card, I used the Anchor die & the Anchors Background stamp. I made watercoloured sea background using Tumbled Glass, Crushed Olive, Peacock Feathers and Faded Jeans Distress reinkers. Once it was dry, I trimmed it using the Wonky Rectangle die. I applied Tumbled Glass Distress ink to the Anchors Background stamp, stamped onto watercoloured panel, then lightly touched the stamped images using water brush. For the centre of the card, I die cut the Anchor from thick white cardstock, wrapped it using natural twine, adhered it using foam tape.


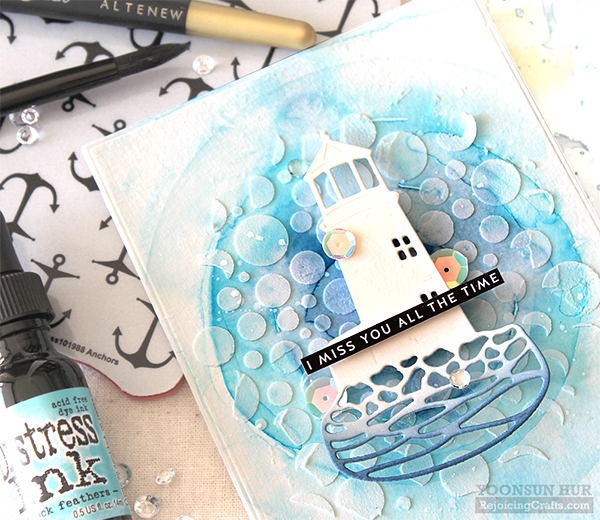
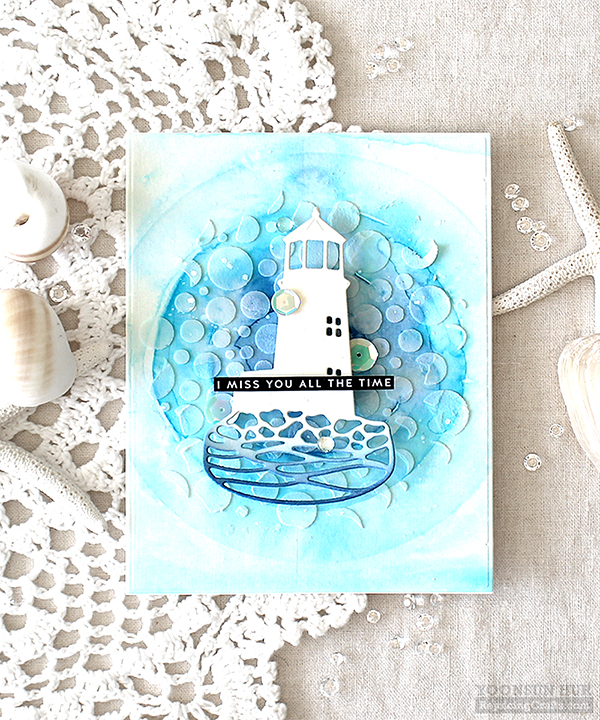
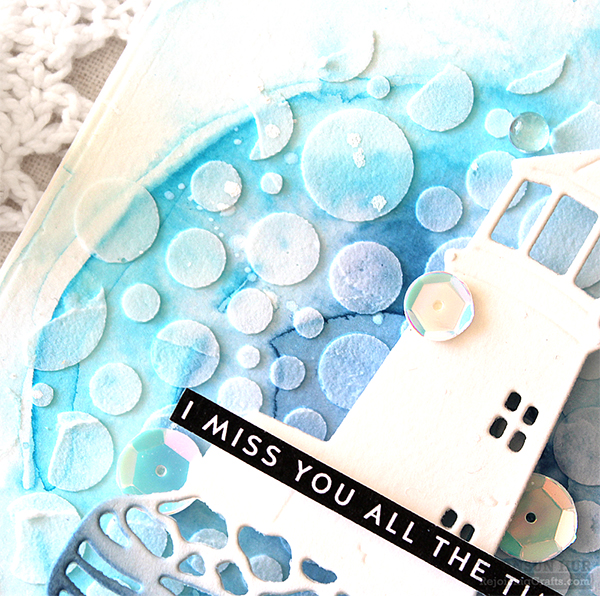
For my last card today, I used the Lighthouse die & the In The Round stencil. To give the wave effect, I used the Circle Masks Stencil set. I placed the circle stencils onto A2 sized watercolour paper panel, then lightly traced circles using pencil in the order of small to large sized circle. I then coloured according to circle lines using Faded Jeans, Peacock Feathers and Tumbled Glass Distress reinkers.


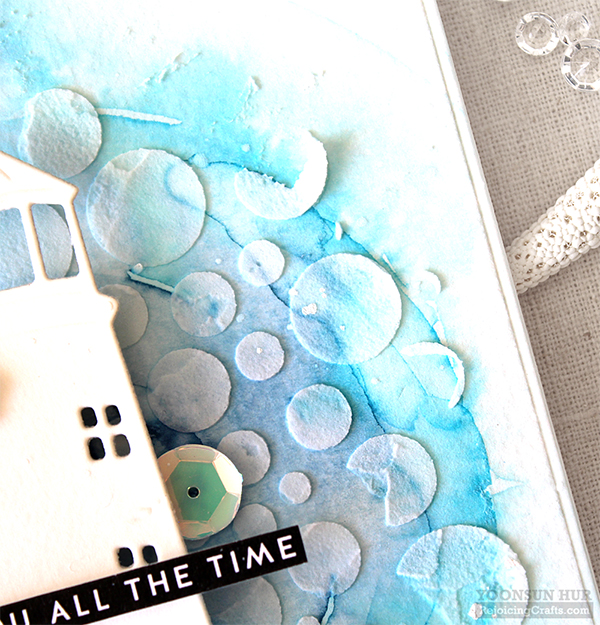
To express breaking waves, I laid the In The Round stencil onto watercolour panel, and then applied white embossing paste. :D


YAY!! You can now get 20% off all Simon branded products until tomorrow!! The code is HPY4TH. Please grab awesome Simon products and share your amazing cards! ;)

Thank you so much for stopping by. Have a safe and restful weekend!

Keep smiling and be blessed. God bless you all.
Love Love Love RejoicingCrafts
SSS Butterfly Kisses
Hello crafty friends!
Today’s cards feature the Butterfly Kisses stamp set along with other SSS goodies. Butterflies and flowers are the best combination for a beautiful card, right?!!

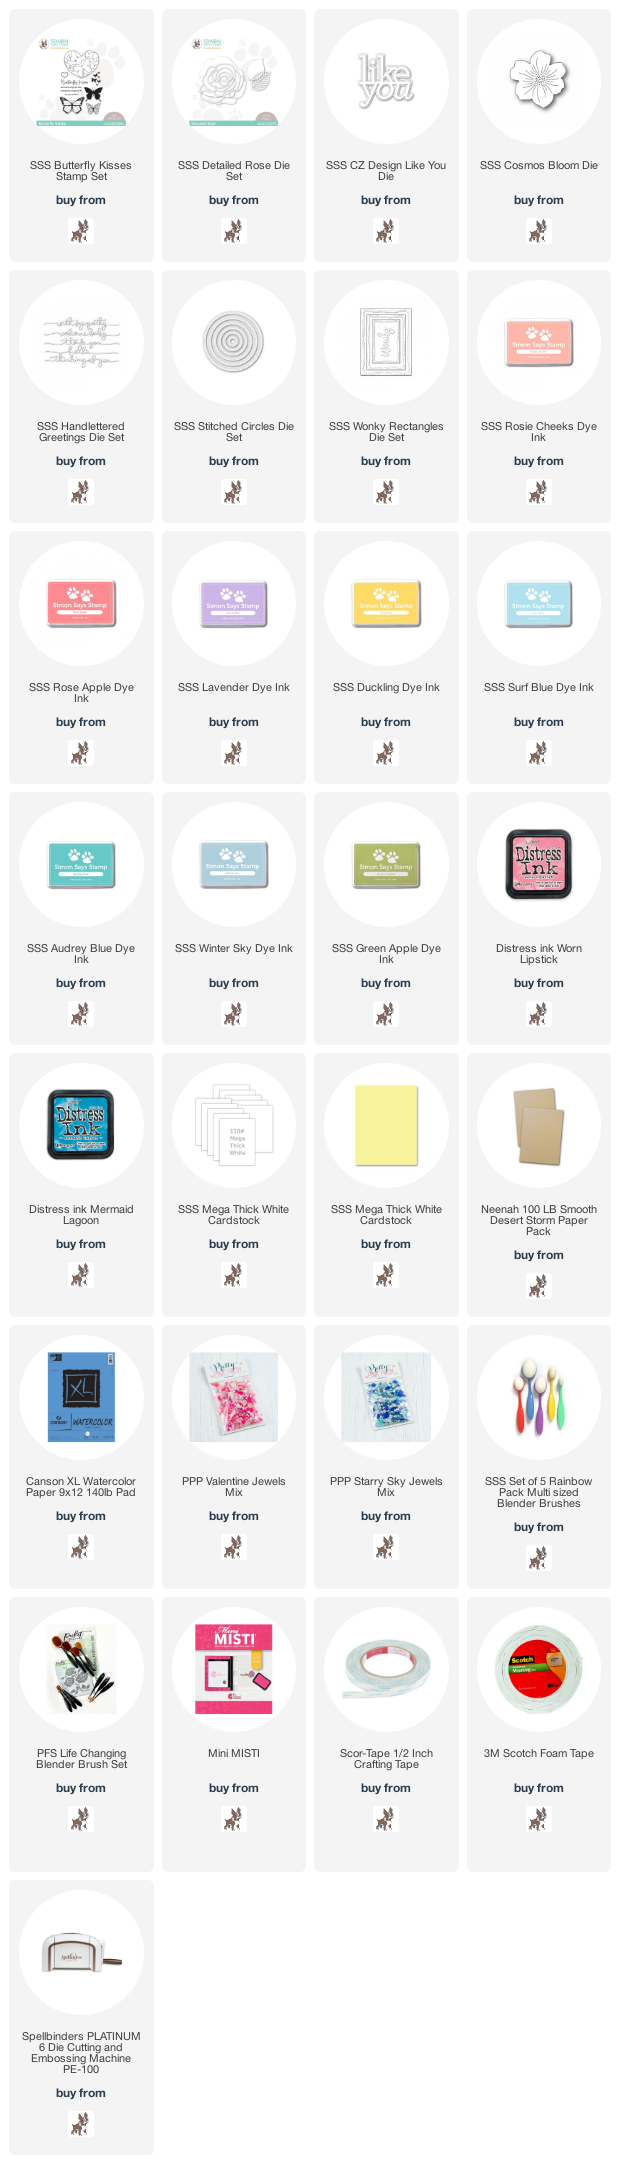
For my first card, I started by making butterflies background with warm-toned dye inks – Rosie Cheeks, Rose Apple, Lavender and Duckling. I then trimmed the edge of the stamped panel down using the Wonky Rectangle die.

For the centre of the card, I added pinkish hydrangea using Hydrangea Petals die – sadly, it’s retired so if you don’t have, you can use any other flower dies.

I die cut several petals from watercolour paper, blended on each petal with Worn Lipstick Distress ink, then gently brushed them with water as shown in the picture. For the pale yellow leaves, I used the detailed leaf die in the Detailed Rose die set. I added pink jewels on the centre of each petals after assembling flower.

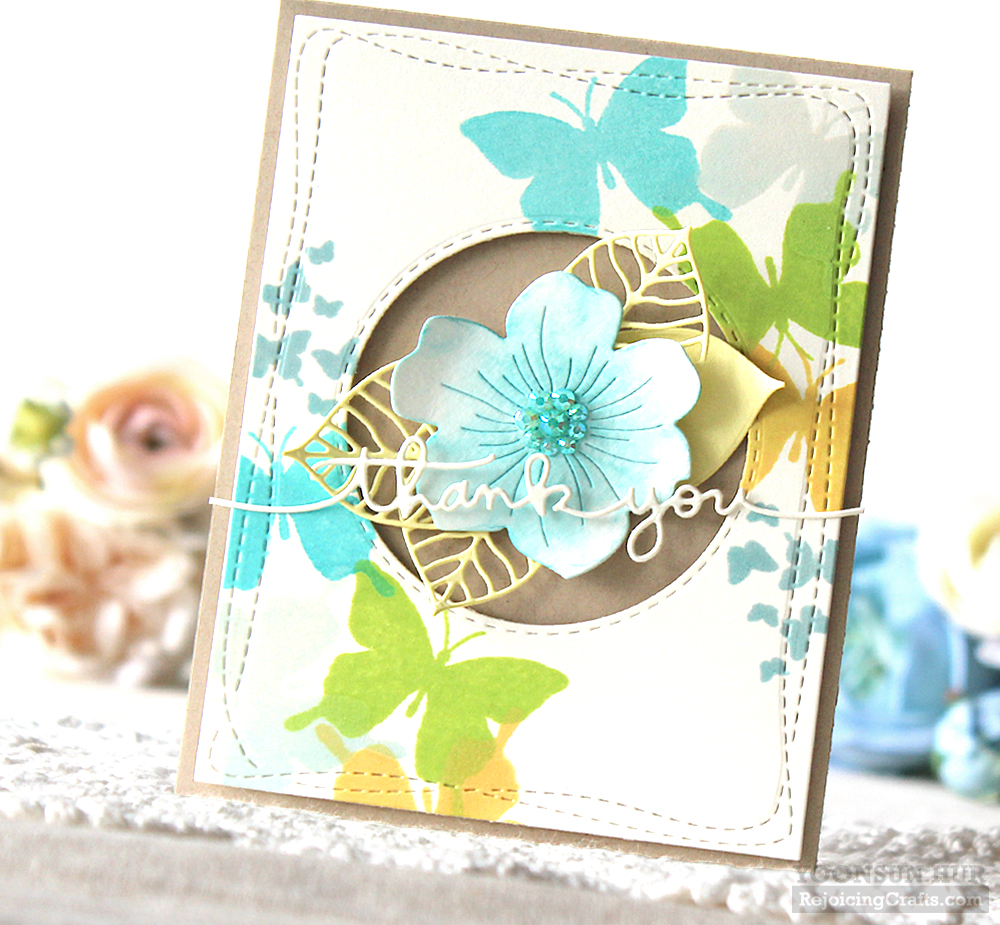
Here is one more card with the Butterfly Kisses stamp set. I stamped solid butterfly images on white panel with cool-toned dye inks – Surf Blue, Audrey Blue, Winter Sky, Green Apple and Duckling. For the centre of the card, I die cut the Cosmos Bloom from watercolour paper, applied Mermaid Lagoon Distress ink, and then brushed it using water brush.

For the sentiment, I used the word “Thank you” in the Handlettered Greetings die set.


Thank you so much for stopping by. Have a healthy and happy week!

Keep smiling and be blessed! God bless you all!
Love Love Love RejoicingCrafts