Hello crafty friends, happy Monday!
Welcome to the Pinkfresh Studio July Release Blog Hop! We released some Christmas products for your Christmas in July projects! :D

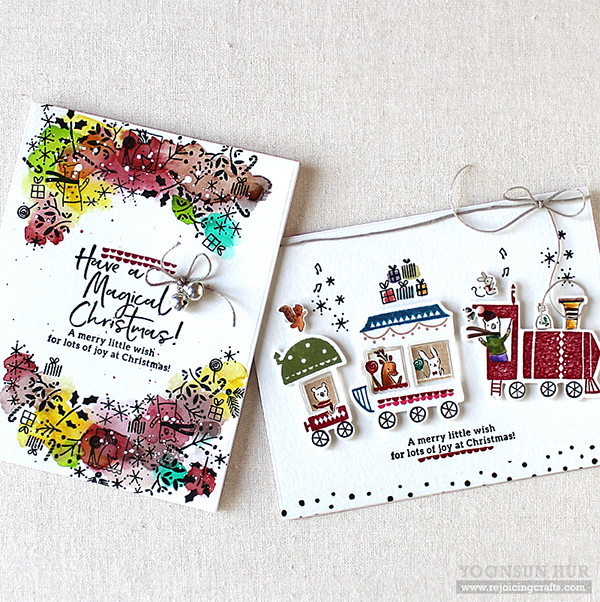
My cards today I’m especially featuring the Train Ride Stamp & Die Set. – it’s so super adorable!!
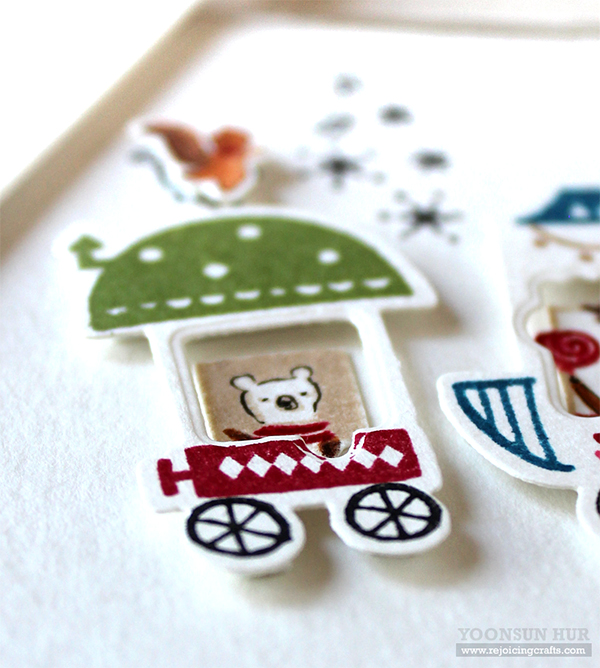
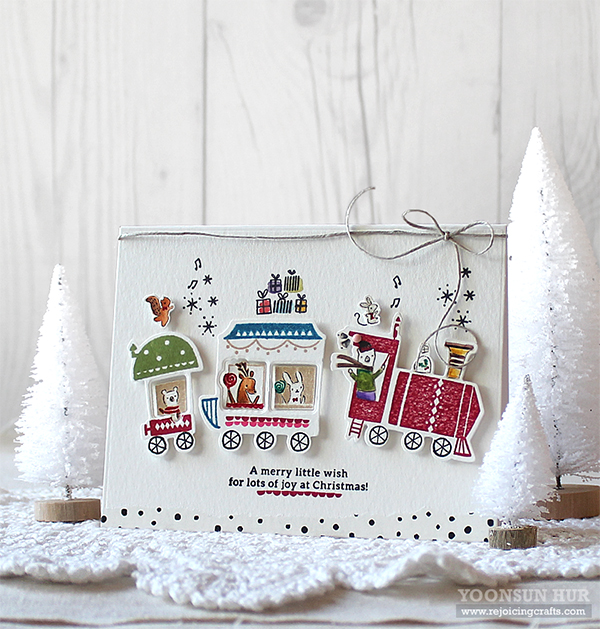 The Train Ride set, we need to assemble each of Christmas trains – it’s a little bit of extra work, but it is totally worth it! I die cut all three trains from watercolour paper using the Train Ride die set first, and then stamped all images in place onto each of train die cuts using dye inks. I used the MISTI Stamping tool.
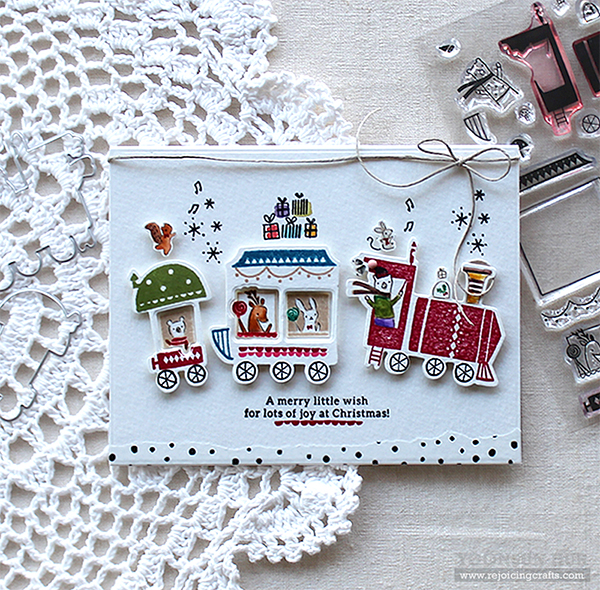 I stamped the sentiment from the Train Ride set on the bottom of card base using black pigment ink, decorated the card with dotty washi tape, and then mounted all trains on the card front using foam tape.

Here are the details:


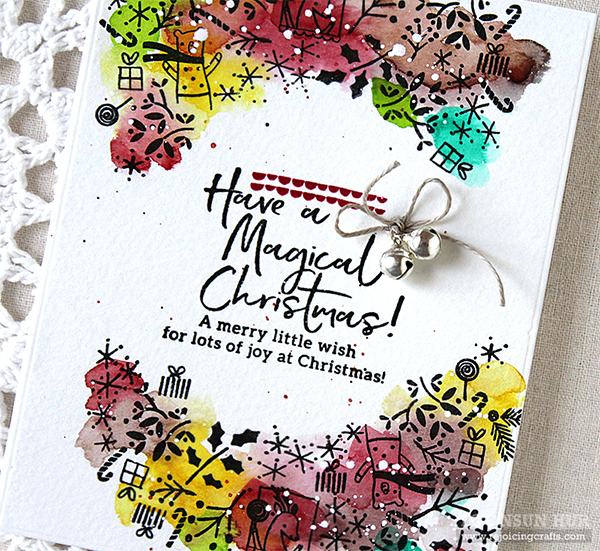
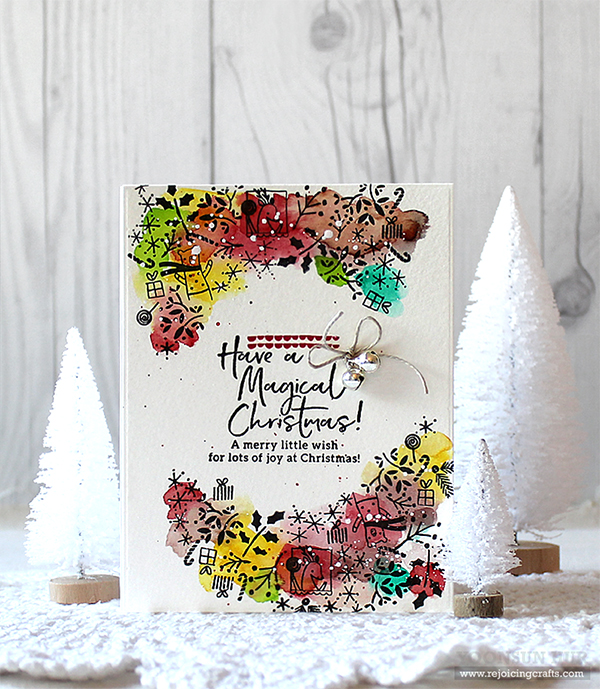 For my second card, I used many small images from Train Ride & Magical Christmas stamp sets. I stamped the sentiments on the centre of watercolour paper panel using VersaFine Onyx Black pigment ink first, stamped all small images randomly onto the panel as well.
 I roughly coloured the stamped images with liquid watercolors, then added some ink splatters here and there. To finish it off, I decorated around the sentiment area with jingle bells.
 Oh! I LOVE creating Christmas cards so much!!
GIVEAWAY!
Pinkfresh Studio blog will be giving away the ENTIRE JULY RELEASE to one lucky commenter! Also, each one of the designers is giving away a $25 gift card to the Pinkfresh Studio store – the winners will be picked from the comments. All winners will be announced on the Pinkfresh Studio GIVEAWAY PAGE on Sunday, July 15th. Please check that page & claim your prize within 2 weeks.
 SHOPPING PROMO!
Pinkfresh Studio will be offering free/discounted shipping from July 9th – July13th on orders $50+. The code is FREESHIPWITH50. Shipping is free in the USA, and $5.50 off for our International friends.
BLOG HOP LIST: Click here InLinkz Link-up
Thank you so much for stopping by. Happy crafting!!
Keep smiling and be blessed! God bless you all!
Love Love Love RejoicingCrafts


 To create the card, I die cut
 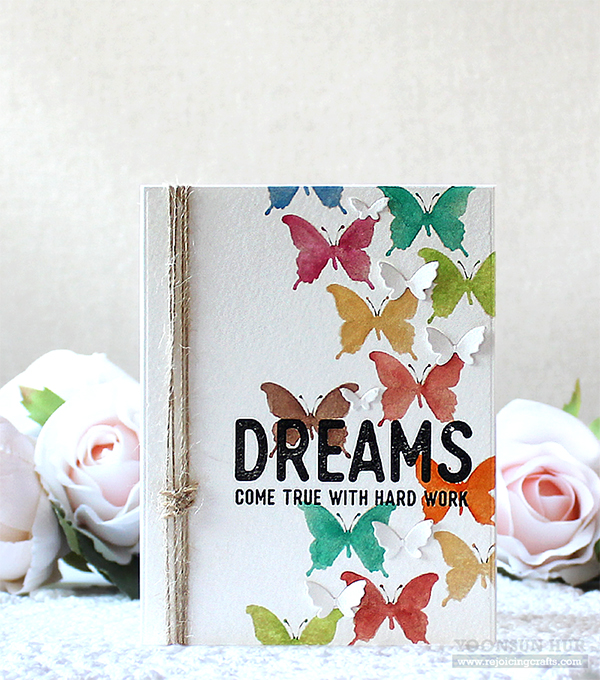 Once the panel was dry, I decorated the left side of the panel with natural twine, and then mounted it on white card base using double-sided tape. To finish it off, I added tiny white butterflies (from the
  These colourful butterflies make me so happy!!

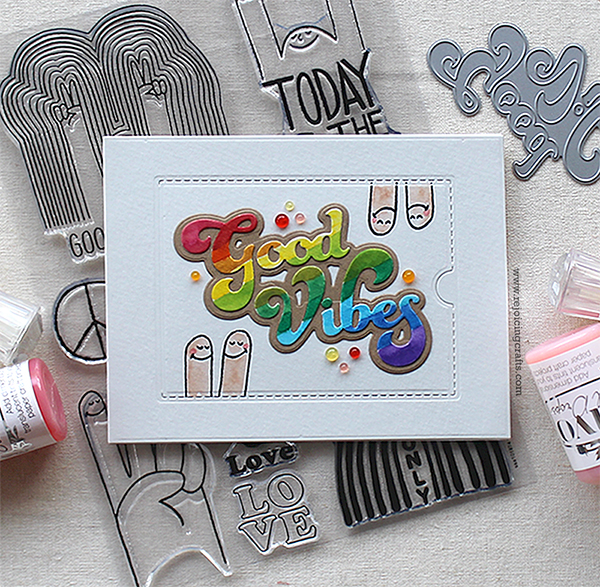 I die cut watercolour paper to 5 ½” x 4 ¼” using the
 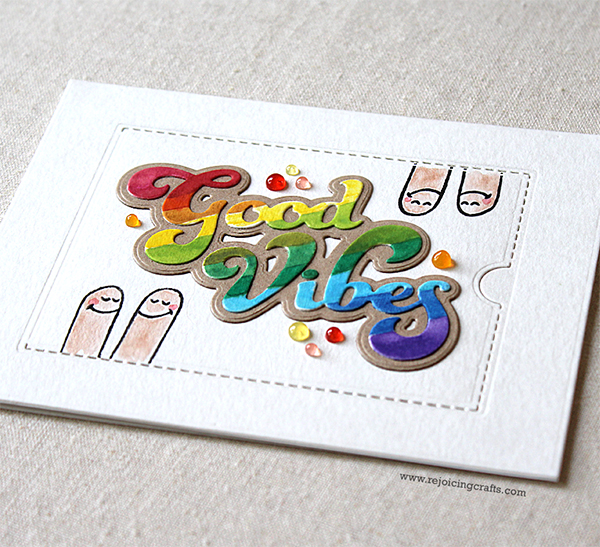 I mounted the sentiment panel on white card base using double-sided tape first, and then added fun fingers (from the
  I tore it carefully..
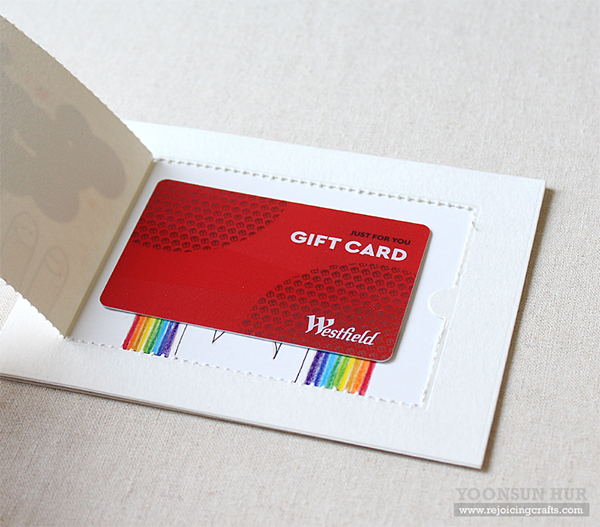 Ta-da! There is a gift card inside the card.
 And..
And..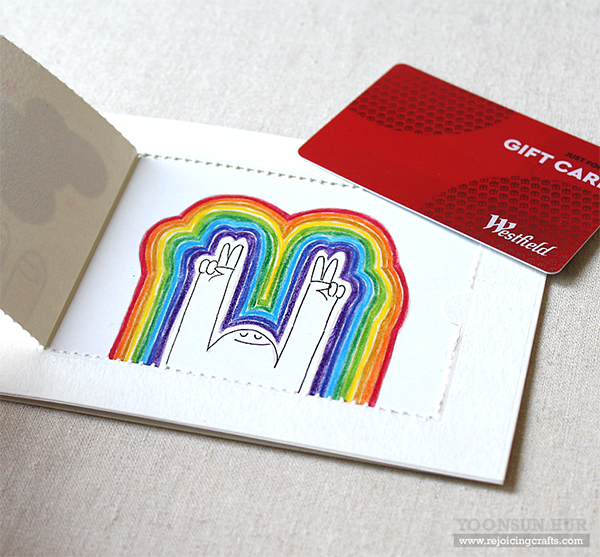 YAY! Sending GOOD VIBES!!
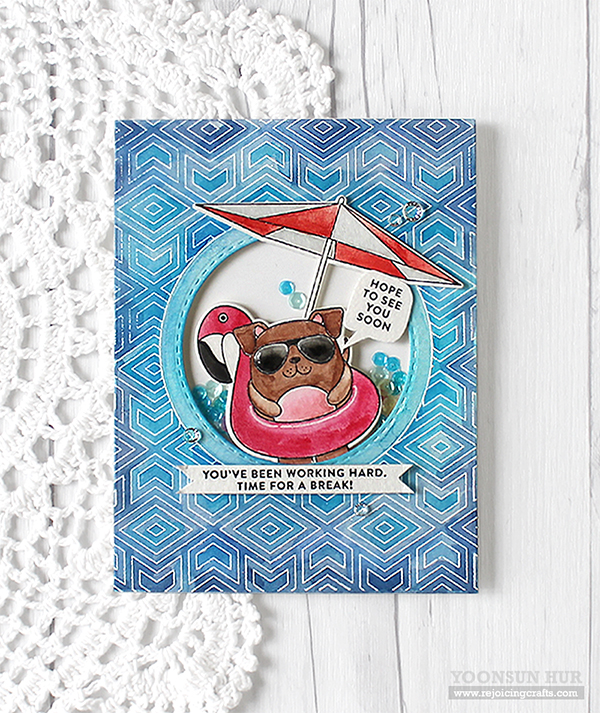 I started by heat embossing the
 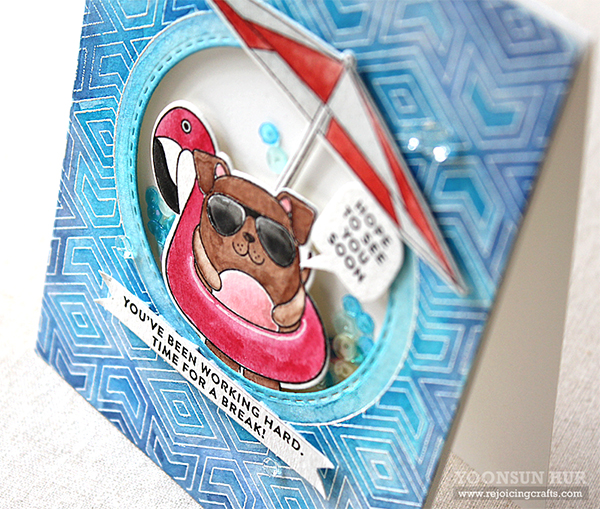 I stamped a cute dog wearing sunglasses & a beach umbrella from the
  For the sentiment, I used the
  “You’ve been working hard. Time for a BREAK!!”
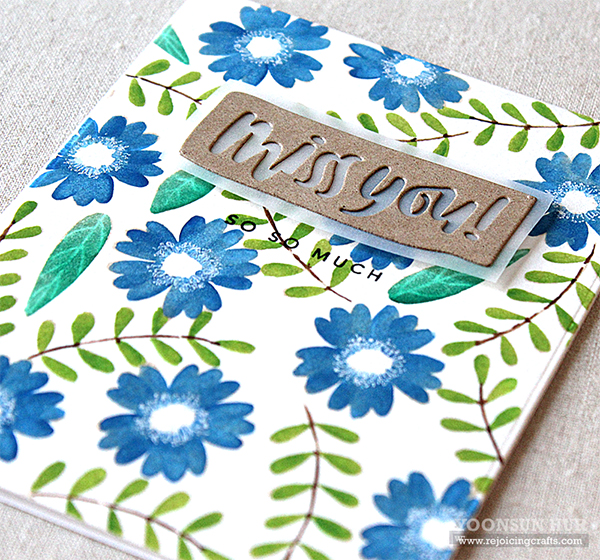
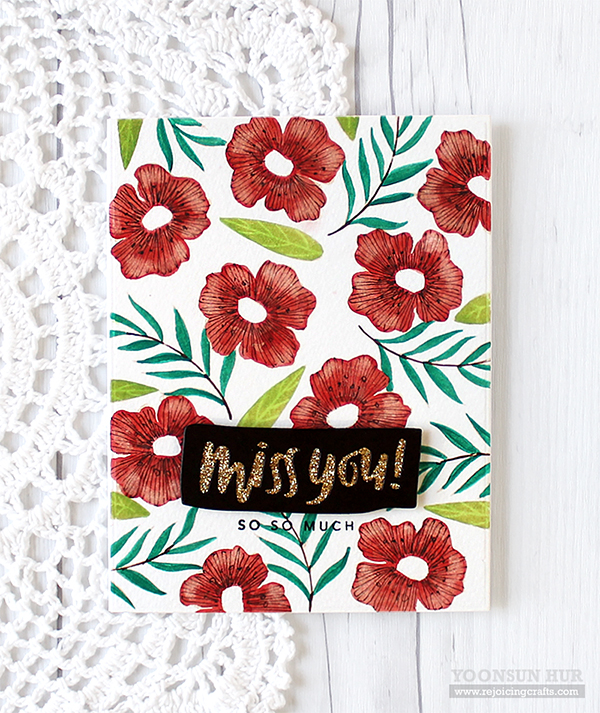 Watercolouring with solid flower stamps is one of my favourite technique! :D
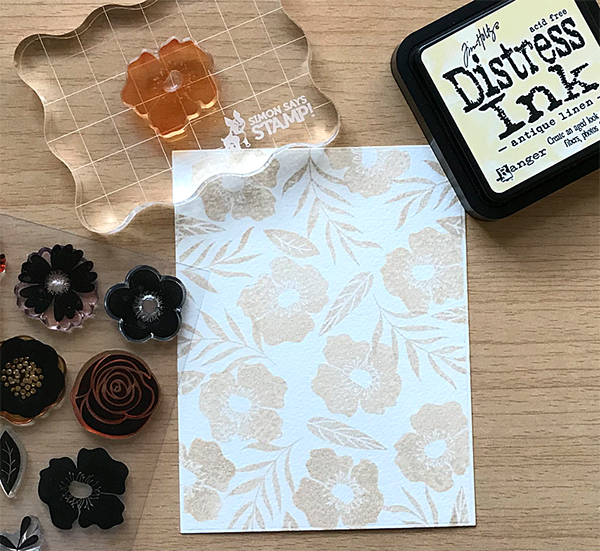 1) Stamped flowers & leaves from the
  2) Coloured the stamped images with
 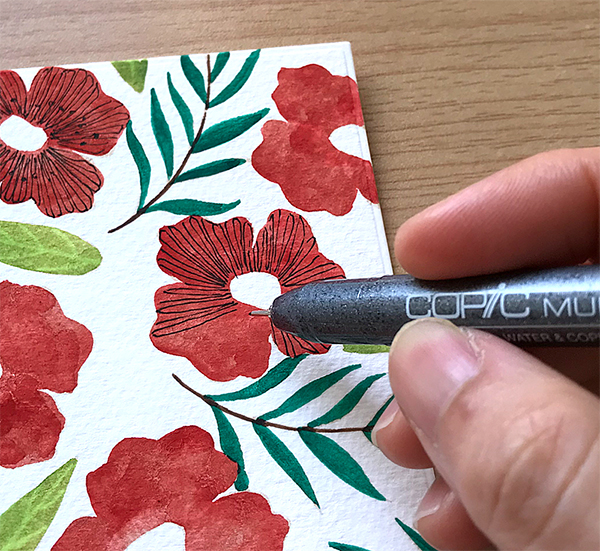 3) Once the watercoloured floral panel was completely dry, I drew thin lines of each flower petal using
 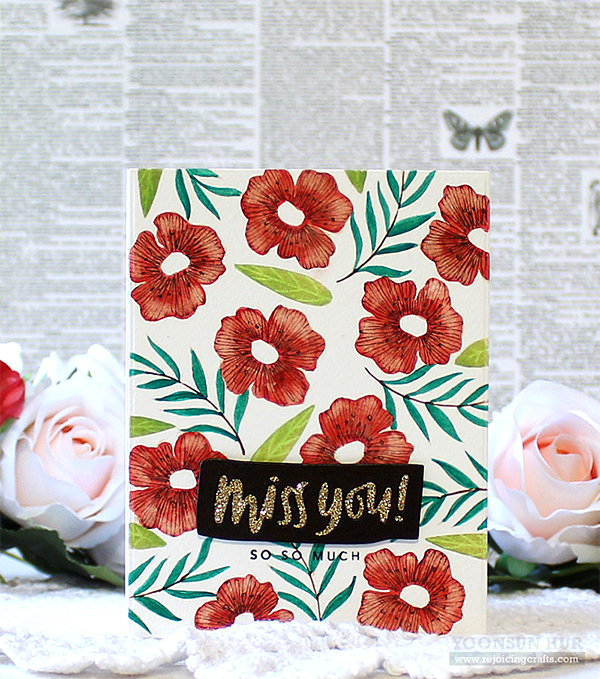 For the sentiment, I die cut the word “
 Here is another floral card with the same
 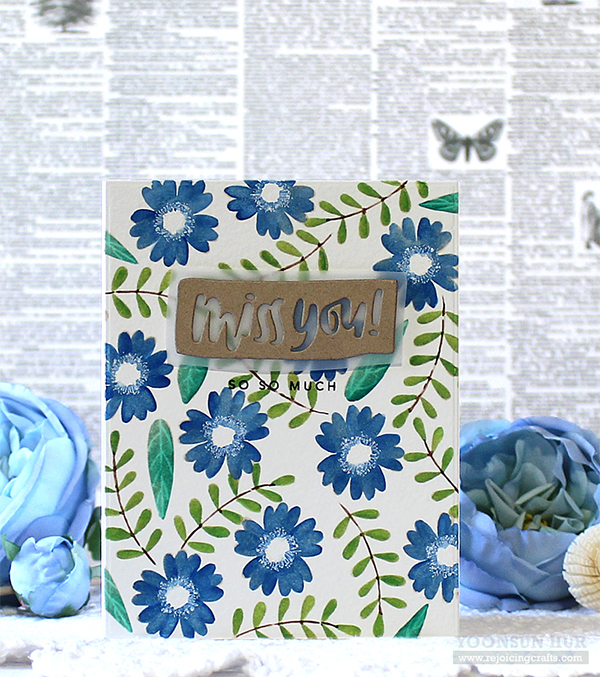 I stamped flowers & leaves with