MFT MAY Card Kit – Flashy Florals

Hello crafty friends!
It’s Time! This new beautiful Flashy Florals Card Kit is available in the MFT Store now!!
PrintMFT_FlashyFlorals_KitPreview

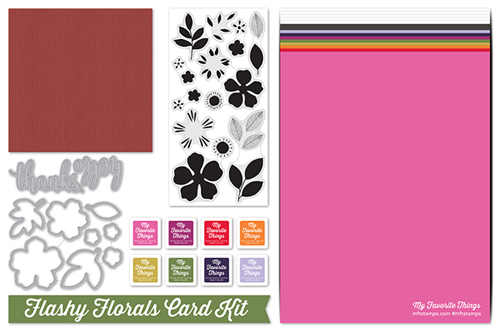
Flashy Florals Card Kit:
Flashy Florals Stamp Set
Flashy Florals Die-namics & Thanks & Hello Die-namics
Scattered Surface Background
8 Premium Dye Ink Cubes – Ripe Raspberry, Red Hot, Orange Zest, Fuse Green, Jellybean Green, Pure Plum, Periwinkle, and Eggplant
15 sheets of Card Stock – Ripe Raspberry, Red Hot, Orange Zest, Fuse Green, Jellybean Green, Pure Plum, Periwinkle, Eggplant, Steel Grey (2 sheets), Smooth White (5 sheets)

Today I want to share with you my three different styles of flower cards using the new kit!
YoonsunHur-20160517-MFT-MAYCardKit-A001
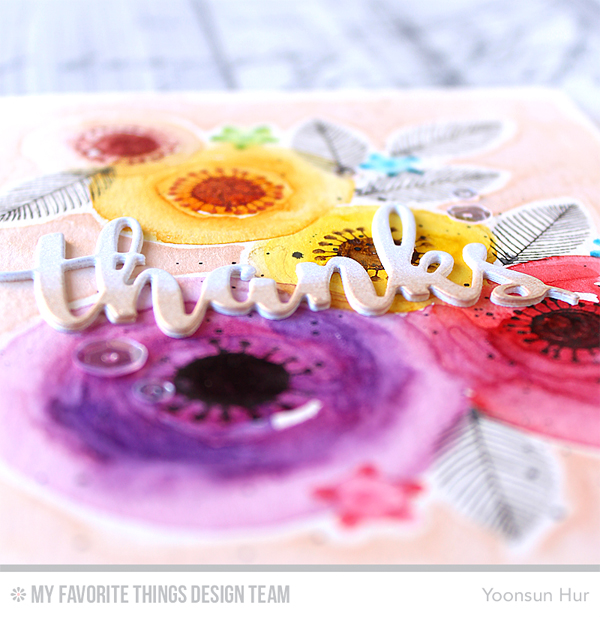
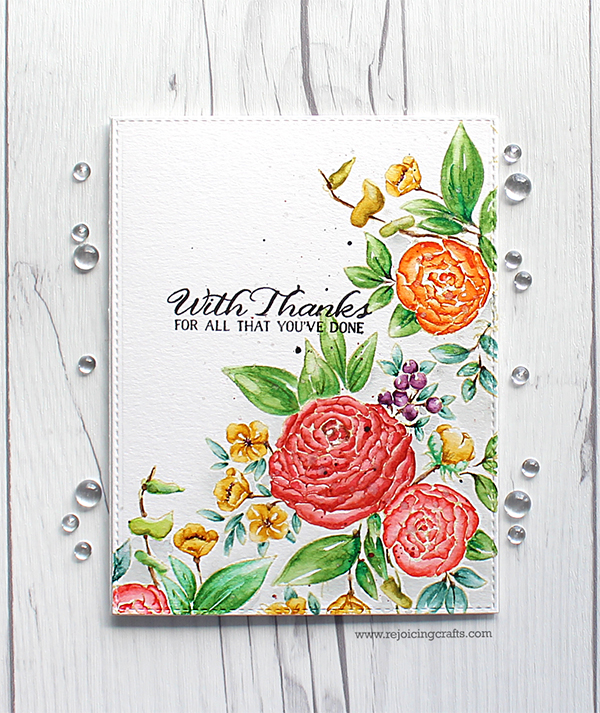
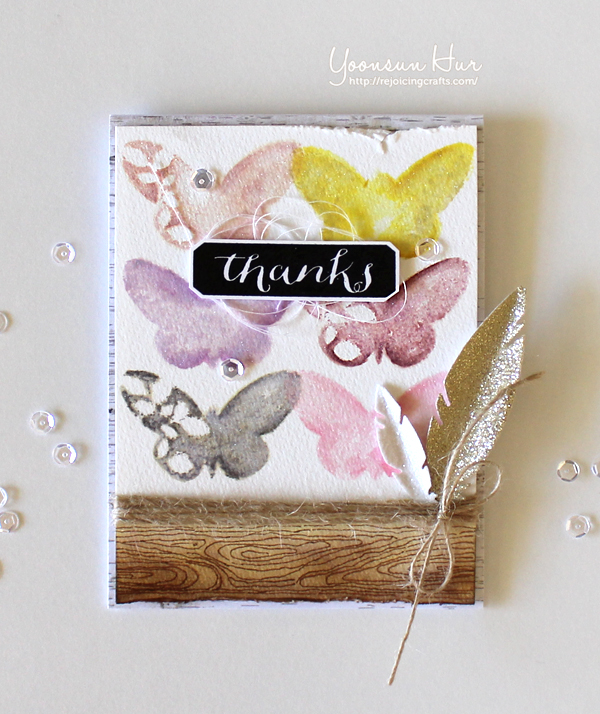
For my first card, I made a watercolour flower card. First, I painted several circles on watercolour paper panel using Kuretake Gansai Tambi Watercolor. I then stamped the flower accents at the centre of the watercoloured circles with Black Licorice hybrid ink & Rusty Hinge Distress ink, the leaves with Black Licorice hybrid ink. For the sentiment, I die cut the word “Thanks” from white card stock using Thanks & Hello Die-namics five times, glued them together, then blended it with Tattered Rose Distress ink using a mini blending tool – I love this painted “Thanks” die so much!!
YoonsunHur-20160517-MFT-MAYCardKit-A002YoonsunHur-20160517-MFT-MAYCardKit-B001
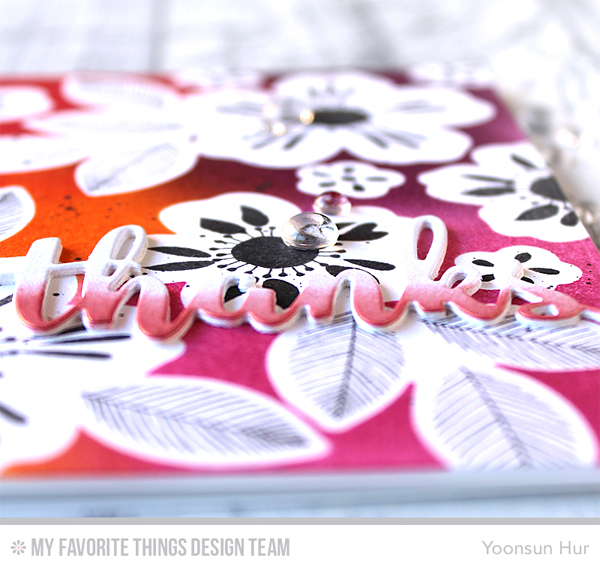
For my second card, I used masking technique. First, I die cut the flowers and leaves from the Inkadinkado stamping mask paper using Flashy Florals Die-namics, placed the mask die cuts on watercolour paper panel, then ink blended the background with Red Hot, Pure Plum, Orange Zest, Ripe Raspberry dye inks using a mini blending tool. Once dry, I removed the masks and then stamped the flower accents and leaves (shown as the picture) using Black Licorice hybrid ink. For the sentiment, I used the Thanks & Hello Die-namics.
YoonsunHur-20160517-MFT-MAYCardKit-B002YoonsunHur-20160517-MFT-MAYCardKit-C001
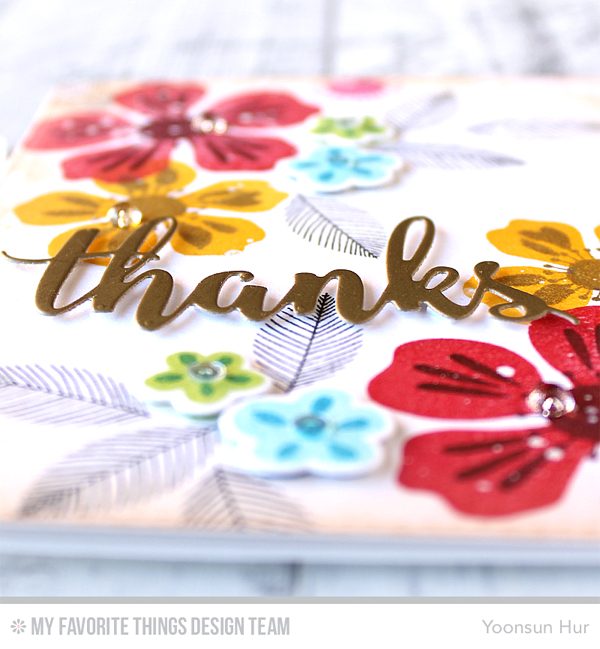
For my last card, I stamped the flowers and leaves from Flashy Florals set on white paper panel with several colours of hybrid ink:
Red flowers: Red Hot & Paver Red
Yellow flowers: PineappleLatte
Small flowers: Summer Splash & Lush LagoonSour AppleGreen-Eyed Monster
Leaves: Black Licorice
I ink blended the edge of the stamped panel with Tattered Rose Distress ink, added some water drops.
YoonsunHur-20160517-MFT-MAYCardKit-C002

Make sure to check out MFT Blog for all the info for today along with links to all the other DT member’s blog posts.

Thank you so much for stopping by. Have a beautiful day!!

Keep smiling and be blessed! God bless you all!
Love Love Love RejoicingCrafts

http://static.inlinkz.com/ppr.js

Wplus9 Beautiful Bouquet: Ranunculus

Hello crafty friends!
Today I am just popping in to show you the watercolour flower card that I’ve made using Wplus9 Beautiful Bouquet: Ranunculus stamp set. Wplus9 is one of my beloved stamp companies and their flower stamps are so beautiful, always!

YoonsunHur-20160218-Wplus9-001With this new Ranunculus stamp set, I couldn’t resist watercolouring! I just wanted to make a beautiful spring card filled with colourful flowers.

For my no line watercolour card, I 1) Stamped the image from Wplus9 Ranunculus set onto watercolour paper panel using Antique Linen Distress ink. 2) Coloured them with Distress markers (Supply links are at the bottom of the post). 3) Added black ink splatters. 4) Stamped the sentiment in pigment black. 5) Mounted the panel on A2 size white card base using double-sided tape.
YoonsunHur-20160218-Wplus9-002

Thank you so much for stopping by. Have a lovely day!

Keep smiling and be blessed! God bless you all!
Love Love Love RejoicingCrafts

http://static.inlinkz.com/ppr.js

MFT July Creative Challenge – Gift Giving Groove

Hello crafty friends, welcome to My Favorite Things July Creative Challenge!

PrintGet into the groove of creating gift card presentations worth getting excited about with this month’s challenge. Whether gifted in the form of a card or small box, the presentation of a gift card doesn’t have to be boring and our team is ready, willing, and able to inspire your next project. From specially designed Die-namics perfect for creating slots and grooves in your cards to 3 dimensional designs that will delight the recipient, you’ll find a bit of everything in this collection of inspired designs.

Here is what I came up with:
YoonsunHur-20150721-MFTCC01
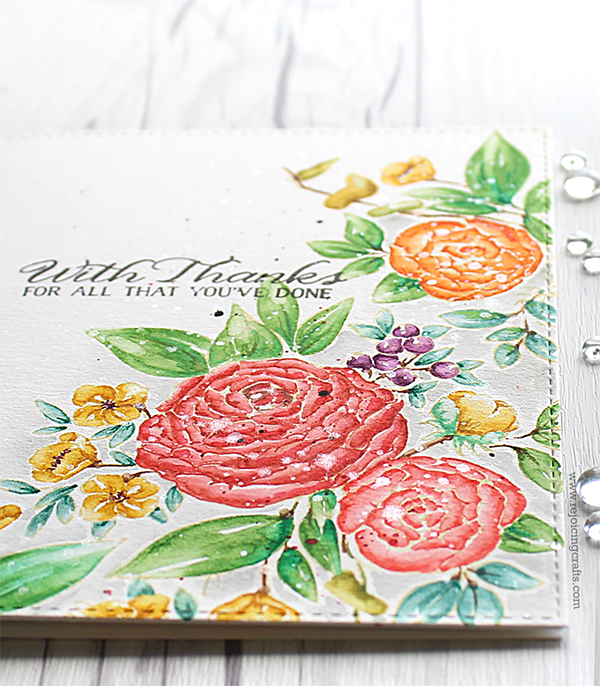
To create the card, I 1) Stamped Tiny Stars Background on the white card stock using Persimmon hybrid ink, and trimmed the stamped panel with Blueprints 25 Die-namics. 2) Prepared some elements for decorating around the gift card pocket -Cross-Stitch Rectangle vellum die cut, balloons, arrow sentiment, pink bow, and tiny stars. 3) Die cut the Gift Card Pocket Vertical Die-namics, it is an old one but great for this theme, from a newly released Plaid Patterns Paper Pack. 4) Mounted all elements as shown to the stamped panel, added some clear sequins.
YoonsunHur-20150721-MFTCC02
Make sure to head over to the MFT blog today for more great projects from the design team for this months challenge.

Thank you so much for stopping by. Have a wonderful day!!

Keep smiling and be blessed! God bless you all!
Love Love Love RejoicingCrafts

TCC #28 – Romantic Roses

Happy Wednesday everyone! Here we are again with a new challenge at The Card Concept!
TCC-IP28Here is an inspirational picture. What a beautiful bunch of flowers!

Here is what I came up with:
20150204-TCC-01Butterflies came into my mind when I saw those beautiful flowers!

During this year, I will show you many of my watercolour cards as a member of the mixed media category. I believe many crafty friends love watercolour cards right?! :D

To create this card, I chose Simon Says Stamp Friendship Butterflies Stamp Set as my main stamp set. At first, I picked neutral colours from my distress ink stash -Tattered Rose, Tea Dye, Milled Lavender, Victorian Velvet, Pumice Stone, and Spun Sugar. I then stamped butterfly onto the watercolour panel and blended with water using waterbrush. I dry the stamped images quickly using heat tool and added sparkle using Zig Wink of Stella Glitter Brush Clear. For my own wood grain paper panel at the bottom, I sponged on the watercolour paper with Distress Ink Vintage Photo and drew timber annual ring using Distress Marker Vintage Photo.

20150204-TCC-0220150204-TCC-03Let’s see what the rest of the design team has come up with:

Freestyle Collage Guest Designer
Jeanne Jachna

Clean & Simple
Kristie Goulet   •   Tracey McNeely

Clean & Graphic
Cindy Lovell   •   Geri Greening

Clean & Layered
Kerin Sylvester   •   Laurie Schmidt

Shabby Chic
Narelle Farrugia   •   Debbie Marcinkiewicz

Freestyle Collage
LauraJane   •   Lea Lawson

Classy & Elegant
Angela Maine   •   Sheri Gilson

Mixed Media
Yoonsun Hur (you are here)   •   Julie Gearinger

Thank you so much for stopping by. Have a wonderful day!

★ Supplies:
Simon Says Stamp Friendship Butterflies Stamp Set
Simon Says Stamp Pointed Feathers Die
Distress Ink – Spun Sugar, Tattered Rose, Squeezed Lemonade, Tea Dye, Milled Lavender, Pumice Stone, and Victorian Velvet
Distress Markers – Vintage Photo
Zig Wink of Stella Glitter Brush – Clear
Tsukineko VersaFine Pigment Inkpad – Onyx Black
Hero Arts Embossing Powder – Clear
EK Powder Tool (Anti static powder tool)
Tim Holtz Detailer Waterbrush
Neat and Tangled Love and Sparkles Sequin Mix

Keep smiling and be blessed! God bless you all!
Love Love Love RejoicingCrafts

Poppystamps Fancy Thanks

Hello folks!
I hope you have had a wonderful Christmas and a fantastic beginning to 2015!! I’m posting on the Poppystamps blog today with Fancy Thanks Die.

Here is a peek:
20150108-Poppy-04-Peek

Fancy Thanks Die is a very intricate and versatile. You can make various styles like simple & fun or classy & elegant using this intricate word die! If you want to see more just click HERE to jump to the Poppystamps Blog!

Thank you so much for stopping by and HAPPY NEW YEAR EVERYONE!!

Keep smiling and be blessed! God bless you all!
Love Love Love RejoicingCrafts