Hello, hello crafty friends! Happy STAMPtember®! Yay!!
 Oh my goodness! I am so super excited and extremely honored to be a part of Simon Says Stamp STAMPtember® Blog Hop!!
September is my favourite month of the year other than Christmas for card making and I am ready to enjoy the month-long event, STAMPtember®!! Are you ready?!
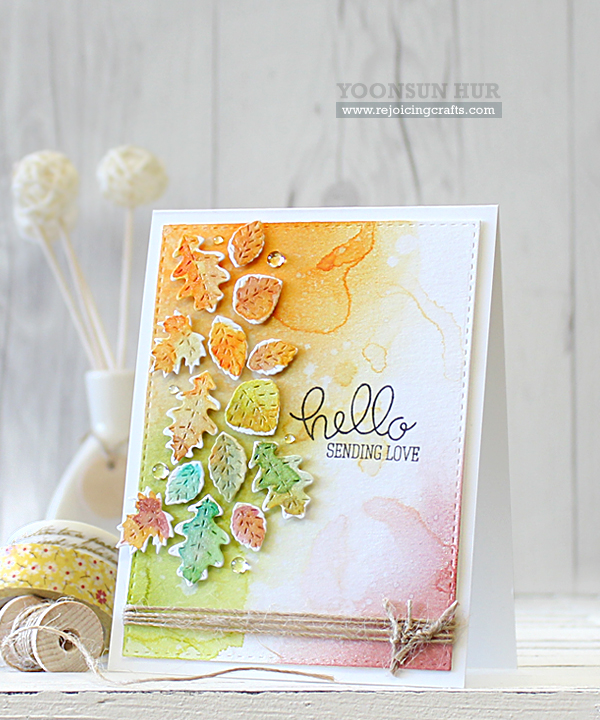 A new Stitched Leaf Wreath die is so versatile. It makes 9 adorable autumn leaves at a time. It can be used by itself as a negative wreath panel, or positive die cuts with other supplies. I really love it!!
To create this card, 1) I die cut many autumn leaves from the watercolour paper using Stitched Leaf Wreath die, loosely coloured them with Distress inks using waterbrush. 2) For my watercolour background, I blended onto the watercolour panel with several colours of Distress ink using mini blending tool, spritzed with water using Mini Mister. I then added water droplets. 3) I tied the natural twine at the bottom of the background panel and then mounted it on the SSS white top fold scored card base. 4) To finish it off, I mounted all leaves as shown to the watercolour panel using dimensional foam tape and then stamped the sentiments with black ink – ‘Hello’ from the Hello Friend Stamp Set, ‘SENDING LOVE’ from the Best Hugs Stamp Set. 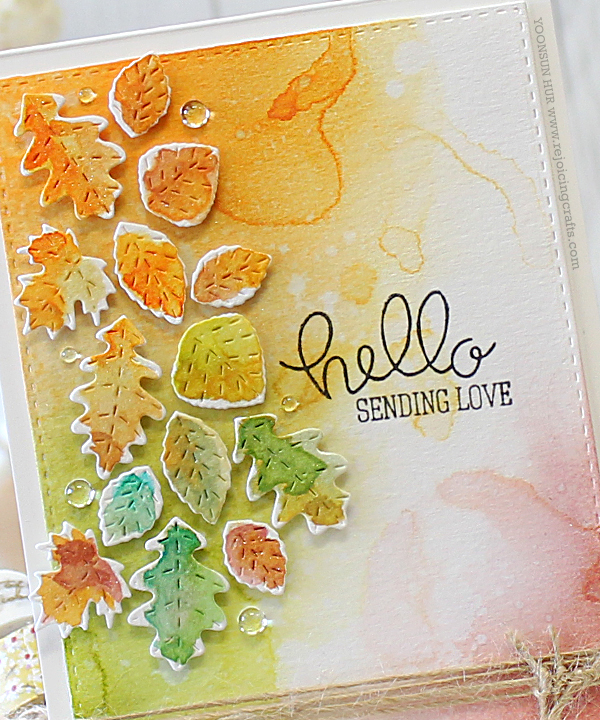
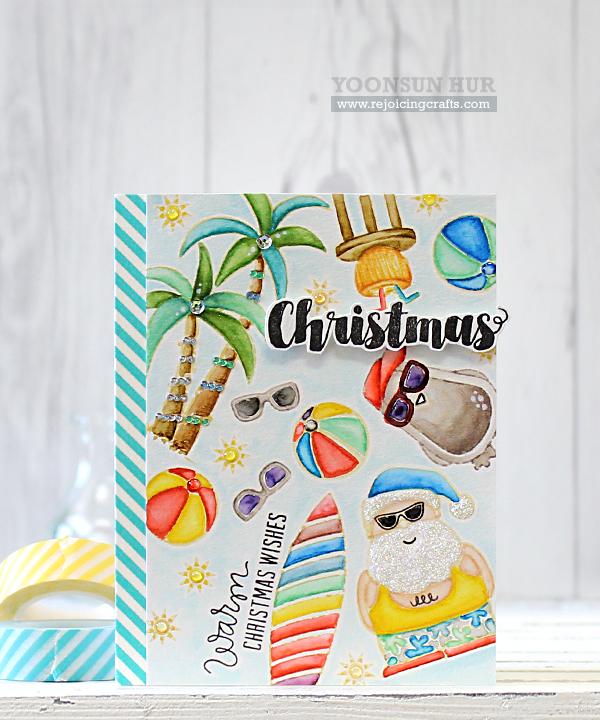 Yee haw! What a FUN Christmas!! I particularly LOVE the Warm Christmas Wishes Stamp Set because it’s really happening in Australia lol!
For my second card – oh, super duper fun – I used no-line watercoloring technique. I 1) Stamped images from the Warm Christmas Wishes Stamp Set onto the watercolour paper using Antique Linen Distress ink, coloured them with Distress markers. 2) Stamped the sentiment from the Christmas Graphic Stamp Set on the white card stock using black pigment ink, fussy cut it. 3) Mounted the watercolour panel on the white card base and then adhered the sentiment on that using dimensional foam tape.
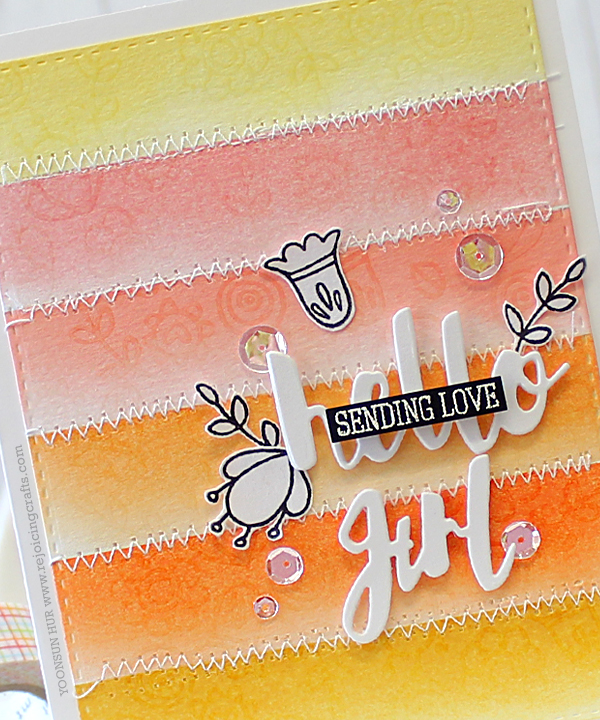
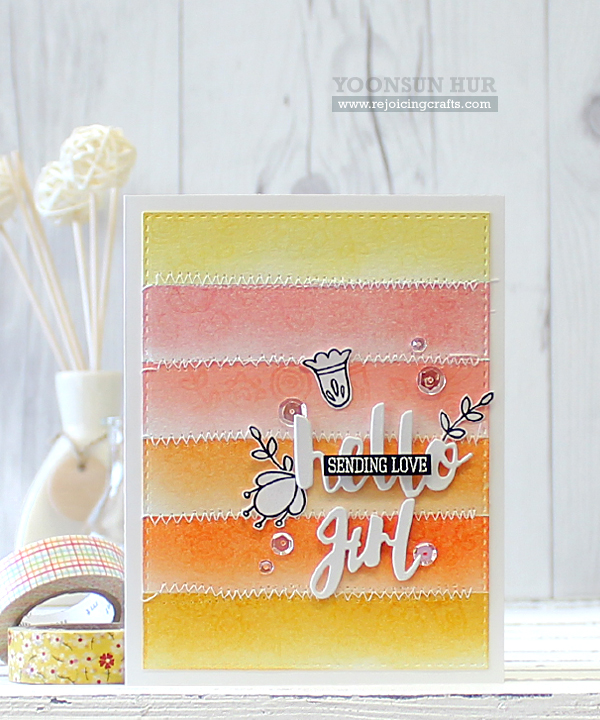 For my last card for the hop, I played with warm colours of Hybrid ink cube. These are so soft like pigment inks but quite a juicy like dye inks. SO CHARMING!!
To create my wide striped background, 1) I masked off strips using washi tape and blended with (from the top) Lemon Chiffon dye ink, Twirling Tutu, Rosie cheeks, Apricot, Sunkist hybrid inks, and lastly Sunshine dye ink using mini blending tool. I then stamped images from the Hello Friend Stamp Set on the inked panel using embossing ink, clear heat embossed. I then added machine stitches.
Simon Says Stamp is giving away a prize package on each stop of the hop, so leave a comment for your chance to WIN. Winners will be selected on September 7.
Your next stop on the hop is incredibly talented Yana Smakula. We hope you have all enjoyed the new release blog hop! If you’ve missed any of the stops along the way, please head over to the Simon Says Stamp blog to find all the links of the hop.
Thank you so much for stopping by. Have a fabulous day!
Keep smiling and be blessed! God bless you all!
Love Love Love RejoicingCrafts
I used:
STAMPtember® 2015 release:
http://static.inlinkz.com/ppr.js
 To create this card, I 1) Stamped the fun images from the Warm Christmas Wishes on the white card stock using Copic friendly black ink, coloured them with Copic markers and then fussy cut them. 2) Stamped the tiny sun images from the My Sunshine randomly on the white paper panel using Sunshine, Lemon Chiffon dye inks. 3) Die cut the stitched circle window at the front of the stamped panel using Stitches Circles die. 4) Stamped the sentiment on the black paper using embossing ink, white heat embossed it and then made a speech bubble banner. 5) Mounted all elements as shown to the white card base using dimensional foam tape.
 Oh YES!! I think Santa is ready to GO for a surf!! And… the next?!
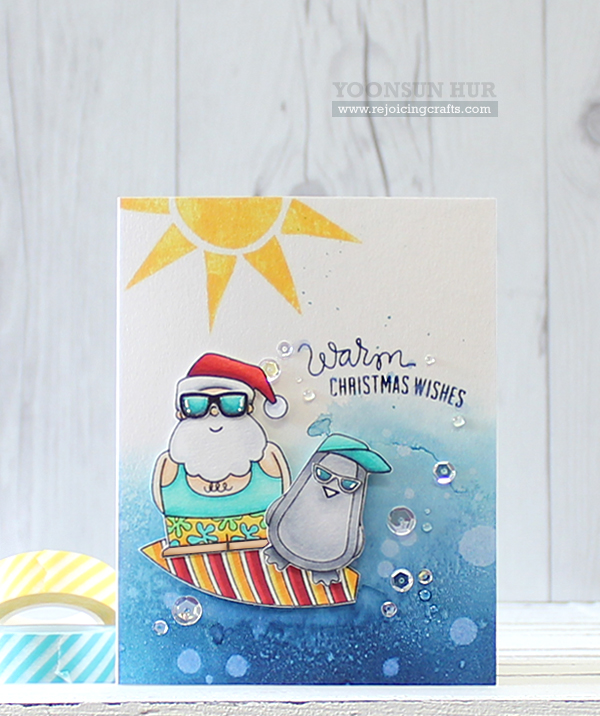 Yee haw! he’s enjoying surfing with his surfer dude on the waves!!
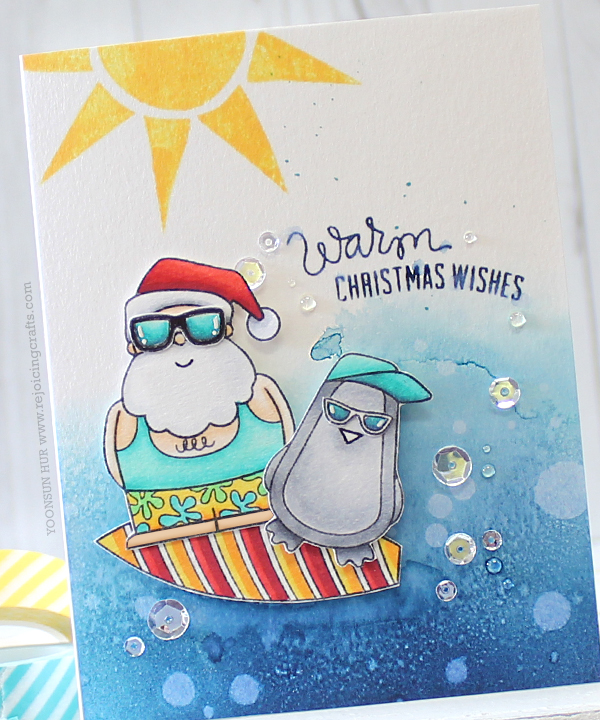 Oh, it was SO fun to make these Beach Christmas Cards :D


 For my first card, I made my floral background with Copic colouring. I 1) Stamped outlined flower images from the
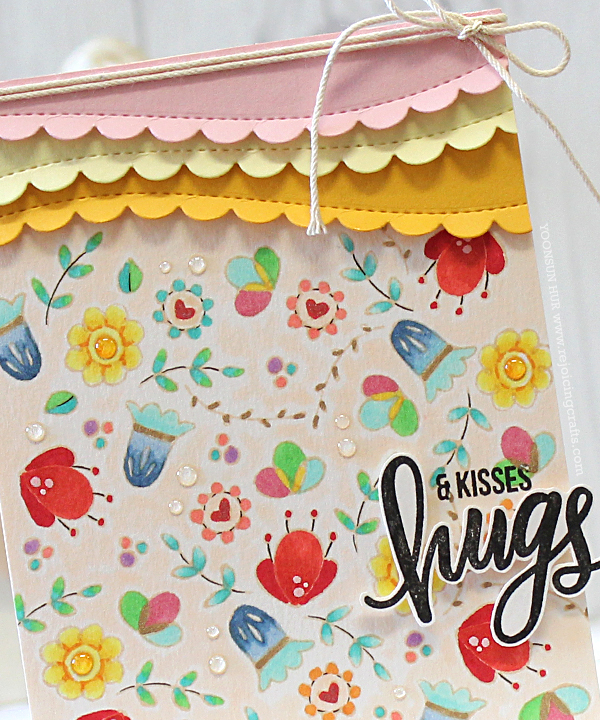
 For my second card, I made watercolour flower card with the


 To create this card, I 1) Stamped the sentiment diagonally on the white card stock using
 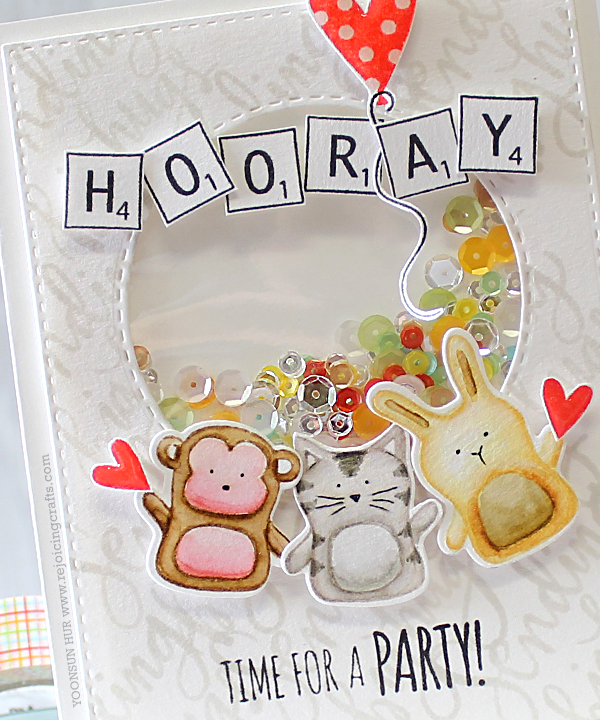 HOORAY!! Time for a PARTY!! It is to celebrate Simon Says Stamp STAMPtember®!! I am SO thrilled and excited about STAMPtember!!
 STAMPtember® is a month-long event! There are full of awesome goodies, inspirations, and super happy celebrations in September!!


 I really love the big and bold script font and
 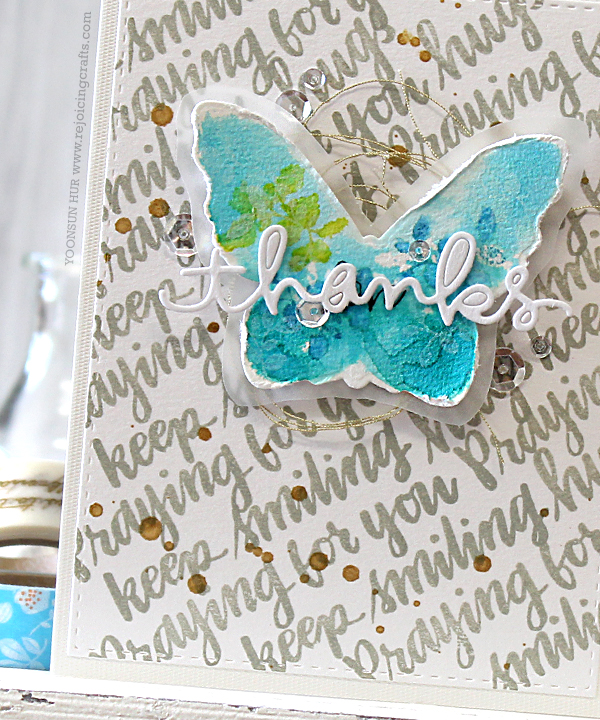 A bright colour is a great way to add pop to a neutral background!


