Hello crafty friends!
Today I want to share with you my couple of floral themed cards using Simon Says Stamp DieCember™ release!

DieCember™ dies are so delicate and beautiful, and I especially love (you can guess) Single Roses dies :D
 For my first card, I used the new Stitched Dress Up Tags, Single Roses Dies, and Painted Hugs Die. First I 1) Die cut Stitched Dress Up Tag from watercolour paper. 2) Coloured onto the tag with Festive Berries, Fired Brick, Wild Honey, Mustard Seed, and Picked Raspberry Distress ink using a wet paintbrush. Then I spritzed Ranger Perfect Pearls Mist all over the watercoloured tag, added some opaque white ink splatters. 3) Die cut roses and leaves from white card stock using Single Roses dies, then positioned Single Roses dies on the watercoloured tag in place, die cut them from it. 4) Applied adhesive to the back of the tag, then inlaid all the pieces of coloured & white die cut together. 6) Die cut the “Hugs” word from white card stock (5 times), glued them together, then heat embossed with gold embossing powder. 7) Stamped the sentiments from the Big Scripty Greetings stamp set randomly on Ivory card base using Fog Gray dye ink. 8) Mounted the tag as shown to the Ivory card base using dimensional foam tape.


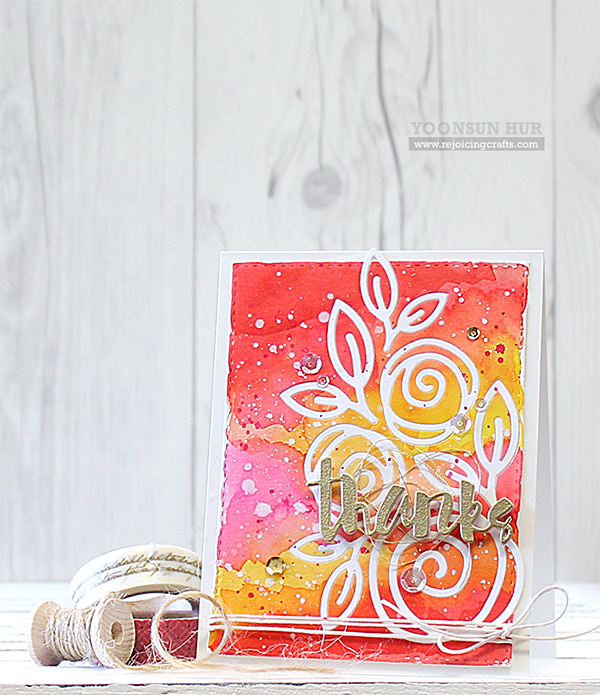 For my second card today, I used the same Single Roses Dies and color scheme but it’s slightly different in design. For the sentiment, I used the new (and gorgeous) Painted Thanks Die!


That’s it for today. Thank you so much for stopping by and have a fabulous weekend!!
Keep smiling and be blessed! God bless you all!
Love Love Love RejoicingCrafts


 When I saw these two kinds of wood envelopes & Suzy’s watercolor doodles at first, I automatically said “sensational!”. With
 For my cards today, I just coloured on


 I usually use A2 size card but today, I used square card size because I just wanted to make simple front with a beautiful large sized script sentiment from the
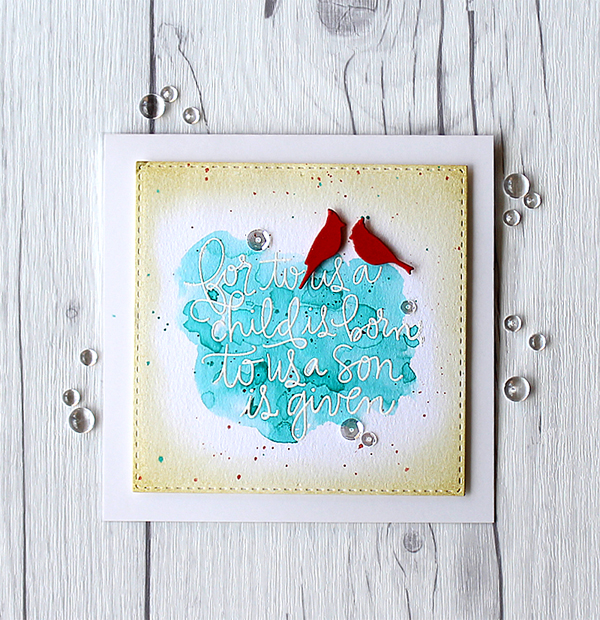
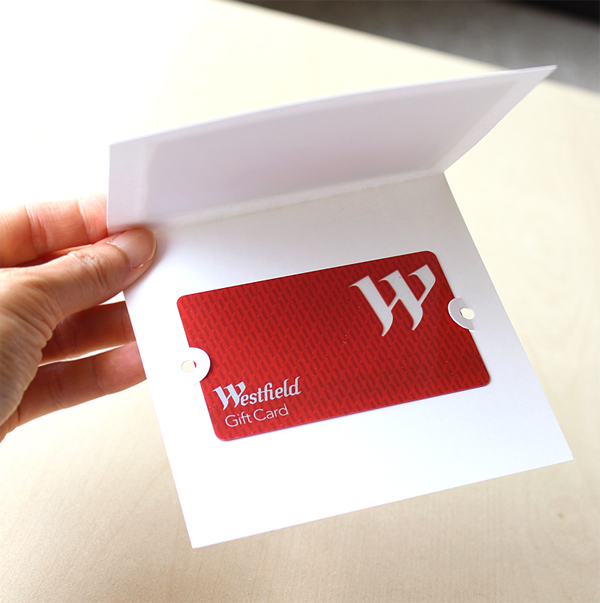 And, here’s a picture of the inside! I die cut a horizontal gift card slot from the


 To create the card, I 1) Stamped “
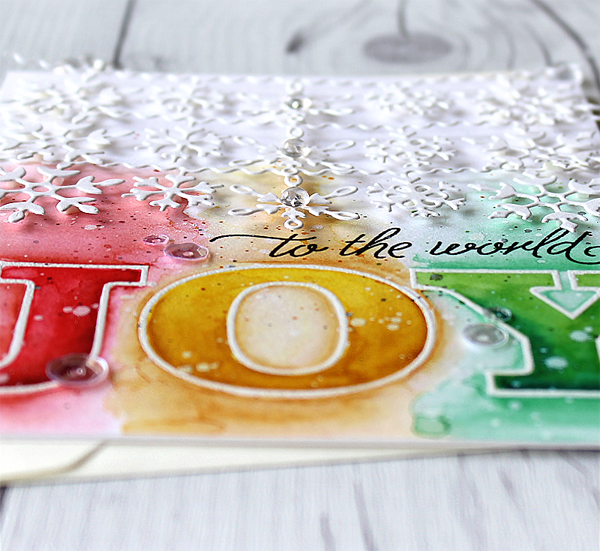


 I so very love a new


