SSS Handmade Holiday Release

Hello crafty friends!
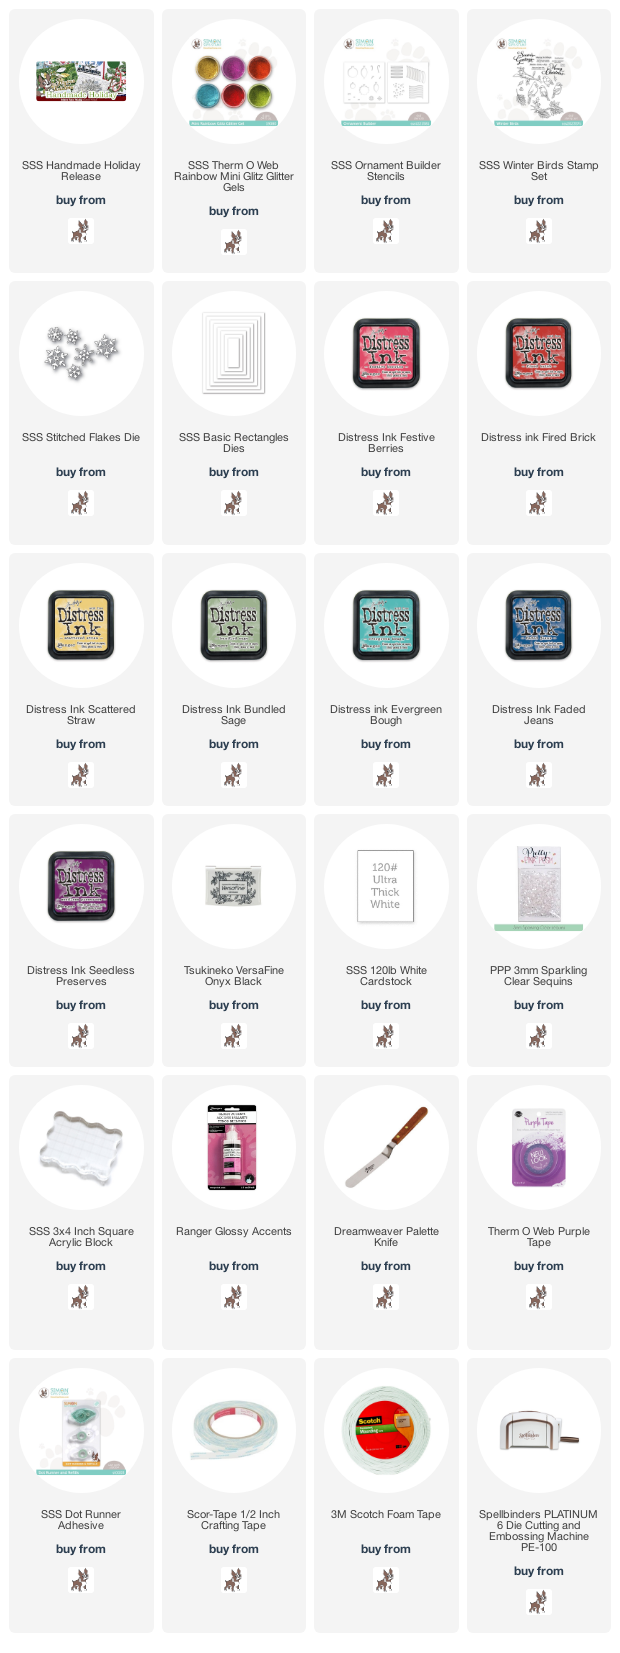
Simon Says Stamp Handmade Holiday Release is LIVE! So today I have a simple Christmas ornaments card with brand new Ornament Builder Stencil and Therm O Web Rainbow Mini Glitz Glitter Gels.

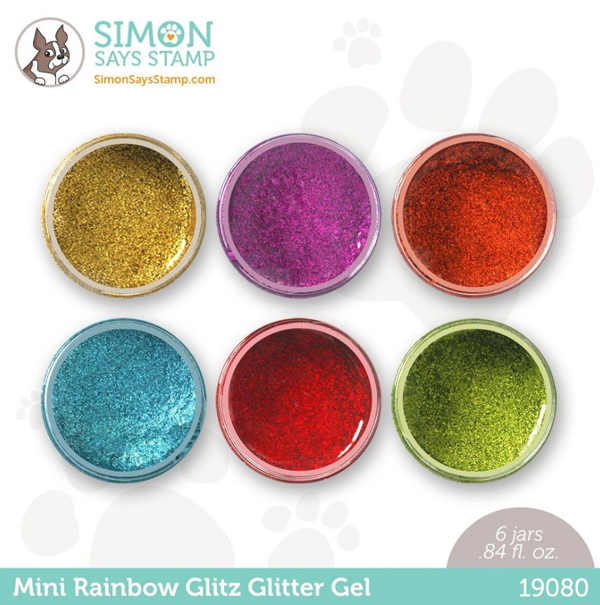
Look at these gorgeous, beautiful glitter gels! Glitter is an indispensable supply for Christmas card making, right?!!


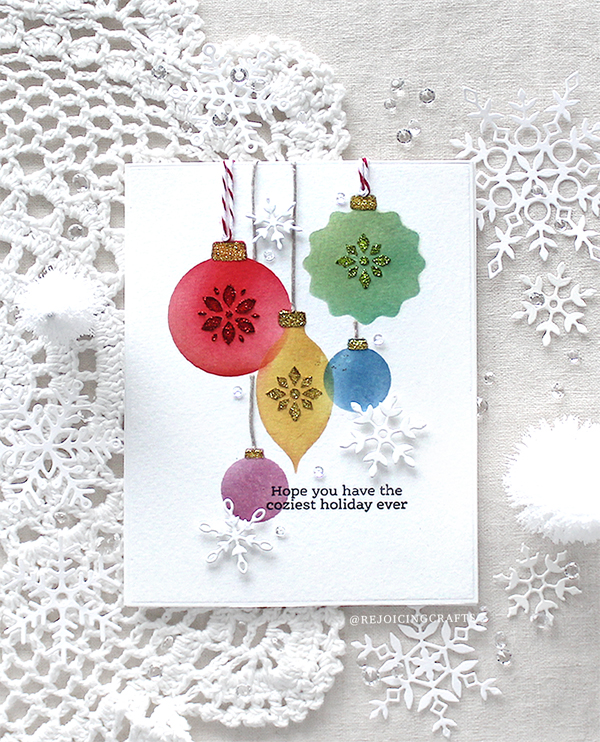
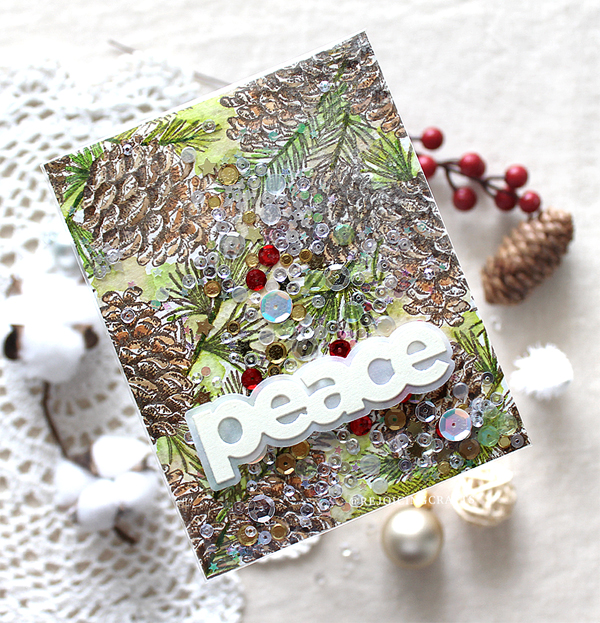
I placed the ornament stencil on A2 sized white paper panel, then applied Distress inks in rainbow order as shown in the picture – you can arrange where you want with the new Ornament Builder stencil. :D


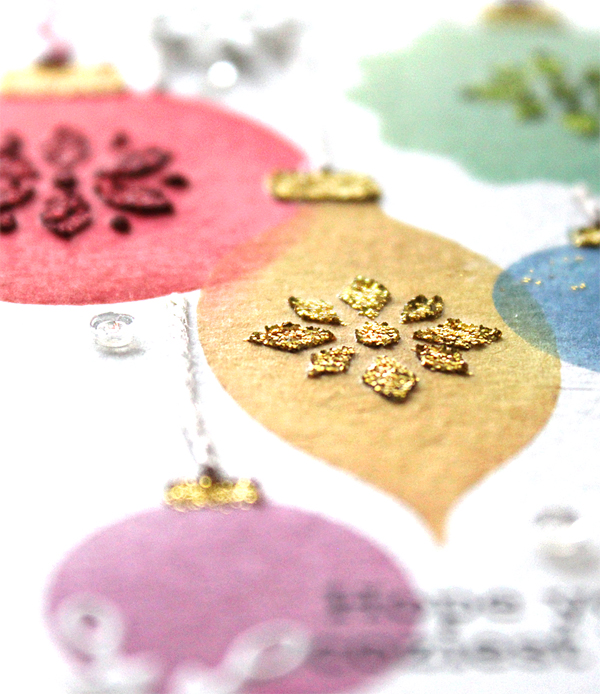
Next is the Glitz Glitter Gels! I applied glitter gold, red and green to ornaments – love it so much!! I stamped the sentiment in the Winter Birds set on the bottom right corner using VersaFine Onyx Black. After mounting the panel on white card base using double-sided tape, then decorated the card with tiny snowflakes & clear sequins.

I will share more of my Handmade Holiday Release cards on Friday. Please look forward to upcoming Handmade Holiday Release blog hop starting tomorrow. Stay tuned!

Keep smiling and be blessed! God bless you all!
Love Love Love RejoicingCrafts

OCC Holiday Card Workshop 2021 Day 2

Hello crafty friends!
My modern and simple Christmas cards today are inspired by Day 2 of Online Card Class Holiday Card Workshop 2021. Ink blending + heat embossing – the results are indeed beautiful!!


Thank you so much for stopping by. Have a great day!

Keep smiling and be blessed! God bless you all!
Love Love Love RejoicingCrafts

OCC Holiday Card Workshop 2021 Day 1

Hello crafty friends!
Online Card Class Holiday Card Workshop 2021 has started. I’m super excited to be playing along with it! The theme of Day 1 is Nighttime Lights. I love a beautiful aurora in the winter night sky with perfect pearls!!


Thank you so much for stopping by. Have a great day!

Keep smiling and be blessed! God bless you all!
Love Love Love RejoicingCrafts

SSS Edge to Edge Holiday Shaker Cards

Hello crafty friends!
Today I have a couple of edge-to-edge holiday shaker cards with the beautiful SSS All Snowflakes & Pinecone Background stamps. I was totally inspired by Nina-Marie’s edge to edge shaker card! Please visit her blog and see her gorgeous card. It is so amazing!!


For my first edge-to-edge shaker card, I used the All Snowflakes Background stamp. I simply stamped the snowflake background onto watercolour paper with Cracked Pistachio, Broken China and Faded Jeans Distress Oxide inks. I then lightly brushed the background with wet paint brush – Distress inks react with water! Once the background dried, I trimmed it down as an A2 sized panel using an A2 sized rectangle panel die in the Basic Rectangles die set.

For edge-to-edge shaker card, I cut a piece of clear plastic bag bigger than A2 size, applied super sticky double-side tape to all the edges of back of the background panel, covered the panel with clear plastic piece, and then filled it with sequins and glitter. I added the “Peace” white die cut sentiment from CZ Design Peace die set.


For my second shaker card, I used the Pinecone Background stamp. I stamped the background onto watercolour paper using VersaFine Vintage Sepia pigment ink first, coloured the stamped images with some Distress reinkers:
Pinecones: Tea Dye & Gathered Twigs
Pine needles: Crushed Olive, Mowed Lawn and Evergreen Bough
I made an edge-to-edge shaker card like the first one. It was so fun to do!!


Thank you so much for stopping by. Have a great day!

Keep smiling and be blessed! God bless you all!
Love Love Love RejoicingCrafts

SSS Mini Slimline Cards with Snowflake Wishes

Hello crafty friends, happy weekend!
Today I have mini slimline Christmas card trio with the SSS Holiday Greetings Mix 1 stamp set and lots of snowflake dies.

I love using traditional colours in my winter holiday cards. I can’t get enough of kraft, red and white no matter how much I use them, haha!


For my kraft holiday card, I used the Neenah Smooth Desert Storm cardstock. I die cut 3.125″ x 6.25″ rectangle panel from Neenah Desert Storm cardstock using the Mini Slimline Rectangles die set – I used the largest size among them. I then heat embossed the sentiment in the Holiday Greetings Mix 1 set on the centre of the kraft panel in white.

I die cut several different designed snowflakes from the same Neenah Desert Storm cardstock, then adhered them on the top and bottom of the panel (as shown in the picture) using fine tip glue pen. I then gently applied white pigment ink to snowflakes. I added opaque white ink splatters & 3mm clear sequins.


For my second mini slimline holiday card, I used white cardstock. For the sentiment, I stamped it with VersaFine Vintage Sepia pigment ink, then added clear embossing powder.

I gently applied Tumbled Glass Distress ink to snowflakes.


For my last card today, I made it in the exact same way of my first card but used different coloured cardstock – Lipstick Red cardstock.


Oh, I was so happy to make them with beautiful sentiment and snowflakes!! :D

Thank you so much for stopping by. Have a great weekend!

Keep smiling and be blessed! God bless you all!
Love Love Love RejoicingCrafts