Floral Friday: PPP Spring Flowers

Hello crafty friends!
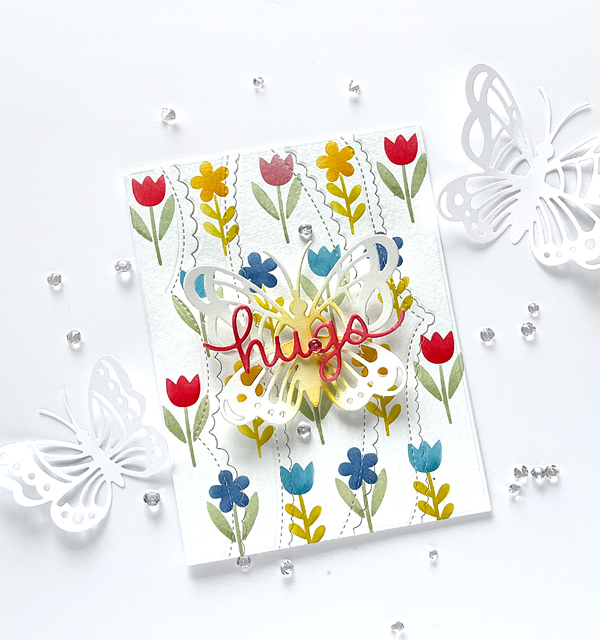
Today I have a cute “Hugs” card with Pretty Pink Posh Spring Flowers layered stencils.
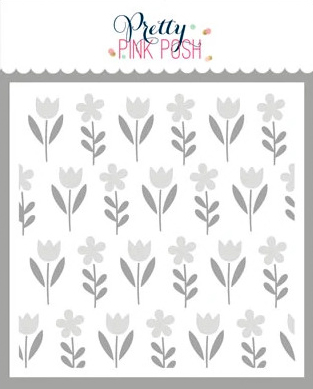

The main flower product of Floral Friday in the third week of January is Pretty Pink Posh Spring Flowers Layered Stencils. It is so adorable!
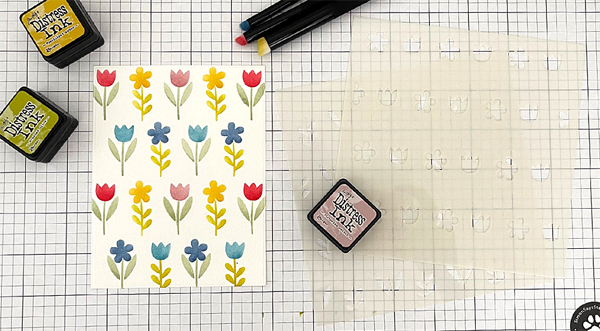


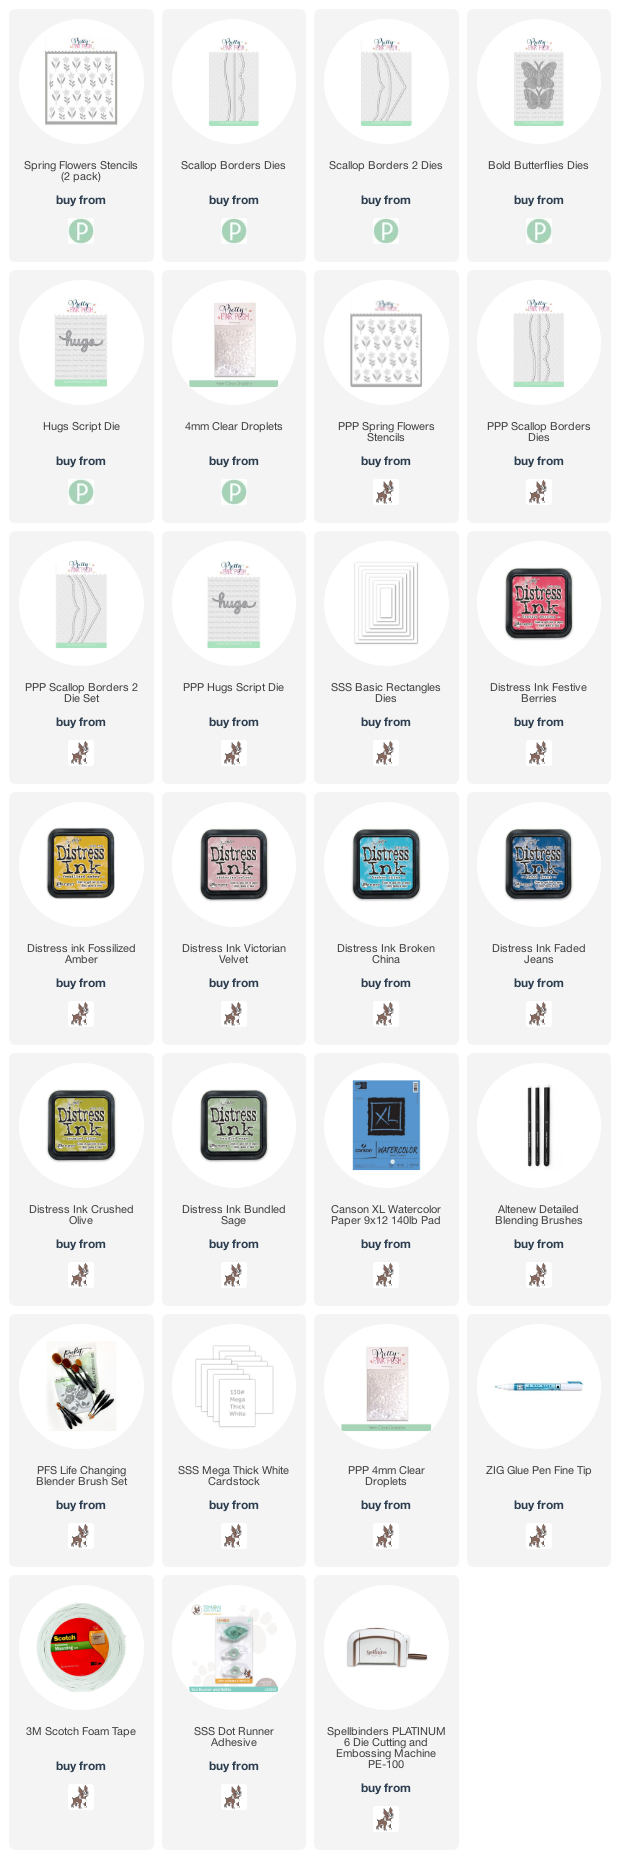
First, I made a cute floral pattern onto an A2 sized paper panel. I used Festive Berries, Fossilized Amber, Victorian Velvet, Broken China and Faded Jeans Distress inks to flowers, then Bundled Sage & Crushed Olive Distress inks to leaves. When applying ink to a small area, it’s better to use detailed blending brushes – I recommend the Altenew Detailed Blending Brushes!
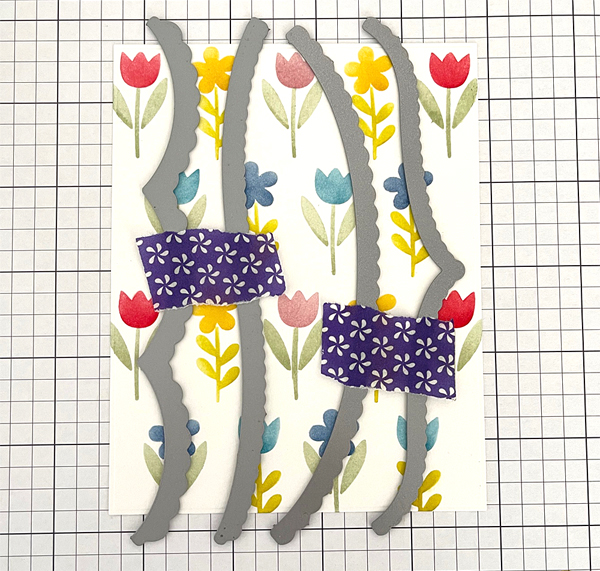
To make the floral pattern more fun, I used several scallop border dies. I put the dies on the pattern paper as shown in the picture, die cut them and assembled them together on A2 sized card base using double-sided tape.
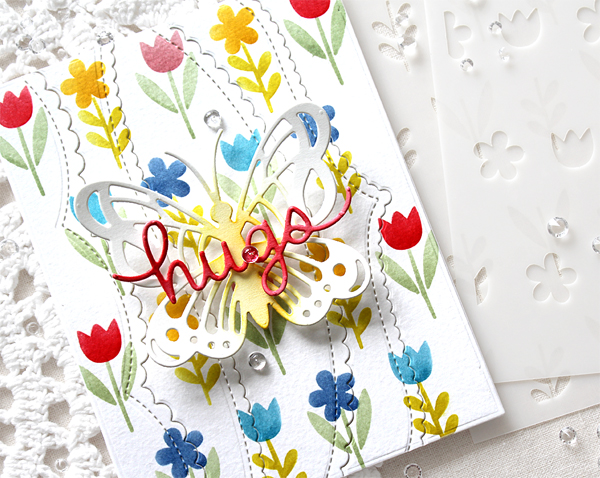

I die cut the large sized butterfly from white cardstock using the Bold Butterflies dies, and then softly inked to the centre of the butterfly with Fossilized Amber Distress ink. For the sentiment, I die cut the “Hugs” from white cardstock, inked it with Festive Berries Distress ink. I added “Hugs” butterfly to the centre of the card using foam tape, and then decorated around the butterfly with 4mm Clear Droplets.
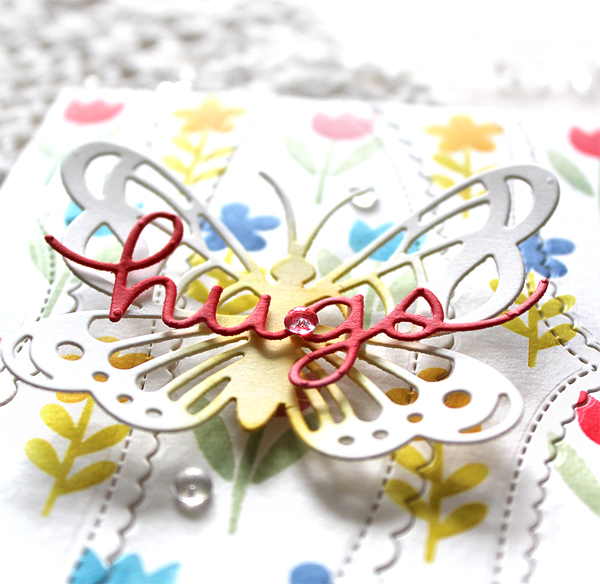
I think flowers and butterflies are a match made in heaven!

Thank you so much for stopping by. Have a wonderful day!

Keep smiling and be blessed! God bless you all!
Love Love Love RejoicingCrafts
PPP January 2022 Product Release Blog Hop

Happy New Year, crafty friends!
Welcome to Day 2 of the Pretty Pink Posh January 2022 Product Release Blog Hop. If you arrived here from the super talented Jeanne Jachna’s blog you are on the right track.

For my first two cards, I used brand new Love Hearts Panel & Hugs Script dies.

I started by die cutting the Love Hearts Panel from watercolour paper. I then loosely watercoloured flowers & leaves with some Distress inks. I applied Picked Raspberry Distress ink to the heart die cuts on the centre of the panel as well. I ink blended onto the A2 sized white card base with Tattered Rose & Worn Lipstick Distress inks, then mounted the Love Hearts Panel using foam tape.

I added the sentiment “hugs” and decorated the card with Pink Blush pearls and Love Letters clay confetti. I love all new confetti and pearls so much!!

For my second card with the Love Hearts Panel, I made blue floral card. I die cut the Love Hearts Panel from watercolour paper, and then coloured them with blue & grey Distress inks.

For the centre flowers, I used the Pretty Petunias set. I heat embossed them in white, watercoloured them with Distress inks, and then die cut them. For the sentiment, I die cut the “hugs” from metallic gold cardstock.


The last card for the hop, you probably saw it on IG Hop. I used so adorable Love Balloons set. I stamped all images with pale beige colour of dye ink first, coloured them with Copic markers, and then die cut them all. I mounted all coloured images on white card base using foam tape, and then decorated the card with Pink Blush pearls and Love Letters clay confetti.

Oh, LOVE IS IN THE AIR!!

GIVEAWAY!!
There are 2 $25 gift certificates up for grabs (one winner each day). Winners will be picked randomly along the blog hop. Comments must be left by 11:59 PM PST on 1/16/2022. Winners will be announced on the PPP blog.

BLOG HOP LIST:
Pretty Pink Posh blog
Tammy Stark
Jeanne Jachna
Yoonsun Hur (Me!!)
Dana Kirby
Heather Hoffman

Thank you so much for stopping by. Have a great day!

Keep smiling and be blessed. God bless you all.
Love Love Love RejoicingCrafts

PPP 2021 Black Friday Sale

Hello crafty friends!
Black Friday Sales are already here. Already?!! Black Friday on 26 of November is the best time to grab things what you wanted. So today I just wanna share with you the Pretty Pink Posh Black Friday Sale info with the products that I recommend! :D

Ready, Set, GO!!


Stitched Poinsettias / Pine Sprigs / Stitched Strips / 4mm Clear Drople
If you want to see this post, please click HERE.

Tulip Cover Plate
If you want to see this post, please click HERE.

Easter Basket
If you want to see this post, please click HERE.

Heart Vines / Layered Hearts Stencils / Lovely Script / Sweetheart Rhinestones
If you want to see this post, please click HERE.

Stitched Leafy Borders / Monkey Friends
If you want to see this post, please click HERE.

Stitched Foliage / Thanks Leaf Shaker
If you want to see this post, please click HERE.

Stitched Poinsettias / Sparkling Clear Snowflake Sequins
If you want to see this post, please click HERE.

Use the code FRIDAY21 at checkout when you purchase at Pretty Pink Posh Store.


Thank you so much for stopping by. Happy holiday crafting!

Keep smiling and be blessed! God bless you all!
Love Love Love RejoicingCrafts

PPP Happy Holidays

Hello crafty friends, I hope you had a wonderful weekend.
Today I have a couple of Winter holiday cards with some PPP Christmas products. I’m always happy making Christmas cards!


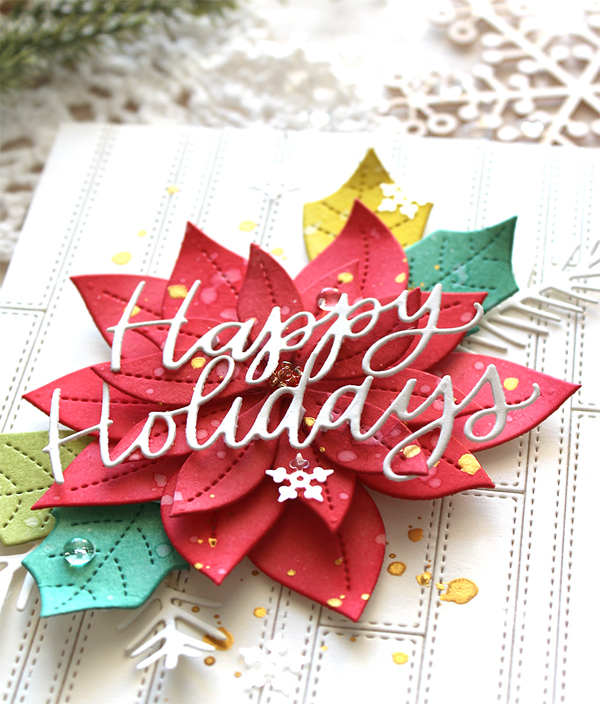
For my first card, I used the Stitched Poinsettias as my main supply.

For my stitched strips background, I was inspired by amazing Dana Kirby’s card. Oh, it’s a really great idea!! Please visit her blog (click HERE). She has so many beautiful cards. :D


I die cut three different sized Stitched Strips from white cardstock first, and then vertically mounted onto white card base using double-sided tape.

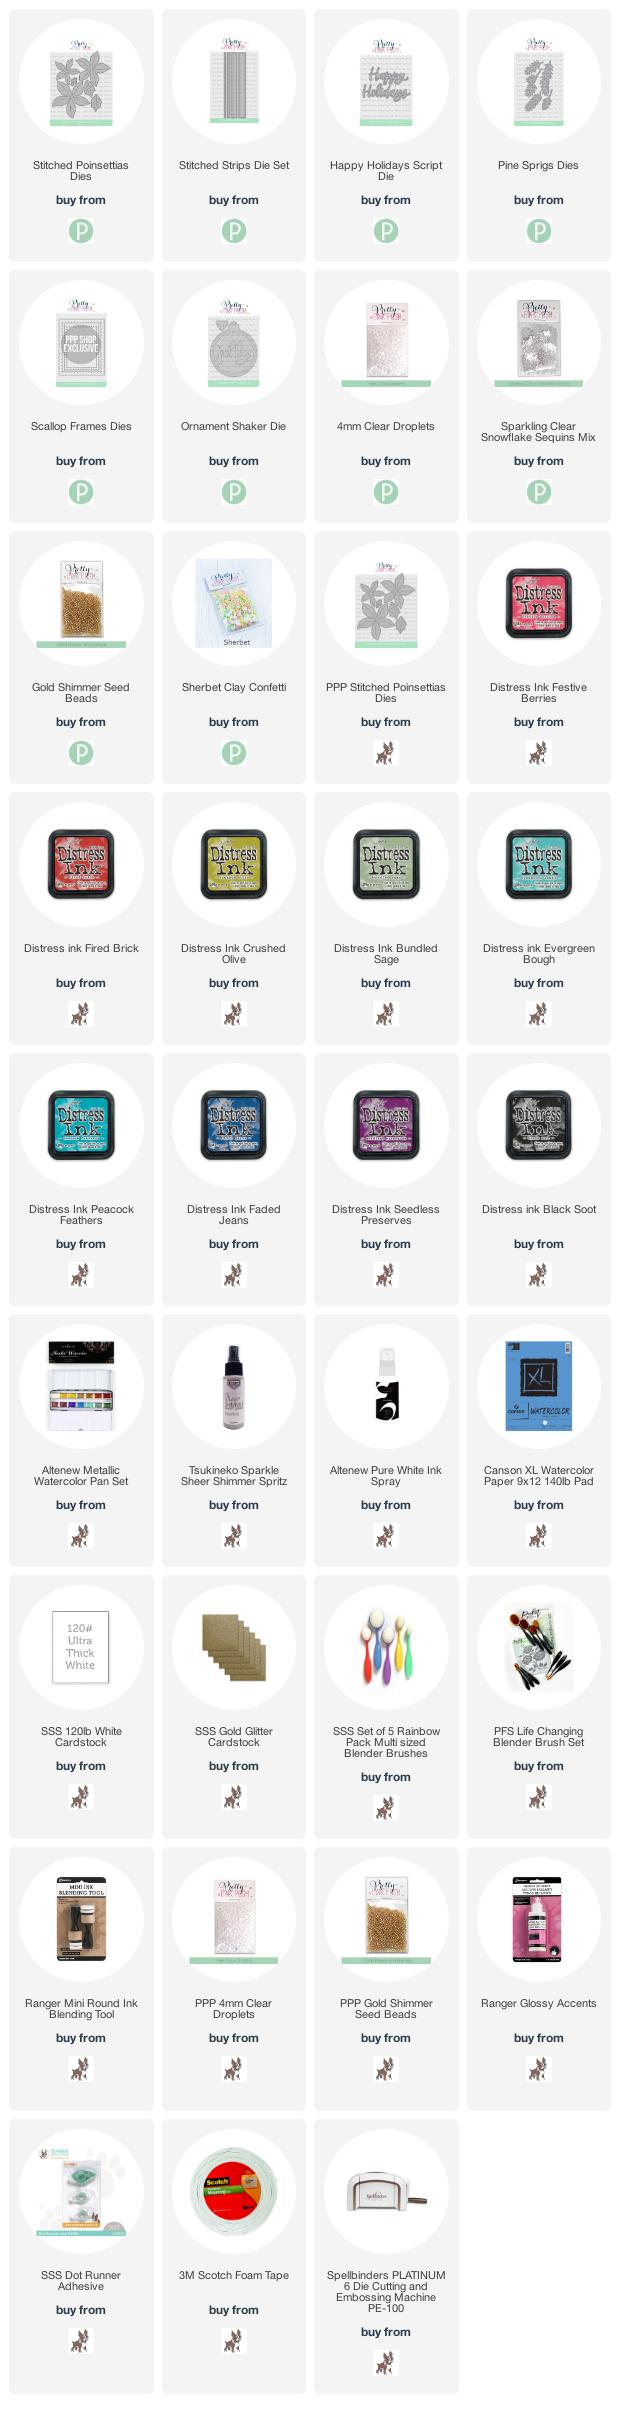
I die cut the poinsettias & leaves from watercolour paper using the Stitched Poinsettias dies first, then applied some Distress inks to them:
Poinsettias: Festive Berries & Fired Brick
Green leaves: Evergreen Bough, Crushed Olive, Bundled Sage
After inking, I layered all poinsettias as shown in the picture using foam tape, then added water drops.

I added one large poinsettia on the centre of the card, then added the sentiment “Happy Holidays” & metallic gold drops.


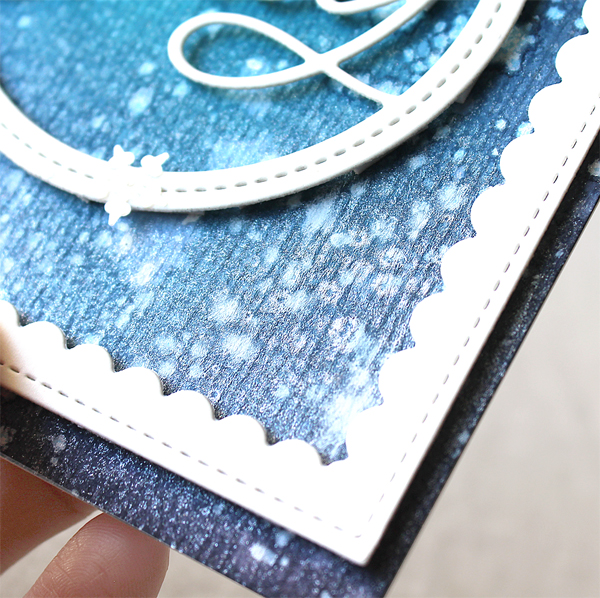
For my second card, I used the Ornament Shaker die. At first, I made snowy winter night background onto an A2 sized watercolour paper panel. I ink blended with Peacock Feathers, Faded Jeans, Seedless Preserves and Black Soot Distress inks, then added Sparkle Sheer Shimmer & opaque white ink splatters all around the panel.


Once the panel was completely dry, I added the “Jolly” circle ornament & white scallop frame using foam tape.

Thank you so much for stopping by. Have a great day!

Keep smiling and be blessed! God bless you all!
Love Love Love RejoicingCrafts

PPP June 2021 Product Release Blog Hop

Hello crafty friends!
Welcome to Day 3 of the Pretty Pink Posh June 2021 Product Release Blog Hop. If you arrived here from the super talented Jeanne Jachna’s blog you are on the right track.


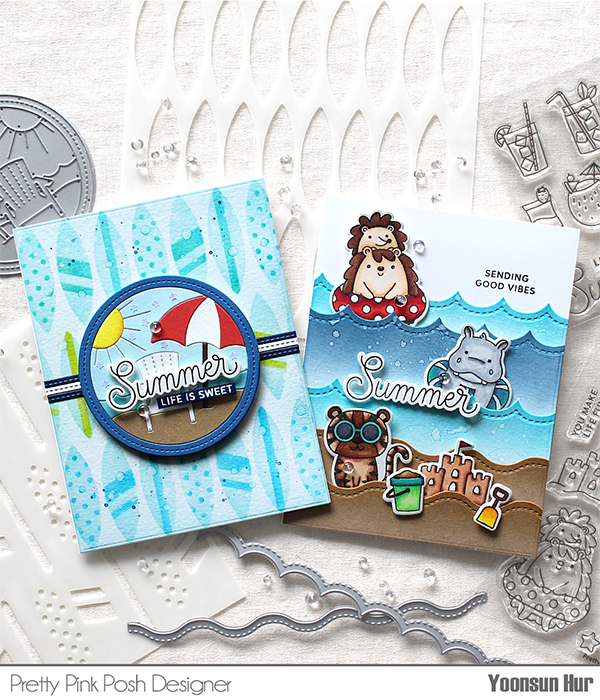
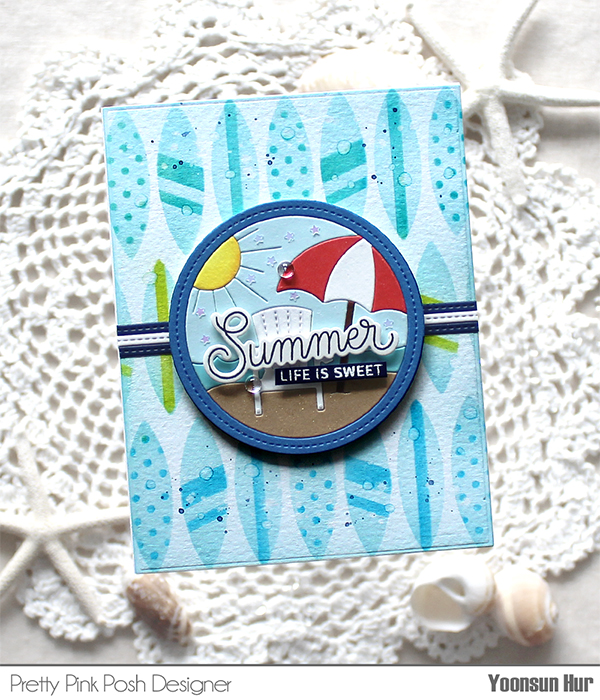
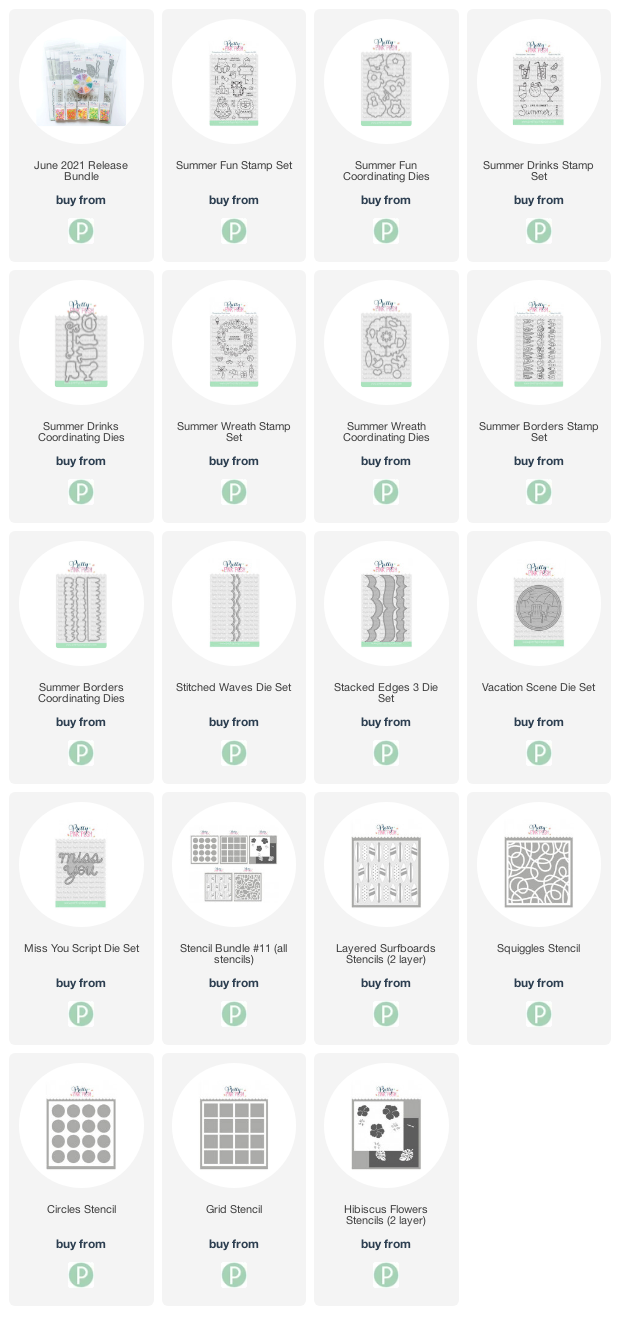
For my first card, I used the new Vacation Scene die & the Layered Surfboards stencils – this combo is really for summer cards!! I die cut all pieces in the Vacation Scene die set from colour cardstock and assembled them like a puzzle!


For this blue surfboards background, I laid the first stencil, surfboard shape only, on an A2 watercolour paper panel in secure, applied Tumbled Glass Distress ink using blending brush. I changed the second stencil, detailed one, on the same place, applied Mermaid Lagoon & Crushed Olive Distress inks. As you know, Distress inks react with water so, I added water drops all over the panel for the effect of splashing water in the beach. ;) For the sentiment, I used the Summer Drinks set.


For my second card, I made a fun beach scene using the new Summer Fun set and the Stitched Waves die set. I stamped & Copic coloured adorable critters, die cut them with the coordinating dies.

I die cut the waves from kraft & watercolour paper using the new Stitched Waves die set. With 3 watercolour die cuts, I ink blended them with Mermaid Lagoon & Faded Jeans Distress inks. I mounted all waves onto A2 card base as shown in the picture, then tucked coloured critters in between the waves. Making summer cards are so much fun!

BLOG HOP LIST:
Pretty Pink Posh blog
Rachel Alvarado
Mona Toth
Ardyth Percy- Robb
Dana Kirby
Jeanne Jachna
Yoonsun Hur (Me!!)

Thank you so much for stopping by. Have a great day!

Keep smiling and be blessed. God bless you all.
Love Love Love RejoicingCrafts