MFT October Release Countdown – Day 1

Hello crafty friends!
Welcome to the My Favorite Things October Release Countdown Day 1. We’ve reached the final day of the countdown!!
NewReleaseCountdown_Day1Today I want to share with you a couple cards I’ve made using Snowflake Flurry stamp set.
YoonsunHur-20151006-MFT-OCTRC-DAY1-A01Imagine snowflakes falling gently down from the sky and onto your face and to the ground.. it’s the most joyous moment in the festive season!!

To create the card, I 1) Stamped the sentiment from the Hand Lettered Holiday stamp set at the centre of watercolour paper panel using embossing ink, gold heat embossed. 2) Stamped the snowflakes on the edge of that using embossing ink, white heat embossed. 3) Blended on the stamped panel with Summer SplashSour Apple, Spearmint, Lush Lagoon, and Kraft dye inks using mini blending tool. 4) Spritzed the ink blended panel with water using a mini mister, added some ink splatters.
YoonsunHur-20151006-MFT-OCTRC-DAY1-A02
YoonsunHur-20151006-MFT-OCTRC-DAY1-B01
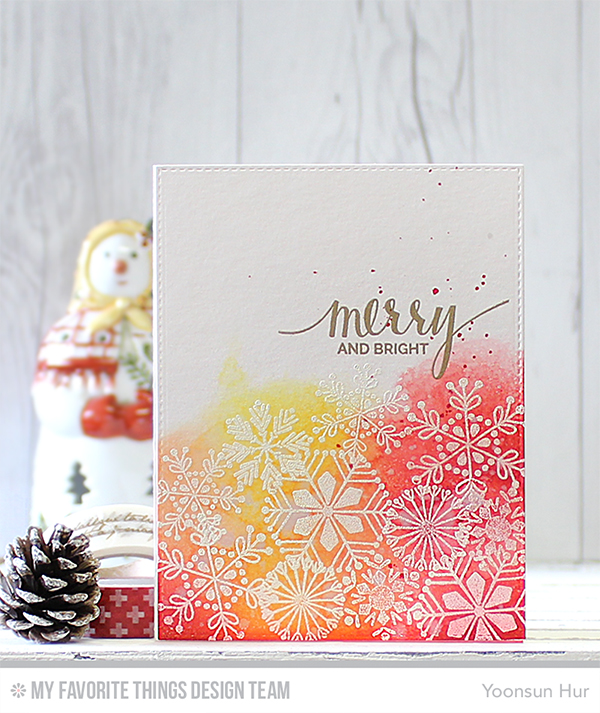
For my second card, I made it the same way I did the first. But I used warm colours instead of cool colours. I blended on the stamped panel with Red HotBubblegum, Lemon Drop dye inks.
YoonsunHur-20151006-MFT-OCTRC-DAY1-B02

Make sure to check out MFT Blog for all the info for today along with links to all the other DT member’s blog posts.

See you TONIGHT for the release!

Keep smiling and be blessed! God bless you all!
Love Love Love RejoicingCrafts

http://static.inlinkz.com/ppr.js

MFT October Release Countdown – Day 2

Hello crafty friends, I hope you had a wonderful weekend!
Welcome to the My Favorite Things October Release Countdown Day 2.
NewReleaseCountdown_Day2Today I want to share with you the card I’ve made using awesome Laina Lamb Design: Cool Cup Die-namics, and Stay Cool stamp set.
YoonsunHur-20151005-MFT-OCTRC-DAY2-A01
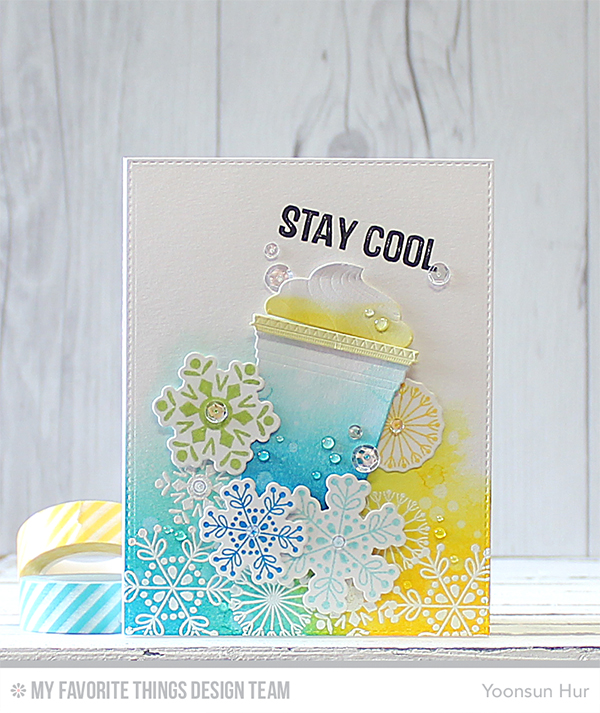
Hey guys, what kind of beverage do you want? Soda or iced coffee? I can make any drink with this awesome Cool Cup Die-namics! I love it so much!!

To create the card, I 1) Stamped the snowflakes on watercolour paper panel using embossing ink, white heat embossed. 2) Blended on the stamped panel with Summer SplashLush Lagoon, and Lemon Drop dye inks using mini blending tool and then added water droplets. 3) Stamped the snowflakes on white card stock with several colours of dye inks and then die cut them with Snowflake Flurry Die-namics -I made extra snowflake die cuts up on the Cool Cup. 4) Die cut Cool Cup from watercolour paper, inked on it with Lush Lagoon dye ink, added water droplets. 5) Mounted all elements as shown to white card base using dimensional foam tape. 6) Stamped the sentiment from the Stay Cool stamp set with Black Licorice hybrid ink. 7) Embellished with a few clear sequins.
YoonsunHur-20151005-MFT-OCTRC-DAY2-A02Make sure to check out MFT Blog for all the info for today along with links to all the other DT member’s blog posts.

See you tomorrow for more countdown fun! Have a wonderful day!

Keep smiling and be blessed! God bless you all!
Love Love Love RejoicingCrafts

http://static.inlinkz.com/ppr.js

MFT October Release Countdown – Day 3

Hello crafty friends, blessed Sunday!
Welcome to the My Favorite Things October Release Countdown Day 3.
NewReleaseCountdown_Day3Today I want to share with you the cards I’ve made using Winter Wonderland stamp set, and Snow Drifts Cover-Up Die-namics.
YoonsunHur-20151004-MFT-OCTRC-DAY3-A01
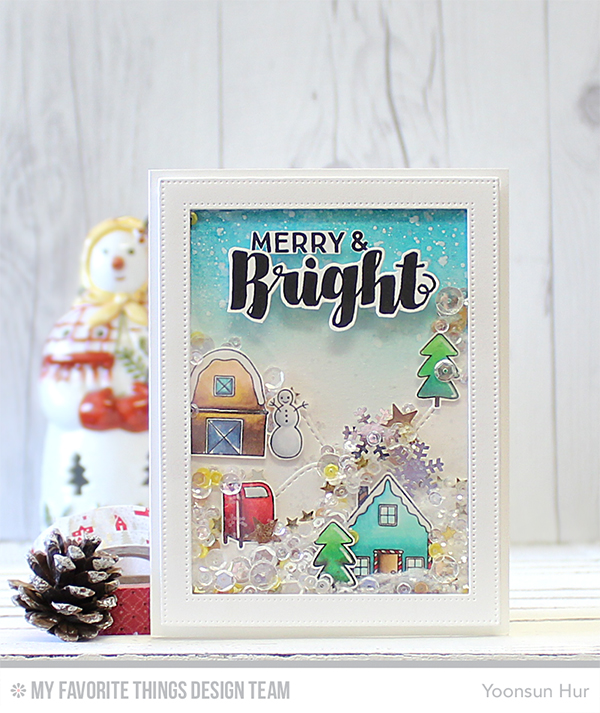
Look out the window and see the snowflakes fall!! Ohhh.. I love a snowy Christmas! And a new Winter Wonderland is the perfect stamp for making a beautiful snowy town.

To create this shaker card, I 1) Stamped the images from the Winter Wonderland stamp set on white card stock using Black Licorice hybrid ink, coloured them with Copic markers, then fussy cut them. 2) Blended the top of white card base with Summer Splash & Lush Lagoon dye inks using mini blending tool, added white ink splatters. 3) Die cut Stitched Mountain Range from white card stock and then adhered them on ink blended card base. 4) Mounted all coloured images over the Stitched Mountains using dimensional foam tape. 5) Die cut Pierced Rectangle Frame from white card stock, back the rectangle frame with acetate, then added mixed sequins & clear glitter powders inside then covered with frame. 6) Stamped the sentiment from the Joyous Christmas Sentiments stamp set with Black Licorice hybrid ink, fussy cut, then layered it over the frame with mounting tape.
YoonsunHur-20151004-MFT-OCTRC-DAY3-A02

YoonsunHur-20151004-MFT-OCTRC-DAY3-B01
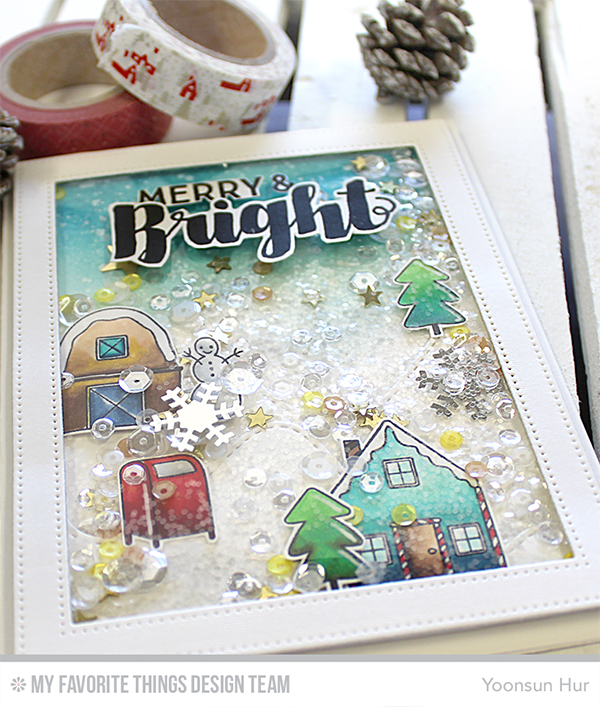
For my second card, I made “loose watercolour landscapes”. I used some post-it notes to mask the house images to stamp them overlapping. I masked and stamped houses with black pigment ink from the bottom of watercolour paper panel and then coloured them with Peerless watercolours.

YoonsunHur-20151004-MFT-OCTRC-DAY3-C01For my last card today, I 1) Die cut Snow Drifts Cover-Up from white card stock and coloured the negative cuts with several colours of dye inks –(from the top) Summer Splash, Sour AppleLemon Drop, Bubblegum, PersimmonRed Hot, Gumdrop Green, and Lush Lagoon dye inks. 2) Affixed all die cuts to the sticky base and then randomly stamped the snowflakes using embossing ink, white heat embossed. 3) Die cut the tag from red card stock using the Tag Builder Blueprints 4 Die-namics, white heat embossed the sentiment from the Hand Lettered Holiday stamp set, topped with natural twines.

Make sure to check out MFT Blog for all the info for today along with links to all the other DT member’s blog posts.

See you tomorrow for more countdown fun! Have a wonderful day!

Keep smiling and be blessed! God bless you all!
Love Love Love RejoicingCrafts

http://static.inlinkz.com/ppr.js

MFT October Release Countdown – Day 4

Hello crafty friends, happy weekend!
Welcome to the My Favorite Things October Release Countdown Day 4.
NewReleaseCountdown_Day4
Today I want to share with you a couple cards I’ve made using so cheerful Christmas goodies: Santa Suit Die-namics, Santa’s Elves stamp set, and Hand Lettered Holiday stamp set.
YoonsunHur-20151003-MFT-OCTRC-DAY4-B01
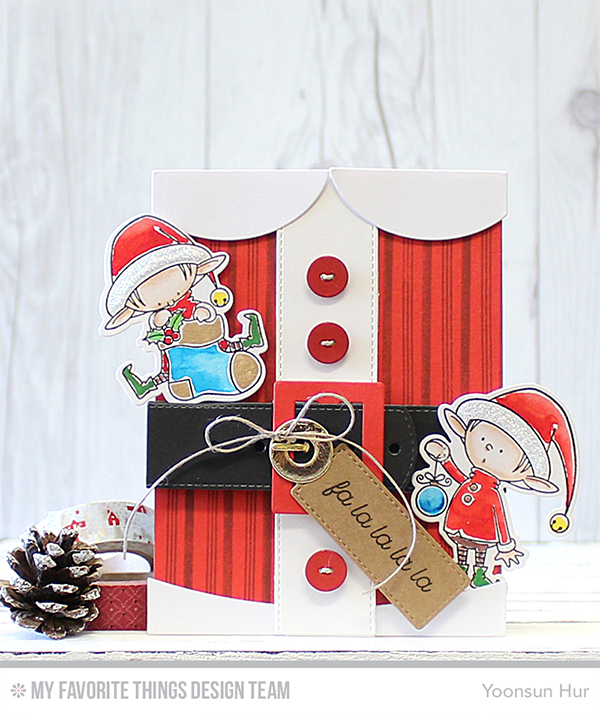
Ho! Ho! Ho! here he comes! Santa is on his way wearing his bright red suit with black belt :D

To create the card, I 1) Stamped the Candy Stripes Background on red card stock using Paver Red hybrid ink. 2) Die cut Santa Suit from white, red, black, and foil gold card stocks. 3) Stamped the elves from the Santa’s Elves stamp set on watercolour paper using black pigment ink, coloured them with Red HotLush Lagoon, Lemon DropField Day, and Chocolate Brown dye inks using waterbrush. And then die cut them with Santa’s Elves Die-namics. 4) Stamped the sentiment from the Trim the Tree stamp set using Black Licorice hybrid ink, die cut it with Tag Builder Blueprints 4 Die-namics. 5) Mounted all elements as shown to white card base.

YoonsunHur-20151003-MFT-OCTRC-DAY4-A01
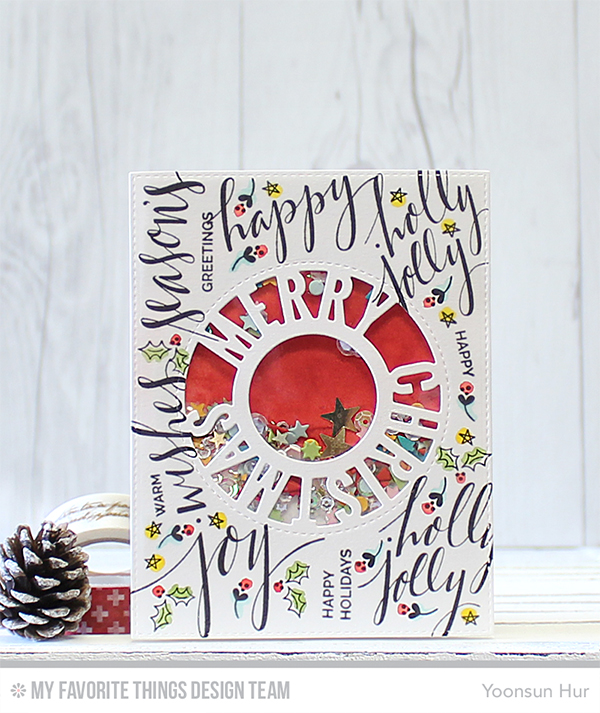
For my second card, I made a fun shaker card. First I 1) Die cut circle merry Christmas from the centre of white paper panel using Merry Christmas Centerpieces Die-namics. 2) Stamped the Christmas greetings and other tiny images to the front of the circle window using black pigment ink, added a touch of colours. 3) Filled the mixed clear sequins, tiny paper embellishments inside the window panel and then mounted it on red ink blended card base using dimensional foam tape.

Make sure to check out MFT Blog for all the info for today along with links to all the other DT member’s blog posts.

See you tomorrow for more countdown fun! Have a wonderful weekend!

Keep smiling and be blessed! God bless you all!
Love Love Love RejoicingCrafts

http://static.inlinkz.com/ppr.js

MFT October Release Countdown – Day 5

Hello crafty friends, TGIF!
Welcome to the My Favorite Things October Release Countdown Day 5.
NewReleaseCountdown_Day5Christmas is coming! And there’s no doubt about that! MFT will no doubt lead you into the world of Sparkle & Shine in October to help you get ready to celebrate! Here are full of awesome holiday stamps and dies to show off your creativity!! Are you ready to have fun?!

YoonsunHur-20151002-MFT-OCTRC-DAY5-01
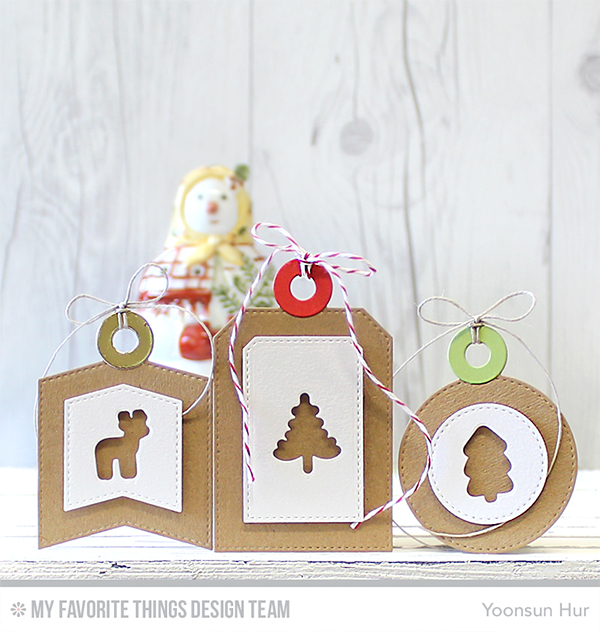
I love (I think everyone loves) Christmas tag hanging from the gift box. The tag itself gives me a great treat!!

Today I made clean and simple tag trio using so sweet Tag Builder Blueprints 4 Die-namics. First I 1) Die cut three of different shaped tags from the kraft card stock. 2) Die cut the smaller shapes from the white card stock, die cut trees and reindeer from the centre of the white panel using Winter Wonderland Die-namics, topped with twines.YoonsunHur-20151002-MFT-OCTRC-DAY5-02

YoonsunHur-20151002-MFT-OCTRC-DAY5-03My second example with Tag Builder Blueprints 4 Die-namics is a card. First I 1) Die cut the tag from kraft card stock, stamped the tree from the Trim the Tree stamp set on that using embossing ink, white heat embossed. 2) Added white ink splatters to express snow scenes. 3) Stamped the sentiment from the Gift Tag Greetings stamp set on black paper, die cut it with Blueprints 25 Die-namics. 4) Die cut Four Way Chevron Cover-Up from white card stock. 5) Mounted all elements as shown to kraft card base. 6) Embellished with a few clear sequins.

Make sure to check out MFT Blog for all the info for today along with links to all the other DT member’s blog posts.

See you tomorrow for more countdown fun! Have a wonderful day!

Keep smiling and be blessed! God bless you all!
Love Love Love RejoicingCrafts

http://static.inlinkz.com/ppr.js