MFT November Release Countdown – Day 3

Hello crafty friends, blessed Sunday!
Welcome to the My Favorite Things November Release Countdown Day 3.
NewReleaseCountdown_Day3Today I want to share with you a couple of inlaid cards I’ve made using Diagonal Quilt Square Cover-UpChunky Chevron Cover-Up Die-namics.
YoonsunHur-MFT-NovemberRC-Day3-01
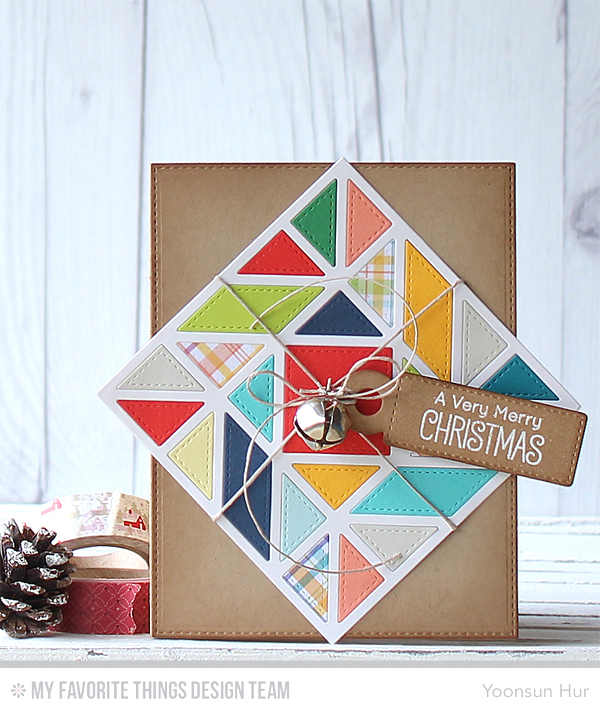
For my first card, I 1) Die cut Diagonal Quilt Square Cover-Up from white card stock at first and then from several colour card stocks, Plaid Patterns Paper Pack again. 2) Adhered the sticky paper behind the white quilt frame panel, then inlaid all pieces into the panel. 3) Stamped the sentiment from the Toasty Greetings stamp set on kraft card stock using embossing ink, white heat embossed and then die cut it with Tag Builder Blueprints 4 Die-namics.
YoonsunHur-MFT-NovemberRC-Day3-02
YoonsunHur-MFT-NovemberRC-Day3-03For my second card, I made the inlaid card same as my first card but added a bit of glitter paper. I used Chunky Chevron Cover-Up Die-namics as my main supply.
YoonsunHur-MFT-NovemberRC-Day3-04

Make sure to check out MFT Blog for all the info for today along with links to all the other DT member’s blog posts.

See you tomorrow for more countdown fun! Have a wonderful day!

Keep smiling and be blessed! God bless you all!
Love Love Love RejoicingCrafts

http://static.inlinkz.com/ppr.js

MFT November Release Countdown – Day 4

Hello crafty friends, happy weekend!
Welcome to the My Favorite Things November Release Countdown Day 4.
NewReleaseCountdown_Day4
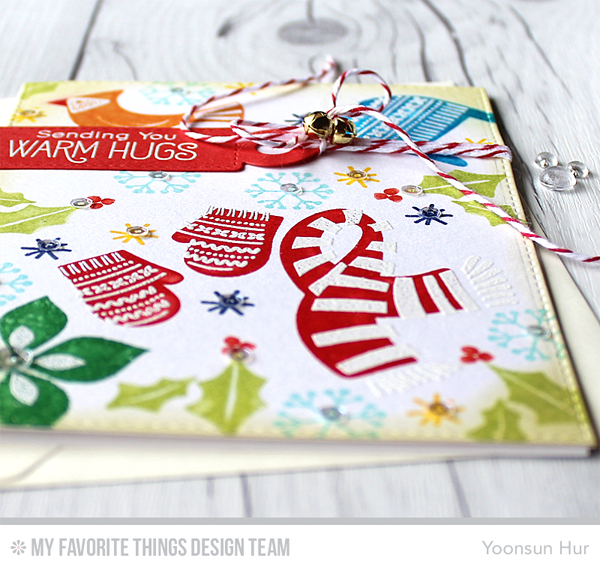
Today I am sharing with you a couple holiday cards with so precious Winter Warmth stamp set.
YoonsunHur-MFT-NovemberRC-Day4-A01For my first card, I 1) Stamped the basic images from the Winter Warmth stamp set randomly onto white card stock using different colours of MFT dye inks, then stamped pattern images in embossing ink, heat embossed with white embossing powder – overlapped stamping them partially. 2) Inked the edge of the stamped panel with Antique Linen Distress ink using mini blending tool. 3) Stamped the sentiment from the Merry Christmoose stamp set on red card stock with embossing ink, white heat embossed, then die cut with Tag Builder Blueprints 4 Die-namics. 4) Mounted all elements as shown to white card base.

YoonsunHur-MFT-NovemberRC-Day4-A02YoonsunHur-MFT-NovemberRC-Day4-A03
YoonsunHur-MFT-NovemberRC-Day4-B01
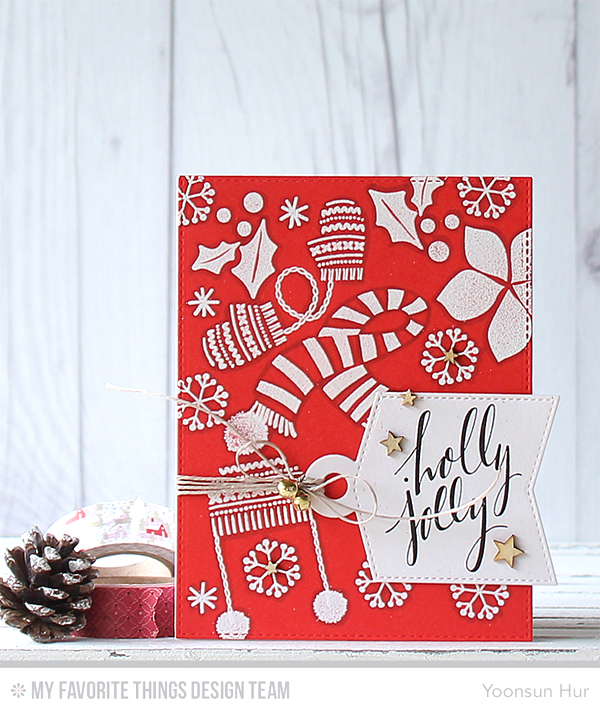
To create my second card, I 1) Stamped the images, Winter Warmth stamp set, onto red paper panel using embossing ink, white heat embossed. 2) Added some dark shading with a Copic marker C3. 3) Stamped the sentiment, Hand Lettered Holiday stamp set, on white card stock using Black Licorice hybrid ink, then die cut it with Tag Builder Blueprints 4 Die-namics.
YoonsunHur-MFT-NovemberRC-Day4-B03YoonsunHur-MFT-NovemberRC-Day4-B02

Make sure to check out MFT Blog for all the info for today along with links to all the other DT member’s blog posts.

See you tomorrow for more countdown fun! Have a wonderful weekend!

Keep smiling and be blessed! God bless you all!
Love Love Love RejoicingCrafts

http://static.inlinkz.com/ppr.js

MFT November Release Countdown – Day 5

Hello crafty friends, TGIF!
Welcome to the My Favorite Things November Release Countdown Day 5.
NewReleaseCountdown_Day5
Wow, wow, WOW!! There are chock full of fabulous holiday goodies in November! I am pretty sure you are going to love MFT November release!!

For my first card, I am showing Birdie Brown Toasty Greetings stamp set; Peek-a-Boo Wonky Windows Die-namics.
YoonsunHur-MFT-NovemberRC-Day5-01To create this card, I 1) Stamped these adorable snowman and penguins from the Toasty Greetings stamp set on white card stock using Black Licorice hybrid ink, coloured them with Copic markers, then die cut them with Toasty Greetings Die-namics. 2) Blended on the star background stamped panel with Lush LagoonSummer Splash (top part) and Chocolate Brown (bottom part) dye inks using mini blending tool, then die cut Peek-a-Boo Wonky Windows at the centre of it.
YoonsunHur-MFT-NovemberRC-Day5-02

YoonsunHur-MFT-NovemberRC-Day5-03
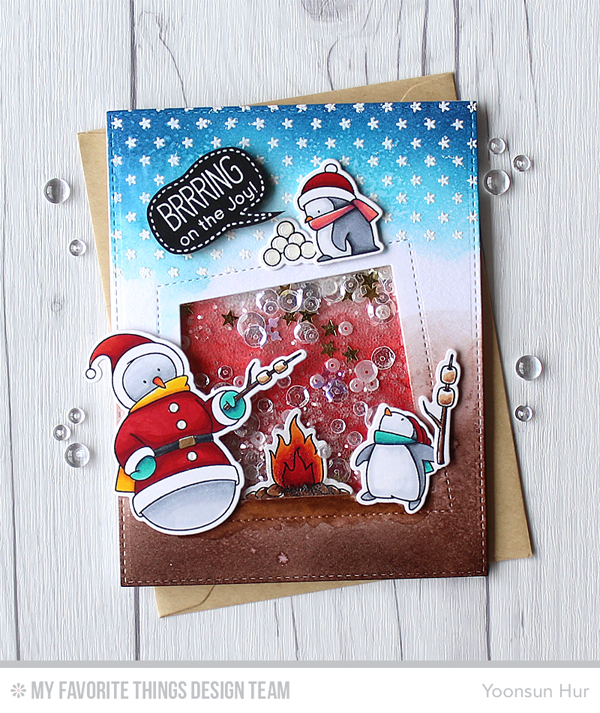
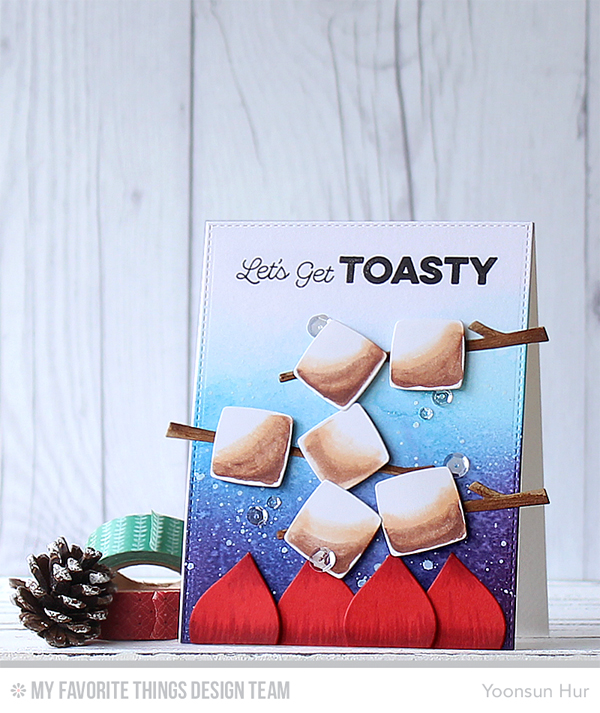
Look, these creamy and delicious toasted marshmallows – yummy! :D

I used a new Toasted Marshmallows Die-namics. I 1) Die cut marshmallows from white card stock, coloured them with Copic markers. 2) Die cut branches from Kraft card stock, flame from Cherry Crisp card stock, added some dark shading with a Copic marker C3. 3) Mounted all elements as shown to the blended paper panel using dimensional foam tape. 4) Stamped the sentiment from the Get Toasty stamp set on top of the card using Black Licorice hybrid ink. 5) Embellished with a few PPP clear sequins.
YoonsunHur-MFT-NovemberRC-Day5-04

Make sure to check out MFT Blog for all the info for today along with links to all the other DT member’s blog posts.

See you tomorrow for more countdown fun! Have a wonderful day!

Keep smiling and be blessed! God bless you all!
Love Love Love RejoicingCrafts

http://static.inlinkz.com/ppr.js

MFT – Happy Holiday Card

Hello crafty friends!
Today I want to share with you a happy holiday card I’ve made using Merry Christmas Centerpieces Die-namics.
Print
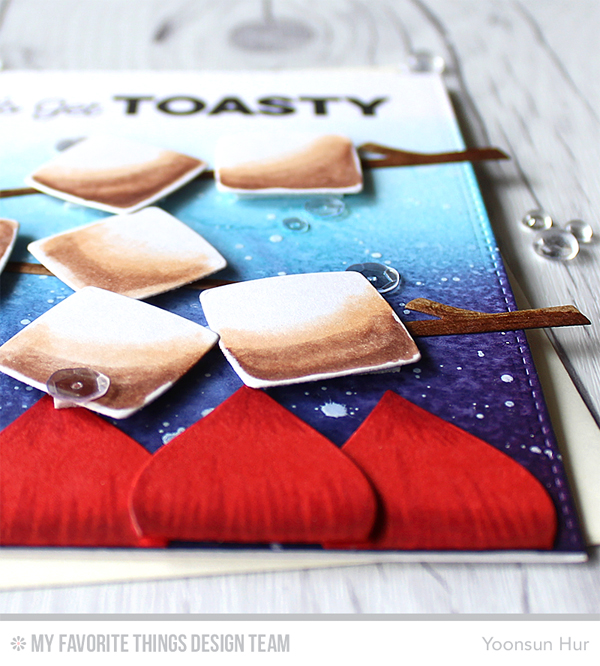
My Favorite Things is celebrating the joys of a Handcrafted Holiday! And today’s question is “What’s your best advice for a stress-free holiday?” My answer? As a handmade card maker, it’ll have to be: to make a card fast and easy – totally stress-free!!

Here is what I came up with:
YoonsunHur-20151013-MFT-Promo-B01As promised, I made simple and easy holiday card! First I 1) Die cut A2 size stitched rectangle from white card stock using Blueprints 25 Die-namics. 2) Die cut 4 confetti stripes (twice) from white paper panel using Merry Christmas Centerpieces Die-namics, then tied the bottom part of the die cut panel with a natural twine. 2) Adhered Cherry Crisp card stock on white card base, then mounted the die cut panel using dimensional foam tape. 3) Stamped “Christmas” from the Hand Lettered Holiday stamp set on white paper using Black Licorice hybrid ink, fussy cut and then affixed it on die cut panel to finish it off.

We can’t wait to hear about what you love to create this time of year and how you cope. And of COURSE there will be prizes up for grabs. Join us every day this week and be inspired for a wonderful holiday season! Come and share your story on our Facebook page and Instagram!!

Thank you so much for stopping by. Happy holiday crafting!

Keep smiling and be blessed! God bless you all!
Love Love Love RejoicingCrafts

http://static.inlinkz.com/ppr.js

MFT October Release – New Product Launch

Hello crafty friends!
Welcome to the My Favorite Things new product launch! The wait is over!! All of the new products we’ve been sharing all week are officially available in the MFT Boutique now! I can’t wait to see what you guys create with them :D
NewProductLaunchIn October, I am featuring a new Stitched Mountain Range Die-namics.
stitchedmountainrange
YoonsunHur-20151006-MFT-OCTRC-NPL
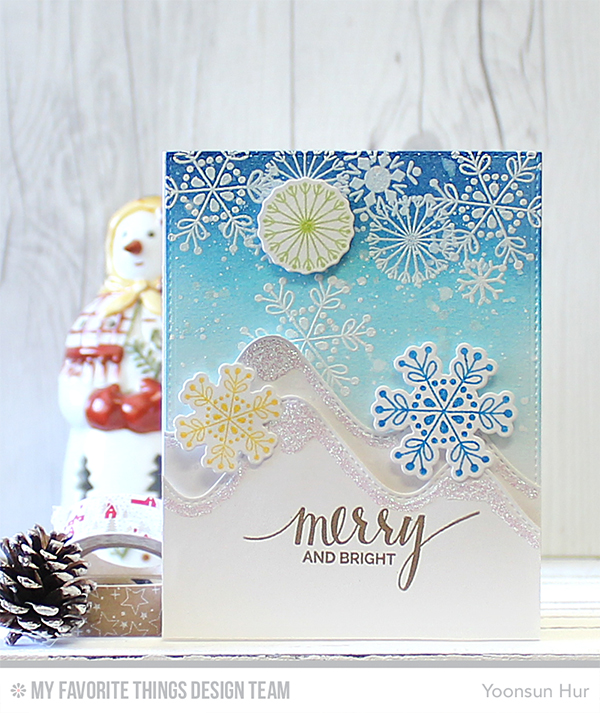
To create the card, I 1) Stamped the snowflakes from the Snowflake Flurry stamp set on the top side of watercolour paper panel using embossing ink, white heat embossed. 2) Blended on the stamped panel with Lush Lagoon, Summer Splash dye inks using mini blending tool. 3) Added white ink splatters. 4) Die cut stitched mountains from white card stock using Stitched Mountain Range Die-namics. 5) Stamped the snowflakes with several colours of dye inks, die cut them with Snowflake Flurry Die-namics. 6) Mounted all elements as shown to white card base using dimensional foam tape, added touches of Star Dust stickles to the top of the mountains.

GIVEAWAY ALERT!
Don’t forget to check out the MFT blog to see all of the amazing projects the creative team has created. You can leave a comment on all of the designer’s New Product Launch posts for a chance to WIN one of two $100 gift vouchers!

Thank you so much for stopping by. Happy crafting!!

Keep smiling and be blessed! God bless you all!
Love Love Love RejoicingCrafts

http://static.inlinkz.com/ppr.js