Hello, hello crafty friends, long time no see!
I recently visited my hometown, South Korea. I was so happy with my family and friends for the last three weeks. But, I really missed my craft desk and all of you at the same time!! Hope you are doing very well :D
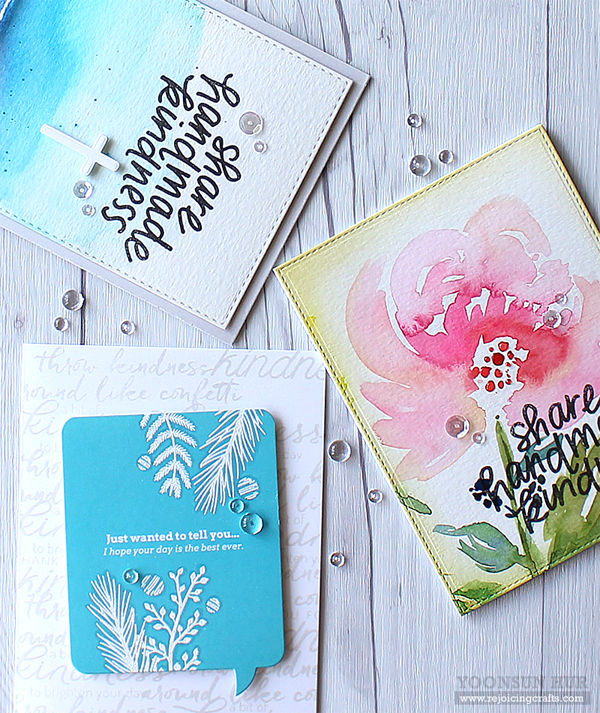
 Today I want to share with you three cards that I’ve made for the Share Handmade Kindness challenge that amazingly beautiful Jennifer McGuire is hosting over on her site.
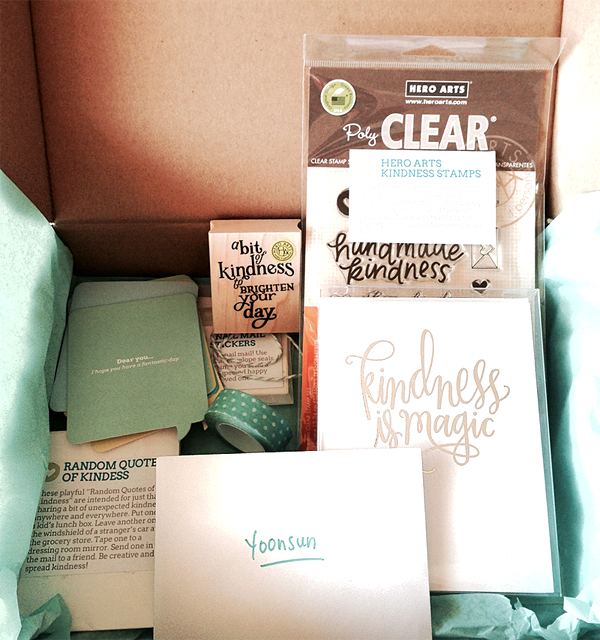 I was super happy when I received (and opened) this package from Jennifer, aren’t they amazing?!
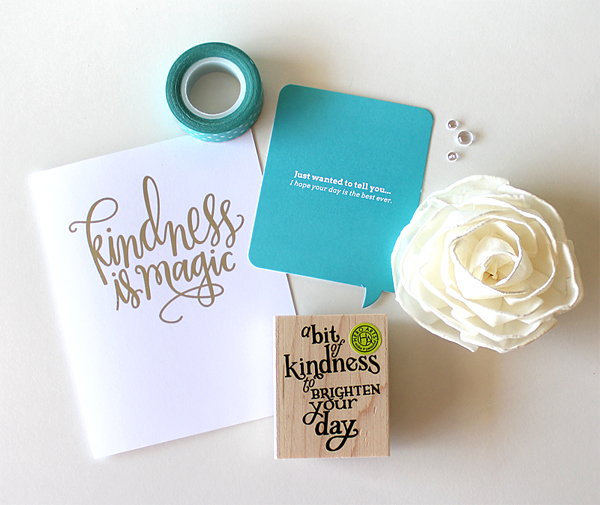 YES! Kindness is Magic!! It is so true! And I feel I am so blessed because I can share my handmade kindness to everyone, everywhere!! Week 4 (November 23-29) will focus on sharing any kind of handmade kindness with strangers. When I thought about strangers who need the encouragement, the words ‘homeless’ came to my mind. My church members are helping several homeless people cope with their difficult condition, so I decided to send my kindness to those homeless people through my handmade cards.
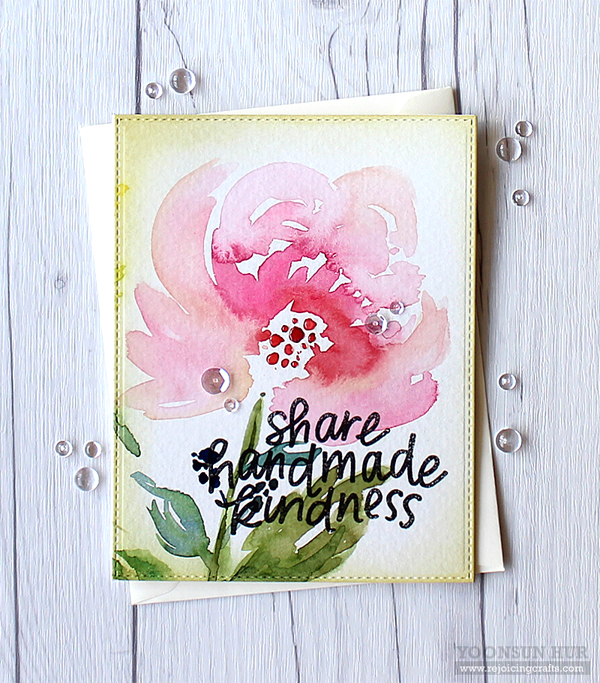
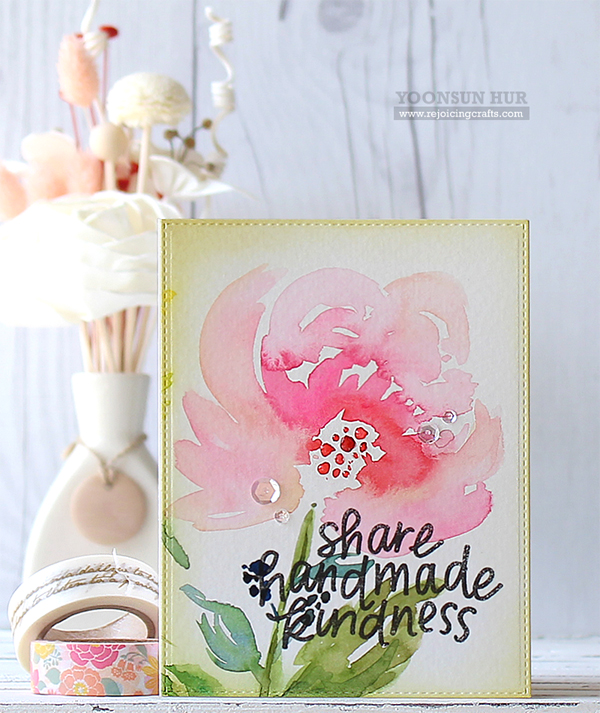 If you are one of my Instagram followers, you’ve already seen this watercolour flower. I painted it onto watercolour paper. Then I trimmed it with MFT Blueprints 25 Die-namics. I stamped the sentiment from the beautiful Hero Arts Acts of Kindness stamp set on the watercoloured paper panel using black pigment ink. I mounted it on white card base using double-sided tape. To finish it off, I embellished with a few PPP clear sequins.
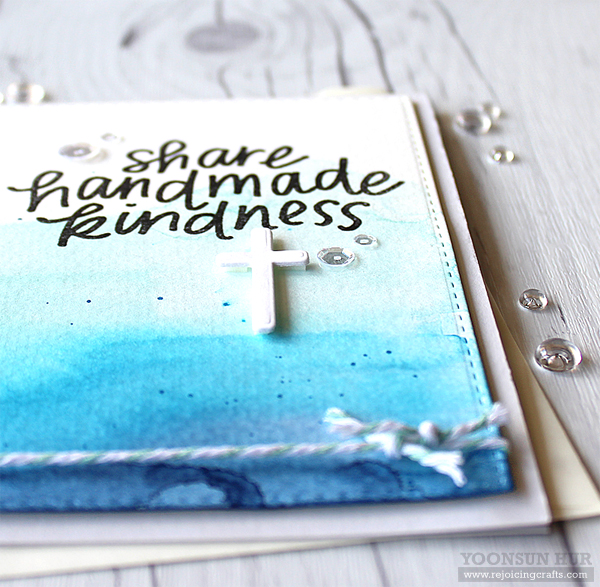
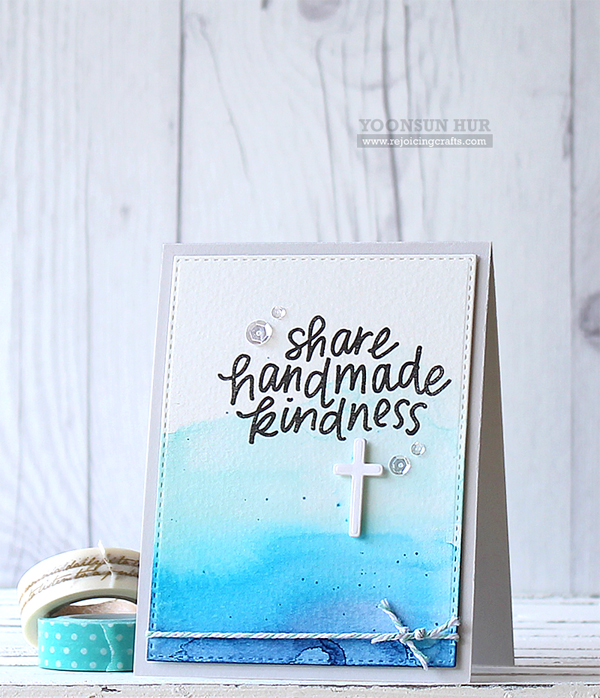 My second card is so simple watercolour card. First, I 1) coloured onto watercolour paper panel with MFT dye inks using a wide paintbrush. 2) Stamped the sentiment in the top right-hand corner of watercoloured panel with black pigment ink. 3) Added some ink splatters. 4) Die cut the small sized Cross from white card stock using SSS Crosses die and then affixed it using dimensional foam tape. 5) Mounted it on SSS Fog Gray card stock using double-sided tape. 6) Embellished with a few PPP clear sequins.
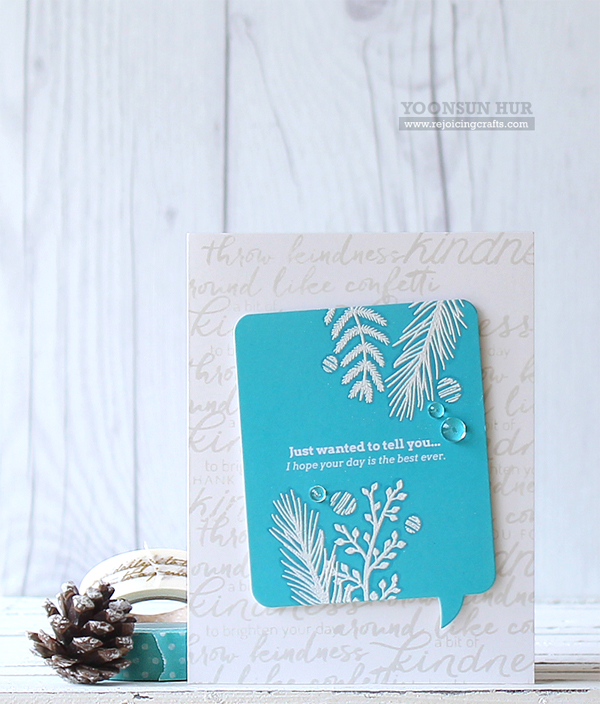 For my last card today, I used one of ‘Random Quotes of Kindness’ cards in the package. I 1) Stamped the sentiments from the Hero Arts Acts of Kindness stamp set on white card base using SSS Fog Gray dye ink. 2) Stamped the Christmas leaves from the Hero Arts Holiday Pine Branches stamp set on aqua coloured ‘Quotes of Kindness’ card using embossing ink, heat embossed with white embossing powder, then added dark shading with a Copic marker C3. 3) Mounted the stamped panel on card base using dimensional foam tape. 4) Embellished with a few PPP clear droplets.
 I hope you’ll join in this beautiful ‘Sharing Handmade Kindness’ challenge! Jennifer is giving away some awesome prizes, too!!
Thank you so much for stopping by and happy crafting!!
Keep smiling and be blessed! God bless you all!
Love Love Love RejoicingCrafts
http://static.inlinkz.com/ppr.js
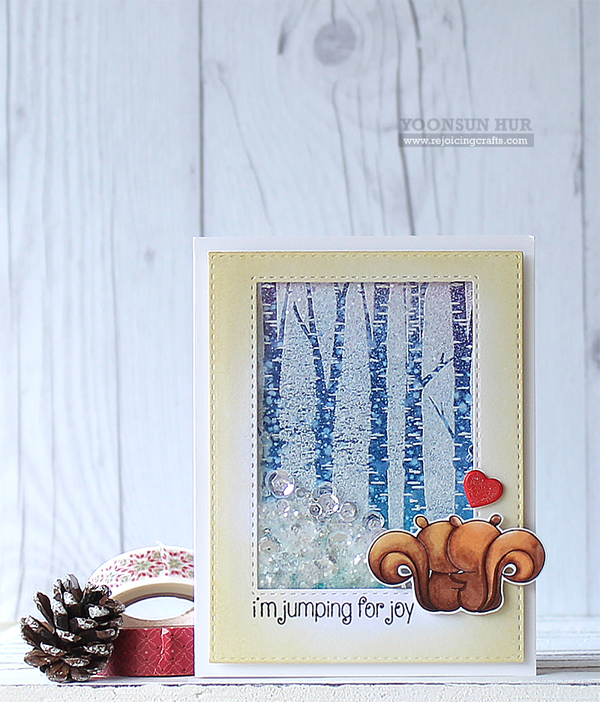
 Today I want to share with you my second post with Tree Hugs stamp set.
 As you already know about this set, it is designed to build birch trees of many sizes! Oh, how smart it is!!
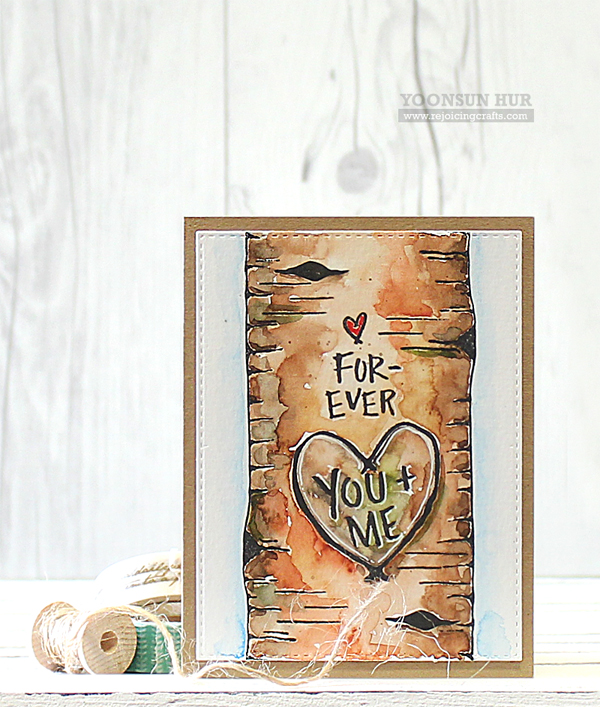 I made watercolour birch tree card. First I 1) Stamped the images from Tree Hugs set onto watercolour paper panel using black pigment ink. 2) Coloured it with Distress inks: Gathered Twigs, Rusty Hinge, Walnut Stain, Vintage Photo, Bundled Sage, Festive Berries, and Tumbled Glass Distress inks. 3) Mounted the watercoloured panel on kraft card base using double-side tape. It is so simple and easy, right?!
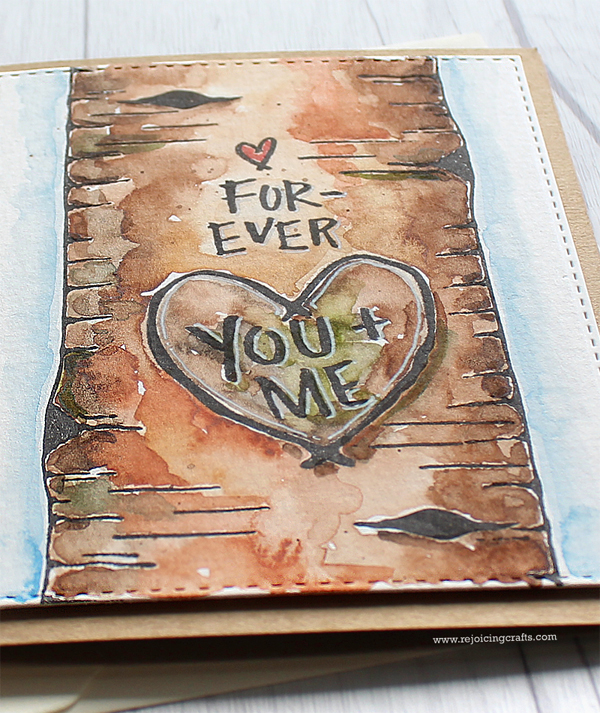 Thank you so much for stopping by and Happy New Year 2016!!


 To create this card, I 1) Stamped the clouds and stars from
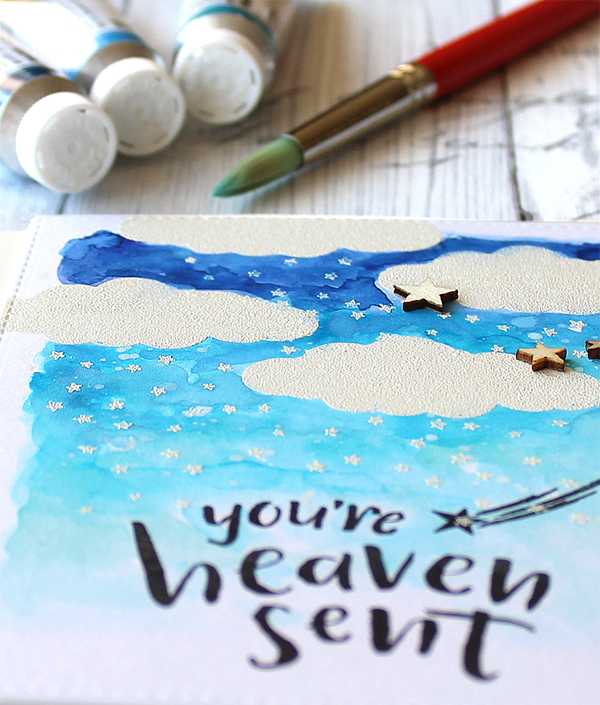


 To create this card, I 1) Stamped the sentiments from the
  Oh, I love their brushstroke sentiments so much!
 For my second card, I used the same stamps and color scheme but it is somewhat different in design. First I 1) Stamped the sentiments at the bottom part of watercolour paper panel using


 If you looking for a beautiful Christmas scene card ideas, I strongly recommend this sweet
 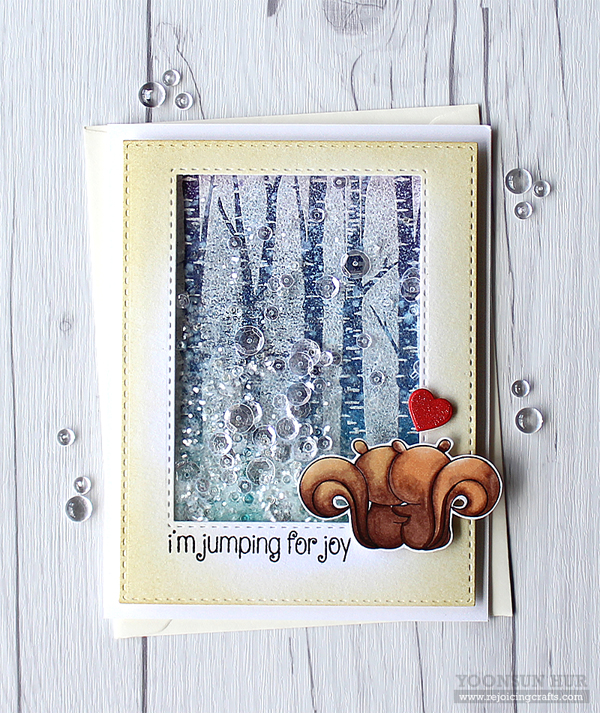 Make sure to check out


