Winter Holiday Card – Joy

Hello crafty friends, I hope you had a wonderful weekend.
October is so soon, this means it’s the month we start making Christmas cards (many of us are already making though). I will also make and share as many Christmas cards as time permits.
Today I have a couple of winter holiday cards with non Christmas products, lol!
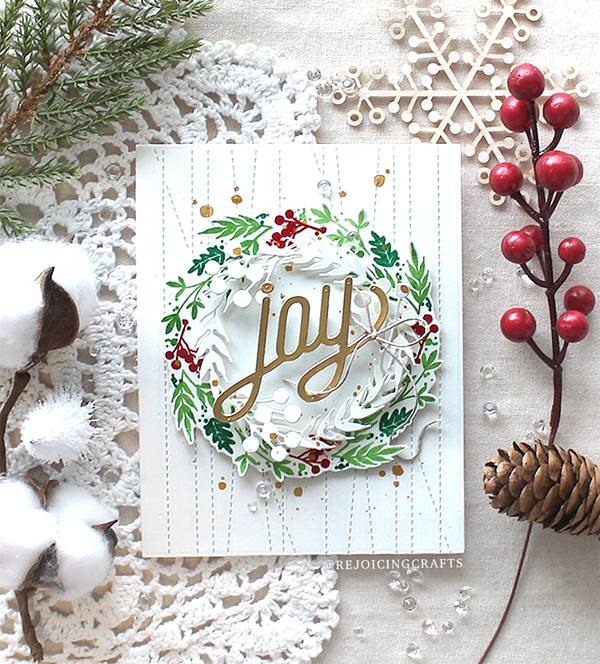

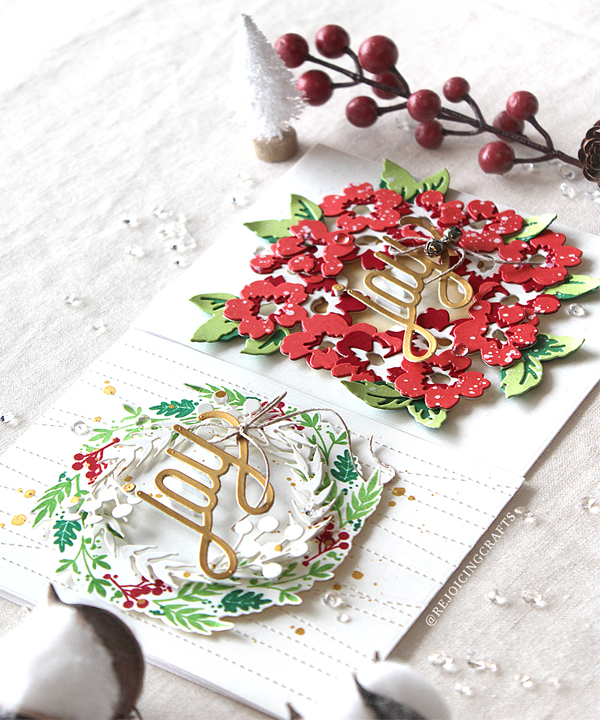
For my first card, I used the Concord & 9th Harvest Wreath set – it’s of course autumn-themed product but with red, green and gold on white, we can make Christmas cards as much as we want, right?!!

I started by stamping Christmas wreath from the C9 Harvest Wreath Turnabout set on white cardstock using C9 Cranberry, Parsley and Clover dye inks. I then cut the outer part of the wreath. I die cut some leaves & berries from white cardstock using the C9 Harvest Wreath die set as well. I mounted the leafy Christmas wreath on the centre of the card using foam tape first, and then added white leafy wreath as shown in the picture. I also added metallic gold ink splatters using Altenew Gold Pearl Metallic Watercolor.
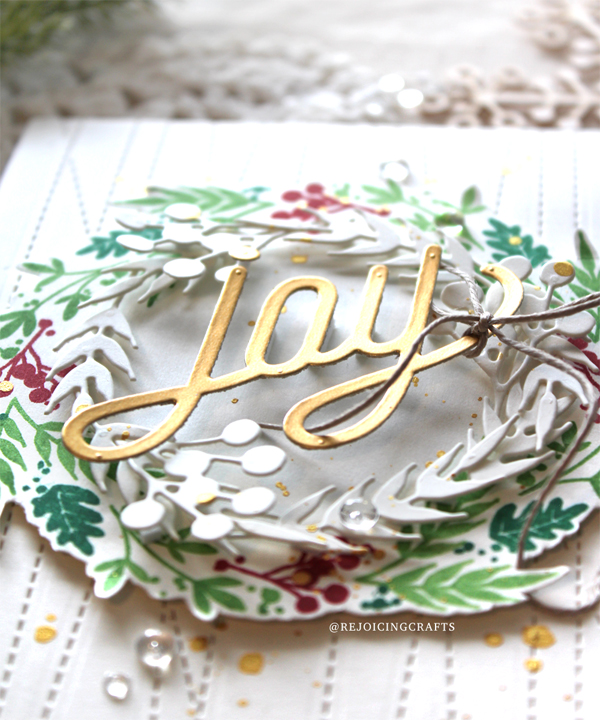
I die cut the word “Joy” from metallic gold cardstock using the SSS CZ Design Joy Script die, then added it on the card.
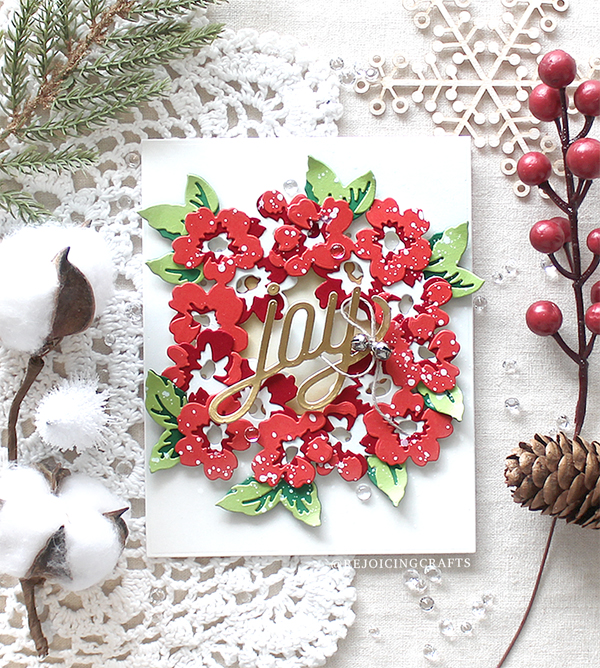


Here is another “Joy” Christmas card with the Altenew Mini Flower Cluster Layering die set. With this non Christmas product, I used only red & green cardstock.
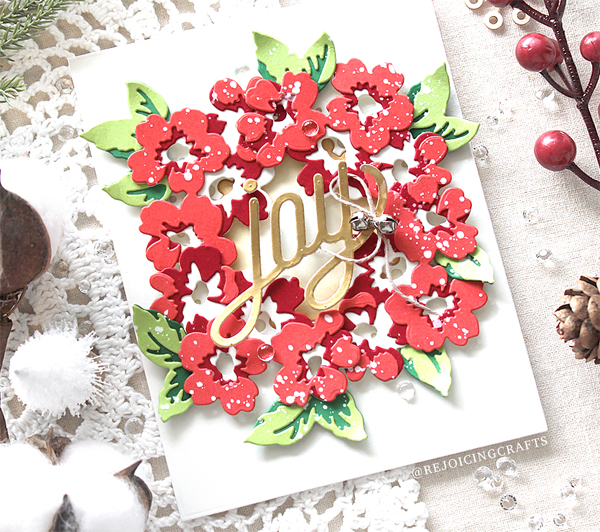
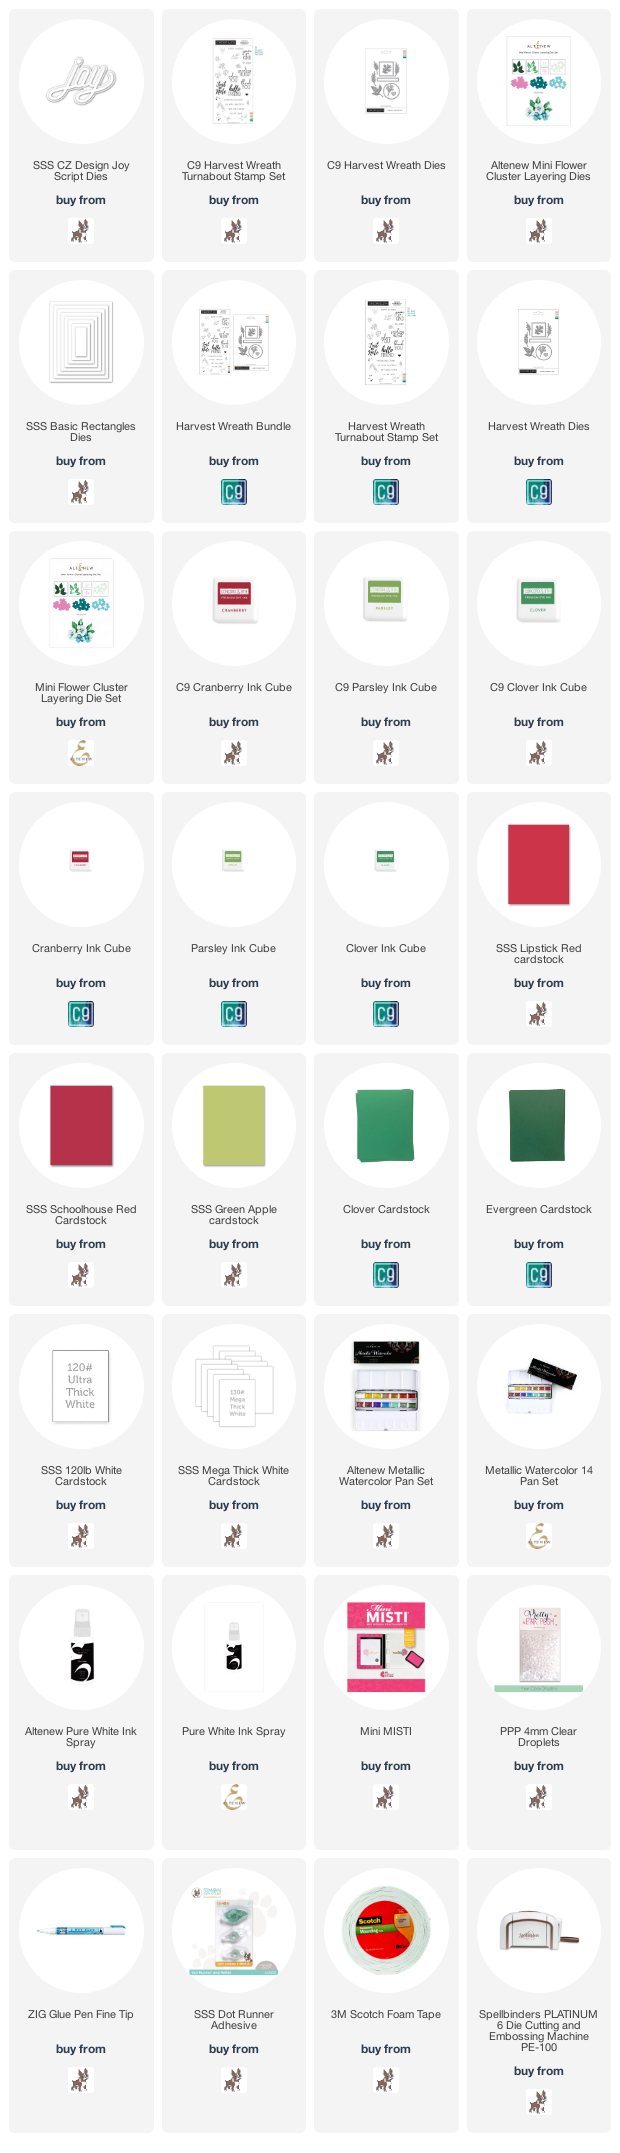
At first, I die cut flower petals from red & white cardstock. I used SSS Mega Thick White for the base layer, SSS Schoolhouse Red for the second layer and SSS Lipstick Red for the top layer. I then used green cardstock to die cut several leaves. I used C9 Evergreen & C9 Clover for the base layer, SSS Green Apple for the top layer. After die cutting, I adhered the pieces all together using ZIG fine tip glue pen.
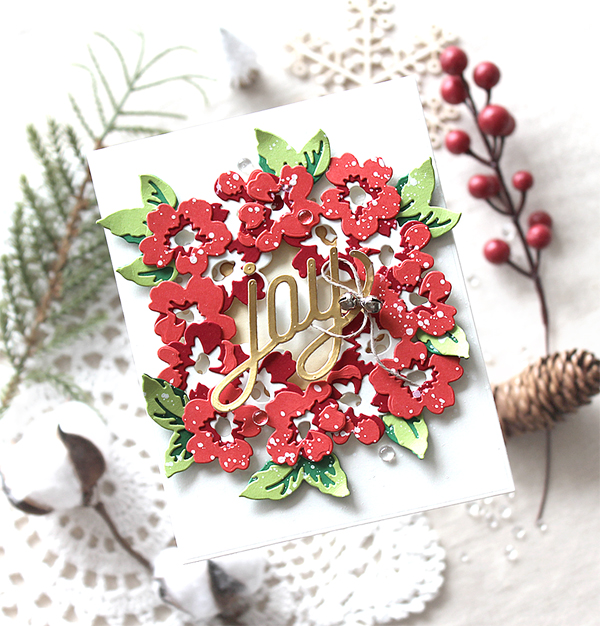
I mounted floral wreath on the centre of the A2 sized white card base using foam tape, added metallic gold “Joy” sentiment, jingle bells and opaque white ink splatters.

How about making Christmas cards with your non Christmas products today? I’m sure it’ll be fun! :D

Thank you so much for stopping by. Have a great day!

Keep smiling and be blessed! God bless you all!
Love Love Love RejoicingCrafts
PPP Happy Holidays

Hello crafty friends, I hope you had a wonderful weekend.
Today I have a couple of Winter holiday cards with some PPP Christmas products. I’m always happy making Christmas cards!


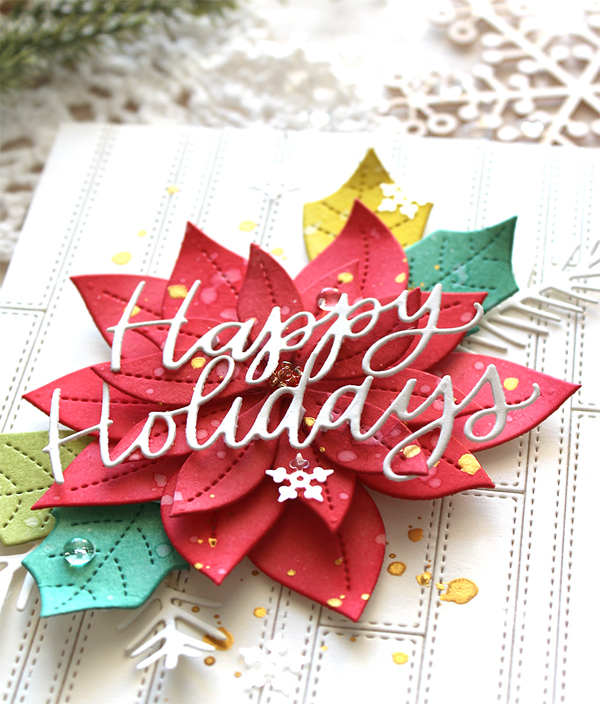
For my first card, I used the Stitched Poinsettias as my main supply.

For my stitched strips background, I was inspired by amazing Dana Kirby’s card. Oh, it’s a really great idea!! Please visit her blog (click HERE). She has so many beautiful cards. :D


I die cut three different sized Stitched Strips from white cardstock first, and then vertically mounted onto white card base using double-sided tape.

I die cut the poinsettias & leaves from watercolour paper using the Stitched Poinsettias dies first, then applied some Distress inks to them:
Poinsettias: Festive Berries & Fired Brick
Green leaves: Evergreen Bough, Crushed Olive, Bundled Sage
After inking, I layered all poinsettias as shown in the picture using foam tape, then added water drops.

I added one large poinsettia on the centre of the card, then added the sentiment “Happy Holidays” & metallic gold drops.


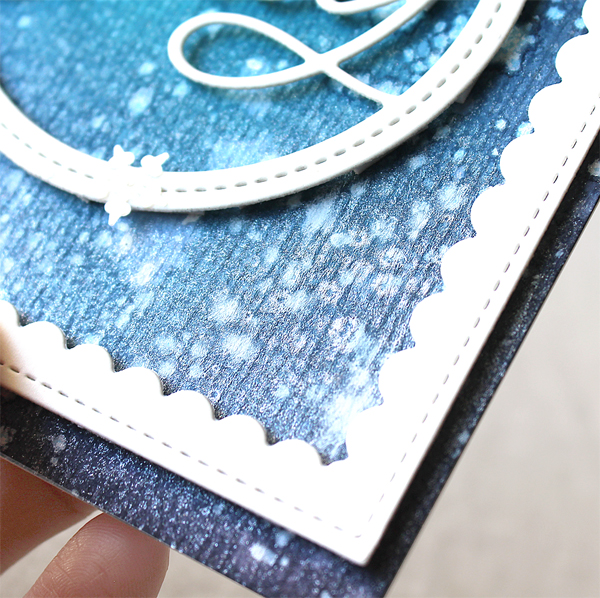
For my second card, I used the Ornament Shaker die. At first, I made snowy winter night background onto an A2 sized watercolour paper panel. I ink blended with Peacock Feathers, Faded Jeans, Seedless Preserves and Black Soot Distress inks, then added Sparkle Sheer Shimmer & opaque white ink splatters all around the panel.


Once the panel was completely dry, I added the “Jolly” circle ornament & white scallop frame using foam tape.

Thank you so much for stopping by. Have a great day!

Keep smiling and be blessed! God bless you all!
Love Love Love RejoicingCrafts

SSS Wood Background

Hello crafty friends, happy STAMPtember!
Today I have custom wood background cards with the Woodgrain Block die.
(Oops! Some crafty people asked me where they can buy this die.. I wasn’t aware that this die is retired when I made it actually. So, I searched alternatives and found Memory Box Wood Grain Planks die set).


I die cut the Woodgrain Block from watercolour paper several times, then applied Gathered Twigs & Tea Dye Distress inks. It’s ready to make my own wood background!

I mounted inked woodgrain blocks on Neenah Desert Storm card base using Dot Runner Adhesive as shown in the picture. I then added sentiment & tiny flowers using foam tape. For the sentiment, I used the With All My Heart die. I die cut the greeting from Kraft Woodgrain cardstock, shadow from thick white cardstock first, and then applied Walnut Stain Distress ink to greeting die cut.

For tiny flowers, I used the Blooming Wave die. It is so adorable!!


Here is another card with my own wood background panel. Oh, and it’s my first winter holiday card this year. :D

For the Leafy Christmas Tree, I die cut them from green coloured cardstock first. I used (from light to dark green) SSS Green Apple, SSS Green Leaf and Concord & 9th Clover cardstock. I then layered all together using foam tape. I decorated the tree with tiny snowflakes, clear snowflake sequins and red jewels. For the sentiment, I used the word “Joy” in the Holiday Sparkle Greetings set.

I love this leafy Christmas tree and the script sentiment!!


The GOLDEN BONE GIVEAWAY lasts until the end of September!
WIN an assortment of Simon Says Stamp brand products from every release for an ENTIRE YEAR! 5 bones to give out, and EVERY purchase made in STAMPtember® is eligible to WIN! DON’T MISS OUT!

Thank you so much for stopping by. Have a wonderful & creative weekend!

Keep smiling and be blessed! God bless you all!
Love Love Love RejoicingCrafts

Concord & 9th August Liquid watercolours

Hello crafty friends!
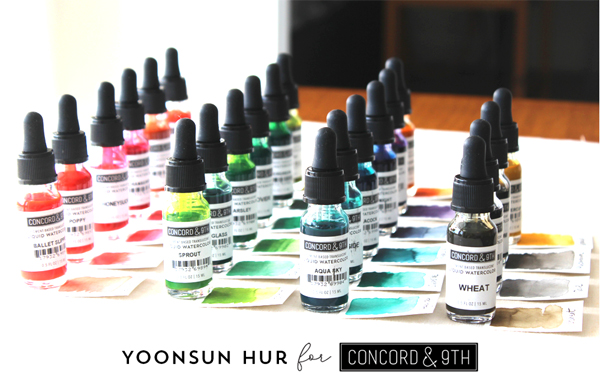
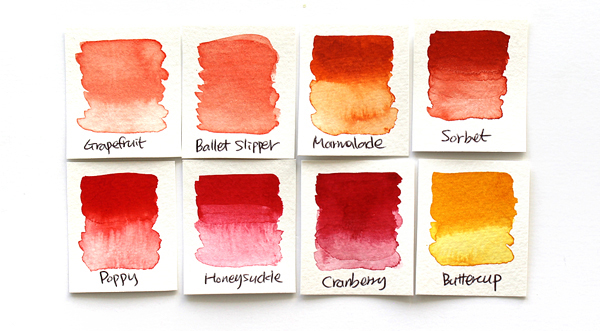
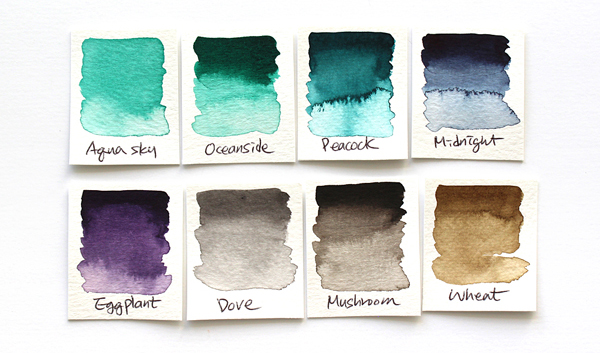
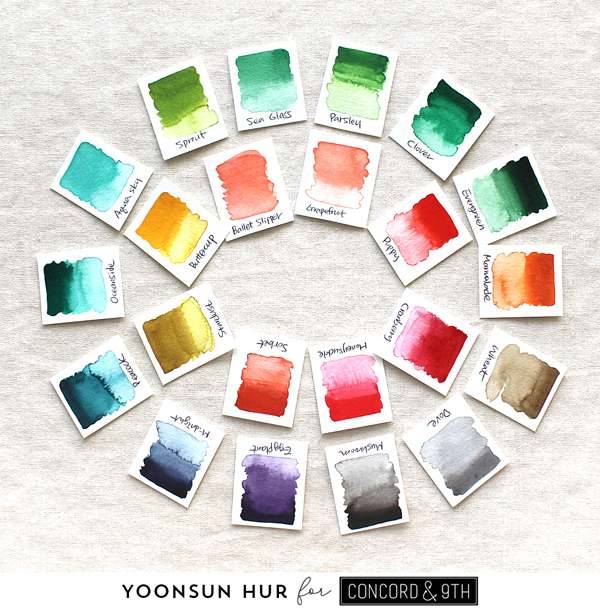
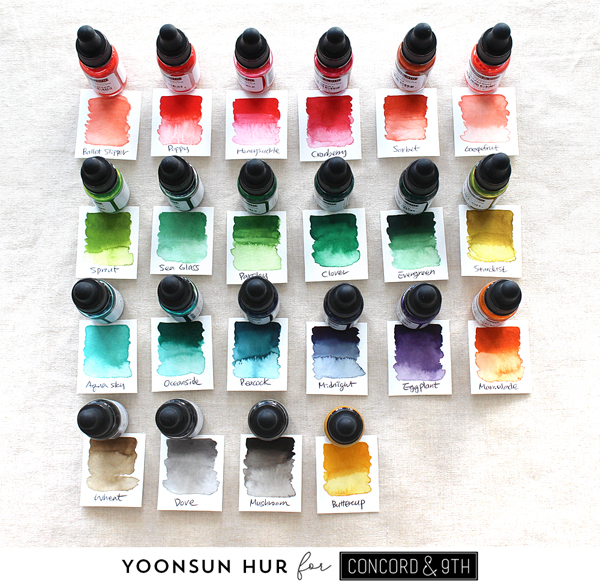
Concord & 9th has been released pigment based liquid watercolours this month and all 22 colours are truly, truly fantastic!

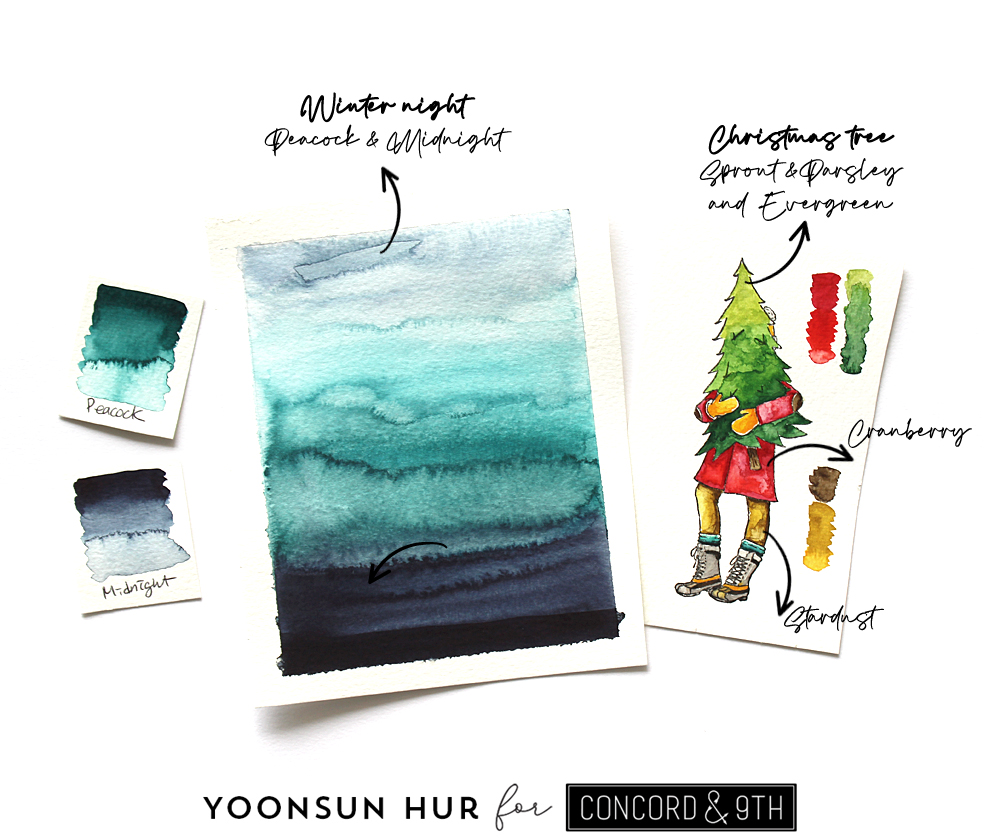
I made colour charts to make it easier for you to see as below:

They are so nice warm colours!

These green colours make me want to keep making autumn cards. So gorgeous!!

Fantastic, aren’t they?!!

These 22 liquid watercolours are really intense and concentrated by themselves but it’s easy to make various shades of the same colour by adding or reducing the amount of water I used on my brush. And they blend extremely well.

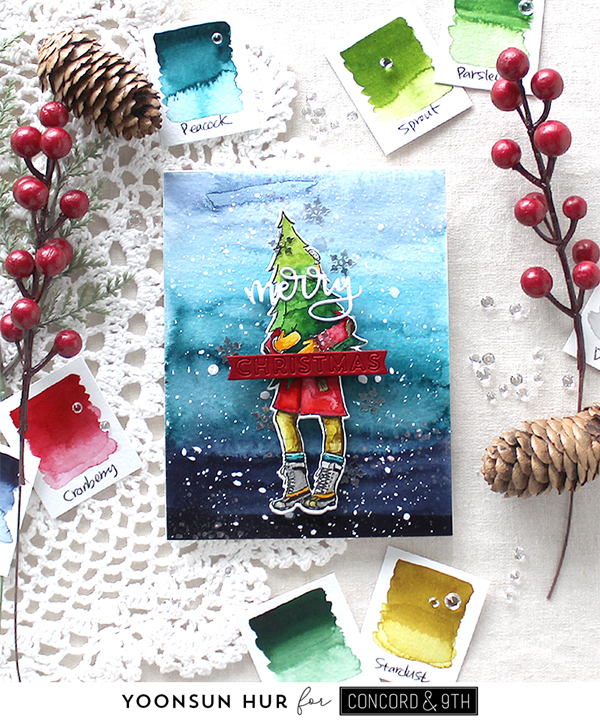
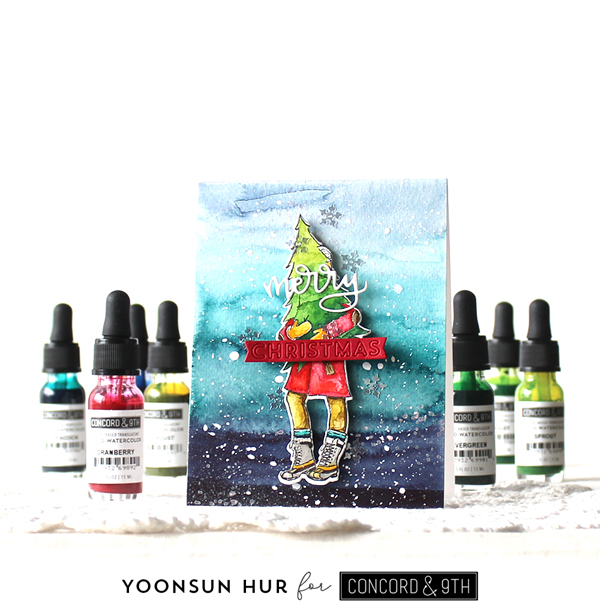
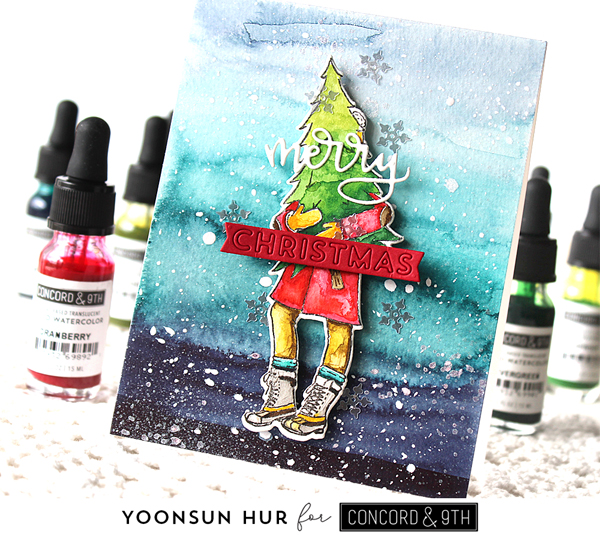
For my card with liquid watercolors, I used the Festive Friends set.


For my snowy winter night background, I used the Peacock & the Midnight liquid watercolour. I just painted Midnight onto the bottom of watercolour panel without water, then painted Peacock mixed with a little water, and then added more water to Peacock and Midnight on top of the panel as shown in the picture. And the woman holding the Christmas tree, I stamped it from the Festive Friends set using pigment black ink, and then coloured it with liquid watercolours.

Once the watercoloured panel was dry, I added opaque white ink all around the panel. For the sentiment, I used them in the Festive Friends die set.


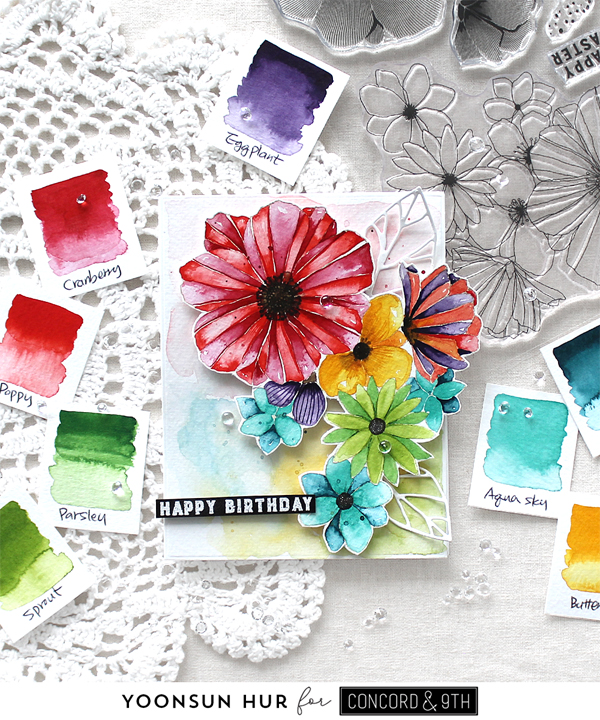
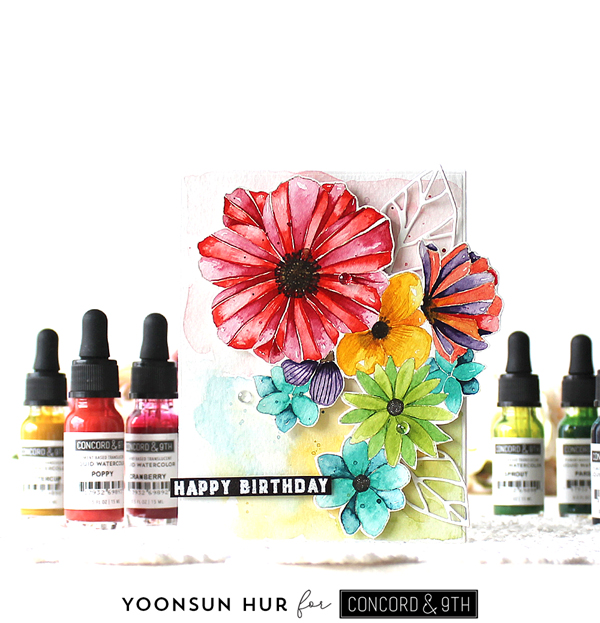
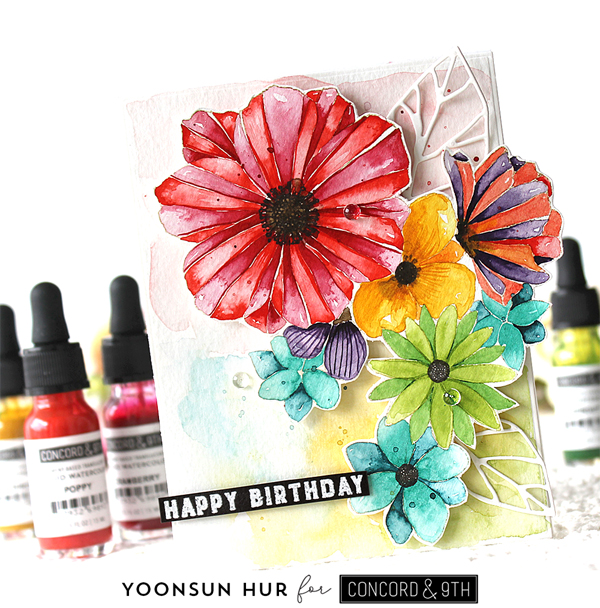
For my second watercolour card, I used the Fine Line Florals set.

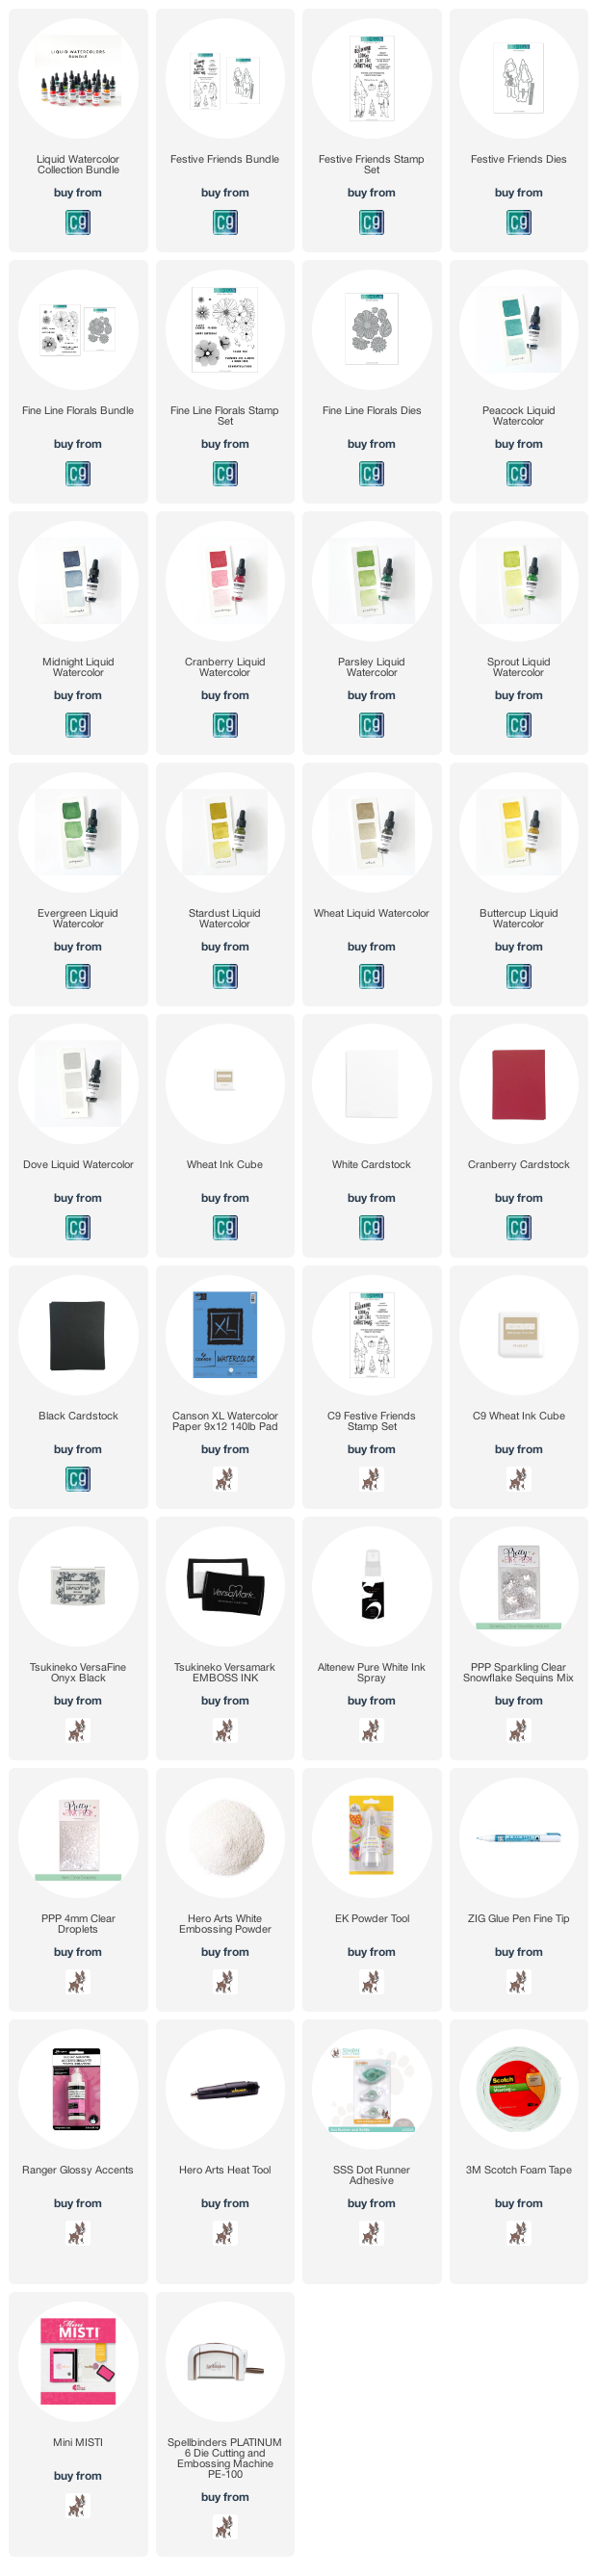
I stamped a large sized flower image from the Fine Line Florals set onto watercolour paper using Wheat dye ink first, and then coloured the stamped image with several liquid watercolours.


I adore these liquid watercolors so much!!

Thank you so much for stopping by. Have a wonderful day!

Keep smiling and be blessed! God bless you all!
Love Love Love RejoicingCrafts

SSS DieCember® Blog Hop – Day 2

Hello crafty friends!
Welcome to Day 2 of the Simon Says Stamp DieCember 2020 Release Blog Hop. I’m super-duper excited to be a part of this fabulous blog hop! If you arrived here from super talented Amanda Korotkova’s blog you are on the right track!

For my first card, I used the Turtle Doves die set as my main supply. Oh, isn’t this couple so lovely?!! I die cut the turtle doves from watercolour paper first, and then ink blended them with several Distress inks. I also die cut mistletoe from green apple cardstock, ribbon & tiny hearts from lipstick red cardstock. I used glitter gold cardstock for beaks because it’s Christmas, lol!

For the background, I heat embossed the Holiday Words background onto watercolour paper panel in white first, and then made circle on the centre of the panel with the Circle Masks stencils & Distress inks: (from the largest circle) Tattered Rose, Worn Lipstick and Candied Apple. I tore up the top & bottom parts of the background panel, mounted it on Neenah Smooth Desert Storm card base, then added all elements as shown in the picture using foam tape. I also decorated the card with clear snowflakes in the Snowy Pines sequins.


For my second card, I used the Paper Hugs & the Detail Bohemian Plate dies. I started by making a beautiful patterned panel using the Detail Bohemian Plate die. I then made circle patterns (like the first card) with the Circle Masks stencils and blue coloured Distress inks.

For the sentiment, I used the Paper Hugs die – it is so adorable sentiment die!!


GIVEAWAY & BLOG HOP EXCLUSIVE PROMOTION!

Simon Says Stamp is giving away a $25 coupon to every stop on the hop. The winners will be chosen over the weekend and post on Simon Says Stamp blog on Wednesday, the 9th of December. ONE MORE! Get a FREE American Crafts Christmas Tag Kit with the code JINGLE (This promotion will expire 12/4 at 11:59 pm EST) at checkout when you purchase at Simon Says Stamp Store.
BLOG HOP LIST:
Simon Says Stamp Blog
Debby Hughes
Laura Bassen
Amanda Korotkova
Yoonsun Hur (Me!!)
Heather Hoffman
Bibi Cameron
Anna-Karin Evaldsson
Bobbi Lemanski
Vicky Papaioannou
Gayatri Murali
Keisha Charles
Dana Joy
Daniel West
Preeti Chandran
Kath Stewart
Kim Hamilton

Enjoy this DieCember Release Blog Hop and happy holiday crafting!!

Keep smiling and be blessed! God bless you all!
Love Love Love RejoicingCrafts