SSS Happy Santas

Hello crafty friends, happy Monday! I hope you had a wonderful weekend!!
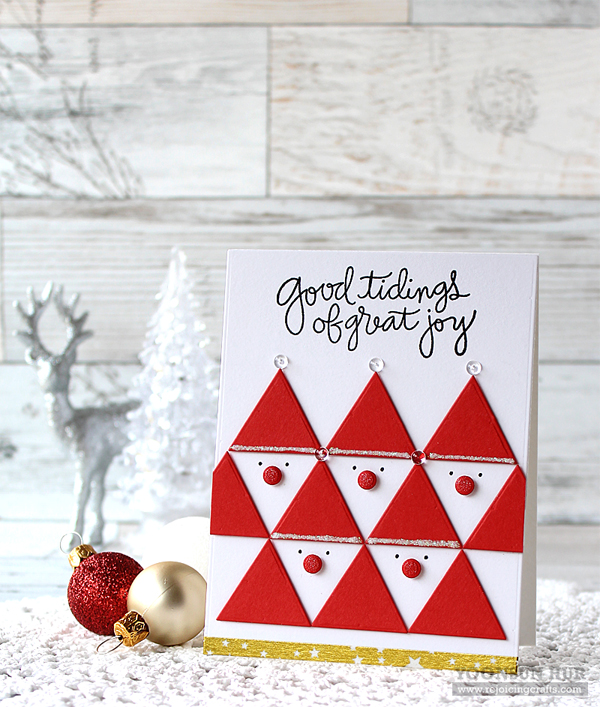
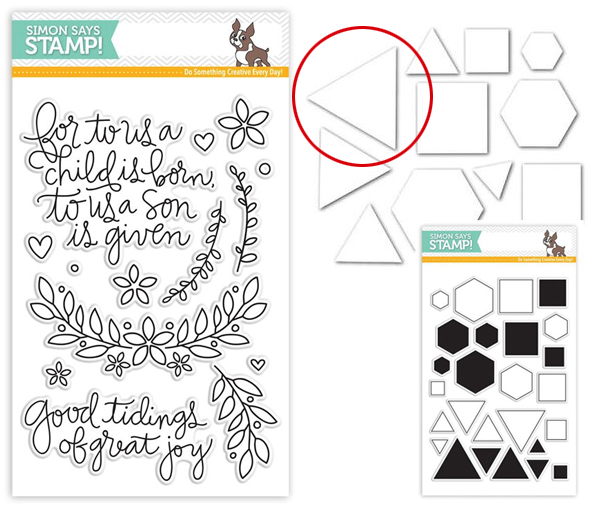
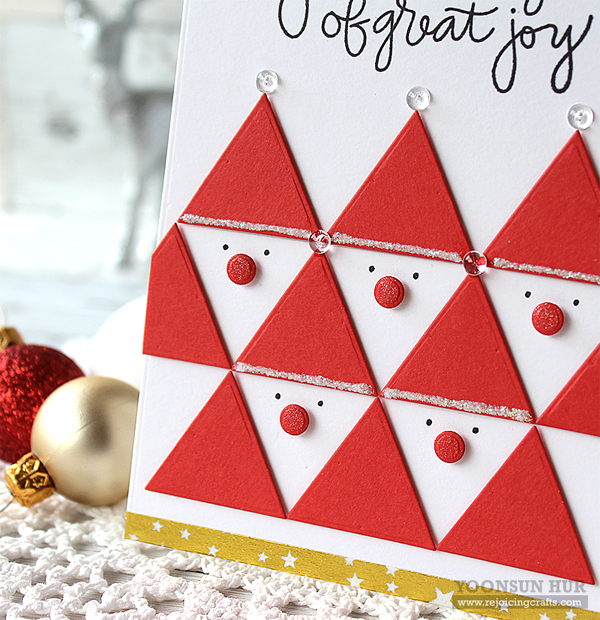
Today I have a fun Christmas card to share with you using the Perfect Shapes dies. The set contains basic hexagons, triangles, and squares and I used the largest triangle shape (1.3″ x 1.3″) to my card.
SSS-20160829
Here is what I came up with:
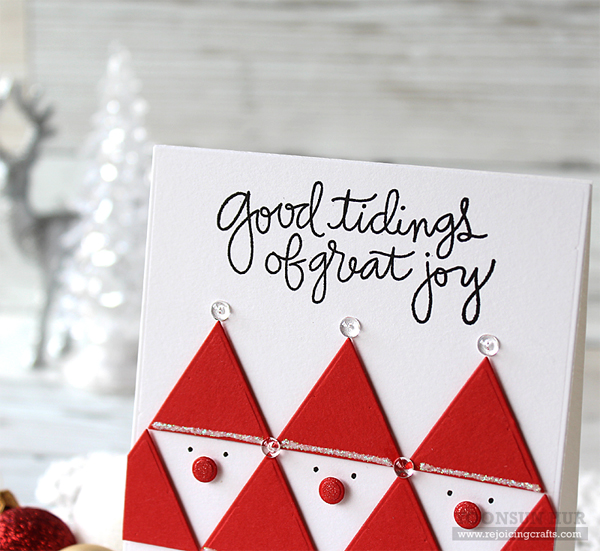
YoonsunHur-20160829-SSS-001To start, I die cut Santa’s hat from the Lipstick Red card stock using triangle die in the Perfect Shapes die set. I then die cut Santa’s nose from the same Lipstick Red card stock using tiny circle die in the Cuddly Critters Accessories die set. Next, I stamped the sentiment from the For To Us set on the top of the A2 white paper panel in VersaFine Onyx Black. I adhered the triangle and circle die cuts (as shown in the picture) on the stamped panel using foam tape, and then drew eyes using black Copic Multiliner.
YoonsunHur-20160829-SSS-002YoonsunHur-20160829-SSS-003
1_121Simon Says Stamp STAMPtember is just around the corner!! All of awesome autumn and winter holiday products will be revealed in September 1st! Can’t wait!!!

That’s it for today. Thank you so much for stopping by. Have a wonderful day!

Keep smiling and be blessed! God bless you all!
Love Love Love RejoicingCrafts

https://static.inlinkz.com/ppr.js

MFT and Chibi Lights Collaboration

Hello crafty friends!
My Favorite Things is collaborating with Chibitronics (Chibi Lights Kit) during this month. I couldn’t be more excited to share a super fun kit with you today.
PrintYoonsunHur-20160824-MFT-ChibiLight-003
With Chibi Lights, I decided to make a Christmas card using the Fireplace Die-namics.
YoonsunHur-20160824-MFT-ChibiLight-001To start, I heat embossed the sentiment from the Hand Lettered Holiday set on the bottom of the Cherry Crisp paper panel in white. Then I made a cozy fireplace scene with the Fireplace Die-namics, adhered vellum paper to the back of the fireplace, and then mounted it on the same paper panel using foam tape.
YoonsunHur-MFT-ChibiLightsOn the Cherry Crisp card base, I set up all the electrical components. I positioned the battery behind the sentiment, and (white) LED stickers behind the fire.
YoonsunHur-20160824-MFT-ChibiLight-004Yay! My interactive cozy fireplace card is ready!!
YoonsunHur-20160824-MFT-ChibiLight-005Isn’t it cool? Seriously, I love this brilliant kit!!
YoonsunHur-20160824-MFT-ChibiLight-002MFT-ChibiLightMake sure to check out MFT Blog for all the info for today along with links to other DT member’s blog posts.

Thank you so much for stopping by. Have a wonderful day!!

Keep smiling and be blessed! God bless you all!
Love Love Love RejoicingCrafts

https://static.inlinkz.com/ppr.js

The Ton – Mini Wild Florals

Hello crafty friends, happy Monday!
I’m posting on the The Ton blog today using so versatile and beautiful Mini Wild Florals stamp set.
YoonsunHur-20160725-TheTON-003If you want to see more just click to the The Ton Blog!

Thank you so much for stopping by. Have a delightful day!

Keep smiling and be blessed! God bless you all!
Love Love Love RejoicingCrafts

SSS Snowflakes

Hello crafty friends, I hope you are doing very well and have good time to read my post!
Today I want to share with you a Christmas card I’ve made using Simon Says Stamp holiday goodies.
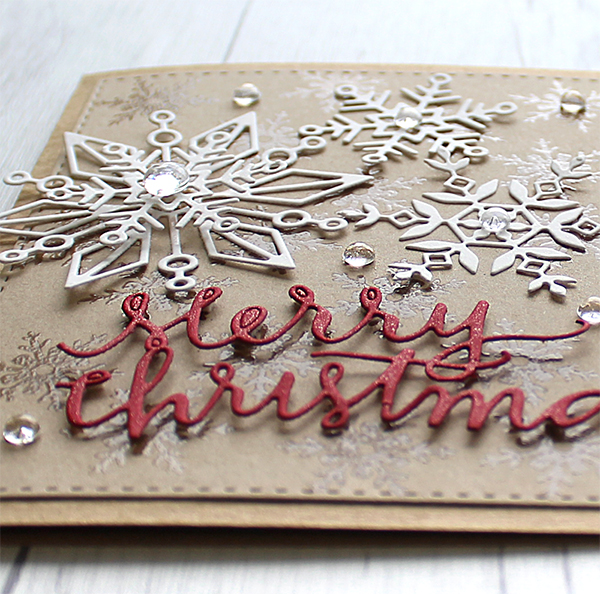
YoonsunHur-20151013-SSS-Snowflakes01-600pxI love to see snowflake cards and one thing for sure, it’s NEVER boring in winter season!! And I also love making Christmas cards with different shapes of the snowflakes :D

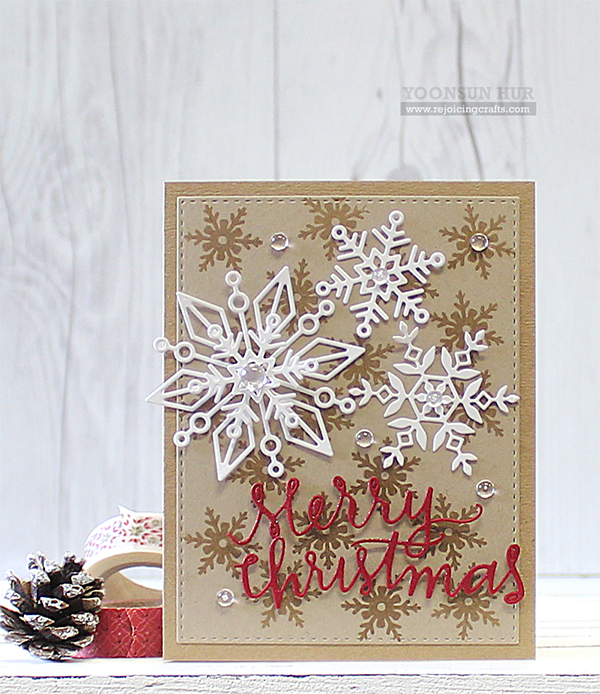
I made so simple Christmas card with old & new SSS Snowflake dies. First I 1) Stamped the snowflake from the Holiday Banners on kraft paper panel using embossing ink, clear heat embossed 2) Affixed the stamped panel on kraft card base using double-sided tape. 3) Die cut the snowflakes from white card stock using (from left to right) Nadine, Maryanne, Kate Snowflake dies. 4) Die cut “Merry Christmas” from SSS Schoolhouse Red card stock using Merry Christmas Ornament Die – I just took sentiment part from the ornament die cut today. 5) Mounted all elements as shown to the stamped base using dimensional foam tape. 6) Embellished with a few PPP clear droplets for finishing touches.
YoonsunHur-20151013-SSS-Snowflakes02-600pxI love the red and white on kraft, it always reminds me of a romantic holiday.
YoonsunHur-20151013-SSS-Snowflakes03-600px
My Christmas will definitely be filled with laughter and joy because of this ;)
SSS-201510-CreateJoy-BannerSimon Says Stamp will release the most wonderful holiday products THIS week! WOOT!!

Thank you so much for stopping by. Have a wonderful day!

Keep smiling and be blessed! God bless you all!
Love Love Love RejoicingCrafts

http://static.inlinkz.com/ppr.js

Penny Black Christmas in July Day 5. Merry Christmas

Hello crafty friends, TGIF!
Today is my last day with Penny Black Christmas in July.
(This is my second post of the day, for the MFT July Release Countdown Day 5, click HERE.)
PennyBlack-Banner
Today’s theme is MERRY CHRISTMAS!!
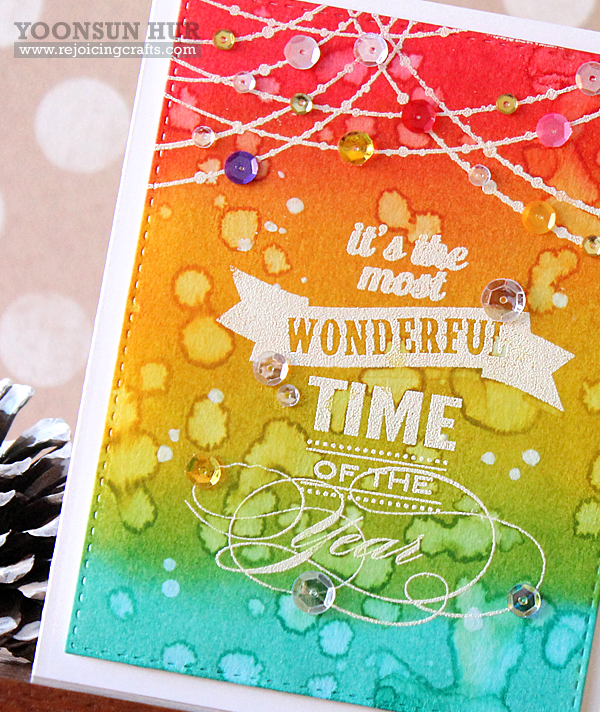
YoonsunHur-2015July-PennyBlack-Day5-A01For my card today, I used Wonderful & Jolly Stamp set. First of all, I stamped the sentiment and Christmas lights on the watercolour panel with embossing ink, white heat embossed. I then blended on the stamped panel with Distress inks Festive Berries, Mustard Seed, Mowed Lawn, Peacock Feathers using mini blending tool, added some water droplets because I wanted to express the falling snow. To finish it off, I embellished different colours of sequins.
YoonsunHur-2015July-PennyBlack-Day5-A02
Oh wow! It was a very enjoyable journey during this week and what I want to say to all of you is: MERRY CHRISTMAS!!

Thank you so much for stopping by. Have a wonderful weekend!

Keep smiling and be blessed! God bless you all!
Love Love Love RejoicingCrafts