Hello crafty friends, happy STAMPtember!
Wow, I can’t believe that today is the last day of the STAMPtember. Time sure flies! But this isn’t the end of it. We will continue to make cards or something with the STAMPtember goodies especially the Christmas projects, right?!! So today I have a Christmas card to share with you using the Merry Christmas stamp set.
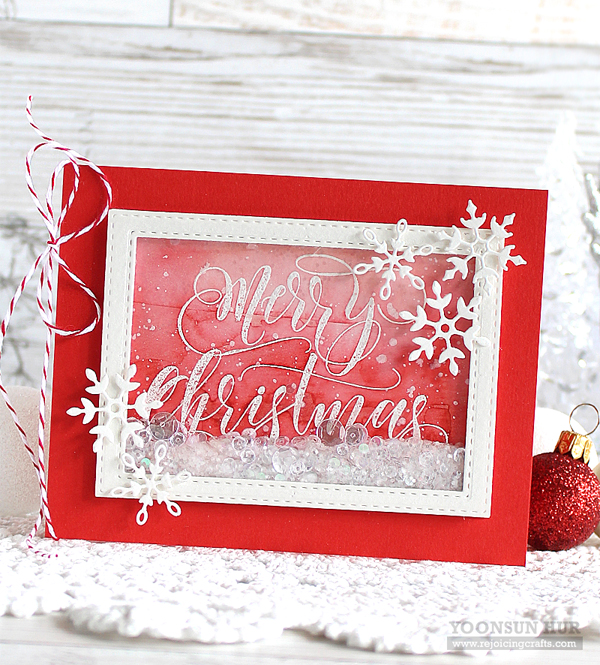
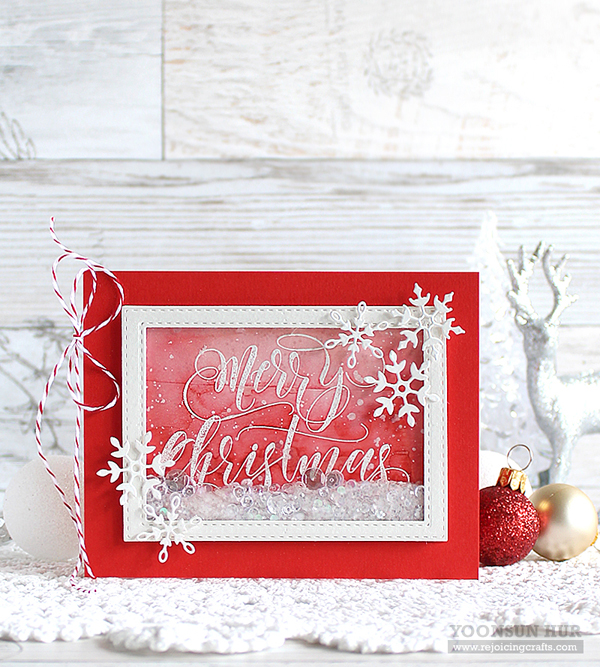 Oh, I love this Merry Christmas sentiment so much! It’s so beautiful and elegant. I heat embossed the sentiment from the Merry Christmas set on watercolour paper panel in white, and then added some Christmas red colours of Distress ink: Festive Berries and Fired Brick. For the shaker window, I used the Stitches Rectangles dies.
 I mounted the shaker panel on the Lipstick Red card base using foam tape, and then decorated the card front with some snowflake die cuts using the Stitched Flakes dies.
 I truly appreciate you taking time out of your day to stop by. Have a fabulous day!!
Keep smiling and be blessed! God bless you all!
Love Love Love RejoicingCrafts


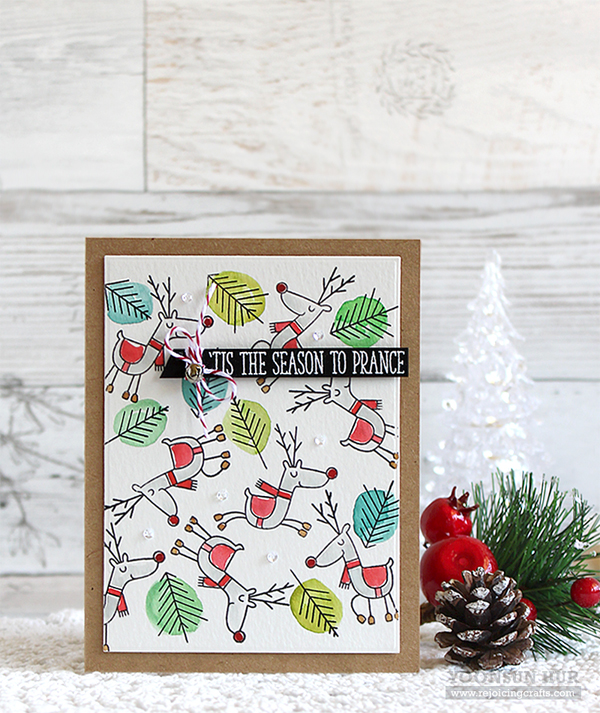 It’s so easy to make!! I randomly stamped the images from the
 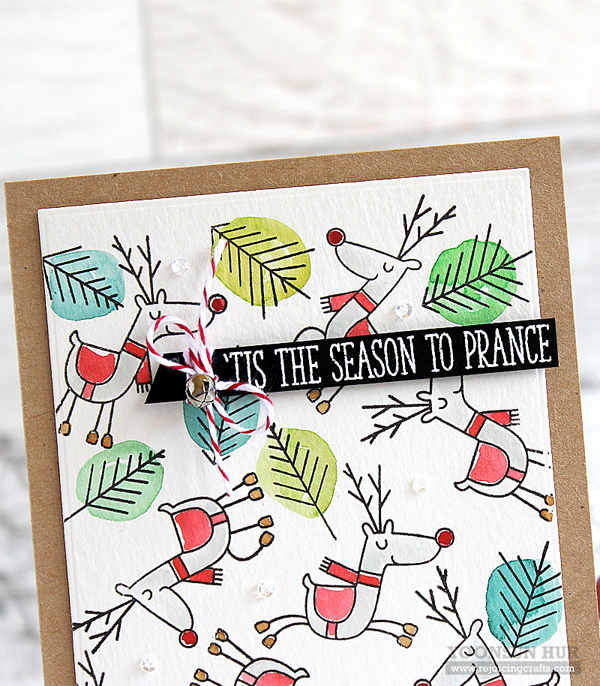 Thank you so much for stopping by. Happy crafting!!


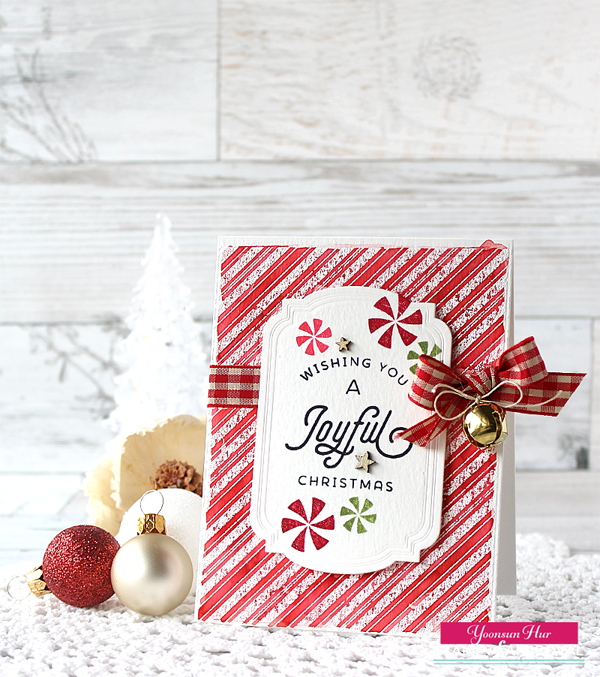 The Peppermint Stick Background Stamp is really GORGEOUS!! I simply heat embossed it onto watercolour paper panel in white, and then coloured it with Festive Berries and Fired Brick Distress inks. For the sentiment panel, I stamped the sentiment from the Merry and Bright Boughs set on white card stock in VersaFine onyx black pigment ink, Christmas candy from the Candy Cane Lane set using some dye inks, trimmed it using the Merry Labels dies. I added red gingham ribbon, natural twine bow, gold jingle bell, and then mounted all elements as shown to A2 top folded white card base using foam tape.
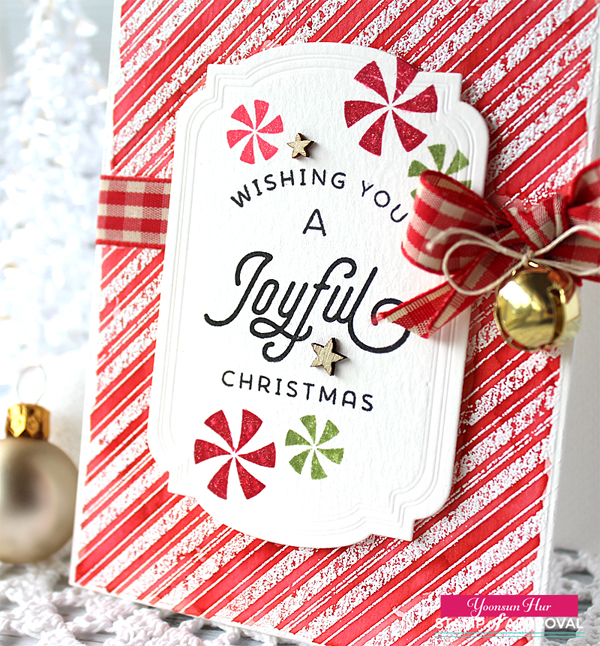
 Thank you so much for stopping by. Happy crafting!!
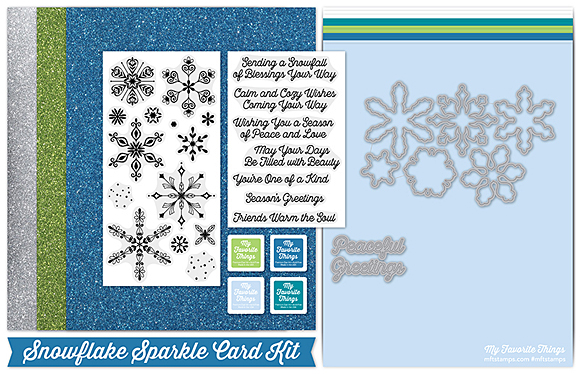
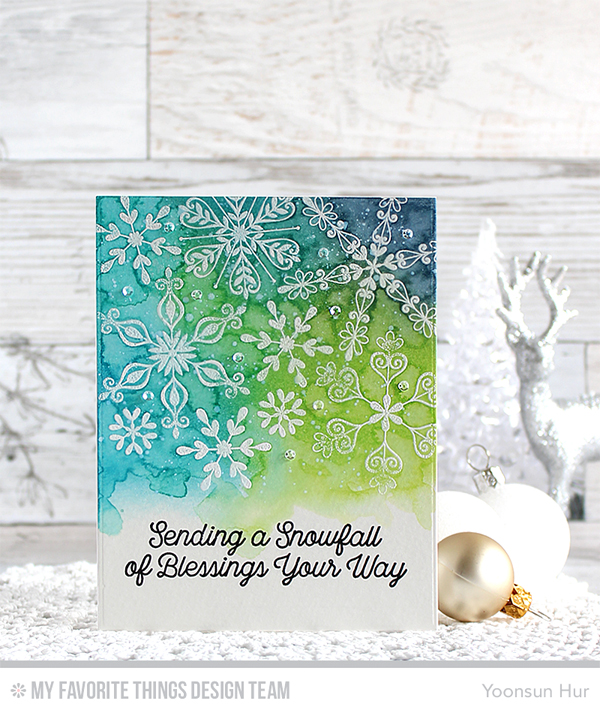 For my first card, I used the emboss resist technique, definitely one of my favourite techniques, with the
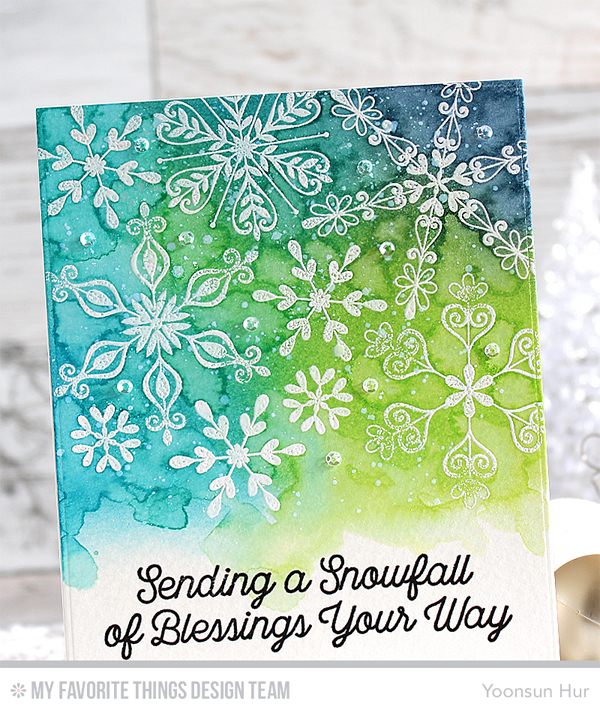
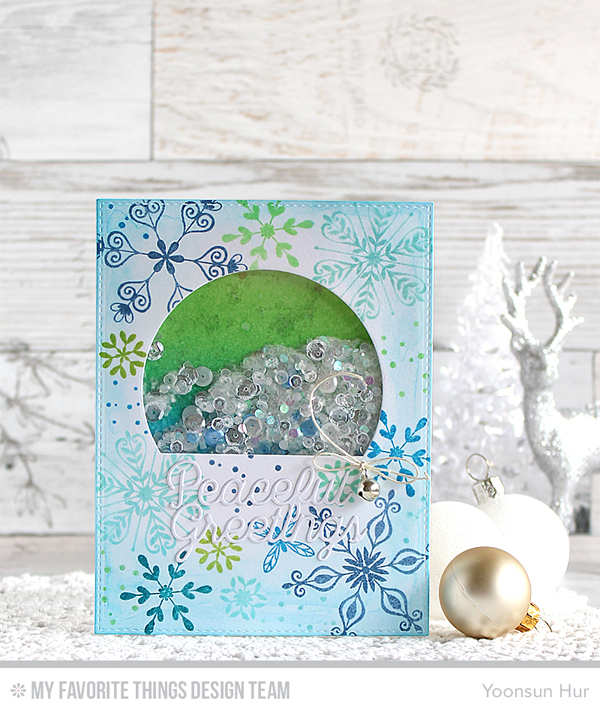 For my second card, I made a shaker card. To start, I die cut the arch window from the stitched white paper panel using the


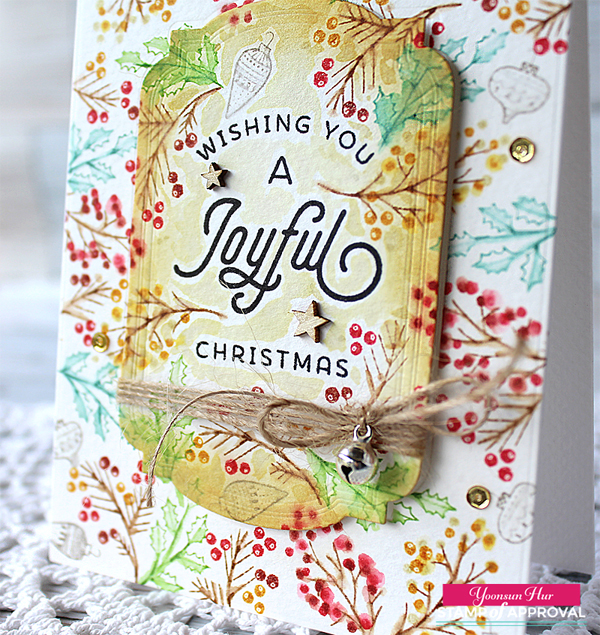
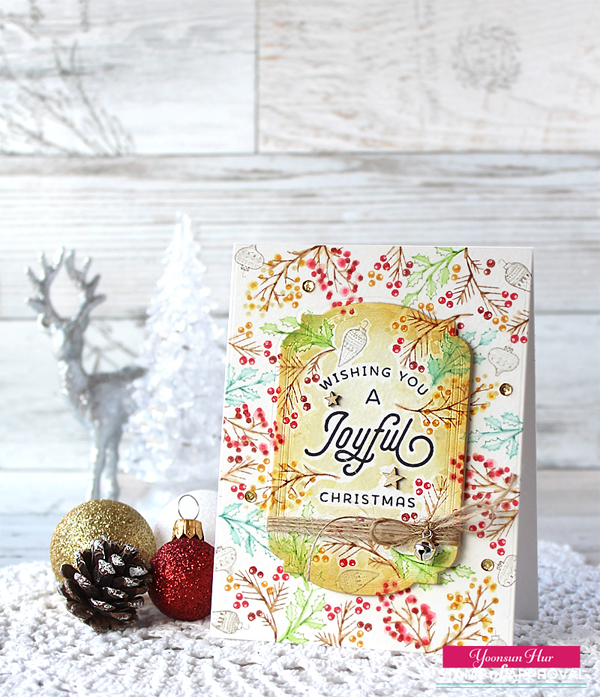 I randomly stamped the boughs, leaves, and berries from the Merry and Bright Boughs set on an A2 sized watercolour paper panel with Christmas colours of Distress ink, and then lightly brushed the stamped images using water brush. Once the panel was completely dry, I die cut the sentiment panel from the centre of the panel using the Merry Labels Dies. I then used the MISTI stamping tool to stamp the sentiment and then inked the edges of the panel with Antique Linen Distress ink using mini round blending tool. I wrapped natural twine on the bottom of the sentiment panel three times, added a bow and silver jingle bell. Lastly I mounted two panels as shown to A2 top folded white card base using foam tape.
 For my second card, I used so cheerful Candy Cane Lane Stamp and Die Set. I stamped the sentiment from the Candy Cane Lane set on the centre of the white paper panel with Versafine onyx black ink first, and then randomly stamped the images around the sentiment area with dye inks. Next, I die cut some stamped images from the panel using the Candy Cane Lane Dies, and then inlaid them in place using foam tape. I mounted the stamped panel on A2 top folded red card base using foam tape.

 THREE commenters will be chosen at random from all the comments on all the blogs (one each day). The more blogs you comment on, the better your chance in winning! Entries close on THURSDAY, September 22 at 9AM EST. Winners will be announced on


