MFT September Release Countdown – Day 1

Hello crafty friends!
Welcome to the My Favorite Things September Release Countdown Day 1. We’ve reached the final day of the countdown!!

NewReleaseCountdown_Day1Today I am sharing with you a couple cards with London Mouse Stamp Set and London Skyline Die-namics.
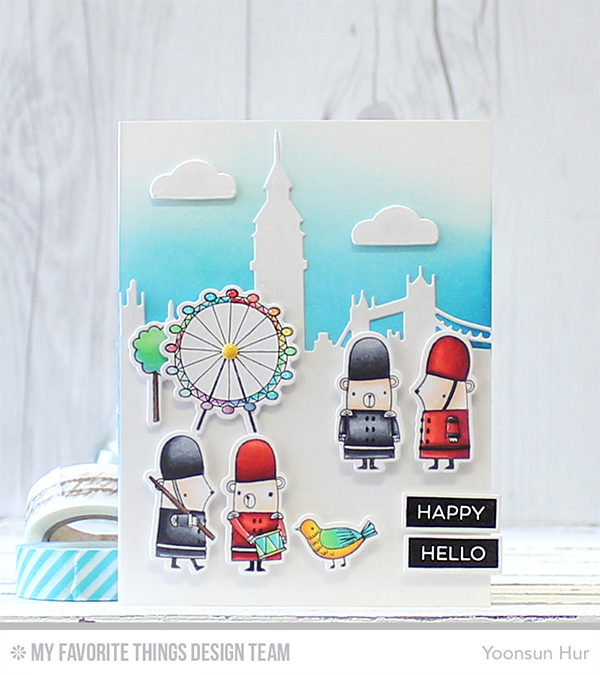
YoonsunHur-MFT-SeptemberRC-Day1-B01Oh, what an adorable policemen!! I wanted to describe a peaceful morning scene in London city when I saw the London Mouse Stamp Set and London Skyline Die-namics.

To create this card, I 1) Stamped images from the London Mouse Stamp Set on the white card stock using Black Licorice hybrid ink, coloured them with Copic markers. 2) Die cut them with London Mouse Die-namics. 3) Die cut London Skyline from the white card stock. 4) Blended on the white card base with Summer Splash, Lush Lagoon dye inks using mini blending tool. 5) Stamped the sentiments from the Label Maker Sentiments Stamp Set on the white card stock using Black Licorice hybrid ink, die cut them with Label Tape Die-namics. 6) Mounted all elements as shown to the inked base using dimensional foam tape.
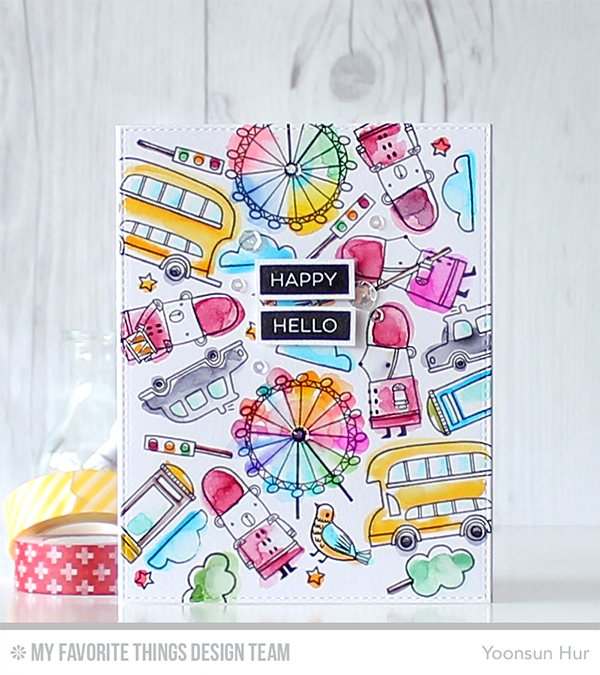
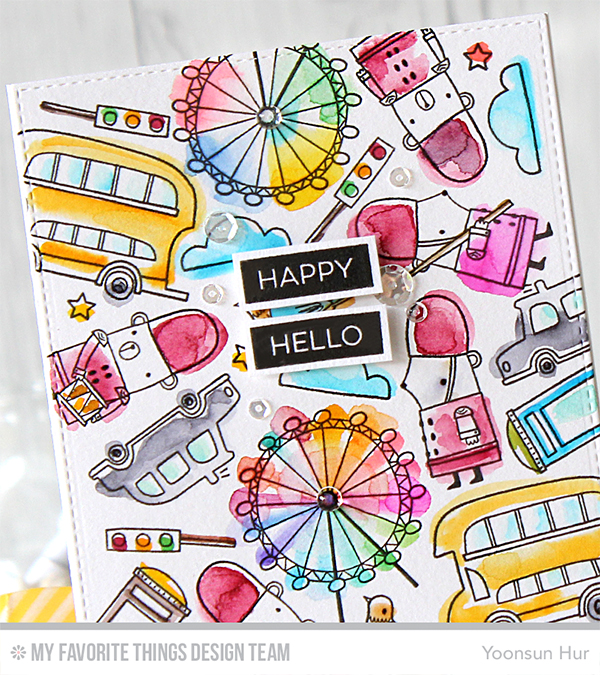
YoonsunHur-MFT-SeptemberRC-Day1-A01For my second card, I made loose watercolour card. I 1) Stamped the images from the London Mouse Stamp Set randomly onto the watercolour panel using black pigment ink. 2) Coloured them with Peerless watercolours. 3) Stamped the sentiments from the Label Maker Sentiments Stamp Set on the white card stock using Black Licorice hybrid ink, die cut them with Label Tape Die-namics. 4) Mounted the watercolour panel on the white card base at first, and then adhered the sentiment banners on top of that using dimensional foam tape. 5) Embellished with a few clear sequins.
YoonsunHur-MFT-SeptemberRC-Day1-A02

Make sure to check out MFT Blog for all the info for today along with links to all the other DT member’s blog posts.

See you TONIGHT for the release!

Keep smiling and be blessed! God bless you all!
Love Love Love RejoicingCrafts

http://static.inlinkz.com/ppr.js

MFT September Release Countdown – Day 2

Hello crafty friends, I hope you had a wonderful weekend!
Welcome to the My Favorite Things September Release Countdown Day 2.
NewReleaseCountdown_Day2
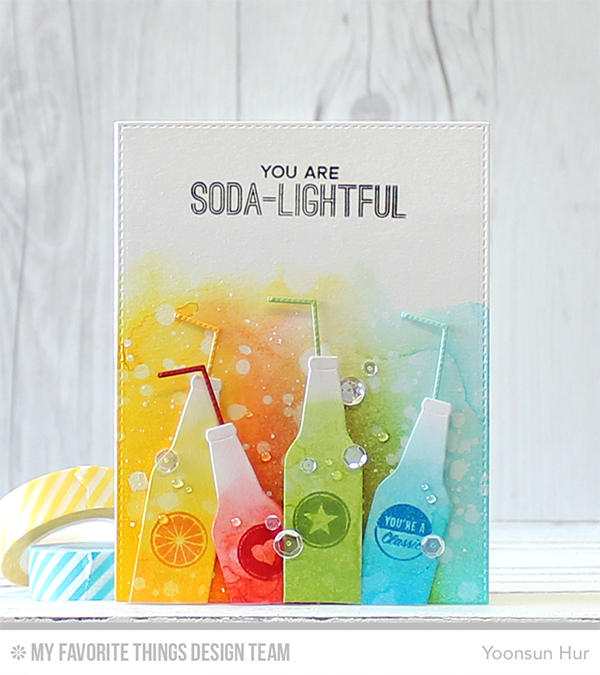
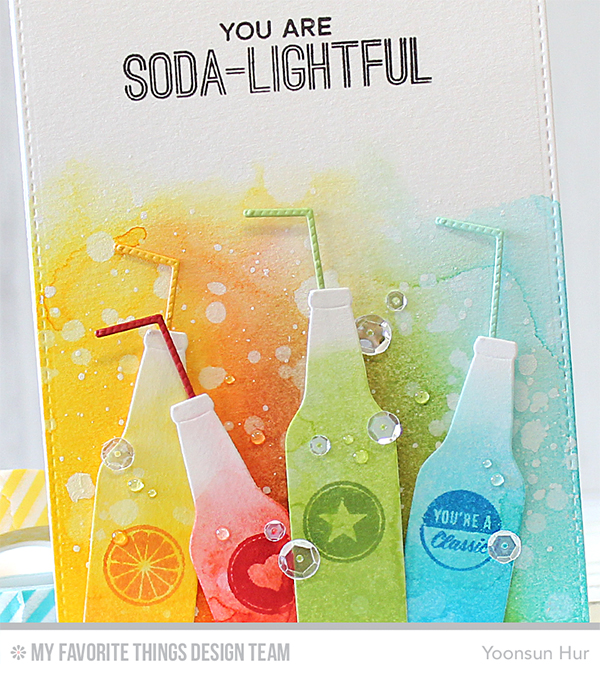
Today I am sharing with you a couple cards with a fresh Soda Pop Stamp Set, Soda Pop Bottles, and Bottlecaps Die-namics.YoonsunHur-MFT-SeptemberRC-Day2-A01For my first card, I 1) Blended onto the watercolour paper with Lemon Drop, Orange Fizz, Wild Cherry, Limelight, and Summer Splash dye inks using mini blending tool. 2) Spritzed with water several times, added water droplets and white ink splatters. 3) Trimmed the inked paper with Blueprints 25 Die-namics. 4) Die cut Soda Pop Bottles from the white card stock, blended four bottles with dye inks and then stamped on them with Soda Pop Stamp Set. 5) Stamped the sentiment on the blended background panel. 6) Mounted all elements as shown to the white card base. 6) Embellished with a few clear sequins.
YoonsunHur-MFT-SeptemberRC-Day2-A02
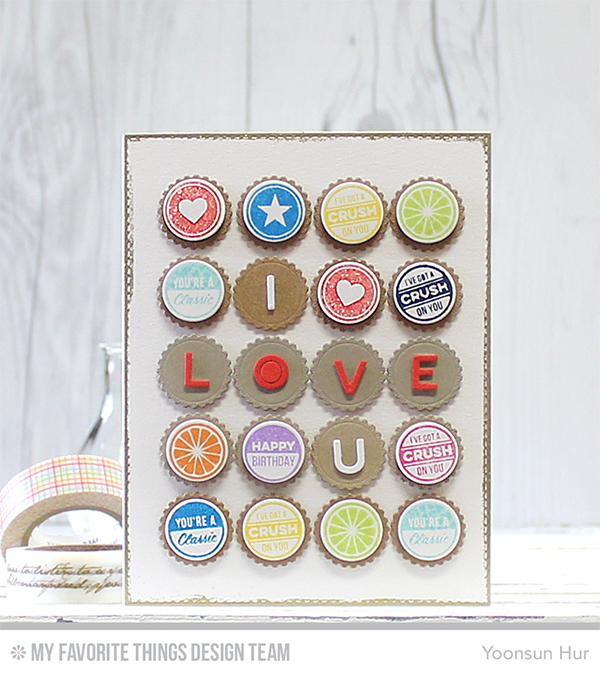
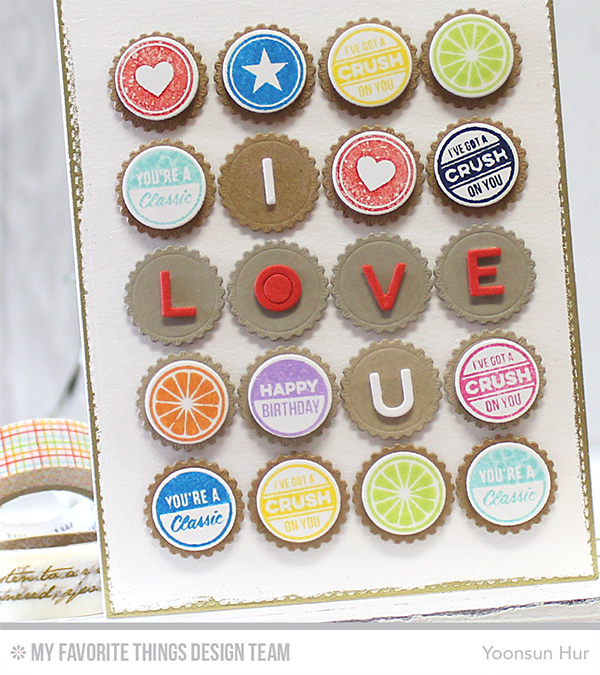
YoonsunHur-MFT-SeptemberRC-Day2-B01I was amazed at the idea of crafty people’s wall art with bottle caps on Pinterest!! So, I tried to put those ideas into my card!

To create this card, I 1) Die cut bottle caps from the kraft card stock (many times) using Bottlecaps Die-namics, small circles from the white card stock as well. 2) Die cut ‘I LOVE U’ words using Bottlecap Letters Die-namics. 3) Stamped a lot of images from the Soda Pop Stamp Set on the small circles in various colours. 4) Heat embossed at the edges of white card stock with gold embossing powder. 5) Laid and adhered the caps as shown to the card base using dimensional foam tape.

YoonsunHur-MFT-SeptemberRC-Day2-B02Oh! It turned out really cool, just what I wanted!! :D

Make sure to check out MFT Blog for all the info for today along with links to all the other DT member’s blog posts.

See you tomorrow for more countdown fun! Have a wonderful day!

Keep smiling and be blessed! God bless you all!
Love Love Love RejoicingCrafts

http://static.inlinkz.com/ppr.js

SSS Time for a PARTY!

Hello crafty friends!
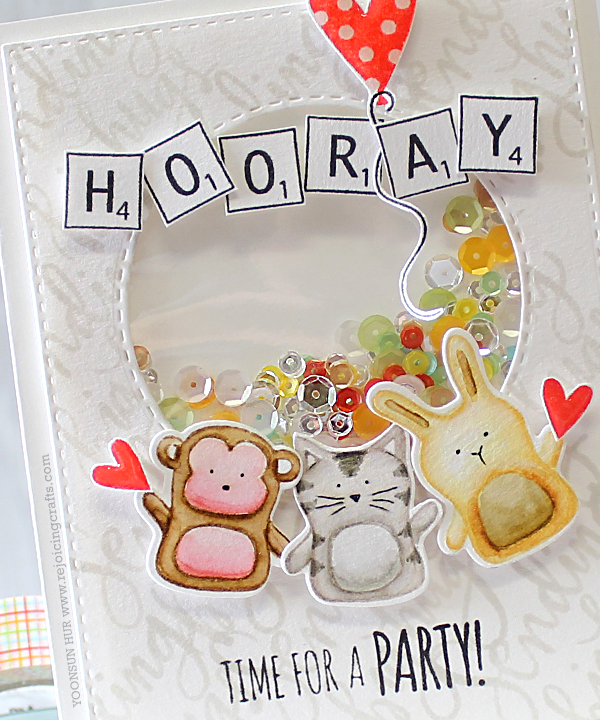
Today I am sharing with you a fun shaker card using Simon Says Stamp Exclusives.
YoonsunHur-20150830-SSS-Hooray01To create this card, I 1) Stamped the sentiment diagonally on the white card stock using Fog Gray dye ink, trimmed it with Stitches Rectangles Die. 2) Stamped ‘HOORAY’ letters from the Game Tile Letters Stamp Set on the white card stock using black pigment ink, fussy cut them. 3) Stamped the cute critters from the Baby Party Animals Stamp Set on the watercolour paper using Antique Linen Distress ink, coloured them with Distress markers – I used no-line watercoloring technique – and then die cut them with the matching dies. 4) Stamped the heart balloon from the Lila’s Heart Stamp Set on the white card stock using Hero Arts Neon Red, fussy cut it. 5) Die cut a stitched circle in the stamped panel – I made the shaker window – and then adhered the acetate to the back side of that panel, added mixed sequins and then covered it with shaker window panel. 6) Mounted all elements as shown to the front of the shaker window panel using dimensional foam tape.
YoonsunHur-20150830-SSS-Hooray02  HOORAY!! Time for a PARTY!! It is to celebrate Simon Says Stamp STAMPtember®!! I am SO thrilled and excited about STAMPtember!!

StamptemberSTAMPtember® is a month-long event! There are full of awesome goodies, inspirations, and super happy celebrations in September!!

Thank you so much for stopping by. Have a wonderful day!

Keep smiling and be blessed! God bless you all!
Love Love Love RejoicingCrafts

http://static.inlinkz.com/ppr.js

MFT September Release Countdown – Day 3

Hello crafty friends, blessed Sunday!
Welcome to the My Favorite Things September Release Countdown Day 3.
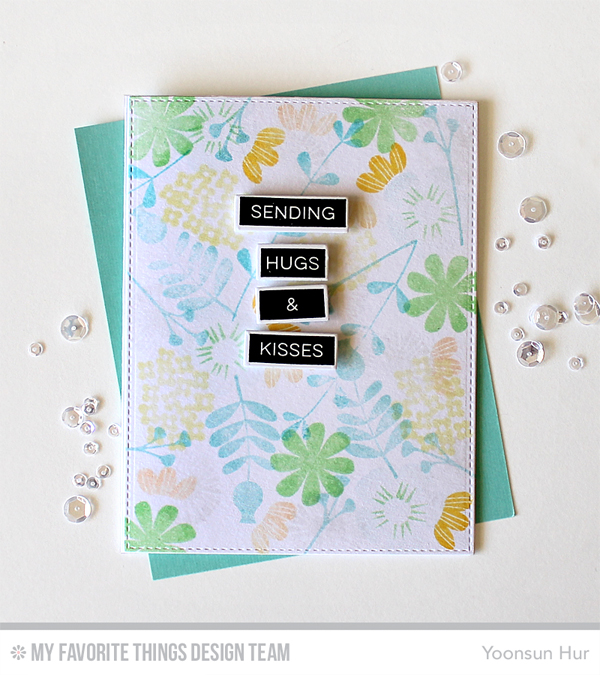
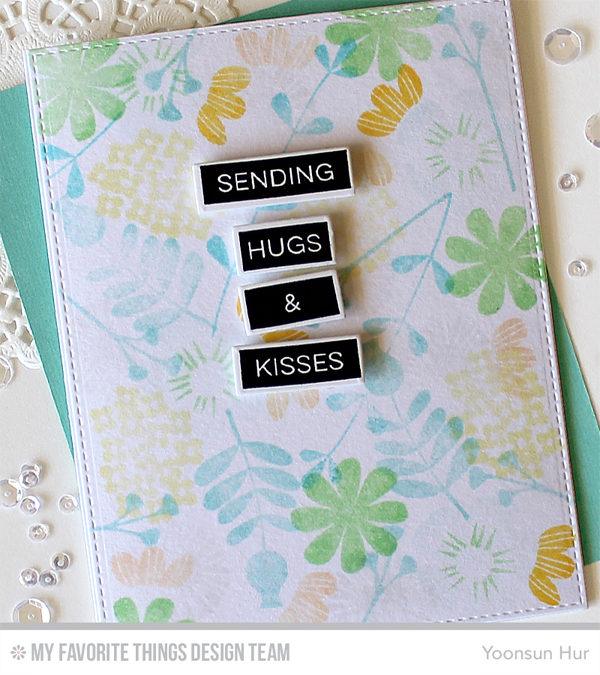
NewReleaseCountdown_Day3Today I am sharing with you my card using Label Maker Sentiments Stamp Set.YoonsunHur-MFT-SeptemberRC-Day3-01To create this card, I 1) Stamped the flowers from the Fall Florals Stamp Set onto the white paper panel using various colours of hybrid ink. 2) Stamped the sentiments from the Label Maker Sentiments Stamp Set on the white card stock, die cut them with Label Tape Die-namics. 3) Mounted them as shown to the white card base.
YoonsunHur-MFT-SeptemberRC-Day3-02
Make sure to check out MFT Blog for all the info for today along with links to all the other DT member’s blog posts.

See you tomorrow for more countdown fun! Have a wonderful day!

Keep smiling and be blessed! God bless you all!
Love Love Love RejoicingCrafts

MFT September Release Countdown – Day 4

Hello crafty friends, happy weekend!
Welcome to the My Favorite Things September Release Countdown Day 4.
NewReleaseCountdown_Day4
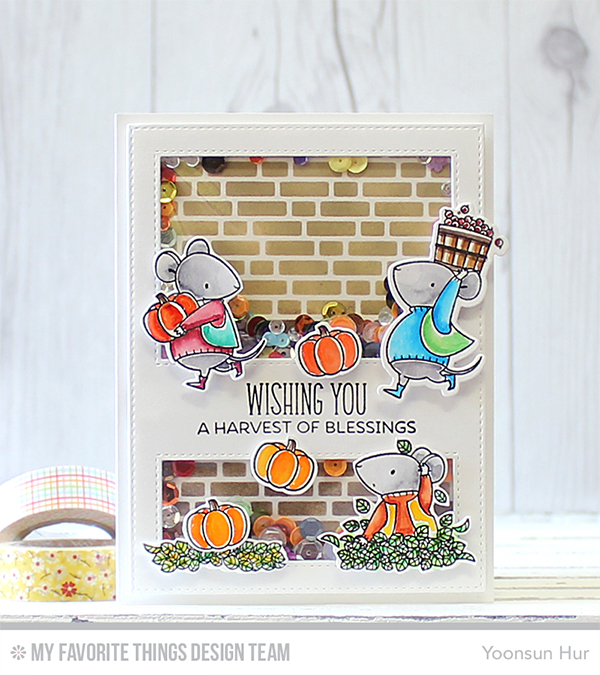
Today I am sharing with you a couple cards using so sweet Birdie Brown Mon Chéri and Harvest Mouse Stamp Sets. If you’re a Birdie Brown lover, today’s your day!YoonsunHur-MFT-SeptemberRC-Day4-A01For my first card, I made a shaker card with Mon Chéri Stamp Set. 1) I stamped the girl on the watercolour paper using black pigment ink, coloured it with Peerless watercolours and then die cut it with Mon Chéri Die-namics. 2) I stamped the Eiffel Tower on the watercolour paper with embossing ink, white heat embossed and then blended on the stamped paper with Red Hot, Lush Lagoon dye inks using mini blending tool -Blue, white, and red are the symbolic colors of the French National flag. 3) For my card front, I repeatedly stamped “Oh La La” on the Primitive White card stock using Steel Grey dye ink. 4) I mounted the blended panel on the Primitive White card base at first, added mixed sequins and then covered it with Stitched Oval Frame. 5) Lastly, I mounted the girl and the sentiment on top of the card using dimensional foam tape.

YoonsunHur-MFT-SeptemberRC-Day4-A02
YoonsunHur-MFT-SeptemberRC-Day4-B01For my second card, I used Harvest Mouse Stamp Set as my main supply. First, I 1) Stamped all cute images from the Harvest Mouse Stamp Set onto the watercolour paper using black pigment ink, coloured them with Peerless watercolours and then die cut them with Harvest Mouse Die-namics. 2) Die cut Stitched Cover-Up Vertical from the white card stock, stamped the sentiment from the Harvest Mouse Stamp Set using black ink. 3) Laid the English Brick Wall Stencil over the white card stock and then inked it with Kraft, Chocolate Brown hybrid inks using sponge daubers. 4) Adhered the brick wall panel on the white card base at first, added mixed sequins and then covered it with Stitched Cover-Up Vertical Frame. 5) Mounted all watercoloured images as shown to the sentiment panel using dimensional foam tape.
YoonsunHur-MFT-SeptemberRC-Day4-B02

Make sure to check out MFT Blog for all the info for today along with links to all the other DT member’s blog posts.

See you tomorrow for more countdown fun! Have a wonderful weekend!

Keep smiling and be blessed! God bless you all!
Love Love Love RejoicingCrafts

http://static.inlinkz.com/ppr.js