MFT November Release Countdown – Day 4

Hello crafty friends, happy weekend!
Welcome to the My Favorite Things November Release Countdown Day 4.

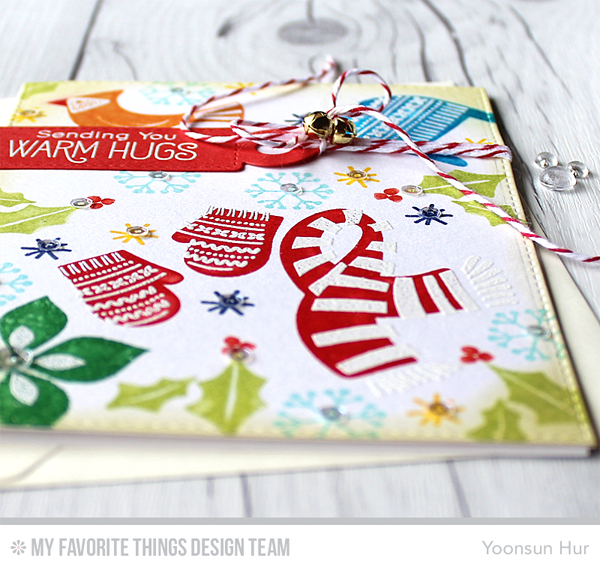
NewReleaseCountdown_Day4Today I am sharing with you a couple holiday cards with so precious Winter Warmth stamp set.
YoonsunHur-MFT-NovemberRC-Day4-A01For my first card, I 1) Stamped the basic images from the Winter Warmth stamp set randomly onto white card stock using different colours of MFT dye inks, then stamped pattern images in embossing ink, heat embossed with white embossing powder – overlapped stamping them partially. 2) Inked the edge of the stamped panel with Antique Linen Distress ink using mini blending tool. 3) Stamped the sentiment from the Merry Christmoose stamp set on red card stock with embossing ink, white heat embossed, then die cut with Tag Builder Blueprints 4 Die-namics. 4) Mounted all elements as shown to white card base.

YoonsunHur-MFT-NovemberRC-Day4-A02YoonsunHur-MFT-NovemberRC-Day4-A03
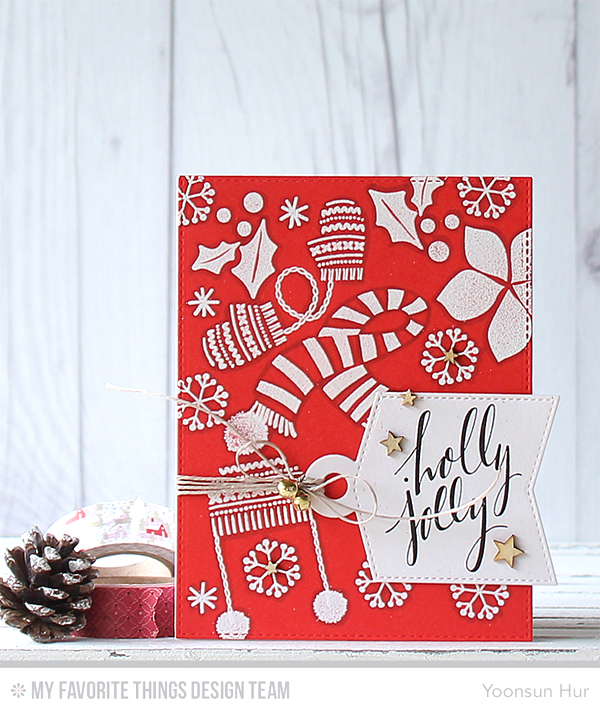
YoonsunHur-MFT-NovemberRC-Day4-B01To create my second card, I 1) Stamped the images, Winter Warmth stamp set, onto red paper panel using embossing ink, white heat embossed. 2) Added some dark shading with a Copic marker C3. 3) Stamped the sentiment, Hand Lettered Holiday stamp set, on white card stock using Black Licorice hybrid ink, then die cut it with Tag Builder Blueprints 4 Die-namics.
YoonsunHur-MFT-NovemberRC-Day4-B03YoonsunHur-MFT-NovemberRC-Day4-B02

Make sure to check out MFT Blog for all the info for today along with links to all the other DT member’s blog posts.

See you tomorrow for more countdown fun! Have a wonderful weekend!

Keep smiling and be blessed! God bless you all!
Love Love Love RejoicingCrafts

http://static.inlinkz.com/ppr.js

MFT November Release Countdown – Day 5

Hello crafty friends, TGIF!
Welcome to the My Favorite Things November Release Countdown Day 5.
NewReleaseCountdown_Day5
Wow, wow, WOW!! There are chock full of fabulous holiday goodies in November! I am pretty sure you are going to love MFT November release!!

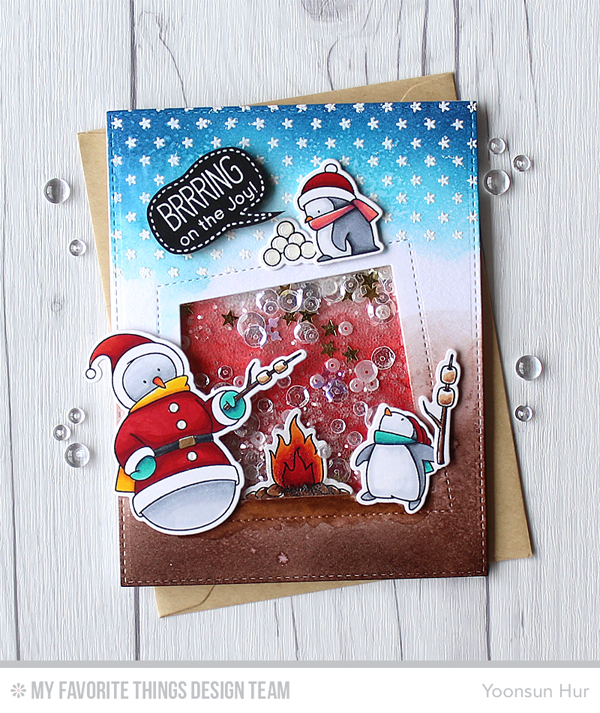
For my first card, I am showing Birdie Brown Toasty Greetings stamp set; Peek-a-Boo Wonky Windows Die-namics.
YoonsunHur-MFT-NovemberRC-Day5-01To create this card, I 1) Stamped these adorable snowman and penguins from the Toasty Greetings stamp set on white card stock using Black Licorice hybrid ink, coloured them with Copic markers, then die cut them with Toasty Greetings Die-namics. 2) Blended on the star background stamped panel with Lush Lagoon, Summer Splash (top part) and Chocolate Brown (bottom part) dye inks using mini blending tool, then die cut Peek-a-Boo Wonky Windows at the centre of it.
YoonsunHur-MFT-NovemberRC-Day5-02

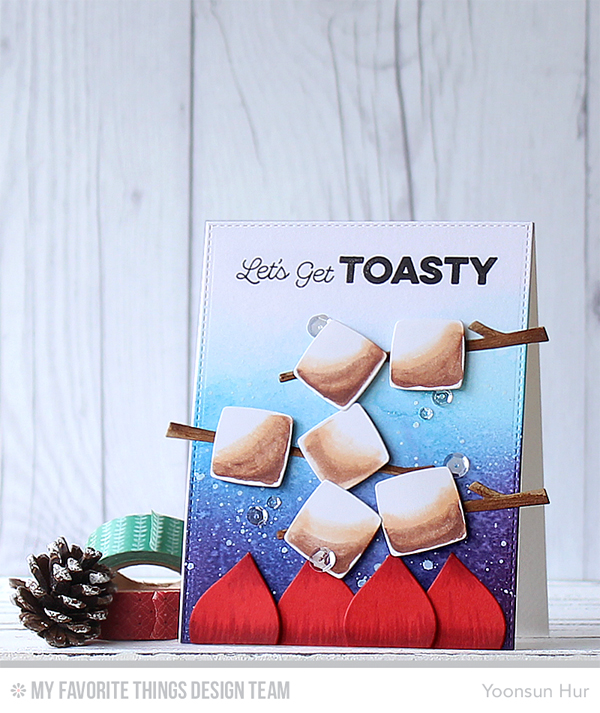
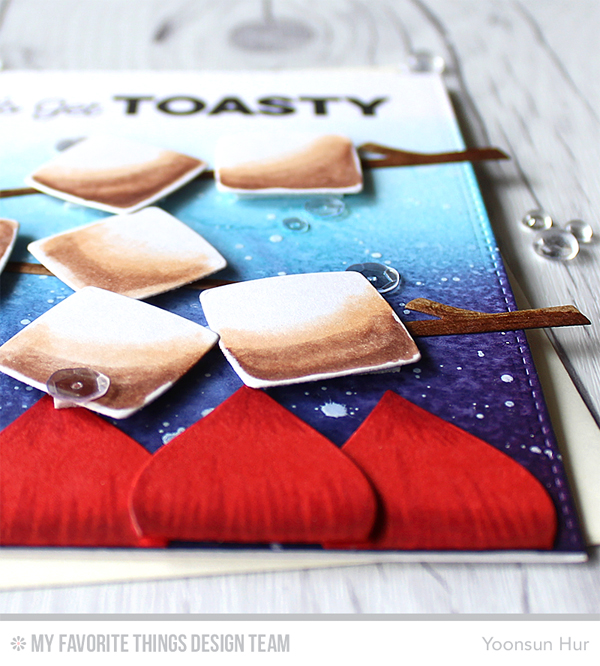
YoonsunHur-MFT-NovemberRC-Day5-03Look, these creamy and delicious toasted marshmallows – yummy! :D

I used a new Toasted Marshmallows Die-namics. I 1) Die cut marshmallows from white card stock, coloured them with Copic markers. 2) Die cut branches from Kraft card stock, flame from Cherry Crisp card stock, added some dark shading with a Copic marker C3. 3) Mounted all elements as shown to the blended paper panel using dimensional foam tape. 4) Stamped the sentiment from the Get Toasty stamp set on top of the card using Black Licorice hybrid ink. 5) Embellished with a few PPP clear sequins.
YoonsunHur-MFT-NovemberRC-Day5-04

Make sure to check out MFT Blog for all the info for today along with links to all the other DT member’s blog posts.

See you tomorrow for more countdown fun! Have a wonderful day!

Keep smiling and be blessed! God bless you all!
Love Love Love RejoicingCrafts

http://static.inlinkz.com/ppr.js

SSS Gift Card Holder Card

Hello crafty friends!
Today I made gift card holder card with SSS Create Joy exclusives.
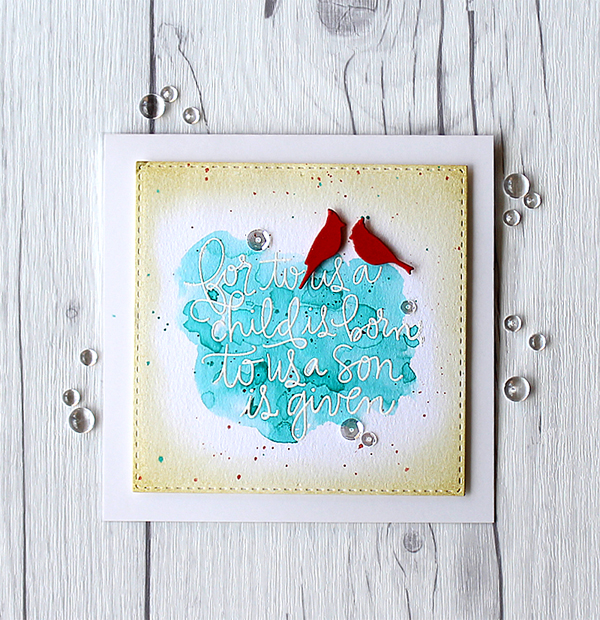
YoonsunHur-20151029-SSS-CreateJoy01-600pxI usually use A2 size card but today, I used square card size because I just wanted to make simple front with a beautiful large sized script sentiment from the For To Us stamp set.

To create this card, I 1) Stamped the sentiment, For To Us stamp set, onto watercolour paper using embossing ink, heat embossed with white embossing powder. 2) Trimmed the stamped paper with SSS Stitches Squares Die. 3) Coloured on it with Peacock Feathers Distress ink using waterbrush, added some ink splatters. 4) Inked the edge of the watercoloured panel with Antique Linen Distress ink using mini blending tool. 5) Mounted the watercolour panel on white square card base using dimensional foam tape. 6) Embellished with a few PPP clear sequins, cardinals from the SSS Chisholm Wreath Dies.
YoonsunHur-20151029-SSS-CreateJoy02-600px
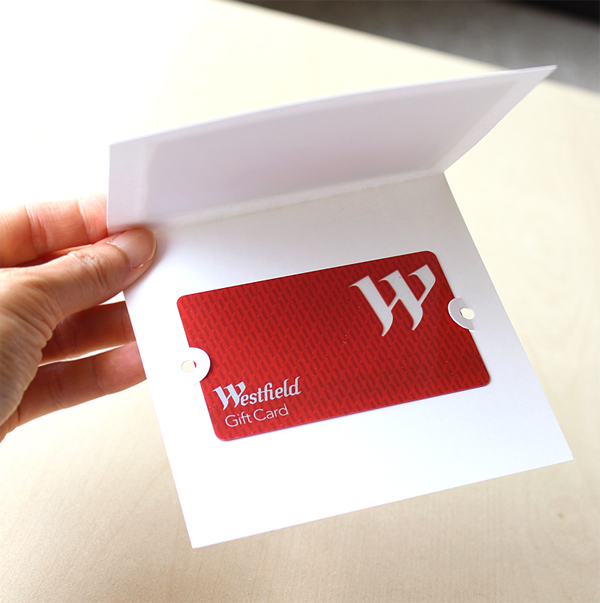
YoonsunHur-20151029-SSS-CreateJoy03-600pxAnd, here’s a picture of the inside! I die cut a horizontal gift card slot from the Gift Card Slots Dies inside the card for holding a standard size gift card securely in place.

That’s it for today! Thank you so much for stopping by and happy holiday crafting!!

Keep smiling and be blessed! God bless you all!
Love Love Love RejoicingCrafts

http://static.inlinkz.com/ppr.js

SSS JOY to the world

Hello crafty friends, I hope you are doing well!
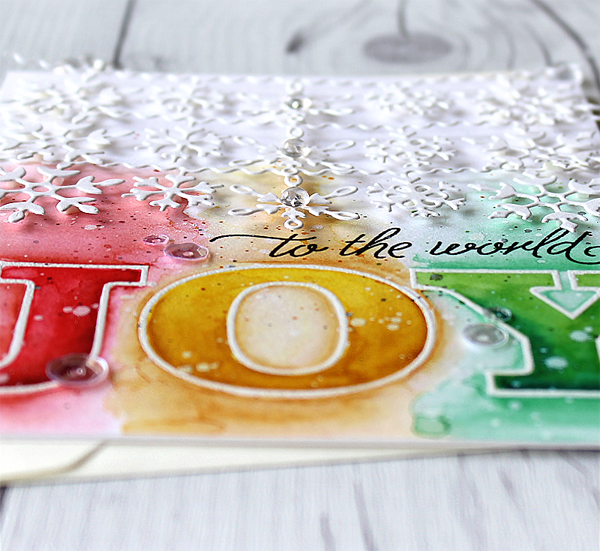
I’m continuing to share with you my Christmas card with SSS Create Joy exclusives. Today I made so feminine card using Big Joy stamp set and Snowflake Banner Die.
YoonsunHur-20151028-SSS-CreateJoy01-600pxTo create the card, I 1) Stamped “JOY” onto watercolour paper panel using embossing ink, heat embossed with white embossing powder. 2) Coloured “JOY” word with Distress markers using waterbrush, added some ink splatters. 3) Die cut Snowflake Banner from white card stock (3 times). 4) Mounted the watercoloured panel on white card base using double-sided tape first and then mounted all pieces of snowflake banner on watercoloured base using dimensional foam tape. 5) Embellished with a few PPP clear sequins.
YoonsunHur-20151028-SSS-CreateJoy02-600px
I really hope all of you like my Christmas cards :D

That’s it for today! Thank you so much for stopping by and happy holiday crafting!!

Keep smiling and be blessed! God bless you all!
Love Love Love RejoicingCrafts

http://static.inlinkz.com/ppr.js

SSS Merry and Bright

Hello crafty friends, happy Monday!
Today I want to share with you another holiday greeting card with SSS Create Joy exclusives.
YoonsunHur-20151026-SSS-CreateJoy01-600pxI so very love a new SSS Lattice Grid Background Stamp and today I made my own geometric patterns with it. First I 1) Stamped Lattice Grid Background onto watercolour paper panel using embossing ink, heat embossed with white embossing powder. 2) Coloured the stamped panel partially with Distress markers using waterbrush. 3) Die cut Merry and Bright from white card stock (3 times), made thicker each pieces using fine tip glue pen. 4) Inked “Merry & Bright” die cut with embossing ink, heat embossed with Snowflakes embossing powder. 5) Die cut Stitched Flakes from white card stock -I used positive snowflakes. 6) Mounted all elements as shown to a top-fold white card base using double-sided tape.
YoonsunHur-20151026-SSS-CreateJoy02-600pxYoonsunHur-20151026-SSS-CreateJoy03-600px
Thank you so much for stopping by and happy holiday crafting!!

Keep smiling and be blessed! God bless you all!
Love Love Love RejoicingCrafts

http://static.inlinkz.com/ppr.js